Leaderboard


Popular Content
Showing content with the highest reputation on 02/11/20 in Posts
-
All of us at Lime Technology Inc. are excited to announce the hiring of Zack Spear as a full-time developer. Please help us give @zspearmint a warm welcome to the Unraid forums! Zack has a diverse skill set and is an all around great guy. Learn more about Zack from his website bio: Please feel free to ask Zack all about his digital nomad travels, Borussia Dortmund banter, love of old school analog film photography, or just drop in below to say "Hey". Welcome aboard Zack!5 points
-
Hey everyone! Stoked to have officially joined the team 🙌5 points
-
#!/bin/bash #Set your Unraid version here in the form 6-7-3 UNRAID_VERSION="6-8-2" # Set the type of build you want here - nvidia or stock BUILD_TYPE="nvidia" #Set the download location here DOWNLOAD_LOCATION="/mnt/cache/downloads/nvidia" echo Downloading v$UNRAID_VERSION of the $BUILD_TYPE build to the $DOWNLOAD_LOCATION folder #Make target directory [[ ! -d ${DOWNLOAD_LOCATION} ]] && \ mkdir -p ${DOWNLOAD_LOCATION} #download files wget https://lsio.ams3.digitaloceanspaces.com/unraid-nvidia/${UNRAID_VERSION}/${BUILD_TYPE}/bzimage -O ${DOWNLOAD_LOCATION}/bzimage wget https://lsio.ams3.digitaloceanspaces.com/unraid-nvidia/${UNRAID_VERSION}/${BUILD_TYPE}/bzroot -O ${DOWNLOAD_LOCATION}/bzroot wget https://lsio.ams3.digitaloceanspaces.com/unraid-nvidia/${UNRAID_VERSION}/${BUILD_TYPE}/bzroot-gui -O ${DOWNLOAD_LOCATION}/bzroot-gui wget https://lsio.ams3.digitaloceanspaces.com/unraid-nvidia/${UNRAID_VERSION}/${BUILD_TYPE}/bzfirmware -O ${DOWNLOAD_LOCATION}/bzfirmware wget https://lsio.ams3.digitaloceanspaces.com/unraid-nvidia/${UNRAID_VERSION}/${BUILD_TYPE}/bzmodules -O ${DOWNLOAD_LOCATION}/bzmodules #download sha356 files wget https://lsio.ams3.digitaloceanspaces.com/unraid-nvidia/${UNRAID_VERSION}/${BUILD_TYPE}/bzimage.sha256 -O ${DOWNLOAD_LOCATION}/bzimage.sha256 wget https://lsio.ams3.digitaloceanspaces.com/unraid-nvidia/${UNRAID_VERSION}/${BUILD_TYPE}/bzroot.sha256 -O ${DOWNLOAD_LOCATION}/bzroot.sha256 wget https://lsio.ams3.digitaloceanspaces.com/unraid-nvidia/${UNRAID_VERSION}/${BUILD_TYPE}/bzroot-gui.sha256 -O ${DOWNLOAD_LOCATION}/bzroot-gui.sha256 wget https://lsio.ams3.digitaloceanspaces.com/unraid-nvidia/${UNRAID_VERSION}/${BUILD_TYPE}/bzfirmware.sha256 -O ${DOWNLOAD_LOCATION}/bzfirmware.sha256 wget https://lsio.ams3.digitaloceanspaces.com/unraid-nvidia/${UNRAID_VERSION}/${BUILD_TYPE}/bzmodules.sha256 -O ${DOWNLOAD_LOCATION}/bzmodules.sha256 #check sha256 files BZIMAGESHA256=$(cat ${DOWNLOAD_LOCATION}/bzimage.sha256 | cut -c1-64) BZROOTSHA256=$(cat ${DOWNLOAD_LOCATION}/bzroot.sha256 | cut -c1-64) BZROOTGUISHA256=$(cat ${DOWNLOAD_LOCATION}/bzroot-gui.sha256 | cut -c1-64) BZFIRMWARESHA256=$(cat ${DOWNLOAD_LOCATION}/bzfirmware.sha256 | cut -c1-64) BZMODULESSHA256=$(cat ${DOWNLOAD_LOCATION}/bzmodules.sha256 | cut -c1-64) #calculate sha256 on downloaded files BZIMAGE=$(sha256sum $DOWNLOAD_LOCATION/bzimage | cut -c1-64) BZROOT=$(sha256sum $DOWNLOAD_LOCATION/bzroot | cut -c1-64) BZROOTGUI=$(sha256sum $DOWNLOAD_LOCATION/bzroot-gui | cut -c1-64) BZFIRMWARE=$(sha256sum $DOWNLOAD_LOCATION/bzfirmware | cut -c1-64) BZMODULES=$(sha256sum $DOWNLOAD_LOCATION/bzmodules | cut -c1-64) #Compare expected with actual downloaded files [[ $BZIMAGESHA256 == $BZIMAGE ]]; echo "bzimage passed sha256 verification" [[ $BZROOTSHA256 == $BZROOT ]]; echo "bzroot passed sha256 verification" [[ $BZROOTGUISHA256 == $BZROOTGUI ]]; echo "bzroot-gui passed sha256 verification" [[ $BZFIRMWARESHA256 == $BZFIRMWARE ]]; echo "bzfirmware passed sha256 verification" [[ $BZMODULESSHA256 == $BZMODULES ]]; echo "bzmodules passed sha256 verification" That script will do it. Need to change the 3 parameters to suit. chmod +x it to make it executable, if all the SHA256 sums match copy it across to your flash disk.2 points
-
@DZMM New script looks good but doesn't work if you use encryption because you need to edit the service account remote but then upload to the crypt for the service account. To edit the service account but upload via crypt I made these changes (added ServiceAccountRemote variable): # REQUIRED SETTINGS RcloneUploadRemoteName="service_account_vfs" # If you have a second remote created for uploads put it here. Otherwise use the same remote as RcloneRemoteName. # Use Service Accounts. Instructions: https://github.com/xyou365/AutoRclone ServiceAccountRemote="service_account" # Name of Remote which authenticates via service_account.json files # Adjusting service_account_file if using Service Accounts if [[ $UseServiceAccountUpload == 'Y' ]]; then ServiceAccountFile+=$CounterNumber.json rclone config update $ServiceAccountRemote service_account_file $ServiceAccountDirectory/$ServiceAccountFile echo "$(date "+%d.%m.%Y %T") INFO: Adjusted service_account_file for upload remote ${ServiceAccountRemote} to ${ServiceAccountFile} based on counter ${CounterNumber}." else echo "$(date "+%d.%m.%Y %T") INFO: Uploading using upload remote ${RcloneUploadRemoteName}" fi This way rclone updates the ServiceAccountRemote instead of the RcloneUploadRemoteName.2 points
-
Welcome aboard Zack Spear @zspearmint we are so happy to have you at Lime Technology Inc. & join this great Unraid community!2 points
-
Hi, Guys. This is a short Video about how to resize a Vdisk in unRAID. I am sure most people know how to expand a Vdisk but this guide will also show you how to shrink a vdisk should you need to. I hope you find it interesting How to Resize Vdisks. Expand or shrink a Vdisk in unRAID1 point
-
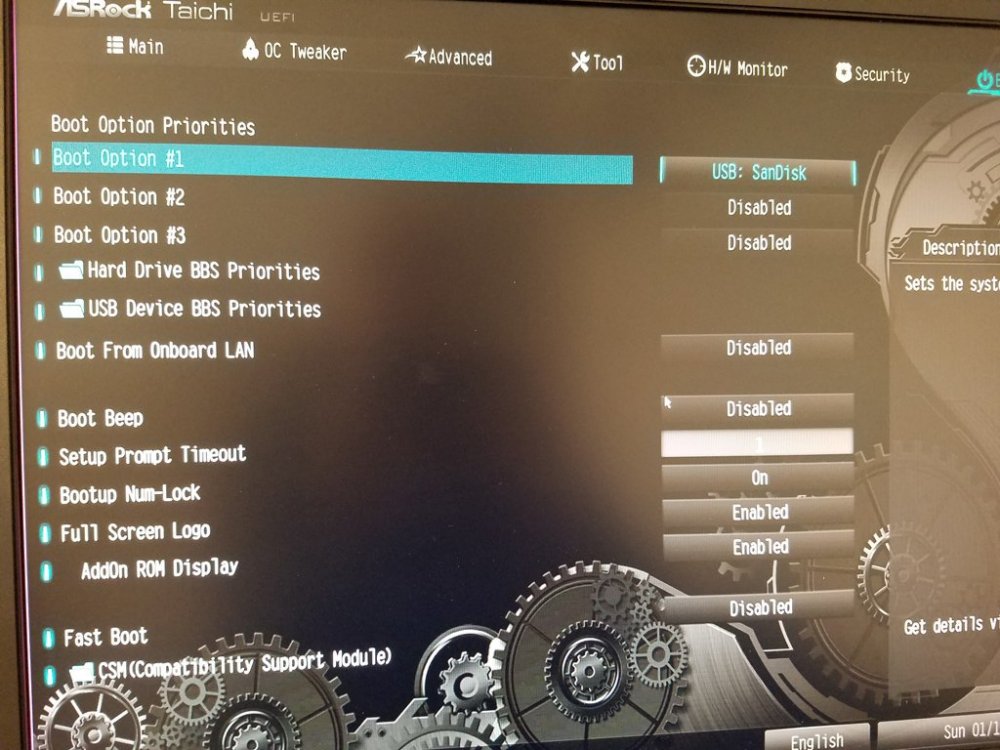
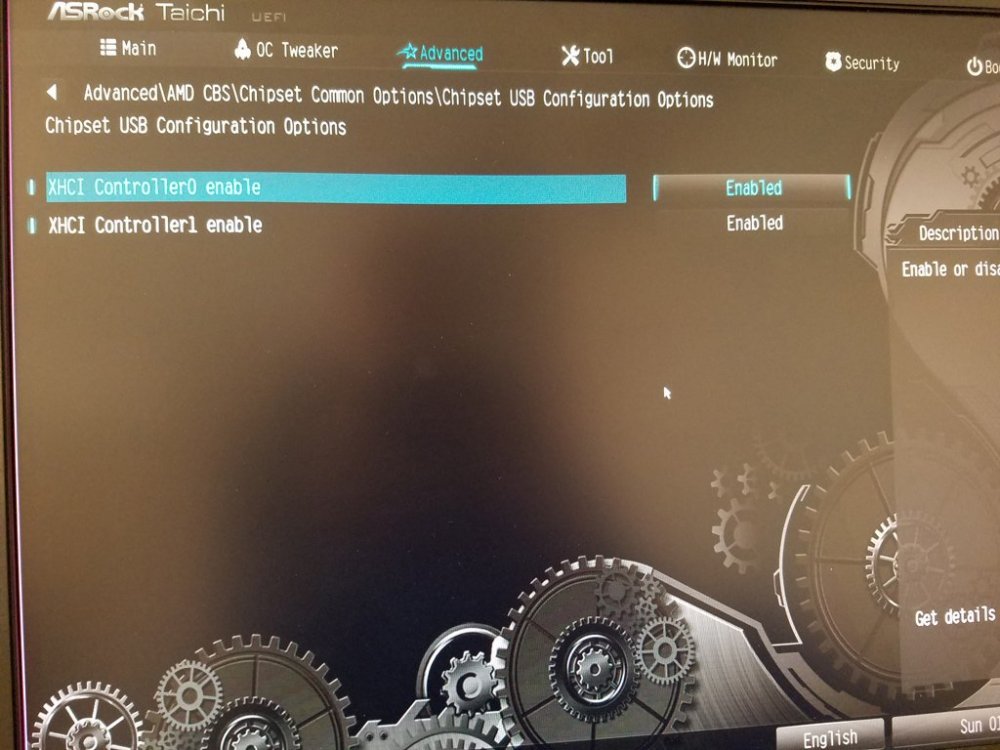
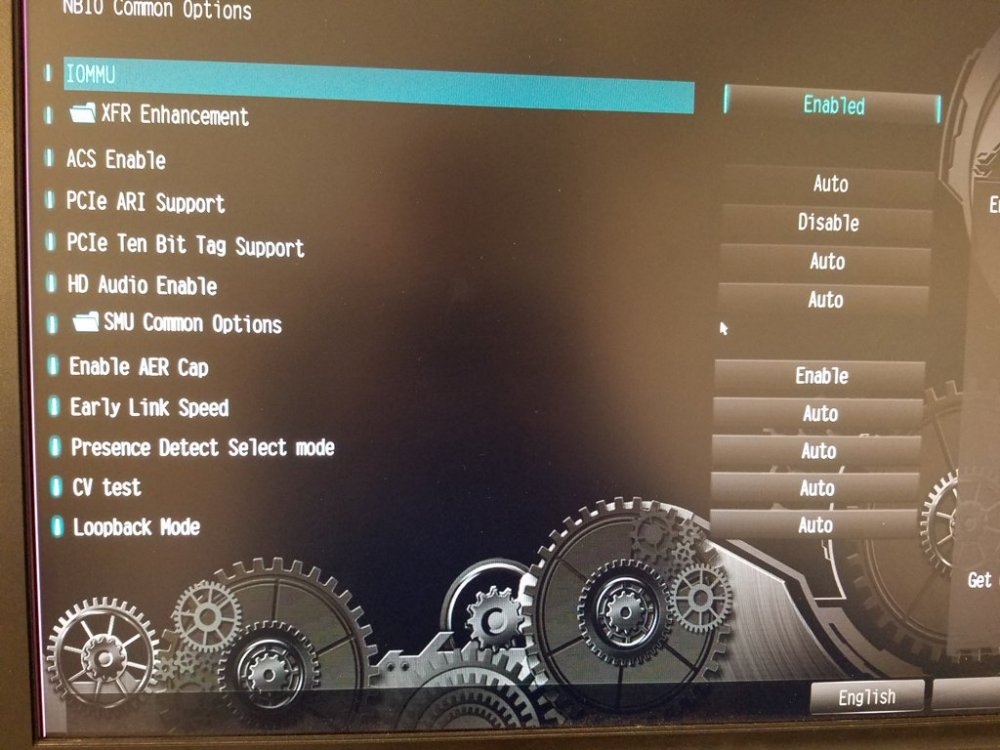
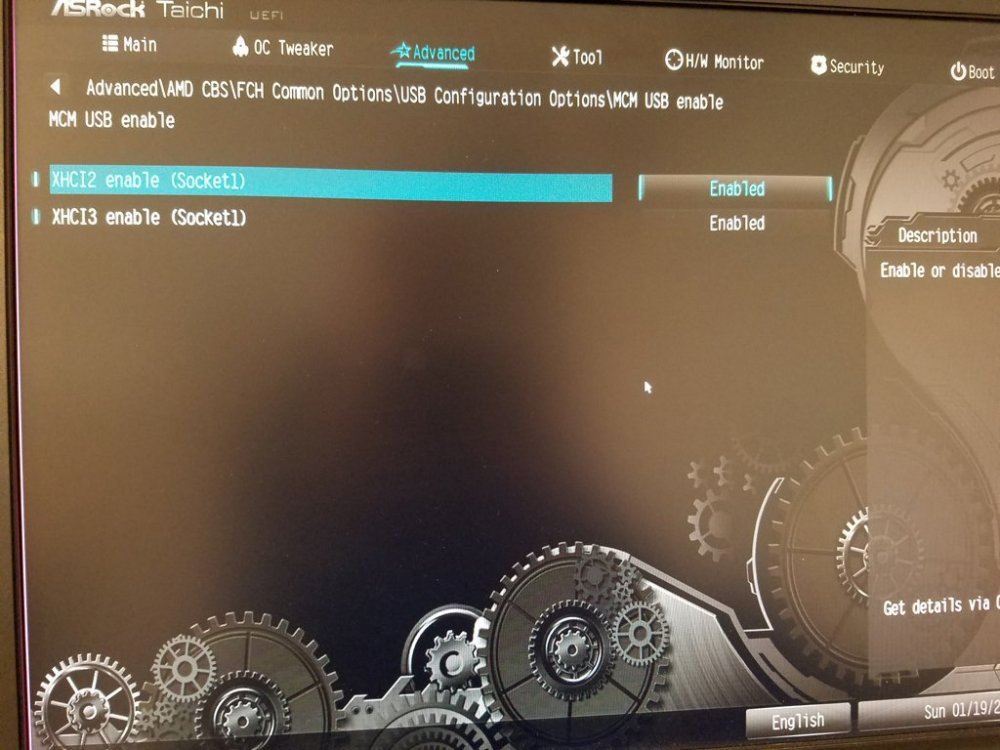
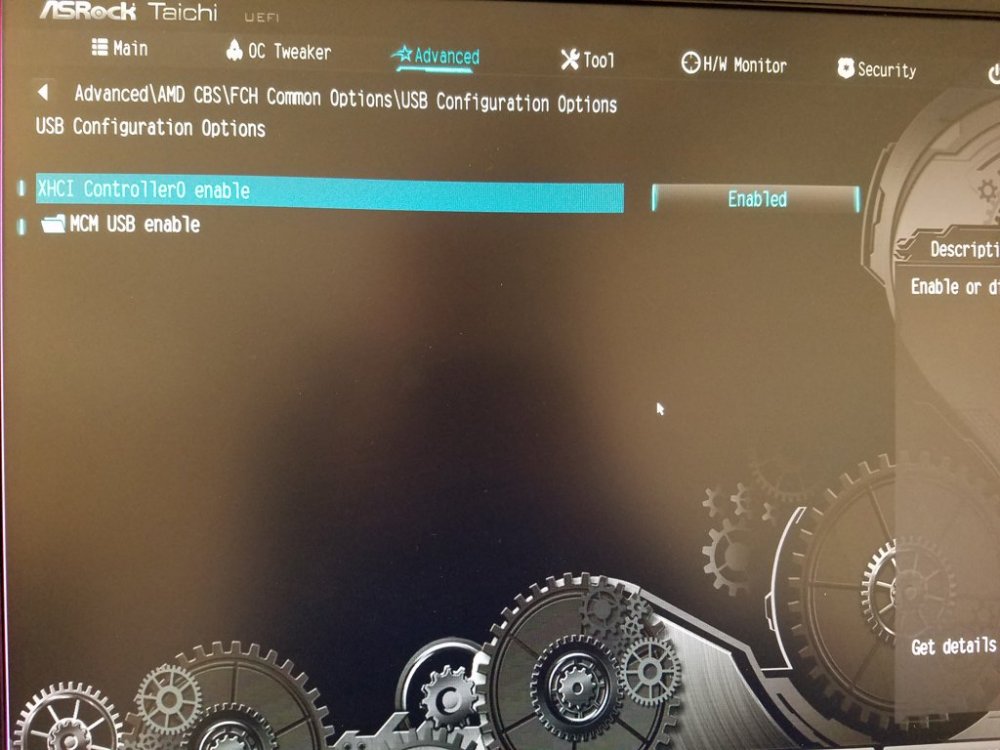
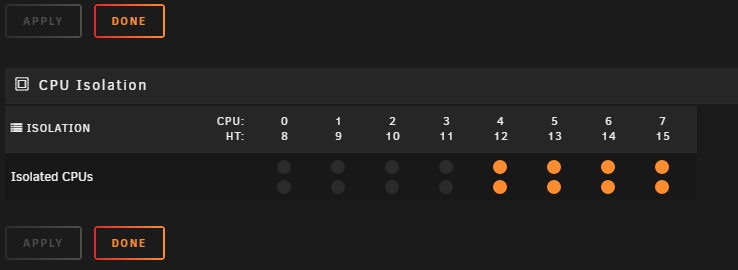
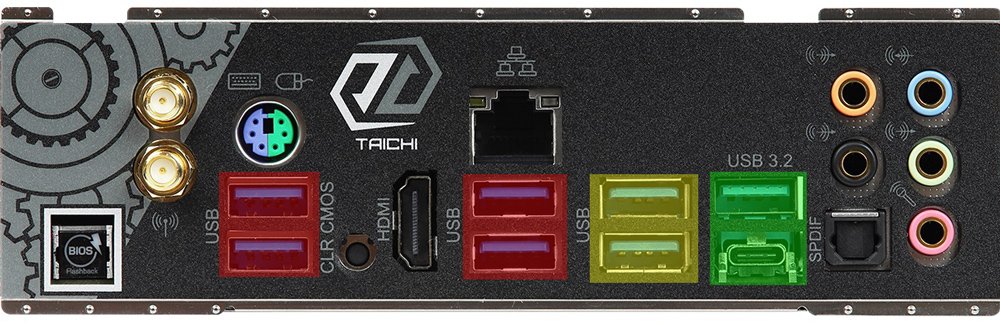
I’ve seen a lot of people asking questions and having problems getting graphics cards and onboard usb controllers passed through on Ryzen X570 systems. I had some issues myself that thanks to a couple of people here on the forums I was able to get resolved. This guide is about setting up a Windows 10 vm using a single graphics card with onboard usb passed through. Because I have managed to get it working, I thought it might be a good idea to write a little guide based on my setup in case it can help some other people. While this was specific to my motherboard and hardware, there are parts that should be applicable for other hardware combinations. Let’s start with my hardware. I’m using a Ryzen 7 3800X with the AsRock X570 Taichi. The graphics card is a Geforce GTX 1070. BIOS First step is to make sure the bios is up to date. At the time I am writing this the newest bios for my motherboard is 2.70 dated 12-9-2019. This is the AGESA version: Update AMD AGESA Combo-AM4 1.0.0.4 Patch B Once updated, boot into the bios once then restore default settings, save, reboot and go back into the bios. To enable IOMMU I found this at level1techs: https://forum.level1techs.com/t/x570-taichi-iommu-groups/145762/2 After some trial and error, I found that in order to passthrough the motherboard usb controllers, I had to change some usb options from Auto to Enabled. Because there is one controller that can’t be passed through, not all of these probably need to be changed, but I’m not sure which ones are for which controllers. Doesn’t seem to be causing me any issues at the moment. Go to Advanced>AMD CBS>FCH Common Options>USB Configuration Options and change XHCI Controller to Enabled. While there go to MCM USB enable and set XHCI2 enable and XHCI3 enable to Enabled. Next is Advanced>AMD CBS>Chipset Common Options>Chipset USB Configuration Options. Change XHCI Controller0 enable and XHCI Controller1 enable to Enabled. The last thing is to set the boot device to the Unraid usb non uefi. (Supposedly booting the usb using uefi can cause problems, but I have not experienced those myself so I can’t comment on that. This is the better safe than sorry approach.) Save settings and reboot. Isolating Cores This next step may be considered optional, but it’s about making sure the vm has the best chance of performing as best it can. In Unraid go to Settings>CPU Pinning. At the bottom you can choose which CPU cores you would like to isolate. Unraid like to use core 0, so I stay away from that one and usually start at the other end. Keep in mind to match the hyperthreads together. In my case I went with cores 4-7 and the matching hyperthreads 12-15. Syslinux Next, in Unraid, go to the Main tab and click on Flash then scroll down to Syslinux Configuration. To edit these click on Menu View and it will change to Raw View. I like to have a separate menu option for hardware passthrough so I just copy everything for ‘label Unraid OS’, delete ‘menu default’ under ‘label Unraid OS’, then paste in the new menu item with the other menu items. Make sure to rename it and that it says ‘menu default’ so that’s the one that Unraid will boot into automatically. The only other change is to add ‘video=efifb:off’ after ‘ initrd=/bzroot’. I admit that I am not sure on the details of why this is necessary, but I believe it has to do with passing through the only graphics card in the system. label Unraid OS HWPT menu default kernel /bzimage append isolcpus=4-7,12-15 initrd=/bzroot video=efifb:off vfio-pci.cfg To stub the graphics card and usb controller I highly recommend using the VFIO-PCI CFG plugin. So far it works really well and makes things much easier. Plus, it gives useful information like if your device can be reset and also which devices are attached to which usb controllers (very useful for figuring out which usb ports belong to which usb controllers). The plugin can be found in Community Apps. Once installed you can find it in the Settings tab. Go there and it’s a good time to double check that the IOMMU groups are looking like they should. Then it’s as easy as selecting which devices you want to stub. Check the graphics card and it’s audio controller. For the onboard usb controllers, it’s tempting to try using the one that is off on in it’s own group. In my case that was this one: Group 33 10:00.3 [RESET] 1022:149c USB controller: Advanced Micro Devices, Inc. [AMD] Matisse USB 3.0 Host Controller However, that one will not work and was one of the problems I ran into, but thanks to an explanation by @Skitals it makes sense why that one would not work. The address is Bus:Device:Function. Notice that the Function for that usb controller is 3. That means that despite being in it’s own IOMMU group, it belongs to another device and therefore, can’t be passed through. Good thing there are two other usb controllers on this motherboard in this group: Group 20 03:08.0 [RESET] 1022:57a4 PCI bridge: Advanced Micro Devices, Inc. [AMD] Device 57a4 0a:00.0 [RESET] 1022:1485 Non-Essential Instrumentation [1300]: Advanced Micro Devices, Inc. [AMD] Starship/Matisse Reserved SPP 0a:00.1 1022:149c USB controller: Advanced Micro Devices, Inc. [AMD] Matisse USB 3.0 Host Controller 0a:00.3 [RESET] 1022:149c USB controller: Advanced Micro Devices, Inc. [AMD] Matisse USB 3.0 Host Controller Select the three Oa:00 devices. Make sure the usb drive that Unraid uses is not in one of the usb ports for those two controllers and then reboot. For reference, here’s a picture that shows the back panel of the X570 Taichi. The ports colored in red belong to the usb controller that’s off in it’s own group. The yellow and green colored ports belong to the two other usb controllers. I have not yet tried to figure out which controllers the mother usb headers belong to. vm xml – graphics card Before creating the vm, we’ll need a dump of the vbios. While it is possible to download from techpowerup, that may or may not be the right vbios for your exact card. I found it was easiest to put Hiren’s BootCD on a usb drive and swap that with the unraid usb drive, boot into that, dump the vbios with GPUZ and save that to the usb drive. Take that usb drive to another computer and edit the vbios with a hex editor to remove the header as seen in this Spaceinvader One video: https://www.youtube.com/watch?v=1IP-h9IKof0&t=438s Put the Unraid usb drive back in the server and start it up. (Now is a good time to make sure it’s still booting into Legacy mode and not uefi as I noticed mine had switched at this point.) Put the vbios file somewhere on your Unraid server so that the vm will be able to access it. (Maybe a vbios folder in with your ISO folders.) Time to create a Windows 10 vm. Go to the VMS tab, Add VM, Windows 10. I’ll just mention the things that I actually change and the rest of the settings will stay at defaults. Logical CPUs - change this to match the the cores you isolated earlier Initial and Max Memory – change these to the desired amount of RAM for the vm, I’m using 8192 MB for both Machine – Q35 OS Install ISO – point this to your Windows 10 install ISO VirtIO Drivers ISO – might want to make sure you have the latest version (virtio-win-0.1.171.iso as of the time I am writing this) They can be found here under Direct downloads virtio-win iso: https://docs.fedoraproject.org/en-US/quick-docs/creating-windows-virtual-machines-using-virtio-drivers/index.html Note: You can set your default virtio iso in Settings>VM Manager. Graphics Card – set to your graphics card Graphics ROM BIOS – point this to the vbios file you got from your graphics card earlier Sound Card – set to the graphics card audio controller Other PCI Devices – I had some issues with this but so far I have found two ways that seem to work. The first is to just select the usb controller that ends in .3. (In the reference photo above, I believe it’s the usb ports colored in yellow.) The other way is to select the 2 usb controllers and the non-essential instrumentation. Then the xml also needs to be edited which will be explained below. Uncheck Start VM after creation Click Create Now the xml of the vm needs to be edited, so go in to edit it and click on Form View to change it to XML View. Now we need to follow this video by Spaceinvader One. There is one thing I noticed that was different for my setup and that was that it was the Bus that was different and not the Slot, so I went ahead and changed the Bus to match. https://www.youtube.com/watch?v=QlTVANDndpM&t=601s Usb Controller If both usb controllers were selected, then the xml needs to be edited in a similar fashion as to the way the graphics card xml was edited. Here’s mine for an example: <hostdev mode='subsystem' type='pci' managed='yes'> <driver name='vfio'/> <source> <address domain='0x0000' bus='0x0a' slot='0x00' function='0x0'/> </source> <address type='pci' domain='0x0000' bus='0x05' slot='0x00' function='0x0' multifunction='on'/> </hostdev> <hostdev mode='subsystem' type='pci' managed='yes'> <driver name='vfio'/> <source> <address domain='0x0000' bus='0x0a' slot='0x00' function='0x1'/> </source> <address type='pci' domain='0x0000' bus='0x05' slot='0x00' function='0x1'/> </hostdev> <hostdev mode='subsystem' type='pci' managed='yes'> <driver name='vfio'/> <source> <address domain='0x0000' bus='0x0a' slot='0x00' function='0x3'/> </source> <address type='pci' domain='0x0000' bus='0x05' slot='0x00' function='0x2'/> </hostdev> I should also mention that I changed the Bus since before it was audio was 5, non-essentials device was 6, usb controller was 7 and usb controller was 8. With the audio moved to Bus 4 with the graphics card, I changed the other 3 devices to the now vacated Bus 5. That should about cover it. If you are trying to use a previous vm and it doesn’t start and no error comes up and it’s just nothing on the screen, try removing the vm and recreating it. (Thanks to @testdasi for that one.)
 1 point
 -
Well its very simple - I have a sonarr that looks after everything from 1980-1989 another for 1990-1999, 2000-20010 etc. Same for movies. Those are then structured the same way in teamdrives. `teamdrive_name:tv/1980s` and then it all comes together in a merger under `/mergerdir/tv`.1 point
-
You just set up mergerfs - you don't really have to do anything I use a bunch of different sonarrs and radarrs to manage my splits. Year based is the easiest because you can allow for that in the series level folder. And movie too. If you need some help with moving stuff between team drives I can help you there. The up loaders I guess can be switched but movies will not ever likely exceed the limit of a single drive. TV - I currently use four different team drives. five if you count anime.1 point
-
ECC is useless until you have a RAM error. How often does that happen? Not too often. But when it happens, I'd rather the error either be corrected if it's possible, or if not at least detect the error and shut down instead of silently corrupting my data. A bad stick of RAM can cause all sorts of havoc if not caught quickly. It all depends on your risk tolerance.1 point
-
Hey everybody, just joined and wanted to introduce myself to all the fine folks here. Name pretty much says it all, I considered myself fairly computer literate (w/ Windows, anyway) but after a friend showed me the benefits that could be had from a home server setup, and some successful experimentation with a Raspberry Pi, I decided to make the jump to a full on SuperMicro server with unRAID, which is a whole new ball of wax. So I find myself near the bottom of a steep learning curve but the community here seems extremely helpful so I'm comforted by the fact there's such a robust foundation of support. A little about my setup, my server was a cost effective eBay purchase with the following specs: Supermicro CSE-825, 8 bay server 2x Intel E5520 2.26 Ghz 4-core processor 6x 4GB PC3 RAM 9650SE-12ML Raid Controller I just got Plex and DelugeVPN up and running, with radarr and sonarr next on my list. Looking further down the line I would like to get PoE cameras installed and running through this as well. Any recommendations for a newbie are greatly appreciated.1 point
-
Connect one of the USB drives to a SATA port, if the error is the one above stop the array, unassign that disk, start array, if the emulated disk mounts correctly you can rebuild on top, just stop the array again, re-assign the disk and start array to begin rebuild, then repeat for the other disks.1 point
-
i personally built a freenas server and keep it at my parents house with enough storage to hold all my movies and important stuff.. it was built with leftover computer parts and all the hard drives i used to have in Unraid that i upgraded. I know that isn't for everyone. I also use Duplicacy with Onedrive and Google Drive. I just found Crashplan slow, buggy and their business practices are a little shady.1 point
-
I’d like to know this as well. My alternative, currently, is working with family members to create replicated servers offsite and use an rclone docker service to automatically mirror my drives to the other server(s).1 point
-
I think it's coz they're cheap. Serious question, though: what's a good alternative? I've been thinking of chucking in the towel, but haven't found anything even close in price.1 point
-
Sorry. Yes, you can close the tab and leave the docker running. The transfer continued. I tested this by having the krusader docker opened at work and starting a file transfer. I then closed the browser tab while it was running. I then vpn'ed in to my home and opened the krusader docker and sure enough, the transfer was still going. I also left it opened at home while I opened it again at work and was able to watch the transfer continue on both computers.1 point
-
Alright. It is running as expected. Thank you for the support. Gesendet von meinem MI 8 mit Tapatalk1 point
-
Problem free upgrade from 6.8.1, current uptime ~7days1 point
-
Hey @jpowell8672 I am still here -- Yeah sorry the last month has been really busy for me with work so I haven't spent a great deal of time on the forums recently. Yeah its a shame that Nvidia cards, since High Sierra, are no longer supported by Apple and especially too that support in High Sierra stops at Pascal - GTX 10 series.1 point
-
opps yes i will fix that1 point
-
This. The 8 pin doesn't have 5V on it, so you can't directly convert it to a molex. Myself back in the day, I spliced the 12V lines from that connector into a molex (and used the 5V directly from the PS)1 point
-
I just had a quick play and it's easy to do: JSONDIR="/your/dir/here" SA="sa_tdrive" # enter the bit before the 1. I'm assuming the first account will be 1 not 01 CounterNumber="1" # my way of doing the count is a bit numpty, but I can follow what's happening and keep track SA+=$CounterNumber".json rclone config update $RcloneRemoteName service_account_file $JSONDIR/$SA # didn't know you could update the config like this Much cleaner. I will do this tomorrow when I'm awake so I don't make any mistakes1 point
-
Unless you have an industrial grade UPS with additional battery packs, that is not a good strategy. Most consumer level battery backups are sized in such a way that running them for more than 10 minutes or so drains the batteries to the point that long term battery health is negatively impacted. You need to accurately measure the draw with your server at full power with all services running on your UPS, find the runtime chart for your specific model, and plot how many minutes until 50% battery depletion. That's how long you have to fully shut down your server with brand new fully charged batteries. Then you need to put your server into the typical use configuration, and trigger an unattended shutdown. Time how long it takes for all the VM's and containers to shut down, all the disks to spin up, and the array to fully and properly stop and power down. Most rigs really should be triggering a shutdown after 3-5 minutes of the power loss in order to keep from dipping below the 50% mark on battery. If the power comes back on, then back off shortly after, you need enough power reserve in an emergency to shut down a second time before the batteries have a chance to recover. Typical recharge rates are 10 to 20 times longer than the time on battery, so if you discharged to 10 minutes, it's likely to be 2 hours before the batteries have recovered.1 point
-
Parity1 and Parity2 are different calculations, not interchangeable at all. So, if you really want the 10TB as Parity1, it will have to be rebuilt. However, there is no reason you can't leave it as Parity2 and leave Parity1 empty. The only downsides would be that Parity2 is more processor intensive and doesn't allow data slot rearrangement while staying valid like Parity1. Either way, going to tools, new config and preserve current assignments : all will allow you to make any changes you wish. IF you keep the 10TB as Parity2 and don't assign the 4TB to any drive slots you can select the box telling Unraid that parity is still valid. However, if you want to move the 10TB to Parity1 and assign the 4TB as a data drive you can do that all at the same time and let Unraid build new parity including the 4TB so you don't have to clear or preclear it. In that case do NOT select the parity is valid box.1 point
-
That did it! You're the best, thank you! We shall name our now functional word processing VM in your honor. For anyone else who might read this seeking to fix the same issue, here's what I did to fix the issue and, most importantly, keep it from happening again. Install The Correct Drivers - The Musical 1) Download Windows 10 64 bit WHQL Radeon Software Crimson version 16.10.1 (I got them from guru3d.com, drivers these old weren't available on AMDs site) and copy it to a USB drive. 2) Install Windows 10 like normal. When Windows boots for the first time, simply disable the network connection to prevent it from automatically updating the display drivers 3) Install previously downloaded drivers from USB drive. Disable Automatic Driver Updates - A Waltz of Seven Steps The previous instructions worked too well - Windows 10 would uninstall the drivers for the device altogether. Oops! 1) Right click the Start button and select Control Panel. 2) Make your way to System and Security. 3) Click System, then Advanced System Settings (in the left sidebar). 4) Select the Hardware tab. 5) Press the Device Installation Settings button. 6) Choose No, and then press the Save Changes button. 7) Now high five yourself, virtually high five testdasi for being awesome and helpful. You'll now have to update all of your drivers manually, display drivers or not, but at least you'll be able to do anything at all!1 point
-
There's a new option in 6.8.2 that enables this, it's available in docker settings (Host access to custom networks). Note docker service must be stopped to enable1 point
-
as I remember, telegraf itself has apcupsd input, you don't need another docker for it1 point
-
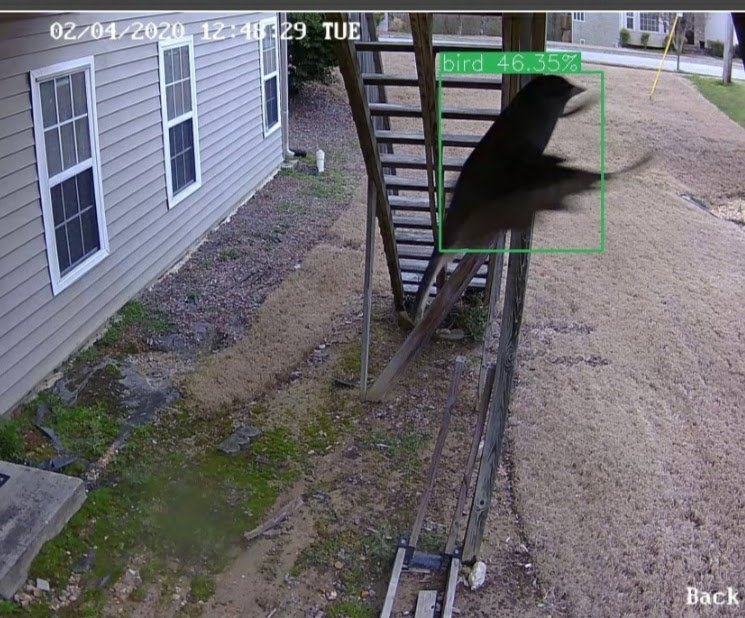
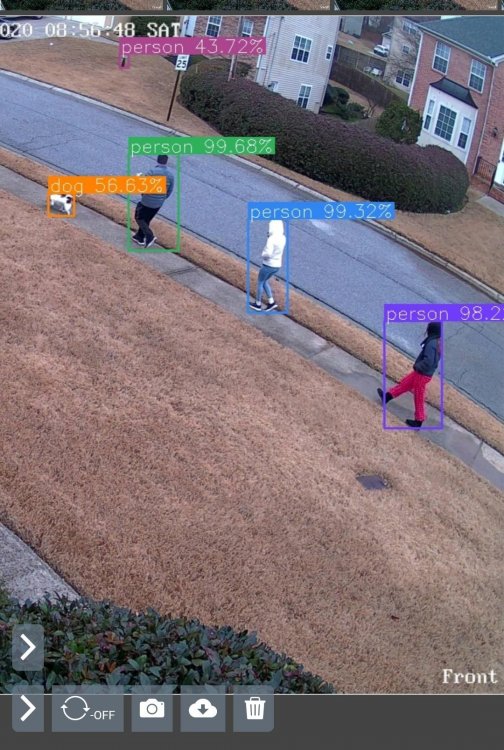
Yep, I'm using ZMNinja and I did check my token.txt file and it looked correct, but thanks for the suggestion anyway. I actually got my zoneminder cert issues resolved a few days ago by finally figuring out how to reverse proxy zoneminder's webui with it's /zm base url. I ended up having to edit the /mnt/user/appdata/letsencrypt/nginx/site-conf/default file by adding the following: location /zm/ { include /config/nginx/proxy.conf; proxy_pass https://mysubdomain.duckdns.org:8443/zm/; } Those trailing slashes after /zm make a big difference! But adding the above kept stripping out the index.php from the Zoneminder webui which caused some other issues on the Zoneminder web console and the picture url for eventserver. So I had to comment out the following in that same file above: # location ~ \.php$ { # fastcgi_split_path_info ^(.+\.php)(/.+)$; # fastcgi_pass 127.0.0.1:9000; # fastcgi_index index.php; # include /etc/nginx/fastcgi_params; # } Commenting out the above doesn't seem to have broken my other dockers that I have reverse proxied that use letsencrypt, and I'm now getting my ZMninja notifications with object detection. I've spent the last couple of days just playing with the object detection settings and I must say it's pretty damn cool!
 1 point
 -
This is under consideration, expect a change in future release.1 point
-
Even if you don't select the movie react roles with `!notifications edit`, the #notifications channel you set up will still receive recently added movie notifications, just with no roles if none are enabled.
 1 point
 -
Can you attach a ioreg dump so I can look at it? Pike's script if I remember well generates p and c states, but since you are running a vm you won't likely have any c and p states working (at least I was not able to have them even with the overcommit and cpu-pm=on in the xml). No need the p and c states to load X86PlatformPlugin.1 point
-
Change both PUID and PGID to 0 in the settings for the container.
 1 point
 -
You need to actually read the first post in this thread. You need to make sure your unraid usb is on the 0b:00.3 USB controller, and the occulus stuff is NOT on that controller. Then you need to pass through 06:00.0, 06:00.1, and 06:00.3. This can all be done very easily with the vfio-pci config plugin. Do not attempt to do anything else until you understand what you are doing.1 point
-
I recently had a HDD fail on my array for the first time, and decided to video the process of dealing with the issue and moving forward. This is filmed in a no nonsense, don't freak out style. I hope it helps you when this inevitably happens everyone.1 point
-
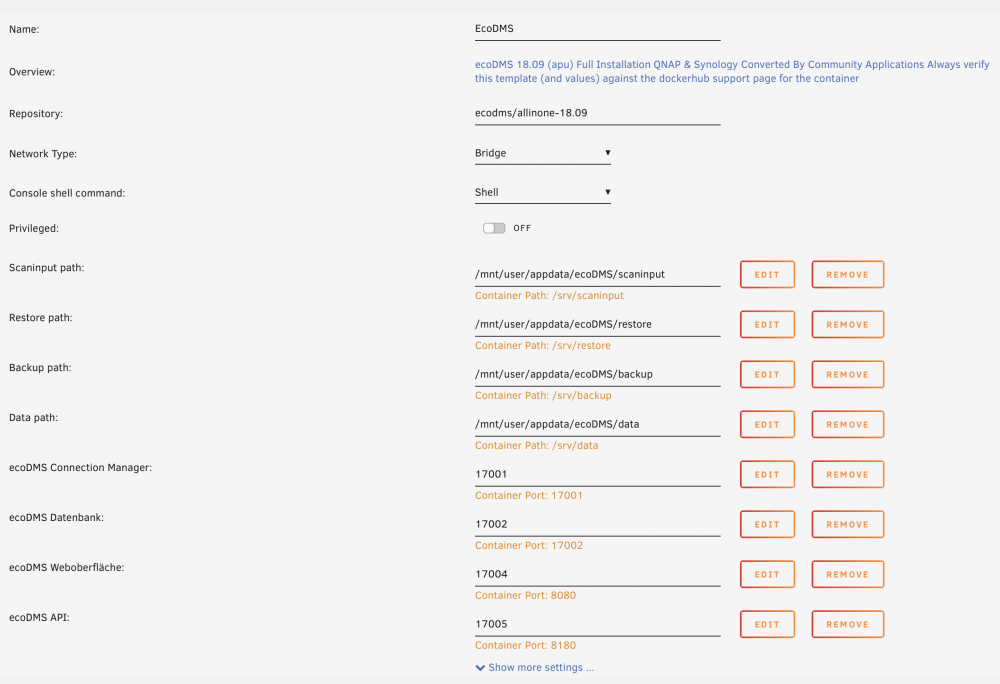
Did you manage to find a solution for this? I also would like to install ecoDMS on Unraid but since it seems not to work properly,.. Edit: Okay got it up and running on UnRaid 6.8.0 with the following steps: Via Community Applications search for ecodms and install the converted Synology/QNAP version allinone 18.09 In the configuration page add the following path and port mappings (see attached screenshot) Download and install the ecoDMS client for your platform (Client Downloads here: EcoDMS) Add a new profile with your UnRaid IP, 17001 as port and login with ecodms as both, user and password. You can change this one you are logged in If the profile is created successfully connect to the new ecoDMS connection If you want to use the web interface of ecoDMS navigate to Settings -> Web/Mobile/API, enable remote access and start the service. Once the service started you should be able to access the web interface via your UnRaid-IP on Port 17004 (or whatever port you chose during setup of the Docker Container. Have fun
 1 point
 -
I would recommend getting i PCIe usb 3.0 card. I use this one here but find one that works for you. I have ran this card using High Sierra, Mojave and now Catalina and it works out the box, no kext needed.1 point
-
We have multiple-pool support coming in 6.9 release. After that we can look at adding a UI to create vdisks that map to iscsi targets. Please do me a favor however: please move any non-Unraid discussion to another forum.1 point
-
Does the 3.1 Gen 2 version work with unRaid?1 point
-
Hey Ich, I'd like to request a DayZ Arma 2 mod docker. Do you think you could add it to your list?1 point