Leaderboard


Popular Content
Showing content with the highest reputation on 04/17/21 in all areas
-
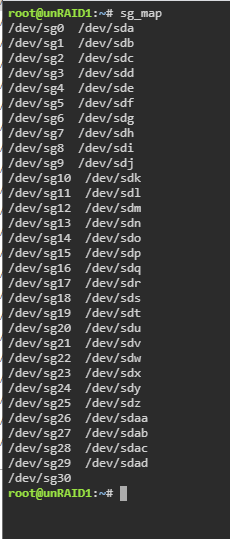
NOTE: There's a TL;DR section at the end of this post with required steps People with specific Seagate Ironwolf disks on LSI controllers have been having issues with Unraid 6.9.0 and 6.9.1. Typically when spinning up the drive could drop off the system. Getting it back on would require checking, unassigning, reassigning and rebuilding its contents (about 24 hours). It happened to me three times in a week across two of my four affected drives. The drive in question is the 8TB Ironwolf ST8000VN004, although 10TB has been mentioned, so it may affect several. There have been various comments and suggestions over the threads, and it appears that there is a workaround solution. The workaround is reversible, so if an official fix comes along you can revert your settings back. This thread is here to consolidate the great advice given by @TDD, @SimonF, @JorgeB and others to hopefully make it easier for people to follow. This thread is also here to hopefully provide a central place for those with the same hardware combo to track developments. NOTE: Carry out these steps at your own risk. Whilst I will list each step I did and it's all possible within Unraid, it's your data. Read through, and only carry anything out if you feel comfortable. I'm far from an expert - I'm just consolidating valuable information scattered - if this is doing more harm than good, or is repeated elsewhere, then close this off. The solution involves making changes to the settings of the Ironwolf disk. This is done by running some Seagate command line utilities (SeaChest) explained by @TDD here The changes we will be making are Disable EPC Disable Low Current Spinup (not confirmed if this is required) The Seagate utilities refer to disks slightly differently than Unraid, but there is a way to translate one to the other, explained by @SimonF here I have carried out these steps and it looks to have solved the issue for me. I've therefore listed them below in case it helps anybody. It is nowhere near as long-winded as it looks - I've just listed literally every step. Note that I am not really a Linux person, so getting the Seagate utilities onto Unraid might look like a right kludge. If there's a better way, let me know. All work is carried out on a Windows machine. I use Notepad to help me prepare commands beforehand, I can construct each command first, then copy and paste it into the terminal. If you have the option, make these changes before upgrading Unraid... Part 1: Identify the disk(s) you need to work on EDIT: See the end of this part for an alternate method of identifying the disks 1. Go down your drives list on the Unraid main tab. Note down the part in brackets next to any relevant disk (eg, sdg, sdaa, sdac, sdad) 2. Open up a Terminal window from the header bar in Unraid 3. Type the following command and press enter. This will give you a list of all drives with their sg and sd reference sg_map 4. Note down the sg reference of each drive you identified in step 1 (eg, sdg=sg6, sdaa=sg26, etc.) There is a second way to get the disk references which you may prefer. It uses SeaChest, so needs carrying out after Part 2 (below). @TDD explains it in this post here... Part 2: Get SeaChest onto Unraid NOTE: I copied SeaChest onto my Flash drive, and then into the tmp folder. There's probably a better way of doing this EDIT: Since writing this the zip file to download has changed its structure, I've updated the instructions to match the new download. 5. Open your flash drive from Windows (eg \\tower\flash), create a folder called "seachest" and enter it 6. Go to https://www.seagate.com/gb/en/support/software/seachest/ and download "SeaChest Utilities" 7. Open the downloaded zip file and navigate to Linux\Lin64\ubuntu-20.04_x86_64\ (when this guide was written, it was just "Linux\Lin64". The naming of the ubuntu folder may change in future downloads) 8. Copy all files from there to the seachest folder on your flash drive Now we need to move the seachest folder to /tmp. I used mc, but many will just copy over with a command. The rest of this part takes place in the Terminal window opened in step 2... 9. Open Midnight Commander by typing "mc" 10. Using arrows and enter, click the ".." entry on the left side 11. Using arrows and enter, click the "/boot" folder 12. Tab to switch to the right panel, use arrows and enter to click the ".." 13. Using arrows and enter, click the "/tmp" folder 14. Tab back to the left panel and press F6 and enter to move the seachest folder into tmp 15. F10 to exit Midnight Commander Finally, we need to change to the seachest folder on /tmp and make these utilities executable... 16. Enter the following commands... cd /tmp/seachest ...to change to your new seachest folder, and... chmod +x SeaChest_* ...to make the files executable. Part 3: Making the changes to your Seagate drive(s) EDIT: When this guide was written, there was what looked like a version number at the end of each file, represented by XXXX below. Now each file has "_x86_64-linux-gnu" so where it mentions XXXX you need to replace with that. This is all done in the Terminal window. The commands here have two things that may be different on your setup - the version of SeaChest downloaded (XXXX) and the drive you're working on (YY). This is where Notepad comes in handy - plan out all required commands first 17. Get the info about a drive... ./SeaChest_Info_XXXX -d /dev/sgYY -i ...in my case (as an example) "SeaChest_Info_150_11923_64 -d /dev/sg6 -i" You should notice that EPC has "enabled" next to it and Low Current Spinup is enabled 18. Disable EPC... ./SeaChest_PowerControl_XXXX -d /dev/sgYY --EPCfeature disable ...for example "SeaChest_PowerControl_1100_11923_64 -d /dev/sg6 --EPCfeature disable" 19. Repeat step 17 to confirm EPC is now disabled 20. Repeat steps 17-19 for any other disks you need to set 21. Disable Low Current Spinup...: ./SeaChest_Configure_XXXX -d /dev/sgYY --lowCurrentSpinup disable ...for example "SeaChest_Configure_1170_11923_64 -d /dev/sg6 --lowCurrentSpinup disable" It is not possible to check this without rebooting, but if you do not get any errors it's likely to be fine. 22. Repeat step 21 for any other disks You should now be good to go. Once this was done (took about 15 minutes) I rebooted and then upgraded from 6.8.3 to 6.9.1. It's been fine since when before I would get a drive drop off every few days. Make sure you have a full backup of 6.8.3, and don't make too many system changes for a while in case you need to roll back. Seachest will be removed when you reboot the system (as it's in /tmp). If you want to retain it on your boot drive, Copy to /tmp instead of moving it. You will need to copy it off /boot to run it each time, as you need to make it executable. Completely fine if you want to hold off for an official fix. I'm not so sure it will be a software fix though, since it affects these specific drives only. It may be a firmware update for the drive, which may just make similar changes to above. As an afterthought, looking through these Seagate utilities, it might be possible to write a user script to completely automate this. Another alternative is to boot onto a linux USB and run it outside of Unraid (would be more difficult to identify drives). *********************************************** TL;DR - Just the Steps I've had to do this several times myself and wanted somewhere to just get all the commands I'll need... Get all /dev/sgYY numbers from list (compared to dashboard disk assignments)... sg_map Download seachest from https://www.seagate.com/gb/en/support/software/seachest/ Extract and copy seachest folder to /tmp Change to seachest and make files executable... cd /tmp/seachest chmod +x SeaChest_* For each drive you need to change (XXXX is suffix in seachest files, YY is number obtained from above)... ./SeaChest_Info_XXXX -d /dev/sgYY -i ./SeaChest_PowerControl_XXXX -d /dev/sgYY --EPCfeature disable ./SeaChest_Configure_XXXX -d /dev/sgYY --lowCurrentSpinup disable Repeat first info command at the end to confirm EPC is disabled. Cold boot to make sure all sorted.
 2 points
 -
Grundsätzlich sollte man davon ausgehen, dass jede Software und jedes Betriebssystem gehackt werden kann. Aus dem Grund sollte man sich an die 3 2 1 Backup Regel halten. 3 Kopien, 2 verschiedene Medien und 1 externer Standort. Ich habe zB lokal ein Backup der wichtigsten Daten innerhalb des Arrays, was ich aber nur als Root-Nutzer einsehen kann. Dann habe ich extern einen Server bei einem Freund stehen, der auf meinen Server nur lesend zugreifen kann. Mein Server kann wiederum nicht auf den externen Server zugreifen. Und zuletzt sichern beide Server in die Cloud. Käme es nun zu dem Fall, dass mein lokaler Server eine Sicherheitslücke hätte, würden die Daten vernichtet. Hätte der Angreifer dann die Möglichkeit sogar auf die Cloud zu kommen, wären auch die Daten evtl weg. Meine letzte Instanz ist dann der externe Server. Andersherum könnte ein Angreifer beim Freund den Server zerlegen. Der kann bei mir aber nur lesend zugreifen. Auch hier wäre ich sicher. Auch eine Möglichkeit ist das Sichern auf USB Laufwerke, die man im Wechsel absteckt und im Spind auf der Arbeit aufbewahrt und auch dort immer nur austauscht. Auch dann hat man sein externes Backup. Angriffe verhindern kann man schon mal, in dem man seinen Server nicht über das Internet bereitstellt. Will man zB unterwegs Filme über Emby/Jellyfin/Plex schauen, könnte man das über einen VPN Tunnel machen. Will man aber zB Nextcloud auch für Dritte verfügbar machen, müsste man dagegen direkten Zugang ermöglichen. Hier wäre es dann denkbar nur bestimmte IPs zuzulassen. zB nur welche aus Deutschland. Außerdem könnte man überlegen, dass der Nextcloud Container vom restlichen Netzwerk isoliert wird. Entweder über VLAN (Managed Switch) oder spezielle Kommandos: https://forums.unraid.net/topic/101603-vlan-und-isolierung-von-docker-containern/ Das würde aber nur verhindern, dass der Angreifer auch das restliche Netzwerk angreift. Gäbe es eine Lücke in Docker, also dem Container-System, könnte der Angreifer auch auf Unraid selbst zugreifen. Lokal könnte man den Server absichern, in dem man sich niemals mit einem PC auf dem Server anmeldet, mit dem man auch ins Internet geht. Oder mit einem Endgerät, dem man am meisten vertraut. Ich würde da zB einem Tablet eher vertrauen als einem Windows PC, da die meisten Viren für Windows PCs geschrieben werden. Das dient dann dem Schutz gegen einen Trojaner, der versucht deinen Root-Login zu stehlen. Tatsächlich vermisse ich an dieser Stelle eine 2-Faktor-Authentifizierung in Unraid. Auch könnte man im Unraid Server alle Dienste schließen, die man nicht benötigt. Ich habe zB SSH, Telnet usw deaktiviert. Wenn Dienste deaktiviert werden, sind die Ports dazu auch dicht. Muss ich doch mal per SSH drauf, mache ich das immer nur temporär auf. Schlussendlich lauscht der Server also nur noch auf Port 80 und 443. Über diese Ports stellt er dann die Unraid WebGUI zur Verfügung. Das kannst du prüfen, in dem du mit einem Port Scanner über Windows deinen Server scannst. Natürlich hilft das nicht, wenn Unraid mal eine Sicherheitslücke besitzen sollte. zB könnte es eine im Nginx Webserver geben, der die WebGUI bereitstellt. Der Angreifer hätte dann Root-Zugang zum Server. Aus dem Grund machen auch Virenscanner keinen Sinn. Sie kennen die Lücken eh nicht, denn wenn sie bekannt wären, gäbe es ja ein Update für Unraid (oder Nginx). In Windows sieht das anders aus. Da soll dich ein Virenscanner davor schützen, dass du eine Anwendung installierst. Also eigentlich schützt dich der Virenscanner vor dich selbst. In Unraid installierst du dagegen nicht mal eben so eine verseuchte App. Dafür müsstest du auf die Kommandozeile gehen und entsprechende Befehle eingeben. Und eine Firewall brauchst du wie gesagt nicht, weil ein Betriebssystem nur auf den Ports lauscht, wo auch ein Dienst hinter steht. Also keine Software, kein offener Port. Ist bei Windows übrigens auch so, aber Windows hat standardmäßig einige Ports offen und es gab immer mal wieder Möglichkeiten darüber ins System einzubrechen. Die beliebtesten Wege sind aber nach wie vor Lücken im Browser oder den Nutzer dazu zu animieren eine verseuchte Software zu installieren. Hier ein Beispiel wie Angreifer in der Vergangenheit mal Linux Server übernommen haben, egal welches Linux installiert war: https://de.wikipedia.org/wiki/Heartbleed Oder hier bei Windows Servern: https://de.wikipedia.org/wiki/Code_Red_(Computerwurm)2 points
-
had more of a in depth look into this this morning and i can confirm if i switch to netherlands i am seeing 503 gateway failures on PIA side, but its intermittent, i restarted the container and it started fine, so i am happy that no changes to the API have happened, its just PIA being a bit shit, hopefully they will get it sorted, god PIA can really be a Pain In the Arse sometimes.2 points
-
Hello all, I'm currently having an issue where I cannot access a file or folder someone else has placed on the server, nor they being able to access mine. When trying to access from my windows 10 laptop it comes up with the error: Network Error Windows cannot access \\servername\share\folder (or \\IP Address\share\folder) You do not have permission to access \\servername\share\folder. Contact your network administrator to request access. There is a link to go to a windows article about permissions but instead it just goes to the default Windows help page...... Everyone is using windows 10 laptops, I'm running Unraid 6.9.1, everyone involved has read/write access to the share, and I have even run the new permissions script, which works for existing files but starts again when new files are added ('old' files folders are still able to be accessed, only the files/folders added after the script is run cannot be accessed). Is there some setting that I'm overlooking that needs to be changed to prevent this from happening? Any help is appreciated. P.S. there is nothing in the syslog for the last twenty minutes prior to this happening besides disk spin up/down1 point
-
One more thing. When you upgrade from a version prior to version 5.0, you will have to run the New Permissions Tool that is in the new version. The permissions/owners changed with the introduction of version 5.0 and this script was written to address that issue. (I seem to recall that it had something to do with security...)1 point
-
i had to go in and update the DNS but its working now for me as well. thank you.1 point
-
Keep in mind every application is different and every application needs eventually it's own custom "things" so that it will run in a container. So a write up could be really difficult and I have a few containers in the CA App that I try to keep up and running and give support for them.1 point
-
My PM is basically a full write up for this.1 point
-
Strange you ended up there if you went via the Manual link. The section of the manual that describes replacing a disk is here under Storage Management.1 point
-
the best place to start is often the ‘Manual’ link at bottom of the unRaid GUI.1 point
-
After using New Config you can reorder the disks with no problems as long as you are not going to assume parity remains valid. unRaid will build parity based on the assignments at the point you start the array.1 point
-
Some are OEM, but also have IBM or HP, don't believe I have any Dell.1 point
-
If the emulated disk is fixed after running xfs_repair and contents look correct, and only if that's true, you can rebuild on top by doing the follow: -stop array -unassign disk1 -start array -stop array -re-assign disk1 -start array to begin rebuild1 point
-
Check filesystem on disk1: https://wiki.unraid.net/Check_Disk_Filesystems#Checking_and_fixing_drives_in_the_webGui Remove -n flag or nothing will be done and if it asks for it use -L1 point
-
I clicked update all for all my modules at once. I posted it to pi-hole and it's a known issue. https://github.com/pi-hole/docker-pi-hole/issues/822 this seems to be the suggested fix https://github.com/pi-hole/docker-pi-hole/actions/runs/745678042 though I'm unsure how to actually do it lol1 point
-
Allright, I hope I have done everything right but here it is https://github.com/kubedzero/unraid-snmp/pull/11 point
-
count me as another user who's migrated everything over the docker-compose so this is a welcome development. i've also found the missing icons annoying. rather than editing core files i'm opted to create templates instead with the same container name and leave everything else blank. this is enough to trick unraid. something like this: <?xml version="1.0"?> <Container version="2"> <Name>portainer</Name> <Repository>portainer/portainer-ce</Repository> <Registry>https://hub.docker.com/r/portainer/portainer-ce/</Registry> <WebUI>http://[IP]:9000/</WebUI> <Icon>https://secure.gravatar.com/avatar/681edab450c1ebab7d83e7266b1d0fbb.jpg</Icon> </Container> you'll have to edit the files directly instead of going through dockerman. and while you can use dockerman to start/stop containers, you can't use it to do anything else like editing containers, updates, etc. otherwise you will mess up your compose configuration and be forced to manually delete conflicting containers. but, once you're fully committed to compose it's literally just a docker-compose pull docker-compose up -d to get the latest of all images and restart everything. dockerman will still inaccurately state that everything is out-of-date, but i've learned to ignore that.1 point
-
For those with the rpcbind log spamming issue, apply this fix. Add the following line to your go file: sed -i s"#rpcbind -l#rpcbind#" /etc/rc.d/rc.rpc and reboot your server. If you want to apply the fix while the server is running, do the following: Unmount all your NFS remote mounts Execute the following commands. sed -i s"#rpcbind -l#rpcbind#" /etc/rc.d/rc.rpc /etc/rc.d/rc.rpc restart /etc/rc.d/rc.nfsd restart Mount all your NFS remote mounts. This will be fixed in the next release.1 point
-
I couldn't find an icon for my admittedly old case a Cooler Master Centurion 590 so I tried my hand at making one :). I figured I might as well share it with the community as well.

 1 point
 -
Go through the dependencies list here1 point
-
I was just about to edit my earlier comment, to report, that I fixed it. So, I backed up the data to an external drive and then I just removed the small cache drive, that way I was able to remove the small cache drive and then bring the array back online. Now I'm back at how it used to be before all that messing around, my Idea for the next try is to just make sure all my VMs aren't on the Cache and then restart the process, this way I assume I'll be able to switch from raid1 to raid0.1 point
-
Problem starts with corruption being detect on the cache filesystem, docker issues after are a consequence of that, best to backup and re-format cache. Note if you need me to follow up please ping me again as I don't check this forum.1 point
-
Thanks @SpaceInvaderOne, I will do that as I didn't realize it was already that old. And thanks for your videos! You saved my butt a number of times the last couple years!1 point
-
The "Passed Through" flag in UD should resolve this1 point
-
Deleted all cron jobs and restarted the container, and the job ran just fine. I'll restart my server and not touch the GUI and see if it still runs tonight, i'll report back the results1 point
-
Also note that just rebooting should bring the data back, but you still need to fix the underlying issue or it will likely happen again. Errors on parity drive are logged like a disk problem, though SMART looks OK and it's using a Marvell controller, still should run an extended test, but the main problem was the onboard SATA controller, which is unfortunately quite common with some Ryzen boards, looks for a BIOS update, if that doesn't help and other than using a different board best bet is to use an add-on controller (non Marvell).1 point
-
I'm afraid I don't know what to suggest to help you any further.1 point
-
You have both the amdgpu and radeon driver modules enabled and installed. You can't pass through a GPU that's bound to a Linux driver. You need to revert to the default condition of having them blacklisted to stand any chance of using the GPU in a VM.1 point
-
🤔 This is odd. Can you please force an update to the container to make sure you are on a version that handles sigterm, and then please share your diagnostics.zip when the container is unresponsive? Also, are you running the latest-root tag or latest? When it is unresponsive, do the logs not load via docker logs XMRig -f as well as the Unraid WebUI or just the WebUI? And does the first command output something and then not continue, or output nothing at all? Also, when you say a clean shut down do you mean of the container or does it hang your whole server during a shutdown? Because when you shut down, Unraid will try stopping the docker daemon, which tells docker to send sigterm to all running containers, and after about 10 seconds it will send sigkill to them. A couple of things to try: docker exec -ti XMRig apt-get install -y htop && htop When it is frozen, can you please run docker stop ----time=60 XMRig, see if it takes the full minute to stop. If it does, this means sigterm is failing. This shouldn't happen, but your diagnostics.zip could explain why it does.1 point
-
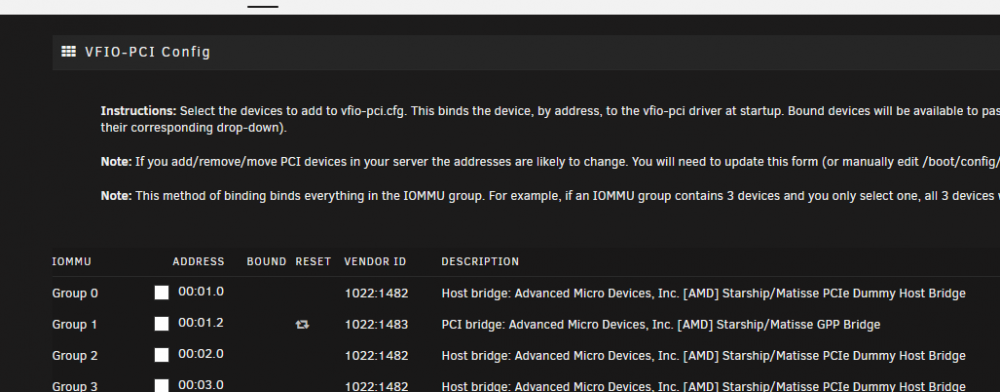
Diagnostics would be more useful than screenshots. What happens if you bind both items in IOMMU group 22 to the VFIO driver?1 point
-
It is normally Marvell controllers that tend to cause problems looks like multiple disks dropped offline at the same time. You might want to check whatever is common (such as cabling).1 point
-
Are these disks on the Marvell controller?1 point
-
Yes. Is is likely that you would not have ended up with as much in tle lost+found folder if the correct device had been used for the first xfs_repair (not that that is much consolation at this point ) Sorting out the lost+found folder can be a lot of work unfortunately when file names are lost. You can use the Linux 'file' command to at least get the file type of files with cryptic names. Yes. I would not expect there to be any parity errors at this point.1 point
-
Now restart the array in normal mode to look at the drive contents.1 point
-
yeah i too have been playing with the alternative way of generating a token and it does seem more stable, so i have made the change for both port assignment and also wireguard, as both require tokens and both are failing, one failing when connecting to 10.0.0.1 and the other failing when connecting to metadata server on certain endpoints, so it def still does look like a pia outage of some type here, but the alternative method of hitting https://privateinternetaccess.com/gtoken/generateToken, seems to be working ok so i have switched over to that, just generating a test image now... edit - ok test went well, new prod image built, please pull down and try at your convenience.1 point
-
I am afraid I have no idea if what you did was OK if you omitted the partition number and whether it would have damaged the file system. Whenever I made that mistake it failed as it could not find the superblock Unless there is serious corruption a xfs_repair is very fast (seconds/minutes) so if your laptop went to sleep this suggests something else was happening. @JorgeB might have a suggestion on best action to take at this point.1 point
-
@Monty I can confirm that I am having the same issue. This started for me after yesterday's Docker update.1 point
-
Yes, it's loaded.. I saw your issue on github.. let's see what ajmadsen says about it if you give him the requested data.. definetely an unexpected behaviour.....1 point
-
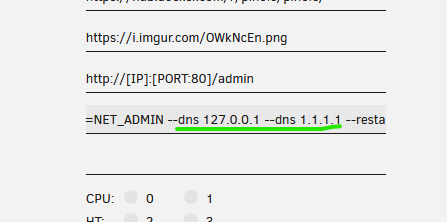
Hi there! Am I the only one with problems with latest update? Had to roll it back to v5.7 to make it work again. Thanks EDIT: Got it fixed deleting dns from "Extra parameters"
 1 point
 -
How will you know if the emails are getting through? The purpose of the daily test mail is to be sure you can get an "all clear" message. Then if something does need to alert you, you know the email should successfully get to you. There is a good reason for a daily all ok message, I strongly suggest you turn that back on and use it as confirmation that everything is working as intended.1 point
-
I think some of the PIA servers are having issues with Wireguard? I usually use Toronto CA, but had to change to Ontario CA to get it to work.1 point
-
Stimmen die Rechte der Datei? Vielleicht gibt es keine Leserechte?1 point
-
I have two issues with this unraid docker package: 1) The dropdown list for VPN providers doesn't contain the CUSTOM field, that is needed for example for AirVPN, because they use custom ovpn configs that you generate. This would not be a problem if not for issue #2 2) Everytime there is an update of this docker, some fields get reset and then the docker stop working. First some fields that I removed, like the /mnt/data/T_Media keep coming back, recreating over and over the share T_Media, which is annoying. More problematic is that the provider resets everytime to the first choice of the dropdown and I have everytime to remove it and manually add it back as CUSTOM, then removed the unneeded fields. Until I do that, the torrenting doesn't work because the VPN can't connect. In summary, it would be nice that the values don't reset like that and that the CUSTOM choice was available for VPN provider.1 point
-
yes, i have code in place to do a graceful kill of the process.1 point
-
i bind my GPU on VFIO-PCI Config. 😭 after that, I reboot my system. It cannot enter into System, It always on this page , see the pic I take.
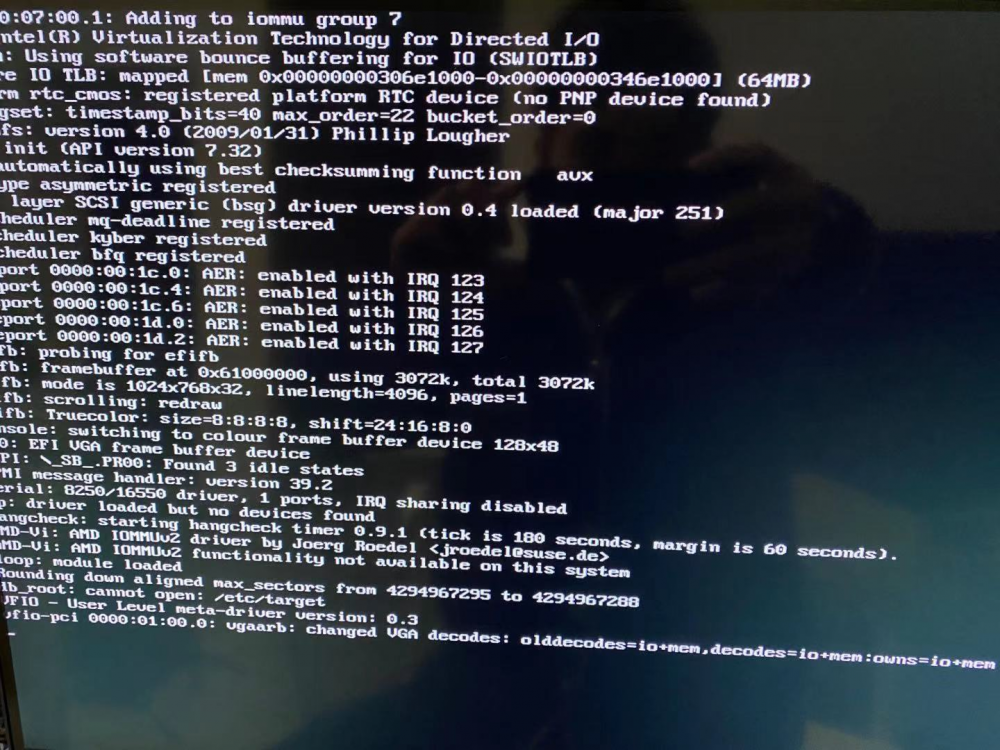 1 point
 -
Am running into the same problem but google and the search function helped me out. ( I am also a total unraid noob) Plug your usb boot device into a pc go into the config folder and delete the vfio config file.1 point
-
Thanks for your awesome work. Installing prometheus on my unraid gets me the following error in the logs: level=error ts=2021-03-22T23:37:01.571Z caller=main.go:333 msg="Error loading config (--config.file=/etc/prometheus/prometheus.yml)" err="open /etc/prometheus/prometheus.yml: no such file or directory" Any idea? Thanks!1 point
-
Install worked well but have trouble changing the admin password. The new password works as well as the old default password. Seems this is a known issue from a couple years ago, still looking for the resolution. Edit: This seems to be a resolution. https://github.com/airsonic/airsonic/issues/733#issuecomment-384286666 Edit: Problem solved. within the WebUI, click on the user tab, select the admin user, click the add credentials checkbox to put in the new password. Then click on the Credentials tab and remove the old one from the list.1 point
-
@jonp It would be nice if you could update your first post as follows: https://forums.unraid.net/topic/35878-plex-guide-to-moving-transcoding-to-ram/?do=findComment&comment=894460 It contains the improvement of @ich777 which makes the guide even easier for the user. Using "/tmp" as mentioned in your post is dangerous as an unlimited RAM usage will probably cause server crashes.1 point
-
Figured it out. No need to mount through /etc/fstab. What's missing are entries in /etc/mtab, which are created if mounted from fstab. So a few echo into /etc/mtab is the solution. Just need to do this at boot. Each filesystem that is accessible by smb (even through symlinks) needs a line in mtab to stop the spurious warning spam. echo "[pool]/[filesystem] /mnt/[pool]/[filesystem] zfs rw,default 0 0" >> /etc/mtab1 point