Leaderboard


Popular Content
Showing content with the highest reputation on 08/29/21 in Posts
-
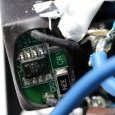
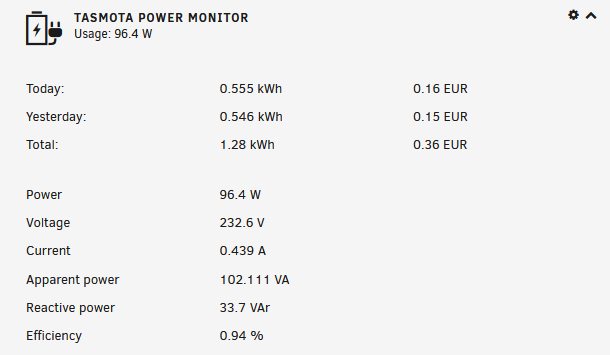
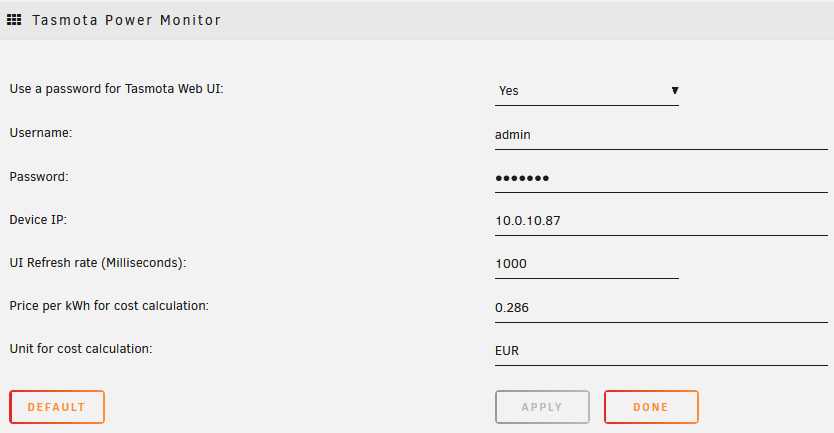
Hi guys, I want to introduce you to my Tasmota Power Monitor. With this UnRaid plugin you can turn a Tasmota device into an energy monitor for your server. I got the idea from corsairpsu-unraid, but since I don't have a suitable Corsair PSU, I found an alternative in a Tasmota Power Plug. It shows the most common measured values and offers the option of costing for electricity consumption. Dashboard: Settings: The password is saved in plain text. Introduction Before you start, be sure that you protect your Tasmota device against incorrect operation. So that you don't accidentally turn off your server. I solved this for myself with the command: PowerOnState 4 This sets the on / off switch in the WebUI and on the device to always on. Therefore, check what would be best for your device before using it. Have a look at the Tasmota Documentation. Use the plugin and device at your own risk. I will not be responsible for any damage. I use an Aisirer Power Monitoring Plug (AWP07L) with Tasmota firmware 8.5.1 and this template. {"NAME":"AWP07L","GPIO":[56,255,255,255,255,134,255,255,131,17,132,21,255],"FLAG":0,"BASE":18} Created and tested with Unraid 6.9.1. Installation as usual... https://raw.githubusercontent.com/Flippo24/tasmotapm-unraid/main/tasmotapm.plg
 1 point
 -
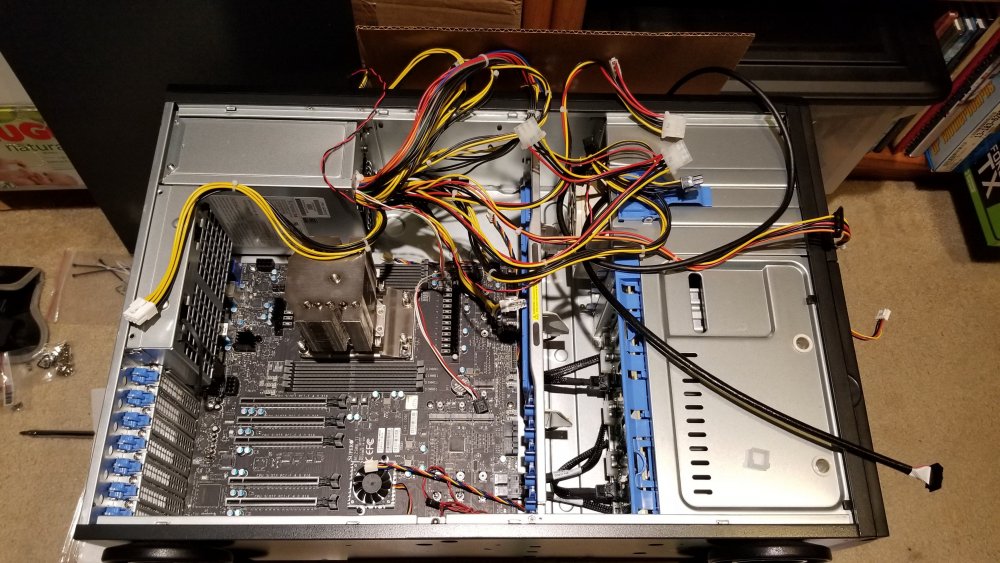
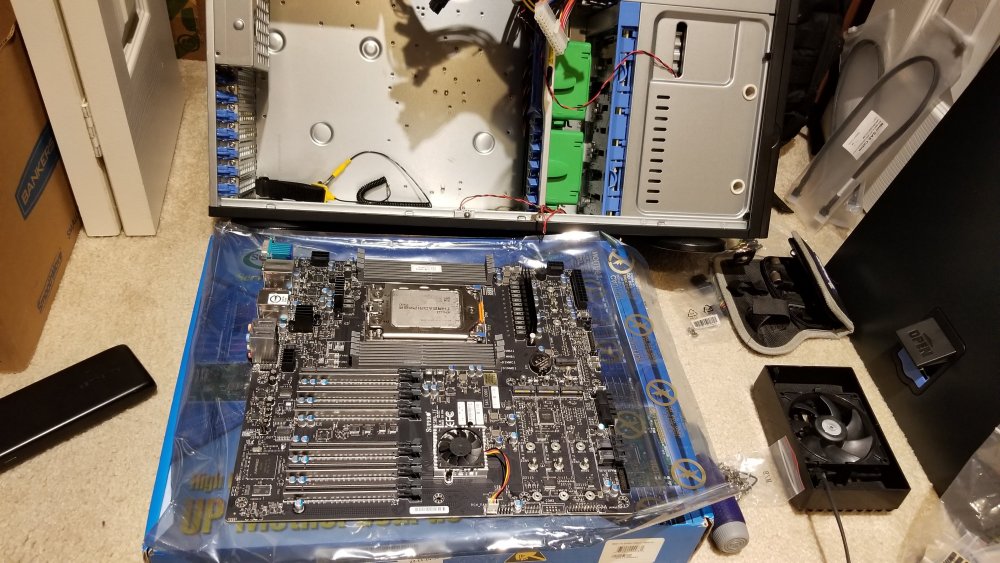
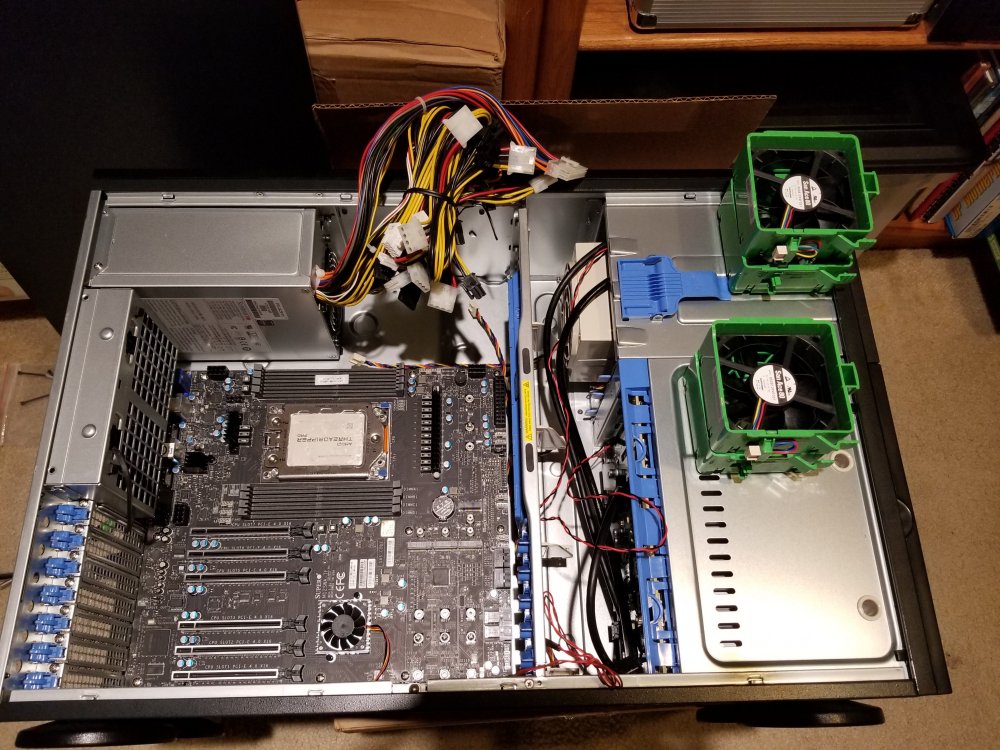
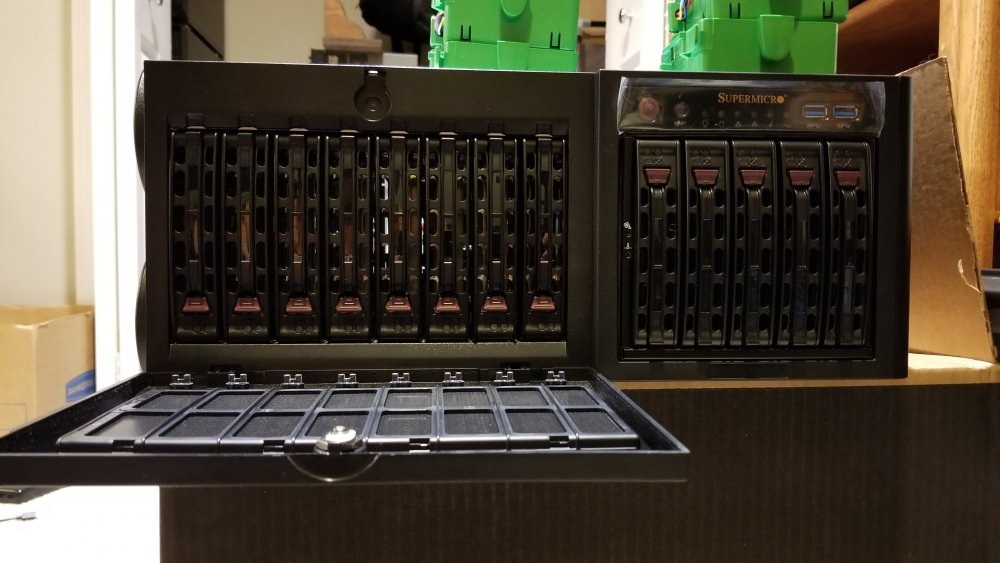
As my earlier post noted, my main server was due for an upgrade - it'll probably keep running for now so as not to overload the backup server due to all the VMs I have running for work-related testing and such, but the replacement, it's finally becoming a reality: It's a supermicro CSE-743-1200B-SQ, a 1200 watt platinum power supply with 8 bays built in, with a 5 bay CSE-M35TQB in place of the 3 5.25" bays, all designed to run at less than 27db, while able to be either ran as a tower, or rack mounted (it'll spend the next 3 months in tower form... seems getting rails for this thing requires first sending a carrier pigeon to hermes, hermes then tasks zeus with forging them in the fires of the gods from unobtainium, who then ships then when he's done doing... well greek stuff). My first 700 series chassis is still doing work, still with it's original X8SAX motherboard, and I see no reason to fix something that isn't broken! While having a bunch of drives is great, the idea here is to have two gaming VMs, run plex, nextcloud, homeassistant, frigate, and numerous others. All of that takes a ton of IO. Enter the motherboard: This motherboard is a friggin monster - but importantly, at least to me, it's design syncs up perfectly with the chassis, so all the power monitoring, fan modulation, and LED/management functions can all be controlled via built-in out of band management. The M12SWA is currently paired to a 3955WX; given how close we are to next gen threadrippers release, I'm going to wait that out for now, and then decide whether to upgrade to next gen's mid-range (whether it be a 5975WX, or whatever the case may be), or otherwise. For now, the VM's will be 4 core / 8 thread to match the CCD's, leaving the rest to docker. Down the line, they'll likely be either 8 cores each, or one 8 and one 4, depending on what the need is. The lighter of the two is going to house an always on emulation VM with a 1650s, which will play all our games on screens throughout the house (or wherever) via moonlight/parsec/whatever. It slots perfectly in the chassis: But cable management is going to be a meeessssss: That ketchup and mustard is hurting my friggin eyes. I'm going to have to wrap those with something More to come on this one - the plan for now is to throw in 128GB of ECC 3200, 4 NVME, an rtx 2070, gtx 1650s, quad 10Gb nic (chelsio, since this thing comes with the stupid acquantia nic which has no SR-IOV support), quad 1Gb nic (since the intel nic they included ALSO doesn't support SR-IOV... ugh), then one slot left for potentially adding either tinker-type toys or an external SAS HBA if I somehow eventually run out of room. There are custom boards out there that combine the x540 and i350 chipsets onto one board, but I may instead consolidate this down to a single X550 or one of those fancy x700 intel based boards... We'll see.
 1 point
 -
I'm not certain but I don't think they have any suffix. But the plugin you mention sounds about like what I was saying. I know with MCEbuddy there was an option to wait until a file hasn't been modified for 1 minute and up to 60 days or something like that.1 point
-
Looks good1 point
-
Hey thanks @ChatNoir. My apologies, I through I had deleted this thread as looking through the diagnostics I found this directory a short time later (I'd never dug into diagnostics and when I didn't see anything obvious in the drives.conf I expected it was beyond my understanding) and managed to resolve the issue. My problem was that a connector was loose on one of the existing drives when I restarted so it was showing a drive missing which threw my confidence in everything. Once I found this directory I realised why it was showing a drive missing (basically I better interpreted what the interface was showing me with the corroborating information), shut down, re-seated the cables and rebooted and got it running correctly. Appreciate you taking the time to assist!1 point
-
nochmal vorweg: Primär habe ich nur den Guide zusammen geschrieben und die Befehle zusammengetragen, um Variablen ergänzt und ausprobiert. Deswegen kann ich nur vermuten, warum die Befehle so sind, wie sie sind. Sollte ich quatsch erzählen, bitte ich dass die von Jemanden der es "weiß", korrigiert wird. Das habe ich so aus dem Script von Lukas Knöller übernommen. Laut diesem Artikel schien mir keine Anpassung von nöten. Ich denke es liegt daran, dass das dd if=/dev/mmcblk0 im Ziel ausgeführt wird, dann per pipe an dd of=${BACKUP_PFAD}/${BACKUP_NAME}-${DATUM}.img übergeben wird, welches lokal ausgeführt wird.1 point
-
Mit dem aktuellen Windows 10 ISO und Rufus konnte ich in meinem Fall (SSD Firmware Update via Kingston SSD Manager) die Firmware problemlos aktualisieren .. zum Glück.1 point
-
Sure, template updated1 point
-
Nice one mate. I'll give this a try later on!1 point
-
No worries, I thought the behavior was weird too. This is still helpful once you get the config changed IMO.1 point
-
Most likely it's definitely a sensor thats not on the CPU1 point
-
Figured it out. Turns out the flash drive was in the wrong format (exFat). Reformatted it as Fat32 and works like a charm. Thank you anyway.1 point
-
****** Please use the Official Template for Photostructure instead of this one ******* You have an offical template now folks - my beta template will be retired.1 point
-
Ah, if that's the case, something is wrong, you could download init.sh here https://github.com/SiwatINC/h265ize_unraid/blob/master/init.sh and paste it into your output directory1 point
-
The /Sync+ folder is where Plex stores the temp files that users select to be downloaded to their devices until they are downloaded. It is not controlled by the trancode folder location, which is where tmp files created when a file is streamed are stored. If they aren't being removed, then one of your users has (probably) mistakenly selected lots of files e.g. a whole season or a whole library to be downloaded, but e.g. doesn't have the space on their device to sync them, or have enough BW to sync them, or never connects that device again for long enough, meaning they don't get uploaded to their device. Sadly, Plex doesn't make it easy to work out which user is syncing. I don't like the feature for my users as they always do it wrong, meaning my server wastes a lot of resources and space, so I turn off user syncing for most users. If you don't want this behaviour, then go through each of your users and Disable "Allow Downloads". Then delete the files from the Sync+ folder.1 point
-
I've created a fork of the PIA scripts to simplify the install process on unRaid, it's still not as simple as importing a configuration, but the scripts now generate a file following the "wg#.conf" convention which gets picked up by the Dynamix WireGuard plugin, it also fills the public key and VPN type fields correctly (which exist in "wg#.cfg"). I also added a user script to be used with the User Scripts plugin to make configuration changes (like re-selecting a server) easy to make, all you really need to fill to be up and running are the PIA account credentials. You can find my fork at https://github.com/DorCoMaNdO/pia-wireguard-unraid, the user script is part of the repo at unraid_userscript.sh1 point
-
I didn't have notifications on... Sorry that I didn't see all of the comments1 point
-
Sure, no problem at all. All I did was a quick template as a favour... Happy if you want to release another and I can remove mine.1 point
-
Easy fix. You're using the env variables that minio has depreciated. I updated the template but they don't seem to have pulled through to you. Remove your container and create it again from community apps. Just don't delete your minio appdata as well!!!! @pervel This should also fix your issue. I have just done the above as well and had no issues. Just make sure to fill in your same user and password as before.1 point
-
The plugin only supports a single appdata share1 point
-
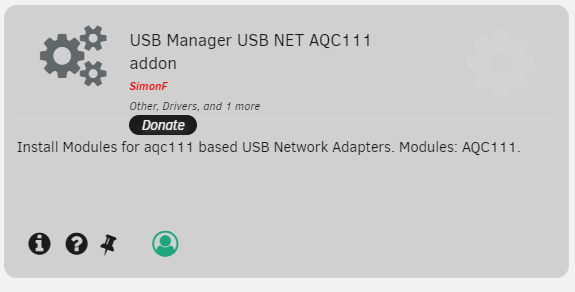
ich777 has created a package for me and I have create a plugin to install that should appear in CA to install the module. I have not been able to test if it works with an adapter or if you can use with Unraid network settings.
 1 point
 -
That's because the Nextcloudpi team does not always upgrade the docker image after each update. Updates are done within the container, but each time you edit the template / destroy the image, it pulls the latest image available on dockerhub, which is generally not the latest releases.1 point
-
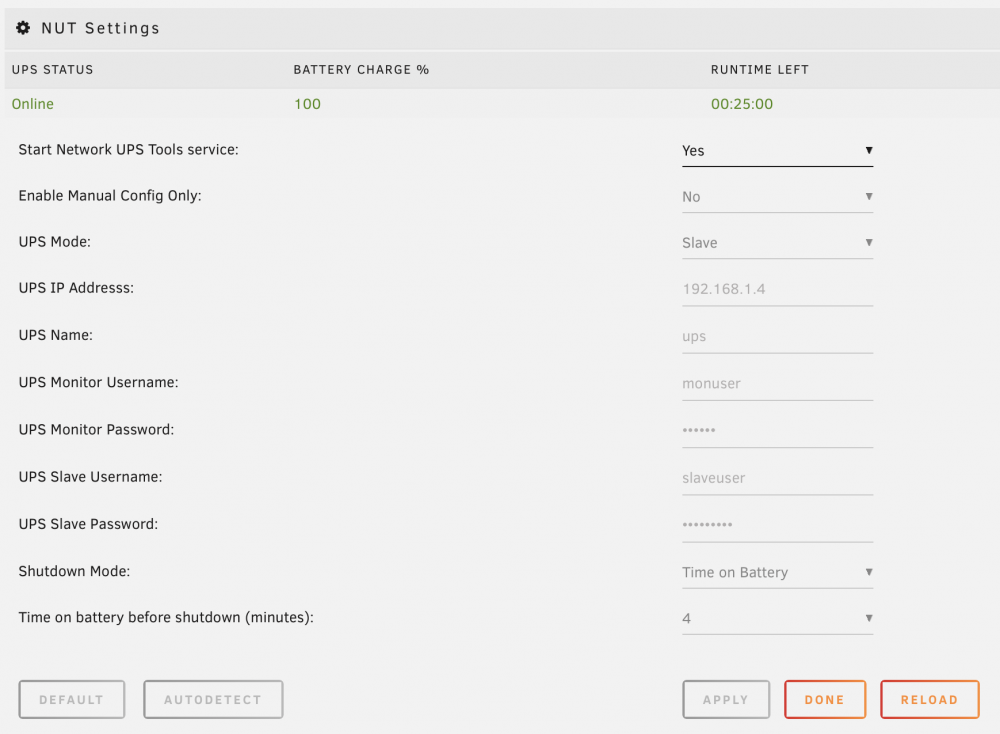
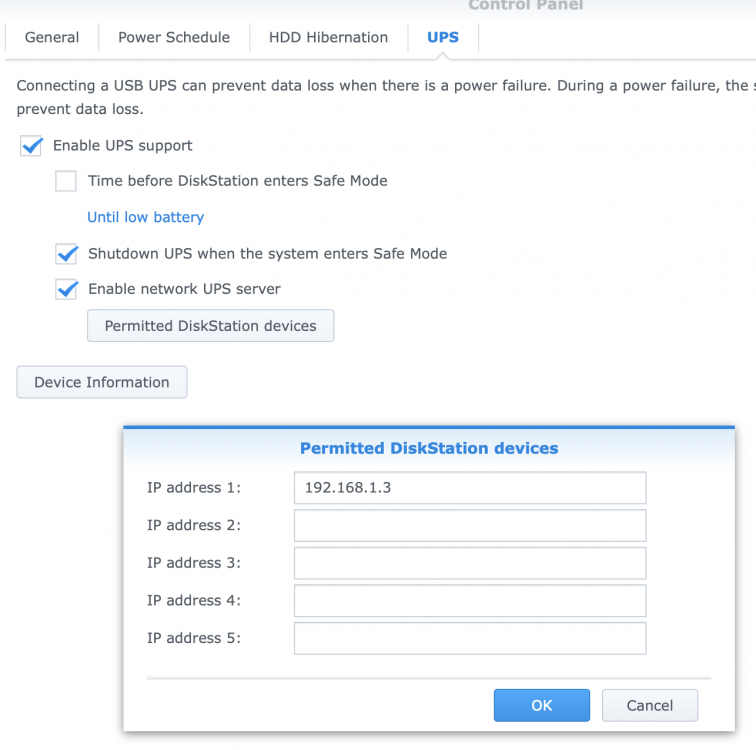
My unRaid box is 192.168.1.3 and my Synology NAS is 192.168.1.4 As mentioned, I changed nothing else other than the UPS Mode in the NUT Settings. Hope it helps!
 1 point
 -
You need install plugin nut ups and disable buildin APCUPSD. Then google Synology access UPS default login password.1 point