Leaderboard


Popular Content
Showing content with the highest reputation on 10/21/21 in all areas
-
No crypto currency? That one will be a global payment system.2 points
-
By popular demand, a GUI for docker searches will be re-integrated into CA at some point this weekend. Admittedly, I really don't understand why you guys find it useful instead of the direct link (with the search already filled out) to dockerHub, but I can deal with it.2 points
-
Compose Manager Beta Release! This plugin installs docker compose and compose switch. Use "docker compose" or "docker-compose" from the command line. See https://docs.docker.com/compose/cli-command/ for additional details. Install via Community Applications This plugin now adds a very basic control tab for compose on the docker page. The controls allow the creation of compose yaml files, as well as allowing you to issue compose up and compose down commands from the web ui. The web ui components are based heavily on the user.scripts plugin so a huge shoutout and thanks goes to @Squid. Future Work: Add scheduling for compose commands? Allow more options for configuring compose commands.1 point
-
This is a support thread for the Nextcloudpi Docker Container for unRaid, from the home page: "NextCloudPi is a Nextcloud instance that is preinstalled and preconfigured, and includes a management interface with all the tools you need to self host your private data in a single package. This is an official open source community project that aims at making it easier for everyone to have control over their own data." For the purpose of unRaid this a single all in one container, an alternative to running nextcloud, database server and reverse proxy in separate containers. I am not the developer of this container but since I use it, I will do what I can to help people wanting to use it. Project homepage: https://ownyourbits.com/nextcloudpi/ Dockerhub homepage: https://hub.docker.com/r/ownyourbits/nextcloudpi You can find this container under the search team "Nextcloudpi" in the brilliant Community Applications system. For help with that please refer to the thread here: https://forums.unraid.net/topic/38582-plug-in-community-applications/ Setup: Once you selected the template in CA you will need to check 5 settings before you can start. Web port: By default this is set to port 80 but change based on your needs. Secure web por: By default this is set to port 443 but change based on your needs. Management port: By default this is set to port 4443 but it can be changed based on your needs. This is the management system behind Nextcloudpi, allowing you to make changes to most of the Nextcloud setup. Data folder: The default is /mnt/user/appdata/nextcloudpi so people can get up and running fast but this should be set somewhere on the array especially if you have alot of data. Making a share specifically for NCP is probably a good idea. Set IP: In the 'post argument' section please set the IP of your unRaid server, for example 192.168.0.5. When NCP starts up it will set this as a safe IP allowing you to continue setup once the container has started. PLEASE NOTE: The container can take upto 10 minutes to start when first installed, on startup it will create the database and do most of the first setup. For this reason please be patient if the web interface doesn't respond shortly after start. Subsequent starts will be much faster. Once the container is running you can access it at https://unraidip:443, this page will list the generated admin user for Nextcloud and the management panel. These can be changed later but for now save them and hit activate. After getting the user details you can use the management system https://unraidip:4443 to setup your own domain, automatic updates and much more. If you have questions or issue please put them here. I or hopefully others will do what we can to help.1 point
-
That would be extremely useful. Especially for those who don't live on any of those country (like me). 🙂1 point
-
hab nochmal gefragt, ein Focusrite Scarlett Solo 3rd Gen nutzt er ...1 point
-
ich persönlich nutze das jetzt nicht, jedoch bei dem Server wo mein Schwager nutzt ... der hat auch so ein Aufnahmeteil dran wo das Mikro dran hängt und sich bisher nicht beklagt am USB Port (ein USB Controller per passthrough zur VM)1 point
-
Das kann ich Dir nicht sagen. Ich hatte eine Windows und eine OSX BigSur mit einer AMD RX 580 am laufen und konnte (mit einem einfachen i3 10100 (4 Cores 8 Threads von denen ich für die jeweilig laufende VM 3 Kerne 6 Threads benutzt habe) sehr gut arbeiten. Dabei war die OSX VM baremetal (Sprich OSX war auf einer separaten NVME installiert und nicht einfach ein Container auf der Cache SSD) und ich konnte zudem auch direkt ins OSX booten ohne Unraid VM auf die gleiche NVME. Das ist dann nochmal ein höherer Level an Konfigurationskomplexität, bringt aber auch nochmal bessere Performance. Dazu muss das Mainboard allerdings auch den "freischnitt" der NVME via eigener IOMMU Gruppe unterstützen. Das mache ich aber nicht mehr. Der Server ist jetzt nur noch ein Datengarb mit einigen Docker Containern. Grund warum ich das nicht mehr mache. Die Leerlauf Leistungsaufnahme des Servers mit verbauter AMD RX580 war ca. 20W höher als ohne. Dann konnte ausserdem ein Absturz der VM den ganzen Server zum Absturz bringen. Danach musste das Array/Parity gecheckt werden, und das dauert sehr lange und kostet Leistung. Aber wenn es um kritische Latenzen geht... Dazu kann ich nichts sagen.1 point
-
Na ja, ich hab seit 20 Jahren Server 24/7 ohne ECC laufen und noch nix verloren. Aber wenn Dir das Geld nicht wehtut dann natürlich ok. Aber stell Dir das einrichten der VM´s mit GPU Passthrough nicht so einfach vor.1 point
-
Meiner läuft auch 24/7 und ich kompilier damit zB die Nvidia Treiber, ZFS für @steini84 und noch ein paar andere Plugins/Sachen und ich hab keine Probleme mit meinem Intel i5-10600 auf einem ASUS Z490-E GAMING mit 64GB DDR4 3600MT/s Sent from my C641 point
-
I'll contact Steef about it to make sure he's planning to update the core image. If not, I'll roll my own and update here. I'll report back here once I know though. Edit: the necessary libraries are already installed in this image, so no changes are necessary. This has already been tested by someone running the beta update. Please see this Github issue for more info. Cheers!1 point
-
Never mind, it was DNS. The container couldn't resolve the vpn domain. I have it now, thanks.1 point
-
Ok, that worked. Thanks very much!1 point
-
Hi, nach dem ausführen der folgende Befehle läuft es wieder: wget -P /tmp https://github.com/Squidly271/community.applications/raw/master/archive/community.applications-2021.10.20-x86_64-1.txz installpkg /tmp/community.applications-2021.10.20-x86_64-1.txz Danke.1 point
-
Ah, yes...you are right. It is always the same NIC that is failing and then recovering again. It is the one named eth0, running the Intel igb driver, from your picture above. Check the bios, especially energy saving features (often called ASPM) and try disabling these...if possible, only for the NICs. You can test the second, if this will behave better, as it uses a different driver in Linux/unraid (e1000e). If you only want to deploy a single link (bond with active backup mode will allow for higher availability, as it will switch over in case of a problem) you could disable bonding in unraid config. Should you keep it, deploy both ports with a patch cable to your switch. Gesendet von meinem SM-G780G mit Tapatalk1 point
-
Yup. This happens if the files / folders have wrong owners or permissions.1 point
-
Muss das wirklich ein Xeon sein mit ECC? Der Fokus scheint mir mehr auf VMs zu liegen als auf NAS? Dann reicht ein B460m/B560m Board (6xSATA) mit einem i7 10700 auch vollkommen. Sollte halt eines sein mit 2 x PCiex16. Beim RAM sollten 32 GB auch reichen wenn die VM´s nicht parallel laufen müssen. Dazu eine Grafikkarte. NVidia ist einfacher ans laufen zu bringen, aber dann ist deine Idee mit OSX in VM tot. OSX BigSur/Monterey kompatible Grafikkarten sind nur von AMD: - RX 560/570/580 - RX 5500/5600/5700 - RX 6800/6900 Mit denen wirst Du aber einen neuen Kernel compilieren müssen (na zumindest mit den meisten) Theoretische Teileliste: i7-10700k - 330 Euro oder i9-10900 - 400 Euro Mainboard - 100 Euro 2x 1 TB NVME - 220 Euro 2x16GB DDR4 RAM - 110 Euro Fractal Design Case 110 Euro Dein Netzteil aus link - 75 Euro 945 Euro bzw. 1015 Euro1 point
-
I don't know if it's "normal" but it is typical. Mine is exactly that same size.1 point
-
Settings / Unassigned Devices1 point
-
When the ovp-client in your local pfsense states, that it is connected to the home ovpn-server, at least you should be able to ping the ovpn-server IP when originating the ping from inside your pfense. For all aother routes, you need to set up these in both sites. Also populate the routes of either side to the ovpn-clients.1 point
-
Glad to hear! We're limited by the options that yt-dlp implements, so if they don't do Embed, we won't have it...1 point
-
WOW, thank you sooo much! It worked! I had to update the date of the battery but it worked. You guys are THE BEST. I love this community! Thank again!1 point
-
Ok, so the WAN IP of your pfsense at your dorm is a non public IP, right? And your going to use the OVPN server at your home as the Internet edge point and a site-2-site connection between your home- and local pfsense installations. ....that should work. So, both vpn links are up and running. What exactly is not working? What IPs in which networks - local/dorm, remote/home and ovpn/transition are you able to ping from a client in your local network? Home-pfsense (192.168.1.1)? Other hosts in your home network (192.168.1.xx)? What IPs are others in your family able to ping, when connected to your home ovpn server? Best guess, as this is the typical mistake in a site-2-site setup is, that both sites need a route defined to the respective remote network. So the pfsense-home needs the route to your local net (192.168.1.0/24) as well when your local/dorm client connects. Also, this route needs to be populated to the other ovpn clients, should they not use the ovpn server IP as new default route, when connected. family clients are mobile/edge, not site-2-site, but your local ovpn client is. Gesendet von meinem SM-G780G mit Tapatalk1 point
-
I'll add it to a todo list1 point
-
<?xml version='1.0' encoding='UTF-8'?> <domain type='kvm' id='4' xmlns:qemu='http://libvirt.org/schemas/domain/qemu/1.0'> <name>MacOS - RiDDiX</name> <uuid>XXXXXXXXXXXXXXXXXXXXXXXXXXXXXXXXX</uuid> <description>MacOS-RiDDiX</description> <metadata> <vmtemplate xmlns="unraid" name="FreeBSD" icon="freebsd.png" os="freebsd"/> </metadata> <memory unit='KiB'>33554432</memory> <currentMemory unit='KiB'>33554432</currentMemory> <memoryBacking> <nosharepages/> </memoryBacking> <vcpu placement='static'>12</vcpu> <cputune> <vcpupin vcpu='0' cpuset='3'/> <vcpupin vcpu='1' cpuset='15'/> <vcpupin vcpu='2' cpuset='4'/> <vcpupin vcpu='3' cpuset='16'/> <vcpupin vcpu='4' cpuset='5'/> <vcpupin vcpu='5' cpuset='17'/> <vcpupin vcpu='6' cpuset='6'/> <vcpupin vcpu='7' cpuset='18'/> <vcpupin vcpu='8' cpuset='7'/> <vcpupin vcpu='9' cpuset='19'/> <vcpupin vcpu='10' cpuset='8'/> <vcpupin vcpu='11' cpuset='20'/> </cputune> <resource> <partition>/machine</partition> </resource> <os> <type arch='x86_64' machine='pc-q35-6.0'>hvm</type> <loader readonly='yes' type='pflash'>XXXXXXXXXXXXXXXXXXXXXXXXXXXXXXXXX</loader> <nvram>XXXXXXXXXXXXXXXXXXXXXXXXXXXXXX</nvram> </os> <features> <acpi/> <apic/> </features> <cpu mode='host-passthrough' check='none' migratable='on'> <cache mode='passthrough'/> <feature policy='require' name='topoext'/> </cpu> <clock offset='localtime'> <timer name='rtc' tickpolicy='catchup'/> <timer name='pit' tickpolicy='delay'/> <timer name='hpet' present='no'/> </clock> <on_poweroff>destroy</on_poweroff> <on_reboot>restart</on_reboot> <on_crash>restart</on_crash> <devices> <emulator>/usr/local/sbin/qemu</emulator> <disk type='file' device='disk'> <driver name='qemu' type='raw'/> <source file='/mnt/user/isos/OpenCore.img' index='1'/> <backingStore/> <target dev='hda' bus='sata'/> <boot order='1'/> <alias name='sata0-0-2'/> <address type='drive' controller='0' bus='0' target='0' unit='2'/> </disk> <controller type='pci' index='0' model='pcie-root'> <alias name='pcie.0'/> </controller> <controller type='pci' index='1' model='pcie-root-port'> <model name='pcie-root-port'/> <target chassis='1' port='0x8'/> <alias name='pci.1'/> <address type='pci' domain='0x0000' bus='0x00' slot='0x01' function='0x0' multifunction='on'/> </controller> <controller type='pci' index='2' model='pcie-root-port'> <model name='pcie-root-port'/> <target chassis='2' port='0x9'/> <alias name='pci.2'/> <address type='pci' domain='0x0000' bus='0x00' slot='0x01' function='0x1'/> </controller> <controller type='pci' index='3' model='pcie-root-port'> <model name='pcie-root-port'/> <target chassis='3' port='0xa'/> <alias name='pci.3'/> <address type='pci' domain='0x0000' bus='0x00' slot='0x01' function='0x2'/> </controller> <controller type='pci' index='4' model='pcie-root-port'> <model name='pcie-root-port'/> <target chassis='4' port='0xb'/> <alias name='pci.4'/> <address type='pci' domain='0x0000' bus='0x00' slot='0x01' function='0x3'/> </controller> <controller type='pci' index='5' model='pcie-root-port'> <model name='pcie-root-port'/> <target chassis='5' port='0xc'/> <alias name='pci.5'/> <address type='pci' domain='0x0000' bus='0x00' slot='0x01' function='0x4'/> </controller> <controller type='pci' index='6' model='pcie-root-port'> <model name='pcie-root-port'/> <target chassis='6' port='0xd'/> <alias name='pci.6'/> <address type='pci' domain='0x0000' bus='0x00' slot='0x01' function='0x5'/> </controller> <controller type='pci' index='7' model='pcie-root-port'> <model name='pcie-root-port'/> <target chassis='7' port='0xe'/> <alias name='pci.7'/> <address type='pci' domain='0x0000' bus='0x00' slot='0x01' function='0x6'/> </controller> <controller type='pci' index='8' model='pcie-root-port'> <model name='pcie-root-port'/> <target chassis='8' port='0xf'/> <alias name='pci.8'/> <address type='pci' domain='0x0000' bus='0x00' slot='0x01' function='0x7'/> </controller> <controller type='pci' index='9' model='pcie-root-port'> <model name='pcie-root-port'/> <target chassis='9' port='0x10'/> <alias name='pci.9'/> <address type='pci' domain='0x0000' bus='0x00' slot='0x02' function='0x0' multifunction='on'/> </controller> <controller type='pci' index='10' model='pcie-root-port'> <model name='pcie-root-port'/> <target chassis='10' port='0x11'/> <alias name='pci.10'/> <address type='pci' domain='0x0000' bus='0x00' slot='0x02' function='0x1'/> </controller> <controller type='pci' index='11' model='pcie-root-port'> <model name='pcie-root-port'/> <target chassis='11' port='0x12'/> <alias name='pci.11'/> <address type='pci' domain='0x0000' bus='0x00' slot='0x02' function='0x2'/> </controller> <controller type='pci' index='12' model='pcie-root-port'> <model name='pcie-root-port'/> <target chassis='12' port='0x13'/> <alias name='pci.12'/> <address type='pci' domain='0x0000' bus='0x00' slot='0x02' function='0x3'/> </controller> <controller type='pci' index='13' model='pcie-root-port'> <model name='pcie-root-port'/> <target chassis='13' port='0x14'/> <alias name='pci.13'/> <address type='pci' domain='0x0000' bus='0x00' slot='0x02' function='0x4'/> </controller> <controller type='pci' index='14' model='pcie-root-port'> <model name='pcie-root-port'/> <target chassis='14' port='0x15'/> <alias name='pci.14'/> <address type='pci' domain='0x0000' bus='0x00' slot='0x02' function='0x5'/> </controller> <controller type='pci' index='15' model='pcie-to-pci-bridge'> <model name='pcie-pci-bridge'/> <alias name='pci.15'/> <address type='pci' domain='0x0000' bus='0x01' slot='0x00' function='0x0'/> </controller> <controller type='virtio-serial' index='0'> <alias name='virtio-serial0'/> <address type='pci' domain='0x0000' bus='0x02' slot='0x00' function='0x0'/> </controller> <controller type='sata' index='0'> <alias name='ide'/> <address type='pci' domain='0x0000' bus='0x00' slot='0x1f' function='0x2'/> </controller> <controller type='usb' index='0' model='qemu-xhci' ports='15'> <alias name='usb'/> <address type='pci' domain='0x0000' bus='0x00' slot='0x07' function='0x0'/> </controller> <interface type='bridge'> <mac address='XX:XX:XX:XX:XX:XX'/> <source bridge='br0'/> <target dev='vnet3'/> <model type='virtio-net'/> <alias name='net0'/> <address type='pci' domain='0x0000' bus='0x04' slot='0x00' function='0x0'/> </interface> <serial type='pty'> <source path='/dev/pts/0'/> <target type='isa-serial' port='0'> <model name='isa-serial'/> </target> <alias name='serial0'/> </serial> <console type='pty' tty='/dev/pts/0'> <source path='/dev/pts/0'/> <target type='serial' port='0'/> <alias name='serial0'/> </console> <channel type='unix'> <source mode='bind' path='/var/lib/libvirt/qemu/channel/target/domain-4-MacOS - RiDDiX/org.qemu.guest_agent.0'/> <target type='virtio' name='org.qemu.guest_agent.0' state='connected'/> <alias name='channel0'/> <address type='virtio-serial' controller='0' bus='0' port='1'/> </channel> <input type='tablet' bus='usb'> <alias name='input0'/> <address type='usb' bus='0' port='1'/> </input> <input type='mouse' bus='ps2'> <alias name='input1'/> </input> <input type='keyboard' bus='ps2'> <alias name='input2'/> </input> <audio id='1' type='none'/> <hostdev mode='subsystem' type='pci' managed='yes'> <driver name='vfio'/> <source> <address domain='0x0000' bus='0x04' slot='0x00' function='0x0'/> </source> <alias name='hostdev0'/> <rom file='/mnt/user/isos/vbios/GeForceGT630OEM.rom'/> <address type='pci' domain='0x0000' bus='0x03' slot='0x00' function='0x0' multifunction='on'/> </hostdev> <hostdev mode='subsystem' type='pci' managed='yes'> <driver name='vfio'/> <source> <address domain='0x0000' bus='0x04' slot='0x00' function='0x1'/> </source> <alias name='hostdev1'/> <address type='pci' domain='0x0000' bus='0x03' slot='0x00' function='0x1'/> </hostdev> <hostdev mode='subsystem' type='pci' managed='yes'> <driver name='vfio'/> <source> <address domain='0x0000' bus='0x0d' slot='0x00' function='0x4'/> </source> <alias name='hostdev2'/> <address type='pci' domain='0x0000' bus='0x07' slot='0x00' function='0x0'/> </hostdev> <hostdev mode='subsystem' type='pci' managed='yes'> <driver name='vfio'/> <source> <address domain='0x0000' bus='0x0a' slot='0x00' function='0x0'/> </source> <alias name='hostdev3'/> <address type='pci' domain='0x0000' bus='0x08' slot='0x00' function='0x0'/> </hostdev> <hostdev mode='subsystem' type='pci' managed='yes'> <driver name='vfio'/> <source> <address domain='0x0000' bus='0x07' slot='0x00' function='0x1'/> </source> <alias name='hostdev4'/> <address type='pci' domain='0x0000' bus='0x09' slot='0x00' function='0x0'/> </hostdev> <hostdev mode='subsystem' type='pci' managed='yes'> <driver name='vfio'/> <source> <address domain='0x0000' bus='0x07' slot='0x00' function='0x3'/> </source> <alias name='hostdev5'/> <address type='pci' domain='0x0000' bus='0x0a' slot='0x00' function='0x0'/> </hostdev> <memballoon model='none'/> </devices> <seclabel type='dynamic' model='dac' relabel='yes'> <label>+0:+100</label> <imagelabel>+0:+100</imagelabel> </seclabel> <qemu:commandline> <qemu:arg value='-device'/> <qemu:arg value='************************'/> <qemu:arg value='-smbios'/> <qemu:arg value='type=2'/> <qemu:arg value='-cpu'/> <qemu:arg value='host,vendor=GenuineIntel,+invtsc,kvm=on'/> </qemu:commandline> </domain> my Mac OS XML. Works like a charm with Big Sur and also Monterey 🙂 Just special maybe is my OpenCore Config, but even this is just simple without any patches just some kexts. If wanted I can publish this also May Ill upgrade my GPU, when prices are dropping nearly MSRP. But atm it does it jobs and yeah, performance and stability are great. Better then my Win 11 VM which just freezes randomly...1 point
-
Not without setting up from scratch, including re-adopting your equipment and setting up the networks. Set a fixed tag as described in the recommended posts at the top of every page in this topic.1 point
-
Den siehst du nur, wenn du dich über das Terminal anmeldest. Das sollte helfen, damit du die Daten sichtbar machen kannst: https://kittmedia.com/2018/synology-pakete-apps-auf-anderes-volume-verschieben/ Nutz aber lieber "cp" statt "mv". Also auf volume1 kopieren und nicht verschieben.1 point
-
Scroll up, the recent version is still broken: https://forums.unraid.net/topic/104437-support-dropbox-by-otherguy/?tab=comments#comment-10388581 point
-
Auf jeden Fall, aber sie hat 125 € gekostet. Da konnte ich nicht nein sagen. Ca 2W (1 bis 2 Seiten vorher siehst du auch meine Messung des ITX): https://www.hardwareluxx.de/community/threads/die-sparsamsten-systeme-30w-idle.1007101/post-28446459 @Anym001 hat das im Einsatz und mit 4 Platten im Spindown um die 8W gehabt. Finde gerade das Foto nicht1 point
-
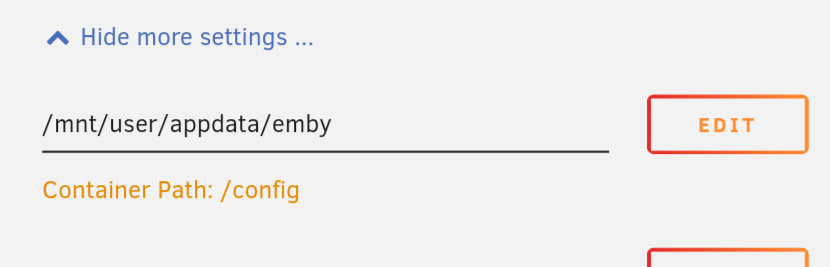
Einfach den appdata Ordner über das Netzwerk freigeben? Oder den Krusader Container installieren (das wäre ein Datei-Explorer)? Gut. Wenn du jetzt zb alles in FilmRecords auf unRAID in den Share "Filme" kopierst, dann würdest du bei den Container Einstellungen einen neuen path hinzufügen, wo du bei Container /volume1/FilmeRecords setzt und bei Host /mnt/user/Filme. Nur den ersten Pfad sieht Emby. Emby weiß also gar nichts davon, dass die Filme in unRAID eigentlich woanders liegen und denkt sich nur "/volume1/FilmRecords", den Ordner kenn ich, ah da sind die Filme ja. Wie gesagt. Wenn du den Container auswählst, beantwortet sich die Frage von selbst. Moment, mach ich mal... ... Ich habe mir den Container von "binhex" und "linuxserver" angeschaut. Beide nutzen intern den Pfad /config: Hast du bei deiner jetzigen Emby Installation die Daten auch in diesem Ordner? Wenn ja: Easy, einfach alles aus dem Ordner nach /mnt/user/appdata/emby kopieren. Wenn nein: Erstmal wie zuvor probieren. Wenn das nicht klappt, dann musst du den Container-Pfad so anpassen, dass er intern auf den Ordner verweist, wo jetzt deine Nutzerdaten liegen. Deine jetzige Aufgabe ist es also herauszufinden wo Emby die Nutzerdaten bei deiner Syno abgelegt hat. Der Pfad von Emby sollte denke ich /volume1/@appstore/EmbyServer sein. EDIT: Ok. Wird doch nicht so einfach. Die Pfade sind nicht nur anders, sondern in der Datenbank selbst und müssen daher geändert werden: https://gist.github.com/Iristyle/0de6b9f7e8534366a28f2768eb94aa21 Sieh also zu, dass du genug Backups machst.
 1 point
 -
wenn du gleich massiv befüllen willst, lies dich ein zum Thema "direkt auf das array schreiben" anstelle den Umweg über den cache zu gehen ... gibts verschiedene Wege das zu lösen, am einfachsten vielleicht, zum Start die zu befüllenden shares auf cache = no zu setzen1 point
-
A container is more than just the application, think of it as a miniature virtual machine. It has an entire operating system, albeit only the pieces essential to supporting the specific application. The tag means the application itself will not be updated, only the supporting OS files inside the container. As an aside, one of the reasons docker containers can be so efficient, they share common pieces between them. So if you have a bunch of LSIO containers using the same internal OS, it's not duplicated no matter how many different containers use those same basic pieces. Running multiples of the same container with different appdata uses almost zero additional resources in the docker image.1 point
-
So I took the leap and set up Blue Iris with a Window 10 VM on the Same unraid Server I was running the Blue Iris Docker. I stopped the Docker and have not yet deleted it. I was also able to copy my config with the .reg file to the new VM and only had to make a few changes! I was very surprised and happy with the outcome. First, I run the BI Service on the VM so the Gui is not always running. I start the Gui when I need to make changes but leave it off otherwise. I access the cameras and normal things from my Mobile app. I found running just the Service I actually had about 5-10% bettter CPU Utilization on Server when compared to the Docker. If I start the GUI on the VM it goes about 10+% higher than the docker but again, I only run the GUI to make changes and adjustments. This said, If things continue to be stable and I have no issues over the next week or two it is my intention to delete the Docker and stay with the VM. I will ost a message after I have tested a while and made that decision.1 point
-
Getting a new error message that the server is outdated. Two of the players on the newer updated Minecraft version are having the issue whereas two players on the older (matching) version are fine. Is there a way to check the docker for updates? I'm on UnRAID 6.9.2 and docker shows the docker was last created 2 days ago (assuming, updated 2 days ago). EDIT: Sigh, should have checked. Docker > Advanced View (top right) > Force Update for docker container. This fixed it; thanks1 point
-
The current default settings of the tuning plugin disable the mover's schedule. Uninstall, or seek assistance on the configuration, in the mover tuning plugin thread (as Squid suggests).1 point
-
You should post in the mover tuning plugin thread, as it takes over when it's installed1 point
-
Run nvidia-smi on the Unraid console not the containers one.1 point
-
The "new" one seems to have a larger heatsink (and is indicated are heavier). I'd go with that one if the price is the same. I doubt a company would add material if it was not necessary, so it is possible that the old one was overheating ?1 point
-
Looks like something is broken in gotenberg 7. Found this issue that was opened yesterday - https://github.com/jonaswinkler/paperless-ng/issues/1250 Downgraded my gotenberg to gotenberg/gotenberg:6 and its working.1 point
-
Use the Previous Apps feature on the Apps page.1 point