





djvj
Members
-
Joined
-
Last visited
-
Yes it uses splitters. I'll check those then and see if it comes back up. Thank you
-
storinator-diagnostics-20250809-1004.zip Here you go
-
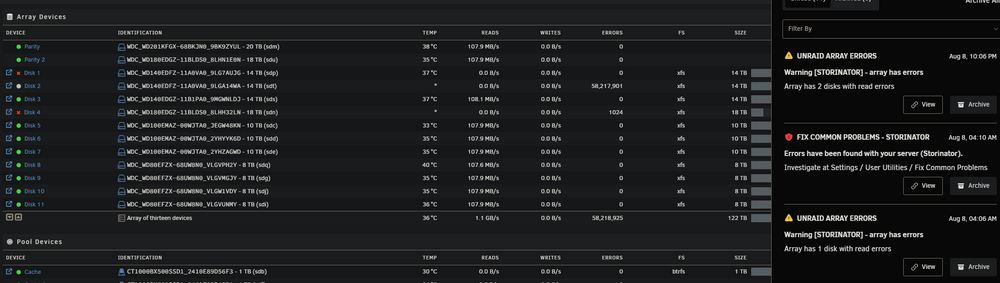
So what I was most afraid of happening has just occurred. During the rebuild, another disk just started dumping errors! Now I'm afraid of what to do as the rebuild is only 20% in?
-
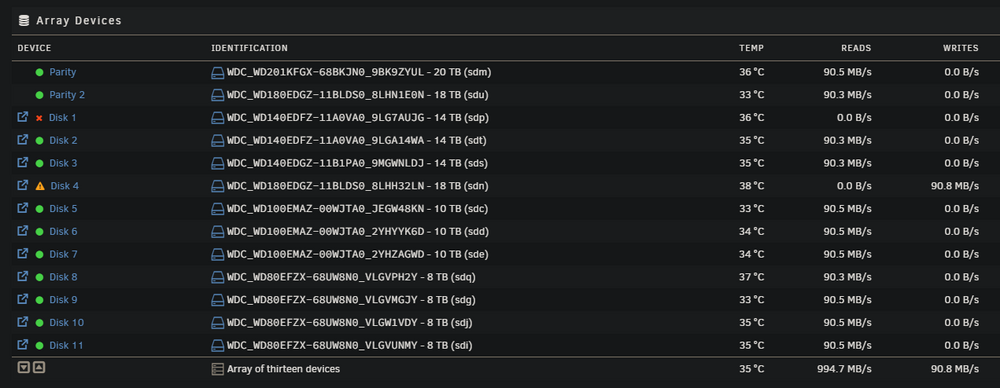
So for the 3rd time, I rebooted and it did give me the start option after the parity-upgrade! So it's rebuilding now finally. Thanks for your help.

-
I think the only option now is to start again for a 3rd try? Maybe I should reboot first in case there is some bug going on?
-
I did change before I started. However, I just woke up and refreshed the page, so no I did not change anything since this last try.
-
Forgot to attach the diagnostics, sorry storinator-diagnostics-20250806-1347.zip
-
I can't start it though as these are my options. Note, I did not reboot or power cycle the server.

-
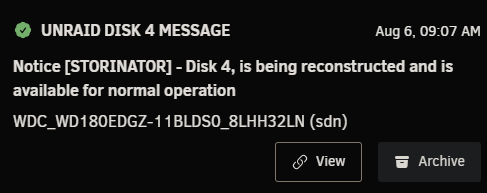
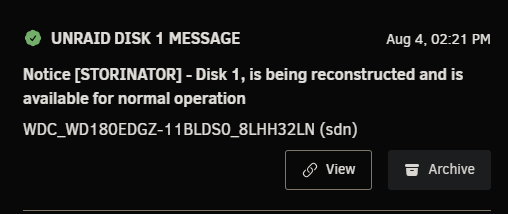
According to the docs, they have an example that sounds exactly like this: https://docs.unraid.net/unraid-os/manual/storage-management/#upgrading-parity-disks Parity SwapThis is a special case of replacing a disabled drive where the replacement drive is larger than your current parity drive. This procedure applies to both the parity1 and the parity2 drives. If you have dual parity then it can be used on both simultaneously to replace 2 disabled data drives with the 2 old parity drives. NOTE: It is not recommended that you use this procedure for upgrading the size of both a parity drive and a data drive as the array will be offline during the parity copy part of the operation. In such a case it is normally better to first upgrade the parity drive and then afterward upgrade the data drive using the drive replacement procedure. This takes longer but the array remains available for use throughout the process, and in addition, if anything goes wrong you have the just removed drive available intact for recovery purposes Why would you want to do this? To replace a data drive with a larger one, that is even larger than the Parity drive. Unraid does not require a replacement drive to be the same size as the drive being replaced. The replacement drive CANNOT be smaller than the old drive, but it CAN be larger, much larger in fact. If the replacement drive is the same size or larger, UP TO the same size as the smallest parity drive, then there the simple procedure above can be used. If the replacement drive is LARGER than the Parity drive, then a special two-step procedure is required as described here. It works in two phases: - The larger-than-existing-parity drive is first upgraded to become the new the parity drive - The old parity drive replaces the old data drive and the data of the failed drive is rebuilt onto it. As an example, you have a 1TB data drive that you want to replace (the reason does not matter). You have a 2TB parity drive. You buy a 4TB drive as a replacement. The 'Parity Swap' procedure will copy the parity info from the current 2TB parity drive to the 4TB drive, zero the rest, make it the new parity drive, then use the old 2TB parity drive to replace the 1TB data drive. Now you can do as you wish with the removed 1TB drive. I let it copy the parity to the drive a 2nd time and it did the same thing. It finished and got a log entry disk4 would be reconstructed and I don't see anything happening on the server and looks to be in the same state as before:

-
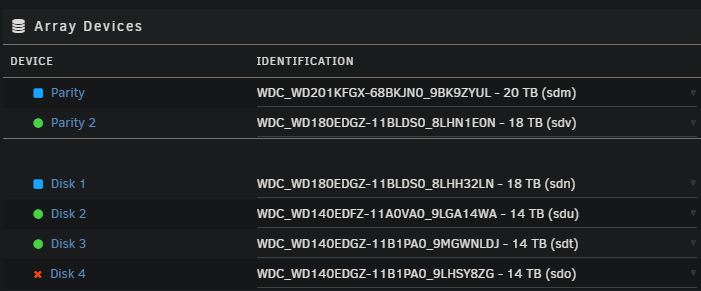
I have 2 failed drives (disk 1 and 4) at the same time in a dual-parity setup. My current parity was 18TB each. I bought 2 new 20TB drives. Put one in and after preclear, I assigned the new one in one of the parity spots and the old 18TB parity as a data disk 1 (one of the failed spots). Both of them shows a blue square and unraid let me do the parity upgrade. That took 2 days straight. It just complete and it wanted to start the array to do a data rebuild on one of the failed drives, but I wanted to start the rebuild on the drive that only had a few TBs used on it. So in the GUI I assigned the old 18TB drive to disk 4 and GUI wouldn't let me start it. So I assigned it back to the disk 1 spot but now it won't let me do anything again except it wants to start the parity upgrade all over again!! Nothing changed except assigning that old disk from 1 to 4 and back, I never touched the parity assignments at all and I don't want to start the same 2-day copy over again! Is this a bug that it thinks the parity is no longer good? I'm not sure what to do to avoid it starting the same exact parity upgrade process again? (I'm on v7.1.4)

-
Satisfactory just made a change to require a parameter sent to steamcmd to stay on the experimental brance. I don't see an ability to do that in the docker settings. How can I sent something like -steambeta to steamcmd? I tried setting this for the game parameters, but doesn't look like those are for steamcmd -beta experimental See more info here: https://satisfactory.fandom.com/wiki/Dedicated_servers#Experimental_Branch_Selection https://github.com/wolveix/satisfactory-server/pull/93
-
Trying to Install TinyMM and when I launch it I get this error: root@localhost:# /usr/local/emhttp/plugins/dynamix.docker.manager/scripts/docker create --name='TinyMM' --net='bridge' -e TZ="America/New_York" -e HOST_OS="Unraid" -e 'USER_ID'='0' -e 'TZ'='America/NewYork' -e 'DISPLAY_HEIGHT'='1380' -e 'DISPLAY_WIDTH'='1200' -e 'PUID'='99' -e 'GUID'='100' -e 'UMASK'='000' -p '5801:5800/tcp' -p '5901:5900/tcp' -v '/mnt/user/Movies/':'/media/Movies':'rw' -v '/mnt/user/TV/':'/media/TV':'rw' -v '/mnt/user/TV2/':'/media/TV2':'rw' -v '/mnt/cache/appdata/TinyMM':'/config':'rw' 'coolasice1999/tmm:latest' 0ff7265bc2d05bc18c8d0deb00e671610d10a8398fc4fbaebb77c7505a4a4b2d Docker log won't show anything as it won't launch yet to start a log. I feel like I'm missing something simple, just can't see what. Compared to other docker settings, everything looks ok.. Anyone have an idea?
-
Just purchased a new 14TB WD Element drive and I've read others preclear before shucking. I just tried doing the same so I don't ruin the warranty in case it's a bad drive but when I start it, the script just gets stuck on Starting... I'm on unraid 6.9.2 and all plugins are updated. Is there something I need to do to get this to work?
-
That was it, thank you!!
-
When trying to delete large files, like multiple gigabyte files, they won't delete. But when I delete smaller files, they delete fine. I'm not sure what the cutoff is between the 2, but I'll try a 14GB file, and nothing happens when I try to delete it. A small txt file, and no problem, deletes fine. Permissions on everything are all 777. When I used the other krusader docker, I never had this issue. I only recently switch to this flavor because the other gave me too many issues. How can I figure out what's causing this?





