FlorinB
-
Posts
125 -
Joined
-
Last visited
Content Type
Profiles
Forums
Downloads
Store
Gallery
Bug Reports
Documentation
Landing
Everything posted by FlorinB
-

OpenVPN-AS Brings up my router login page
FlorinB replied to Annie SIxgun's topic in General Support
Do not worry, you can extend your trial several times. -
OpenVPN-AS Brings up my router login page
FlorinB replied to Annie SIxgun's topic in General Support
Normally the router should not be reachable in Internet. You have to map into your router the port 1194 pointing to the unRaid IP (I assume you are talking about the Docker OpenVPN-AS) Have you already watched this tutorial? Additionally, if you do not have a static ip, you will need to use a dynamic DNS service like NoIP, DynDNS, DuckDNS. -
[solved] Safe to copy from user share to disk share?
FlorinB replied to DZMM's topic in General Support
When you try to copy a file to itself and this ends up badly, with data loss, then for sure it is not the OS fault. I would not name it "bug" as well. Anyway this topic together with the other one from here, helped me to understand better what and how exactly this "bug" is behaving. -
Those are good news. At this moment on my 4TB Array I have a lot of 500GB disks with 2 x 1.5TB for parity. I am planning replace gradualy in time the 500GB with 4TB WD RED disks, but to add a 4TB disk into array i will actually need 3x4TB disks (2 for parity), which is impossible for me at this moment to buy at once. Since the Unassigned Devices Plugin is giving us the possibility to mount out of array disks, I will use the first and the second 4TB disks outside of the array, to backup the array or to save additional data. Clear enough and somehow expected behaviour. I would not name it a bug. Thank you jonathanm ?
-
mea culpa...i was searching yesterday and did not found too much. Thank you johnnie.black.
-
I had the same issue today. It would be helpful to have a more clear message with what is wrong.
-
I know that withing the array you should not mix copying/moving files from disk to share. It should always be used disk to disk or share to share, due to a bug which is leading to data corruption. Do we have the same issue with data corruption in the below copy/move situations? 1. /mnt/user/SHARE to /mnt/disks/UNASSIGNED_DISK 2. /mnt/diskX to /mnt/disks/UNASSIGNED_DISK 3. /mnt/disks/UNASSIGNED_DISK mount to /mnt/user/SHARE 4. /mnt/disks/UNASSIGNED_DISK /mnt/diskX Note: Using the Plugin Unassigned Devices with Destructive Mode:Enabled it is possible to format and use the hot spare disks outside of the unRaid Array.
-
Good reason for preclearing earlier. Now the array starts immediately. Preclear might be used optionally for drive testing purposes. Thank you very much for the detailed clarifications jonathanm.
-
No preclear needed?
-
The Fix Common Problems warnings are telling you everithing you need to know: appdata, Applications, downloads - should be (according to your configuration) on the cache drive, but somehow you move them to the array. Docker folder should not use the cache at all, the a folder Docker exist (empty or with content) on you cache drive. You can use the tools mentioned in warnings to move your files where it should be. Always copy a file from a disk to a disk and from a share to a share!!! Do not mix disks with shares - there is a bug which will dostroy your data, if you do not respect that rule. See the following post for more details:
-
Please do a df -h /mnt/* In my case this is what i get: You can see the disk usage of cache drive as well as the disks from Array.
-
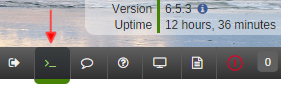
Another way to see with what is full your cache drive is to open a Terminal from your Web GUI and run the following command: In my case the cache is used by appdata, domains, system and share4all - one of the shares which should be moved automatically to Array at a specific disk usage threshold.
-
(Solved) unRAID Test System built inside of an unRAID server as a VM
FlorinB replied to FlorinB's topic in General Support
After watching the video I am realizing that it can be done, but it 2 USB with licenses are plugged in, you have issues to start the array in your real unRAID system. I also do not like the idea of plugging in the USB for unRAID test and removing it. -
(Solved) unRAID Test System built inside of an unRAID server as a VM
FlorinB replied to FlorinB's topic in General Support
Fast as the speed of light... I was watching some of the video from Spaceinvader One, but I did not find this one. Thank you very much @Squid ? -
Because I am planning to start testing and possibly developing some pugins and I do not have the resources to build another physical server for unRAID test the following idea an idea went through my mind: Create an unRAID Test System inside my real unRAID server as a VM. What are you guys saying about this? It will work?
-
I mean that Copy instead of Move would be preffered. In case something goes wrong, with Copy you still have the data from the broken/simulated disk unaltered.
-
Very useful rule. I was already doing this intuitively, but I was not yet in a situation to have one or more disks failed. We are realizing that copying new data with some disks broken will be slower, but if there is no network share or unused disk available that is the only way. Do we have to test or is working 100%? Move from the broken disk is the last thing you want...It must be Copy! If this is working as you said SSD, definitely should be included into the unRaid manual under a section like Shrink Array with Broken Disk(s).
-
There are 3 possibilities: 1. copy the emulated data from the failed disk(s) somewhere over the network 2. if you have a cache drive big enough - disable the mover and copy the emulated data temporary to the cache disk 3. if you have hot-spare disk(s) install the Unassigned Devices plugin, set Destructive Mode enabled and format one of your hot-spare disks, then copy the data from emulated disk there. Of course after fulfilling one of the above steps you have to shrink your array, rebuild parity and copy your data back to the array.
-
How much RAM do you have installed in your unRAID server?
FlorinB replied to harmser's topic in Unraid Polls
Memory: 16 GB Single-bit ECC (max. installable capacity 64 GB) - 2x8GB Initially only 8GB but after building some VMs it was not enough. -
To edit the title in your topic: Click and hold on the title.
-
One reason why I had chosen UnRAID is because of its flexibility. Into my system I have various disks: 2.5inch/500TB drives with 2x3.5inch/1.5TB parity disks and one 2.5inch/250TB Samsung EVO SSD for cache. According to the above details the cache disks can be used in RAID 1 or RAID 0 mode. RAID 1 will add redundancy, RAID 0 will give you a bigger cache pool size. In RAID 1 situation the writing speed will be the minimum speed of both cache disks, therefore it is recommended to use disks with similar performance, it does not matter if are the same model/brand or not. In RAID 0 case, if the cache disks have different writing performances you will get the speed of the current cache disk where the data is written.
-
(Solved) CA Auto Turbo Write Mode - Settings Explained
FlorinB replied to FlorinB's topic in General Support
Now i understand how it works - actually the CA Auto Turbo Write Mode can be considered/used like a replacement of the Tunable (md_write_method):Auto, but you sould set that parameter initially to read/modify/write. In addition to this you can define how many disks from array (no parity disks, no cache disks, no outside of array disks) may be stopped, so that the reconstruct write will kick in. This is a kind of negation thinking, as we need always to do some math to calculate how many disks may be stopped, instead of how many disks should be already active that reconstruct write will kick in. Example for the current situation: I have 7 data disks into my array and I would like to have the reconstruct write enabled as soon as 2 disks from array are active. That would be 7-2=x and x=5. I have to set the Disks Allowed To Be Spun Down Before Invoking Turbo Mode: 5 Would not be easier to say I want to kick in the reconstruct write when minimal 2 disks are spun up? Important: Kicking in reconstruct write mode will automatically wake up/spin all disks from array, including the parity disks. I did the following tests to clarify completely how this is working: 1. set all disks to standby mode. This can be done either from the Web GUI -> Main-> Spin Down button or from command line using the command 2. Using the plugin unBALANCE->Gather, I was browsing to a folder with some big files. At this moment the first disk - source - from array started 3. Select where to move the folder and started the moving process. At this point the second disk - destination - from array started 4. Since the settings of the CA Auto Turbo Write Mode were Disks Allowed To Be Spun Down Before Invoking Turbo Mode: 5, with 2 disks already spinning the reconstruct write mode was activated and activating the reconstruct write leaded to set all disks from array to active. Note: Remeber that I have 7 disks into my array and I want Turbo Mode to kick in when 2 or more disks are spinning (7-2=5). Results without Turbo Mode (reconstruct write) active Results with Turbo Mode (reconstruct write) active With Turbo Mode enabled there is an increase of 30% of the transfer speed, in my case. That would mean If you want to transfer 1TB of data with Turbo Mode enabled it will take 1000000 / 45.68 =21891 sec (6h 4min 51 sec) vs 1000000 / 32.41 = 30854 sec (8h 34min 14 sec) without Turbo Mode enabled. The downside of the reconstruct write enabled is that the power consumption is bigger and also the generated heat. Once more thank you very much Squid for your clarifications and the quick reply.
-
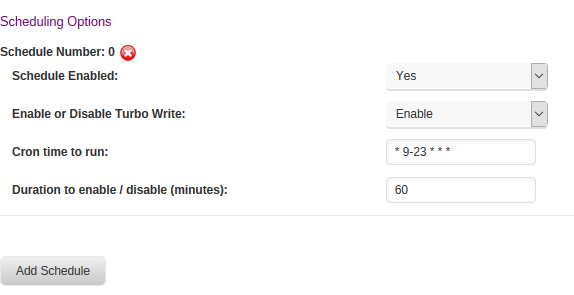
I am trying to figure how to use the CA Auto Turbo Write Mode. I have read almost everything that I had found here, however it is still unclear for me Turbo write, By RobJ, September 22, 2016 The Turbo write details are quite clear.Into Settings -> Disk Settings, and look for Tunable (md_write_method) - there are 3 options: 1. Auto - auto is not currently (version 6.5.3) implemented, therefore is doing the same as 2. read/modify/write 2. read/modify/write - is calculating the parity based on the Parity checksums, does not require all disks to spin 3. reconstruct write - it does not take into account the old data on Parity disks, it just calculate again the parity by reading data from all data disks. Requires all disk to spin. ------------------------------------------------- [Plugin] CA Auto Turbo Write Mode, By Squid, March 12, 2017 The TurboWrite Plugin, as described, will enable / disable Turbo Write Mode (reconstruct write) based upon the number of hard drives currently spun down. My understanding is that plugin should do what Auto mode is not currently doing. ------------------------------------------------- Please help me to clarify the following questions: 1. With the CA Auto Turbo Write Mode how should be the Settings -> Disk Settings -> Tunable (md_write_method) configured? 2. What is the Disks Allowed To Be Spun Down Before Invoking Turbo Mode doing? As defined into Turbo write details you need all disks to spin to benefit of the reconstruct write. Is Turbo Mode plugin doing a mix between reconstruct write and read/modify/write methods or how should be this option used? 3. The reconstruct write option can lead to have all the time all disks spinning up, therefore into the CA Auto Turbo Write Mode plugin was added the option to define your own schedules for enabling/disabling the TurboMode. I have added the following schedule: then received the following errors into syslog: My best guess, but I could not find this anywhere documented, is that we should use a fixed hour, minute, second time instead of interval. - Is this assumption correct ? 4. When should be Enable or Disable Turbo Write: Enable used and Enable or Disable Turbo Write: Disable be used. Does it make sense to have those 2 options? 5. With TurboWrite enabled sometimes the writing speed is lower that without. I get 18MB/s instead of 25-30MB/s in read/modify/write mode. Why is this happening and is it any possibility to fall back into normal read/modify/write mode when this is happening? Thanks in advance to @Squid or to whom will help to clarify my questions.

-
Slack step-by-step tutorial (setup in Notifications)
FlorinB replied to unP's topic in General Support
Thanks @serviam your steps helped me to figure out the steps required at this moment and enable my Slack push-notifications. -
Slack step-by-step tutorial (setup in Notifications)
FlorinB replied to unP's topic in General Support
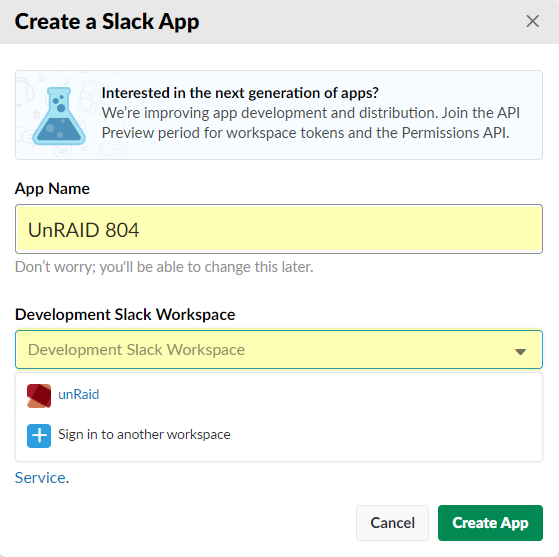
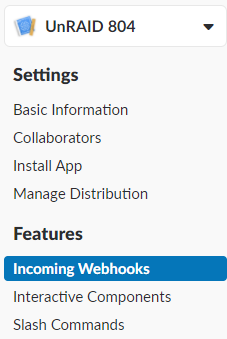
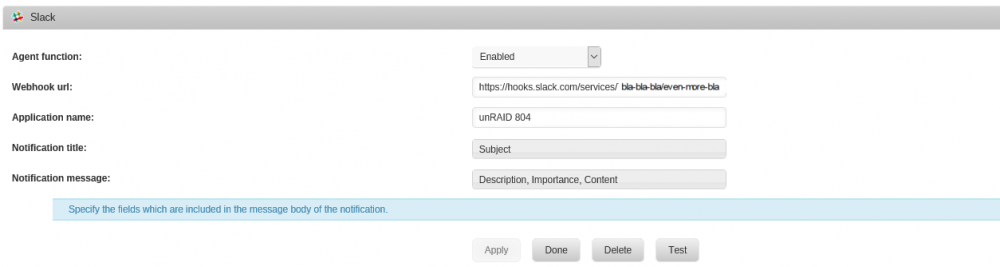
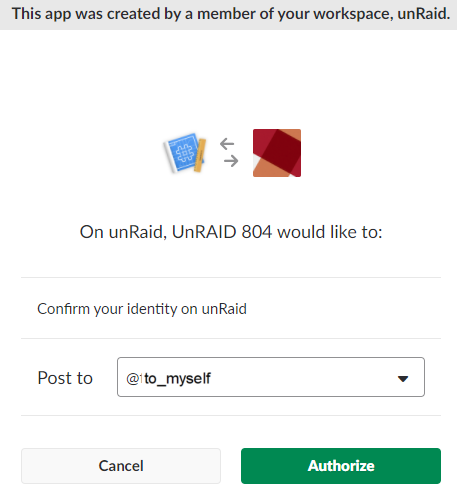
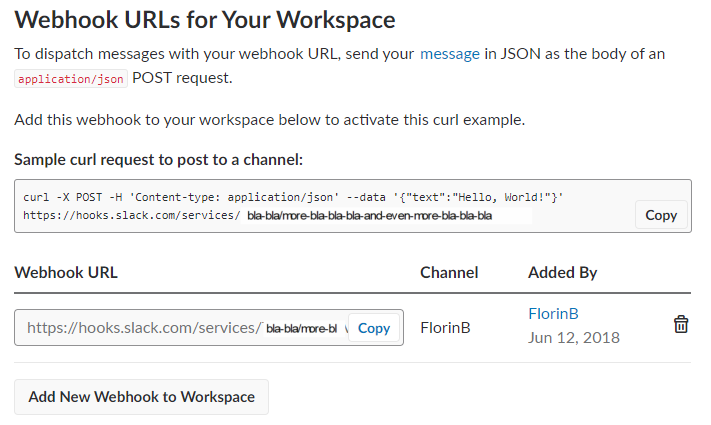
The procedure is slightly changed, you have to create an app first. This is what I did to enable slack notifications: The Slack Part 1. Go to slack.com and setup a new account by creating a new workspace. https://slack.com and define your workspace "YourWorkspace.slack.com". 2.To get the webhook URL go to https://api.slack.com and select from the left side menu under App features - Incoming webhooks. 3. On the Incoming webhooks page under step 1. Create a Slack app (if you don't have one already) click on the Create your Slack app 4.Define your App Name and select the previously defined workspace. 5. On the new created App select from the left-side menu under Features - Incoming Webhooks 6. On the Incoming Webhooks page you have to set Activate Incoming Webhooks - On 7.As soon you activate the incoming webhooks the Webhook URL will be automatically generated 8. This is your webhook required for UnRAID to send push-notifications using Slack. Copy the full URL and save it somwhere. You will need to paste it later in UnRAID config. The UnRAID Notifications Part 1. In UnRaid - Go to Settings > User Preferences > Notification Settings Note: Here you also select what notifications you want and how often at the top of the page. 2. At the bottom of Notification Settings enable Slack and enter the webhook URL. 3. Copy/Paste the Webhook URL to your Unraid Notification Settings for Slack. 4. On Unraid now click "Test" in the Slack Notification Settings Box and a message should get pushed to your newly created Slack channel. Note: At a point you have to select where to post the message, I have selected to post it to myself(replaced my username with to_myself in photo): UnRaid 804 is at this moment my UnRAID name, as it is buid in a Fractal Design Node 804 case. The Client for Notifications Part 11. Sign-in on the desktop or install the Slack mobile app. For mobile Slack - make sure you see the channel and set your app notifications for push notifications if you want it. Enjoy receiving your Slack push-notifications!