jonp Posted August 26, 2014 Share Posted August 26, 2014 Chuck, This is just about the coolest idea I've seen in a long time. What a creative way to hide your storage. I am beyond impressed. This needs to be featured in a blog post on our website. Would you mind if I linked these photos? Do you have any more to share? This is amazing!! Quote Link to comment
garycase Posted August 26, 2014 Share Posted August 26, 2014 Chuck => How's this coming along? I assume it's not yet finished, but DO post some photos when it is !! (I'm sure you already plan to do this) ... and I'm equally interested in seeing your 2nd server in a Coca Cola dispenser Quote Link to comment
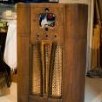
ChuckTSI Posted August 30, 2014 Author Share Posted August 30, 2014 Hi Guys. This is still happening. Unfortunately, my wife decided that this project was taking up too much of my time and asked for a divorce. I'm kidding........ It's not cause of the radio. So till the house sells and this mess is over, the project will be very slow, but I am working on it. I have finalized the drive tray design. Hoping to start on the trays this week. Jon, if you want to steal the images for blog post, by all means. Garycase, I will be taking photos. As a photographer, I feel it is my duty. Hope to meet all your expectations. Quote Link to comment
gfjardim Posted August 30, 2014 Share Posted August 30, 2014 Oh, man, that's sad. Many people live their religion with too much gilt/sin in sight, not just the sense of right and wrong. Maybe in your case it has more to do with jealousy than religion. People can use religion to excuse/cover up pretty much anything. Quote Link to comment
ChuckTSI Posted August 30, 2014 Author Share Posted August 30, 2014 Here is another render. Gonna go mock it up before I buy some hardwood to cut out the box. Quote Link to comment
dirtysanchez Posted September 15, 2014 Share Posted September 15, 2014 Very cool idea. Looking forward to seeing the finished product. Quote Link to comment
ChuckTSI Posted September 15, 2014 Author Share Posted September 15, 2014 Update: I should be back on the project starting this October. Did a quick mock-up of the last render I did, and found that the back bracket between the radio side and the drive cage is nearly inaccessible. Might be hard to mount new drives. Looking at using lift off hinges Each side will weigh between 18-20 lbs (when full). The hinges must be able to handle it. This would allow easier removal of the cages for new HDD install/replacement. Might try a few new designs.. but I like the current hinge design. Would have used drawer slides on top (so the cage slides back), but getting them short enough will be tough. Quote Link to comment
theone Posted September 15, 2014 Share Posted September 15, 2014 Would have used drawer slides on top (so the cage slides back), but getting them short enough will be tough. What length of slides do you need. I used some 9.84" rails in my custom case which were quite short http://lime-technology.com/forum/index.php?topic=27485.0 Here is an example of shorter rails - only 6" http://www.ebay.com/itm/6-Long-Soft-Close-Side-Mount-Metal-Ball-Bearing-Drawer-Slides-2pcs-/390854782680?pt=LH_DefaultDomain_0&hash=item5b00c2aed8 Intended for side mounting but I use them for bottom mounting. Quote Link to comment
garycase Posted September 18, 2014 Share Posted September 18, 2014 Those 6" slides are a nice find -- I've looked for very short slides for a couple of projects ... these will work nicely. Don't need any at the moment, but definitely bookmarked the page ! Quote Link to comment
ChuckTSI Posted October 7, 2014 Author Share Posted October 7, 2014 Here is an example of shorter rails - only 6" http://www.ebay.com/itm/6-Long-Soft-Close-Side-Mount-Metal-Ball-Bearing-Drawer-Slides-2pcs-/390854782680?pt=LH_DefaultDomain_0&hash=item5b00c2aed8 Yes. Nice find. I may have to go that route. Thanks House sold. Almost done storing / sorting / purging all my crap. Should be starting this weekend or next week! Quote Link to comment
ChuckTSI Posted October 17, 2014 Author Share Posted October 17, 2014 Starting finally. There is going to be a redesign of the way the racks open. They will pivot back from the bottom. Here is the damaged top again: Removed the top damaged layer of veneer. Going to go veneer hunting (saved large piece for grain matching) Cutting the shelf brackets. Rough idea of height / clearance requirements (mock up using pine. too soft and not quite cut to spec. Slight bends in the brackets). Solid though. Most wood parts for each rack will be made using hardwood. (possibly leftover bloodwood. Very messy cutting though) All for now. Gonna have to go back to Sketchup for a new pivot design. Quote Link to comment
ChuckTSI Posted October 18, 2014 Author Share Posted October 18, 2014 Forgot the sketchup at work. Got some parts. Ready to start tomorrow hopefully. try and finish the front plate (with fans), sides and bottom supports along with the two racks. Will examine a pivot style when complete. overkill but would love soft open / close racks. Quote Link to comment
ChuckTSI Posted October 19, 2014 Author Share Posted October 19, 2014 Cut out the rack tops: Mounted: Assemble Fan / Rack Box Cut out and install fans into front plate Fans Installed: Front and Read View (still needs cutout for fan power wires to leave the fan box) Quote Link to comment
ChuckTSI Posted October 21, 2014 Author Share Posted October 21, 2014 This not making new holes in the original radio is becoming a pain. Tried to remove the mid shelf, but they glued the front. This has caused more headaches. The space between the front curves and that plate allows for 1 finger. I now need to create custom power cables and distribution block. For now I built a baseplate to cover the midshelf and accept mounting hardware. The bolts holding down the baseplate are a little high for my liking. I'll be getting some of those ikea style furniture bolts. I also need to buy new baseplate material as the old piece I used was warped. Going to try and use clamps to see if I can get it to hold flat shape. (highly doubt it) Tossed in all the drives I have. Worried that parity and cache are so close to the top. Maybe the design will only hold 20 drives instead of 22. We'll see how temps are. and here is the mess of wires I need to deal with. <grumble grumble> I forgot about getting a power button. Reset button, etc etc. lots of forgots. so now unraid is offline and my regular drives will have to bear the brunt of media for now. Total Spent so far: $40 - $40 Radio $90 - Fans and Controller $53 - 3/4 Inch Poplar $30 - Closet Rails 6$ - PC Screws ------------------------------- $229 Quote Link to comment
ChuckTSI Posted October 21, 2014 Author Share Posted October 21, 2014 I just spotted this power button... maybe an easy way out for the magic eye? http://www.kustompcs.co.uk/acatalog/info_2208.html Cheaper but silver http://www.ebay.ca/itm/1-25mm-12V-Green-Led-Stainless-Switch-Momentary-Push-Button-6-Pins-Waterproof-/321144879239?pt=LH_DefaultDomain_0&hash=item4ac5b9f887 Quote Link to comment
garycase Posted October 21, 2014 Share Posted October 21, 2014 This is REALLY starting to look good !! I wouldn't bother with a Reset button ... just a power button is all you really need. Personally, I also wouldn't connect the hard drive LED output to anything ... those flashing LED's can be a bit annoying. Definitely looking forward to pictures of the finished unit Quote Link to comment
ChuckTSI Posted October 21, 2014 Author Share Posted October 21, 2014 You are right. Unraid and reset button bad idea. I am rethinking the power button as the magic eye. I don't need people walking by pushing the button (unless I make the power button in back and just use it for the glowing eye part). Some bumps in the road I need to tackle: 1) How to get the power and data cables past the motherboard shelf. a) I am thinking of making a back for the radio using 1/8th inch backerboard. Cut holes like they used to in the old days to hide the cables running down the back. But I would know it's messy back there. Use velcro to hold in place (no damage) b) Cutting out one corner of the midshelf (break my promise of no damage).. but it's inside and would not affect any mounting of original equipment. c) Start making custom data and power cables (cables will fit, connectors won't clear the hole) 2) Existing cables are too short to make clean runs. a) Make custom cables that would appear to look like old phone patch chords b) Keep standard look and buy longer and just route cleanly. 3) Rebuild motherboard wooden adapter plate (curved issue) 4) Fan Controller Location (18inch temp leads) 5) Power Button / Magic Eye Decision 6) Using the original glass dial face in some fashion. 7) Power Supply positioning. (will depend on cable / routing decision) 8 ) To pivot or not pivot the racks. Just simple pull out? Need lock pin ideas. 9) Fan/Speaker location covering. Can't use speaker cloth. Air won't move past it easily. Thinking of perforated sheet metal. or And then having it air brushed to an old speaker cloth pattern. Quote Link to comment
DoeBoye Posted October 21, 2014 Share Posted October 21, 2014 I'm loving this thread! Keep up the progress posts! Quote Link to comment
switchman Posted October 21, 2014 Share Posted October 21, 2014 I would verify how the old radio chassis mounds then drill a pass through hole that does not interfere wit the original mounting. You have already stripped the top an are replacing it with new veneer so it is no longer original. Quote Link to comment
ChuckTSI Posted October 21, 2014 Author Share Posted October 21, 2014 There was no restoring the top veneer. Fully split, cracked and water damaged (flower pot on top?) Previous owners stored it outside in covered sun room (no humidity control) The 4 holes you see in the adapter bracket (http://lime-technology.com/forum/index.php?topic=34329.msg334452#msg334452) is in line with the 4 holes in the mid-plate of the radio which are used to mount the radios component. Any additional hole would not interfere nor would it create any structural issue. The problem I struggle with is: Yes. I did strip off the old veneer but to benefit the original look (should it go back to a radio). Making a hole is something the radio doesn't need to look new again. I know I'm quibbling over semantics. Quote Link to comment
ChuckTSI Posted October 22, 2014 Author Share Posted October 22, 2014 Tonight was taking care of some little things that were driving me crazy. Changed the adapter plate bolts to low profile. Had to custom cut. Change out the warped board for a straight one. Better motherboard clearance now. Added cage/tray lock bolts. Didn't want my production drives falling on the floor. Cleaned up some wiring for now. Bought the hardboard for the back. Until I know exactly where everything is going, can't cut it. I think I am taking a small break. Then again, tomorrow is a new day. If I find a temporary switch, I might try and fire it up. Quote Link to comment
Chugiak Posted October 22, 2014 Share Posted October 22, 2014 What, no flat head screwdriver? It's the ultimate temporary switch. This is a beautiful project you have going. Really appreciate your attention to detail. Quote Link to comment
ChuckTSI Posted October 22, 2014 Author Share Posted October 22, 2014 Ok. I screwdriver'ed it. IT'S ALIVE!!! (I feel like Henry Frankenstein running around the house saying it) So far, so good. ** Parity Check brought temps to no higher than 30 degrees ** Quote Link to comment
garycase Posted October 22, 2014 Share Posted October 22, 2014 You might want to set the time and date Quote Link to comment
ChuckTSI Posted October 22, 2014 Author Share Posted October 22, 2014 My date is fine. Looking at my Last parity check date? Quote Link to comment
Recommended Posts
Join the conversation
You can post now and register later. If you have an account, sign in now to post with your account.
Note: Your post will require moderator approval before it will be visible.