





dan_raid
Members
-
Joined
-
Last visited
-
Thank you for your explanation As this is my first time in removing drive, I think I stay with the routine. Next time I switch to "livin la vida loca" 🤪 Ok, understood. ---- Sorry, but I still have a question: Is it also possible to add (completely) new drives in the new config part?
-
Great, I will follow those steps 😎. Nope, nothing set up. I found other methods, but I'm fine with this approach. My plan is pause the usage of the server, copy the data, remove the drives and resync parity. ---- I would like to raise two additional questions: [1 - During the copy process] How "important" is the comparison step (rsync -narcv)? I am looking for a way to speed up the process and I cannot fully understand the verify part. [2 - Rebuild partiy] Do the old drives (e.g. drive #07) have to stay at their old slots? Or can I rearange them by size? My idea: First 8TB drives and then followed by 10TB drives
-
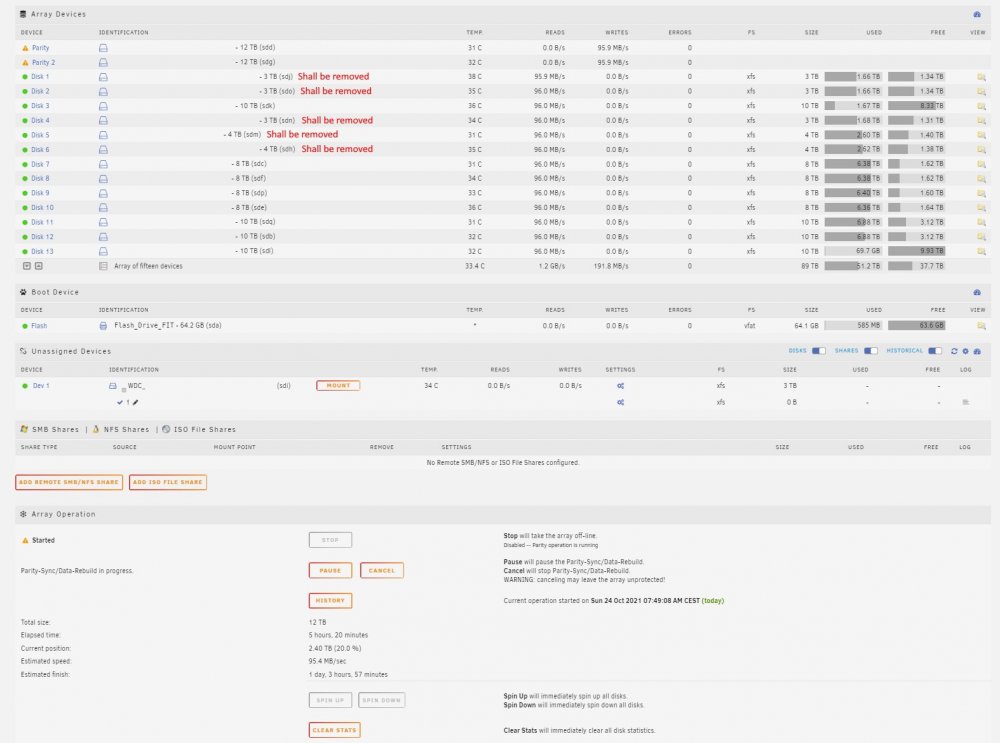
I followed your steps and parity sync is running: After this step I want to remove disks #01, #02, #04, #05 and #06 (as marked in the screenshot above). Is the best way to repeat the steps from above? rsync -arv /mnt/disk1/ /mnt/disk3 rsync -narcv /mnt/disk1/ /mnt/disk3 rsync -arv /mnt/disk2/ /mnt/disk3 rsync -narcv /mnt/disk2/ /mnt/disk3 rsync -arv /mnt/disk4/ /mnt/disk3 rsync -narcv /mnt/disk4/ /mnt/disk3 rsync -arv /mnt/disk5/ /mnt/disk13 rsync -narcv /mnt/disk5/ /mnt/disk13 rsync -arv /mnt/disk6/ /mnt/disk13 rsync -narcv /mnt/disk6/ /mnt/disk13
-
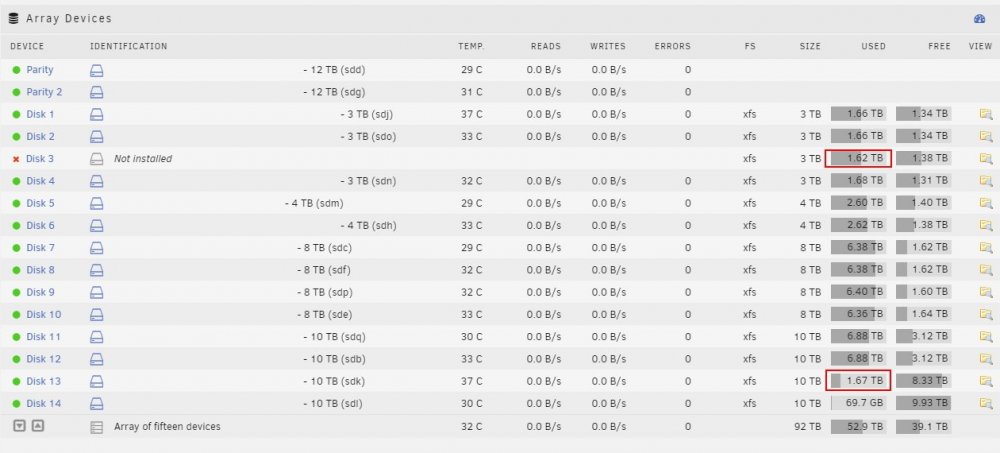
I checked the overall folder structure and it looks similiar. Disk #03 has 1,62TB and Disk #13 now has 1,67TB.
-
First of all: Thank you for your precious support! I am glad you are supporting me 👍 I ran both commands, after the last one I received the following message: For me it looks like everything is fine. I am right? I am not sure what you mean. Do you mean to shrink the array or remove disks?

-
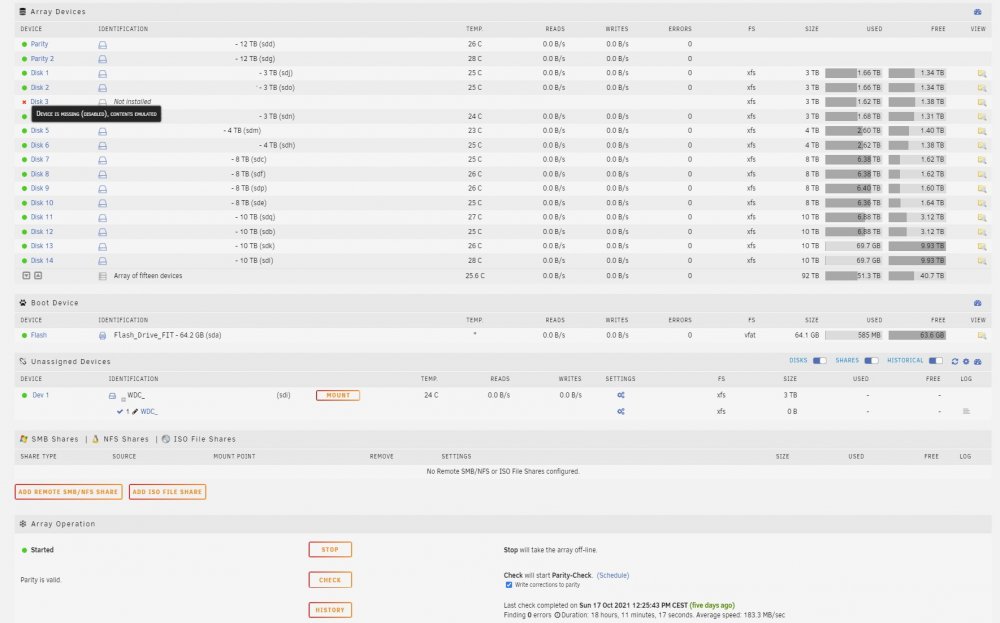
When I start the array the drive is listed as missing / not installed. The contents of it are emulated. Here is a screenshot: From this point I want to remove drive #03 and rebuild parity, but I do not know how.
-
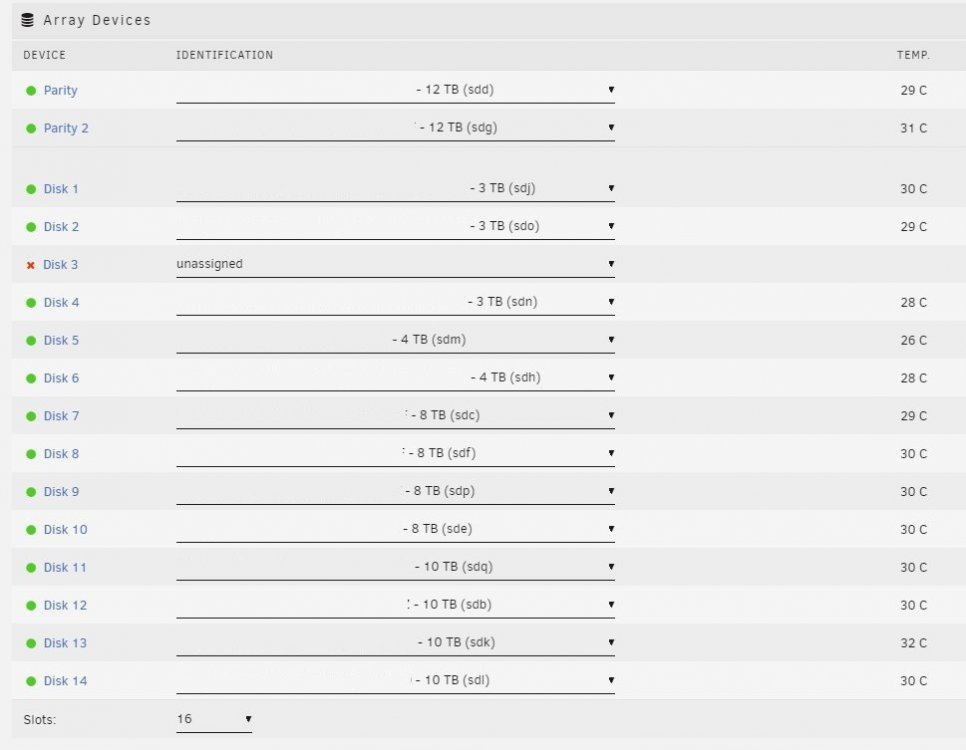
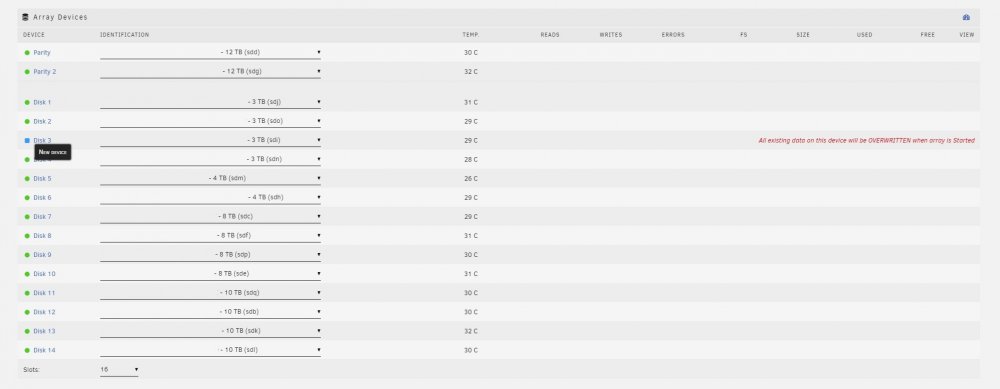
What do you mean by showing the correct content? The drive is showing up, but when I want to add it, UNRAID wants to overwrite it. Here are two screenshots
-
Ok, I understand. But is the data lost of #3 with this method? Or will it be rebuild with parity?
-
That is my problem. I added the new drives (#13 and #14) before #03 was removed. So now I cannot use the replacement-function. Therefore I need an option to rebuild parity of the "new" array (all drives excl. #03). Thank you for sharing. I will use this method after fixing my problem above.
-
Hi UNRAID Community, I have some trouble with my UNRAID server. I wanted to replace some drives of my servers, but it looks like i followed the wrong steps 😵. Here is my setup: - #01: 12TB Parity - #02: 12TB Parity - #03: 3TB Data - #04: 3TB Data - #05: 4TB Data - #06: 4TB Data - #07: 8TB Data - #08: 8TB Data - #09: 8TB Data - #10: 8TB Data - #11: 10TB Data - #12: 10TB Data -- - #13: 10TB Data - #14: 10TB Data What I did: - I added #13 and #14 to the array - I "somehow" removed #03 from the pool and UNRAID is now showing drive is in "error state: no device identification" > When I try to add #03 to the array again, UNRAID identifies the drive as "new device" and wants to overwrite it. What I want to do: I want to remove #03 and rebuild parity, but I don't know how?! Do I have to use the new config procedure for this? Which boxes do I have to tick? Thank you for your precious help!


