


Teejoo
Members
-
Joined
-
Last visited
-
I looked into it but it's too complicated for me. I think I will format both discs and set up a new cache pool and start over. That probably is faster.
-
I will test that. Thanks.
-
Here you go
 Here it is:
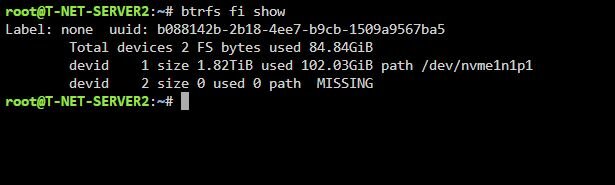 Can you help me where I can edit the VM when I can't see it? I'm a bit clueless..
 I disbled autostart in the VM settings tab and rebooted. See screenshot and attachment for diagnostics. I hope this helps. t-net-server2-diagnostics-20250208-1555.zip
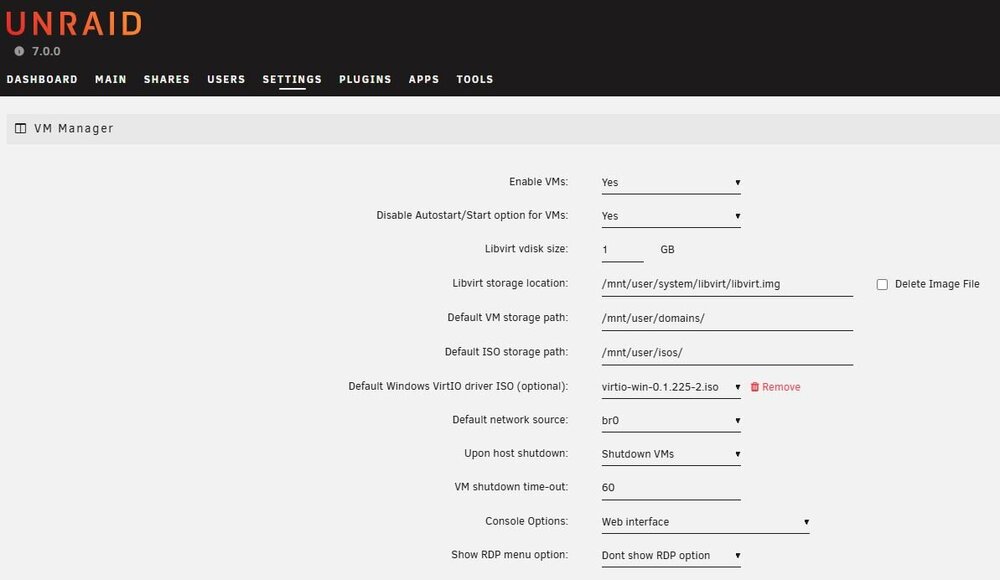 That makes sense.. But I can't edit the VM because of this Libvirt Servic failed to start error because it's on those cache pool drives.
 Thanks for your response. I already checked that, but in the settings 'passed' is not turned on as you can see. Also it doesn't say 'passed' but 'array'. I can't get in the VM settings because Libvirt Servic failed to start.., so I can't check things there.
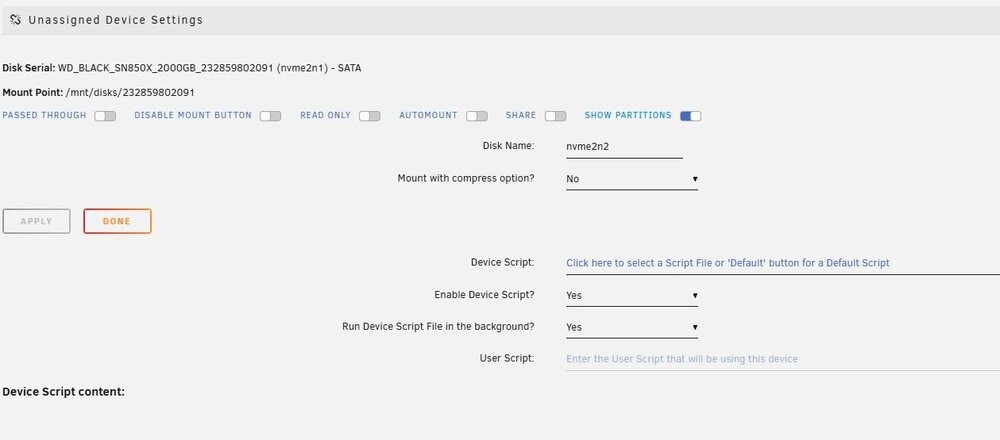 Hi all, I upgraded 2 servers to Uraid 7. Both servers had an error with the wrong pool state error. Dockers and VM didn’t run because of this. On the first server removing the pool and adding it again as described in several topics solved it. Dockers and VM are running again on that server. On the second server I did the same, but I get an error that it’s “unmountable: unsupported or no file system” message. Also I see one of the drives in the unassigned disc section. See screenshot. Dockers and VM’s don’t run because of this. Any ideas how to solve this? I attached the diagnostics file t-net-server2-diagnostics-20250207-1931.zip
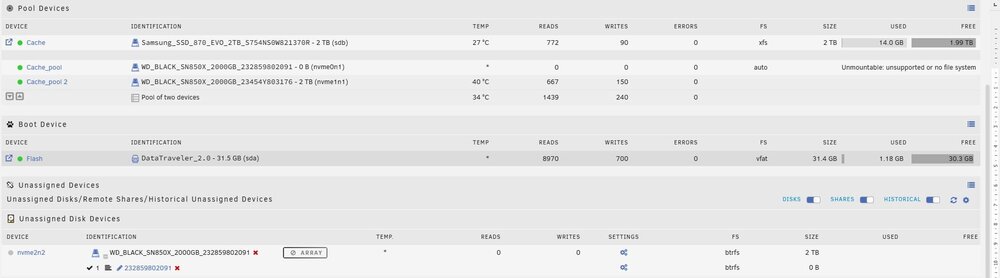 So I guess that has been solved 😎:A follow up: I managed to use a script to activate the 2.5g mode using the script plugin. This worked, Unraid now detects the correct speed. However, although a speedtest shows it has indeed almost 2.5G speed, actual copy speed was much lower compared to my other asus 2.5G nic. Very strange. So in the end I returned the Intel card and put back the Asus nic.Here they are t-net-server2-diagnostics-20241103-1430.zipI’m encountering an issue with my 10G Dual Port RJ45 NICs that use the Intel X550 chipset on both of my Unraid servers. Unraid is only detecting these NICs at a 1G speed, even though they’re connected to a 2.5G switch and should be running at 2.5G. Interestingly, when I used my previous ASUS XG-C100C NIC, Unraid correctly recognized the 2.5G speed. Same with the motherboard’s 2.5G NIC. Also, when I passthrough the Intel NIC for testing purposes to a Windows VM, the speed shows up correctly as 2.5G in the Windows VM!.. What steps can I take to ensure that Unraid correctly detects the NIC at 2.5G speed?


