


elogg
Members
-
Joined
-
Last visited
-
Disk rebuild successfully completed this morning. @trurl & @JorgeB thanks so much for your assistance!
-
Not recently, no. Just looked in the share via the UI and only seeing an osx metadata file on disk8. Must be a bunch of empty folders… Not sure why it’s showing on all those disks, I definitely haven’t done that many repairs.

-
OK, started the array. Not seeing any unmountable filesystem messages and the rebuild seems to be running smoothly now 🤞 diagnostics-20230116-1244.zip
-
Appreciate the explanation. 👍 I am rebuilding to different disks (of the same sizes). Got in the habit of holding the originals aside, just to be safe. So running a xfs repair without any flags, appears to have cleared up the filesystem. It didn’t request a run with -L How do you recommend I proceed? Despite having dual parity, thinking now I might prefer to rebuild one disk at a time if it’s not too late… Since I canceled the first rebuild attempt, do I need to do the unassign, start array, stop, reassign, and start rebuild dance? Not sure if just exiting maintenance mode and starting the array will trigger a rebuild? Output of run with -nv flags now shows Phase 1 - find and verify superblock... - block cache size set to 1432488 entries Phase 2 - using internal log - zero log... zero_log: head block 1859593 tail block 1859593 - scan filesystem freespace and inode maps... - found root inode chunk Phase 3 - for each AG... - scan (but don't clear) agi unlinked lists... - process known inodes and perform inode discovery... - agno = 0 - agno = 1 - agno = 2 - agno = 3 - agno = 4 - agno = 5 - agno = 6 - agno = 7 - agno = 8 - agno = 9 - agno = 10 - agno = 11 - agno = 12 - agno = 13 - agno = 14 - agno = 15 - agno = 16 - agno = 17 - agno = 18 - agno = 19 - agno = 20 - agno = 21 - agno = 22 - agno = 23 - agno = 24 - agno = 25 - agno = 26 - agno = 27 - process newly discovered inodes... Phase 4 - check for duplicate blocks... - setting up duplicate extent list... - check for inodes claiming duplicate blocks... - agno = 0 - agno = 1 - agno = 2 - agno = 3 - agno = 6 - agno = 4 - agno = 10 - agno = 15 - agno = 9 - agno = 5 - agno = 11 - agno = 13 - agno = 12 - agno = 14 - agno = 7 - agno = 8 - agno = 16 - agno = 17 - agno = 18 - agno = 19 - agno = 20 - agno = 21 - agno = 22 - agno = 23 - agno = 24 - agno = 25 - agno = 26 - agno = 27 No modify flag set, skipping phase 5 Phase 6 - check inode connectivity... - traversing filesystem ... - agno = 0 - agno = 1 - agno = 2 - agno = 3 - agno = 4 - agno = 5 - agno = 6 - agno = 7 - agno = 8 - agno = 9 - agno = 10 - agno = 11 - agno = 12 - agno = 13 - agno = 14 - agno = 15 - agno = 16 - agno = 17 - agno = 18 - agno = 19 - agno = 20 - agno = 21 - agno = 22 - agno = 23 - agno = 24 - agno = 25 - agno = 26 - agno = 27 - traversal finished ... - moving disconnected inodes to lost+found ... Phase 7 - verify link counts... No modify flag set, skipping filesystem flush and exiting. XFS_REPAIR Summary Sun Jan 15 22:06:40 2023 Phase Start End Duration Phase 1: 01/15 22:06:10 01/15 22:06:11 1 second Phase 2: 01/15 22:06:11 01/15 22:06:11 Phase 3: 01/15 22:06:11 01/15 22:06:37 26 seconds Phase 4: 01/15 22:06:37 01/15 22:06:37 Phase 5: Skipped Phase 6: 01/15 22:06:37 01/15 22:06:40 3 seconds Phase 7: 01/15 22:06:40 01/15 22:06:40 Total run time: 30 seconds
-
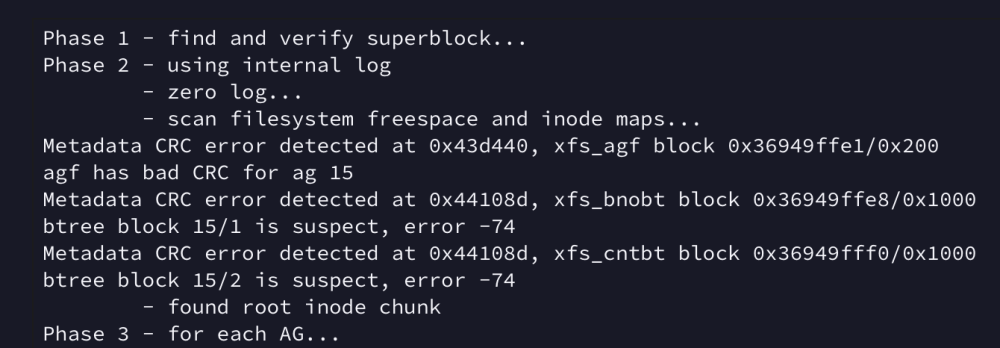
Yes, redundant format was prior to adding to the array. I learned that lesson the hard way a few years back, only ever format in the array when expanding now. Makes sense that the rebuild handles overwriting too. Ah, so original filesystem is recorded (assuming this is how emulation works?) and if something is off, it will carry over to the new disk? Assuming the next step is performing a repair? Last check was run from the webUI in maintenance mode (xfs). Here’s the full output from a run with the -nv flags Phase 1 - find and verify superblock... - block cache size set to 1432488 entries Phase 2 - using internal log - zero log... zero_log: head block 1859593 tail block 1859593 - scan filesystem freespace and inode maps... Metadata CRC error detected at 0x43d440, xfs_agf block 0x36949ffe1/0x200 agf has bad CRC for ag 15 Metadata CRC error detected at 0x44108d, xfs_bnobt block 0x36949ffe8/0x1000 btree block 15/1 is suspect, error -74 Metadata CRC error detected at 0x44108d, xfs_cntbt block 0x36949fff0/0x1000 btree block 15/2 is suspect, error -74 - found root inode chunk Phase 3 - for each AG... - scan (but don't clear) agi unlinked lists... - process known inodes and perform inode discovery... - agno = 0 - agno = 1 - agno = 2 - agno = 3 - agno = 4 - agno = 5 - agno = 6 - agno = 7 - agno = 8 - agno = 9 - agno = 10 - agno = 11 - agno = 12 - agno = 13 - agno = 14 - agno = 15 data fork in ino 16106127516 claims free block 2027533582 - agno = 16 - agno = 17 - agno = 18 - agno = 19 - agno = 20 - agno = 21 - agno = 22 - agno = 23 - agno = 24 - agno = 25 - agno = 26 - agno = 27 - process newly discovered inodes... Phase 4 - check for duplicate blocks... - setting up duplicate extent list... free space (15,14267749-14267758) only seen by one free space btree - check for inodes claiming duplicate blocks... - agno = 0 - agno = 2 - agno = 9 - agno = 4 - agno = 15 - agno = 7 - agno = 1 - agno = 8 - agno = 10 - agno = 6 - agno = 12 - agno = 11 - agno = 5 - agno = 13 - agno = 14 - agno = 3 - agno = 16 - agno = 17 - agno = 18 - agno = 19 - agno = 20 - agno = 21 - agno = 22 - agno = 23 - agno = 24 - agno = 25 - agno = 26 - agno = 27 No modify flag set, skipping phase 5 Phase 6 - check inode connectivity... - traversing filesystem ... - agno = 0 - agno = 1 - agno = 2 - agno = 3 - agno = 4 - agno = 5 - agno = 6 - agno = 7 - agno = 8 - agno = 9 - agno = 10 - agno = 11 - agno = 12 - agno = 13 - agno = 14 - agno = 15 - agno = 16 - agno = 17 - agno = 18 - agno = 19 - agno = 20 - agno = 21 - agno = 22 - agno = 23 - agno = 24 - agno = 25 - agno = 26 - agno = 27 - traversal finished ... - moving disconnected inodes to lost+found ... Phase 7 - verify link counts... No modify flag set, skipping filesystem flush and exiting. XFS_REPAIR Summary Sun Jan 15 19:29:52 2023 Phase Start End Duration Phase 1: 01/15 19:29:21 01/15 19:29:21 Phase 2: 01/15 19:29:21 01/15 19:29:22 1 second Phase 3: 01/15 19:29:22 01/15 19:29:48 26 seconds Phase 4: 01/15 19:29:48 01/15 19:29:48 Phase 5: Skipped Phase 6: 01/15 19:29:48 01/15 19:29:52 4 seconds Phase 7: 01/15 19:29:52 01/15 19:29:52 Total run time: 31 seconds
-
Docker manager, VM manager, & mover logger have been disabled. 👍 Appreciate the advice on just going ahead with rebooting. UI initiated reboot was successful and the array stop/start functionality is now working! Unfortunately, the rabbit hole is getting deeper... Stopped the array, shutdown the server, and swapped the disks out (just incase the rebuild has issues). Set both disk slots to "no disk" and started the array, then stopped it, and formatted the two new disks via Unassigned Devices. Set the disks to their appropriate slots and started the array. This is where things went sideways... disk 4 started rebuilding, but disk 1 showed unmountable...? The odd thing is filesystem check in UD showed no issues after they were formatted. Canceled the rebuild, stopped the array, and restarted in maintenance mode to run a filesystem status check. Which is reporting metadata issues. Not really sure what the best next step should be? Hoping to avoid any data loss at this point. Is it possible Disk 1 is actually faulty or could there be something else at play? diagnostics-20230115-1551.zip

-
I believe this from some ssh plugin I set up a few years ago… Any thoughts on why disks (1 & 4) re-registered differently, they were not touched at all during the cache swap? I do see now that some of the drive letters changed around, but was under the impression that didn’t really matter as the disk identifier is used for matching. I would really like to get a rebuild started, since the array is unprotected with 2 disks disabled. If there is no way of getting insight into what is causing the UI not to stop the array, is there an alternative safe method to stopping it?
-
Have 2 disabled disks, but am unable to stop the array to address. Clicking "Stop" + "Proceed" outputs the following message but seems to have no other effect. nginx: 2023/01/11 22:43:30 [error] 8673#8673: *4428546 connect() to unix:/var/run/emhttpd.socket failed (11: Resource temporarily unavailable) while connecting to upstream, client: 10.20.0.86, server: , request: "POST /update.htm HTTP/2.0", upstream: "http://unix:/var/run/emhttpd.socket:/update.htm", host: "10.20.0.10:4443", referrer: "https://10.20.0.10:4443/Main" So leading up to this...I have 2 cache ssd's in btrfs single mode. Attempted to upgrade the smaller of the drive with a larger version, but it ended up being defective. Should have tested it first, but is going back for RMA now. Put the old ssd back in, and the cache pool was rebalanced when the array started back up. Sometime during that process 2 disks from the array were disabled for read issues, which I'm assuming are cabling issues as they're basically new. I've stopped all dockers and shut down the VM's. Unsure what could be preventing the array from stopping, as I'm not seeing any disk or share unmount failures or anything. diagnostics-20230111-2251.zip
-
I've followed the instructions here: https://www.linuxserver.io/2016/07/28/installing-nextcloud-on-unraid/ and keep running into an issue trying to create the admin account for nextcloud. I'm getting an access denied message with an internal docker IP, despite entering my unRAID instance IP and db port. I have tried logging into the db via terminal and get the same messages. Appreciate any advice on how to resolve this issue. Edit: Reinstalled MariaDb docker and can now successfully login to mysql via terminal and Sequel Pro. But I'm still getting the access denied message with a docker IP on the admin account creation page.


