





Catsk
Members
-
Joined
-
Last visited
-
Hi Sundo, Thanks you for your tuto, but doesn't work for me. When I try to launch the container, I have the error message Start container Deluge failed: rpc error: code = 2 desc = "oci runtime error: could not synchronise with container process: not a directory" But, when I execute this command with sudo : docker run -d --cap-add=NET_ADMIN -p 8112:8112 -p 8118:8118 -p 58846:58846 -p 58946:58946 --name=Delugevpn -v /volume1/docker/deluge/data:/data -v /volume1/docker/deluge/config:/config -v /etc/localtime:/etc/localtime:ro -e VPN_ENABLED=yes -e VPN_USER=myusername -e VPN_PASS=mypass -e VPN_REMOTE=nl.privateinternetaccess.com -e VPN_PORT=1198 -e VPN_PROTOCOL=udp -e VPN_DEVICE_TYPE=tun -e VPN_PROV=pia -e STRONG_CERTS=no -e ENABLE_PRIVOXY=yes -e LAN_NETWORK=192.168.31.0/24 -e NAME_SERVERS=8.8.8.8,8.8.4.4 -e DEBUG=false -e UMASK=000 -e PUID=0 -e PGID=0 binhex/arch-delugevpn The container was created successfully, and works fine . It's not serious, but it's too bad I can't create container with the sync GUI Edit : To create the container with the Syno GUI, do not add the localtime folder. Without this folder, container working fine. But, I must re-edit the port setting because are on "Auto". I have enter the correct port and it's ok
-
Hi, I can't create the container with this command in the Sync Docker GUI. I tried to launch the docker command with ssh but It can't create the folders because the folders doesn't exist in a NAS synology. Somebody knows how to install this docker container on a sync ?
-
Hi Binhex, I tried to change with :ro and same error ...
-
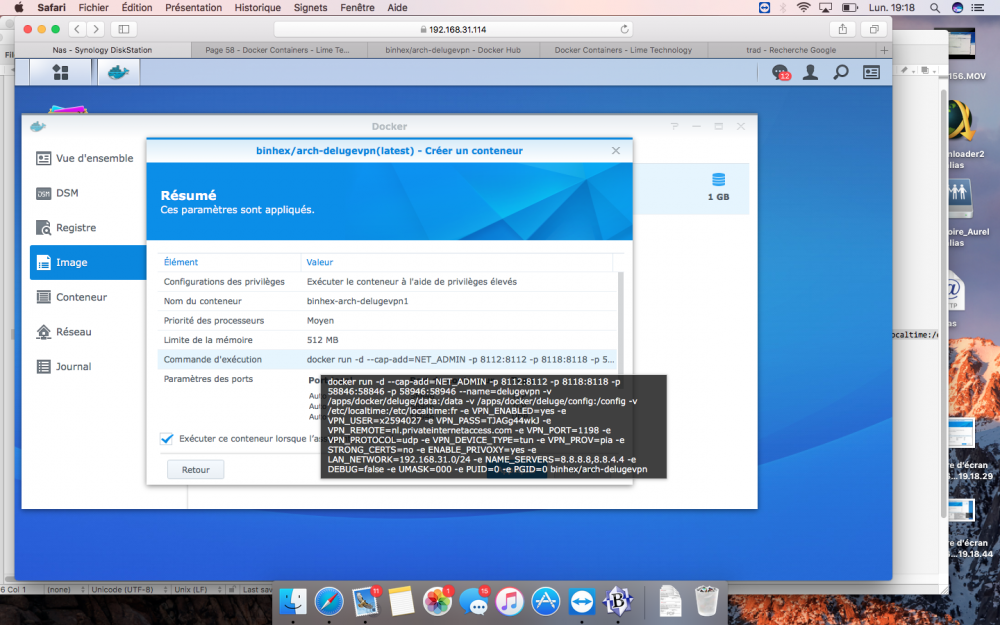
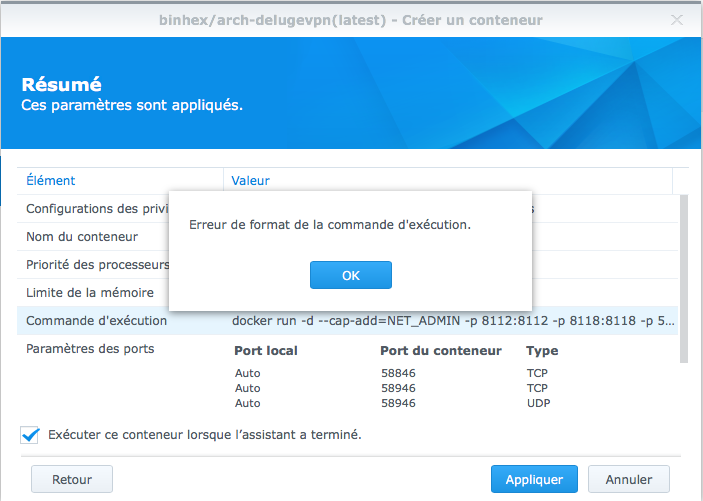
HI binhex, Thanks for your reply ! I'm able to create a container because I can create a deluge container without command line. I tried to make this command in one line but I have the same error. My command line : docker run -d --cap-add=NET_ADMIN -p 8112:8112 -p 8118:8118 -p 58846:58846 -p 58946:58946 --name=delugevpn -v /apps/docker/deluge/data:/data -v /apps/docker/deluge/config:/config -v /etc/localtime:/etc/localtime:ro -e VPN_ENABLED=yes -e VPN_USER=username -e VPN_PASS=Passwd -e VPN_REMOTE=nl.privateinternetaccess.com -e VPN_PORT=1198 -e VPN_PROTOCOL=udp -e VPN_DEVICE_TYPE=tun -e VPN_PROV=pia -e STRONG_CERTS=no -e ENABLE_PRIVOXY=yes -e LAN_NETWORK=192.168.31.0/24 -e NAME_SERVERS=8.8.8.8,8.8.4.4 -e DEBUG=false -e UMASK=000 -e PUID=0 -e PGID=0 binhex/arch-delugevpn In attachement, the screen of my container and error. Thanks for your help
-
Hi binhex, First, thanks you very much for your work ! I tried to setting up the container on my Synology DSM6+ but I have a error message as the finally step : "Format error in execution command". I enter this execution command : docker run -d --cap-add=NET_ADMIN -p 8112:8112 -p 8118:8118 -p 58846:58846 -p 58946:58946 --name=Deluge -v /apps/docker/deluge/data:/data -v /apps/docker/deluge/config:/config -v /etc/localtime:/etc/localtime:ro -e VPN_ENABLED=yes -e VPN_USER=username -e VPN_PASS=password -e VPN_REMOTE=nl.privateinternetaccess.com -e VPN_PORT=1198 -e VPN_PROTOCOL=udp -e VPN_DEVICE_TYPE=tun -e VPN_PROV=pia -e STRONG_CERTS=no -e ENABLE_PRIVOXY=yes -e LAN_NETWORK=192.168.31.0/24 -e NAME_SERVERS=8.8.8.8,8.8.8.4 -e DEBUG=false -e UMASK=000 -e PUID=0 -e PGID=0 binhex/arch-delugevpn Have you a solution ? Thanks you

