Symple
Members
-
Joined
-
Last visited
-
@JorgeB I managed to move the remaining files off of the old cache drive and replaced it with the new and larger drive. Reformatted the new drive to get a fresh start and all of the previously cached files are now back where they belong. Yay! Thanks you so very, very much for your assistance. I'd imagine troubleshooting something like this is fairly trivial for you, but know that you have saved me hours and hours of headaches and nail biting trial 'n errors. I've sent you a small token of my appreciation. Thanks again for all the help!
-
Converted to RAID1 and full balance performed. thevault-diagnostics-20250204-1340.zip
-
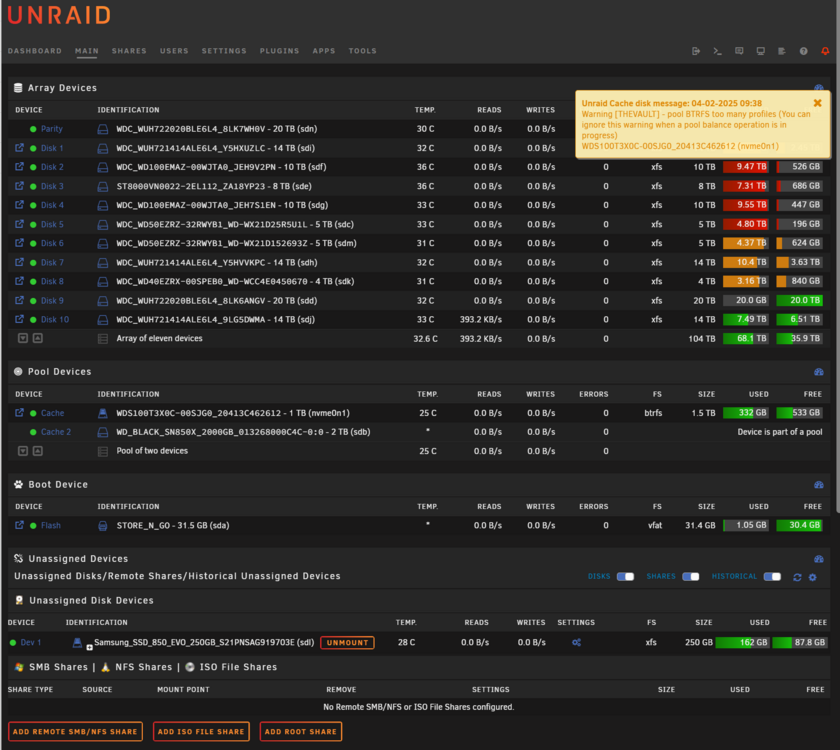
As best as I can tell, the cache is back in action! There's a warning about pool balancing, but I don't see any data transfers going on. Can you advise on the best/safest approach to remove the 1TB drive from the cache pool? I assume that the pool is currently in RAID1 which should make the drive contents identical, but simply unassigning the smaller drive is what led to this whole mess in the first place so I expect that I need to be more delicate when switching over to only using the 2TB drive. thevault-diagnostics-20250204-1010.zip

-
root@TheVault:~# btrfs fi show Label: none uuid: bc2d8f75-e458-4c15-8af2-c228015cb0cb Total devices 2 FS bytes used 420.57GiB devid 1 size 931.51GiB used 490.08GiB path /dev/nvme0n1p1 devid 2 size 1.82TiB used 254.03GiB path /dev/sdb1
-
root@TheVault:~# sfdisk /dev/nvme0n1 Welcome to sfdisk (util-linux 2.38.1). Changes will remain in memory only, until you decide to write them. Be careful before using the write command. Checking that no-one is using this disk right now ... OK Disk /dev/nvme0n1: 931.51 GiB, 1000204886016 bytes, 1953525168 sectors Disk model: WDS100T3X0C-00SJG0 Units: sectors of 1 * 512 = 512 bytes Sector size (logical/physical): 512 bytes / 512 bytes I/O size (minimum/optimal): 512 bytes / 512 bytes sfdisk is going to create a new 'dos' disk label. Use 'label: <name>' before you define a first partition to override the default. Type 'help' to get more information. >>> 64 Created a new DOS disklabel with disk identifier 0x46421735. Created a new partition 1 of type 'Linux' and of size 931.5 GiB. Partition #1 contains a btrfs signature. Do you want to remove the signature? [Y]es/[N]o:
-
root@TheVault:~# sfdisk /dev/nvme0n1 Welcome to sfdisk (util-linux 2.38.1). Changes will remain in memory only, until you decide to write them. Be careful before using the write command. Checking that no-one is using this disk right now ... OK Disk /dev/nvme0n1: 931.51 GiB, 1000204886016 bytes, 1953525168 sectors Disk model: WDS100T3X0C-00SJG0 Units: sectors of 1 * 512 = 512 bytes Sector size (logical/physical): 512 bytes / 512 bytes I/O size (minimum/optimal): 512 bytes / 512 bytes sfdisk is going to create a new 'dos' disk label. Use 'label: <name>' before you define a first partition to override the default. Type 'help' to get more information. >>> 2048 Created a new DOS disklabel with disk identifier 0x6b0f6168. Created a new partition 1 of type 'Linux' and of size 931.5 GiB. /dev/nvme0n1p1 : 2048 1953525167 (931.5G) Linux /dev/nvme0n1p2:
-
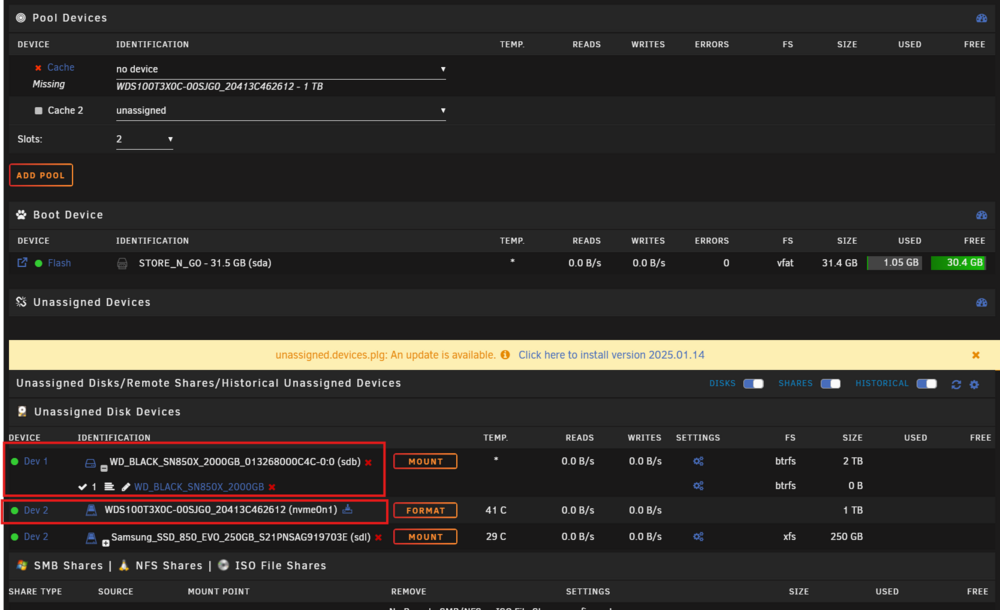
Hi folks, In an attempt to upgrade to a larger cache drive I've managed to shoot myself in the foot and make both the old cache drive as well as the new one unmountable. I followed a seemingly simple guide which instructed me to add the new drive to the existing cache pool, have the drives sync up in a RAID1, and lastly remove the old cache drive. Now, I'm not 100% sure exactly where it all went wrong, but as I recall the RAID1 pool did come online (data was being copied to the newly added drive for a good while). I then proceeded to stop the array and remove the old drive from the pool, but when I spun up the array again the new drive was now unmountable. Adding the old drive back warned me that it would clear the disk so I did not do this, but now I cannot get either one to function. The 2TB WD_BLACK_SN850X (Dev1) is the new NVME drive - temporarily connected via an external USB enclosure and the 1TB WDS100T3XOC (Dev2) is the old NVME drive - inserted in internal NVME slot on the motherboard I have followed initial instructions from a similar thread but have had little luck with bringing either cache drive back and am apprehensive about going much further without specific instructions to do so. Any help would be greatly appreciated. I am posting the response of the initial commands that were run while resolving that particular users issue. root@TheVault:~# btrfs fi show warning, device 1 is missing warning, device 1 is missing Couldn't read chunk tree Label: none uuid: bc2d8f75-e458-4c15-8af2-c228015cb0cb Total devices 2 FS bytes used 420.57GiB devid 2 size 1.82TiB used 254.03GiB path /dev/sdb1 *** Some devices missing >> >> root@TheVault:~# fdisk -l /dev/nvme0n1 Disk /dev/nvme0n1: 931.51 GiB, 1000204886016 bytes, 1953525168 sectors Disk model: WDS100T3X0C-00SJG0 Units: sectors of 1 * 512 = 512 bytes Sector size (logical/physical): 512 bytes / 512 bytes I/O size (minimum/optimal): 512 bytes / 512 bytes root@TheVault:~# fdisk -l /dev/sdb Disk /dev/sdb: 1.82 TiB, 2000398934016 bytes, 3907029168 sectors Disk model: SN850X 2000GB Units: sectors of 1 * 512 = 512 bytes Sector size (logical/physical): 512 bytes / 512 bytes I/O size (minimum/optimal): 512 bytes / 512 bytes Disklabel type: dos Disk identifier: 0x00000000 Device Boot Start End Sectors Size Id Type /dev/sdb1 64 3907029167 3907029104 1.8T 83 Linux Best regards, thevault-diagnostics-20250204-0004.zip
-
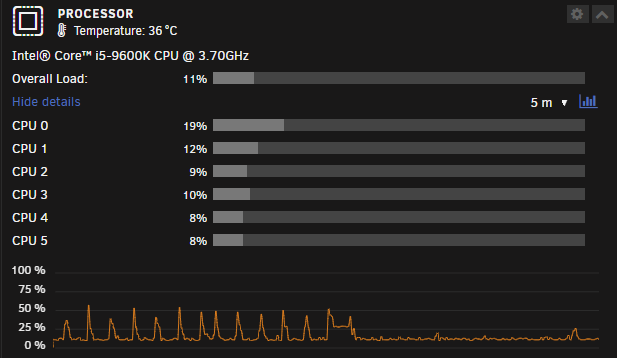
Looks like you were right on the money with that suggestion 👏 Temporarily disabling the Cache Dirs plugin just about eliminated the spikes. I will look into tweaking it to avoid such spikes going forward. Thank you so much!
-
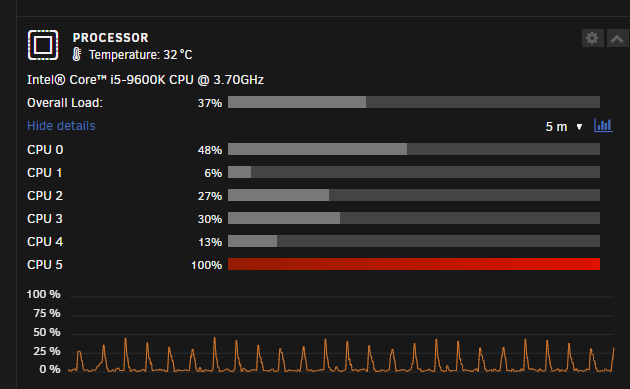
I'm experiencing some strange periodic CPU spikes every 13-15 seconds and I'm struggling to figure out what is causing it. Using top/htop doesn't reveal any processes using any significant amount of CPU (or perhaps I'm just not clever enough to read it). With all dockers and VMs shut down, spikes are still happening. In order to stop the spikes I need to fully stop the array, so I assume that it is caused by one of the tools or plugins performing some action on a schedule. Spinning up the array reintroduces the spikes. Any tips on diagnosing the culprit are very welcome. thevault-diagnostics-20240116-2130.zip