Soundwork
Members
-
Joined
-
Last visited
Everything posted by Soundwork
-
You're most welcomed :)
-
You're most welcomed
-
I should've specified that, yes. That did the job, thank you very much!
-
Hey all, I've had this working no issue for a year or so. In the latest update, however (I'm not sure if it was a docker update or unraid update), it just stopped working. Nothing's changed in terms of my settings, etc. Log shows this constantly. 2024-03-04 03:05:02,015 DEBG 'start-script' stderr output: readnatpmpresponseorretry() failed : the gateway does not support nat-pmp 2024-03-04 03:05:02,017 DEBG 'start-script' stdout output: [warn] Unable to assign an incoming port for protocol UDP, returning 1 from function... [warn] Unable to assign incoming port [info] 11 retries left [info] Retrying in 10 secs... 2024-03-04 03:07:19,836 DEBG 'start-script' stderr output: readnatpmpresponseorretry() failed : the gateway does not support nat-pmp 2024-03-04 03:07:19,841 DEBG 'start-script' stdout output: [warn] Unable to assign an incoming port for protocol UDP, returning 1 from function... [warn] Unable to assign incoming port [info] 10 retries left [info] Retrying in 10 secs... Here's my config: <?xml version="1.0"?> <Container version="2"> <Name>QBittorrent_VPN</Name> <Repository>binhex/arch-qbittorrentvpn</Repository> <Registry>https://registry.hub.docker.com/r/binhex/arch-qbittorrentvpn/</Registry> <Network>br0</Network> <MyIP>13.4.87.246</MyIP> <Shell>sh</Shell> <Privileged>true</Privileged> <Support>https://forums.unraid.net/topic/75539-support-binhex-qbittorrentvpn/</Support> <Project>https://www.qbittorrent.org/</Project> <Overview>qBittorrent is a bittorrent client programmed in C++ / Qt that uses libtorrent (sometimes called libtorrent-rasterbar) by Arvid Norberg. It aims to be a good alternative to all other bittorrent clients out there. qBittorrent is fast, stable and provides unicode support as well as many features.
 This Docker includes OpenVPN and WireGuard to ensure a secure and private connection to the Internet, including use of iptables to prevent IP leakage when the tunnel is down. It also includes Privoxy to allow unfiltered access to index sites, to use Privoxy please point your application at "http://host ip:8118".</Overview> <Category>Downloaders:</Category> <WebUI>http://[IP]:[PORT:8080]/</WebUI> <TemplateURL>https://raw.githubusercontent.com/binhex/docker-templates/master/binhex/qbittorrentvpn.xml</TemplateURL> <Icon>https://raw.githubusercontent.com/binhex/docker-templates/master/binhex/images/qbittorrent-icon.png</Icon> <ExtraParams>--sysctl="net.ipv4.conf.all.src_valid_mark=1"</ExtraParams> <PostArgs/> <CPUset/> <DateInstalled>1709550555</DateInstalled> <DonateText>If you appreciate my work, then please consider buying me a beer :D</DonateText> <DonateLink>https://www.paypal.com/cgi-bin/webscr?cmd=_s-xclick&amp;hosted_button_id=MM5E27UX6AUU4</DonateLink> <Requires/> <Config Name="Host Port 1" Target="6881" Default="6881" Mode="tcp" Description="" Type="Port" Display="always" Required="true" Mask="false">6881</Config> <Config Name="Host Port 2" Target="6881" Default="6881" Mode="udp" Description="" Type="Port" Display="always" Required="true" Mask="false">6881</Config> <Config Name="Host Port 3" Target="8080" Default="8080" Mode="tcp" Description="" Type="Port" Display="always" Required="true" Mask="false">8080</Config> <Config Name="Host Port 4" Target="8118" Default="8118" Mode="tcp" Description="" Type="Port" Display="always" Required="true" Mask="false">8118</Config> <Config Name="Host Path 2" Target="/data" Default="/mnt/user/appdata/data" Mode="rw" Description="" Type="Path" Display="always" Required="true" Mask="false">/mnt/user/appdata/data</Config> <Config Name="Key 1" Target="VPN_ENABLED" Default="yes" Mode="" Description="" Type="Variable" Display="always" Required="false" Mask="false">yes</Config> <Config Name="Key 2" Target="VPN_USER" Default="vpn username" Mode="" Description="" Type="Variable" Display="always" Required="false" Mask="false">##############</Config> <Config Name="Key 3" Target="VPN_PASS" Default="vpn password" Mode="" Description="" Type="Variable" Display="always" Required="false" Mask="false">##############</Config> <Config Name="Key 4" Target="VPN_PROV" Default="pia|airvpn|protonvpn|custom" Mode="" Description="" Type="Variable" Display="always" Required="false" Mask="false">protonvpn</Config> <Config Name="Key 5" Target="VPN_CLIENT" Default="openvpn|wireguard" Mode="" Description="" Type="Variable" Display="always" Required="false" Mask="false">wireguard</Config> <Config Name="Key 6" Target="VPN_OPTIONS" Default="" Mode="" Description="" Type="Variable" Display="always" Required="false" Mask="false"/> <Config Name="Key 7" Target="STRICT_PORT_FORWARD" Default="yes" Mode="" Description="" Type="Variable" Display="always" Required="false" Mask="false">yes</Config> <Config Name="Key 8" Target="ENABLE_PRIVOXY" Default="no" Mode="" Description="" Type="Variable" Display="always" Required="false" Mask="false">no</Config> <Config Name="Key 9" Target="WEBUI_PORT" Default="8080" Mode="" Description="" Type="Variable" Display="always" Required="false" Mask="false">8080</Config> <Config Name="Key 10" Target="LAN_NETWORK" Default="192.168.1.0/24" Mode="" Description="" Type="Variable" Display="always" Required="false" Mask="false">13.4.87.0/24</Config> <Config Name="Key 11" Target="NAME_SERVERS" Default="84.200.69.80,37.235.1.174,1.1.1.1,37.235.1.177,84.200.70.40,1.0.0.1" Mode="" Description="" Type="Variable" Display="always" Required="false" Mask="false">84.200.69.80,37.235.1.174,1.1.1.1,37.235.1.177,84.200.70.40,1.0.0.1</Config> <Config Name="Key 12" Target="VPN_INPUT_PORTS" Default="" Mode="" Description="" Type="Variable" Display="always" Required="false" Mask="false">35824</Config> <Config Name="Key 13" Target="VPN_OUTPUT_PORTS" Default="" Mode="" Description="" Type="Variable" Display="always" Required="false" Mask="false">35824</Config> <Config Name="Key 14" Target="DEBUG" Default="false" Mode="" Description="" Type="Variable" Display="always" Required="false" Mask="false">true</Config> <Config Name="Key 15" Target="UMASK" Default="000" Mode="" Description="" Type="Variable" Display="always" Required="false" Mask="false">000</Config> <Config Name="Key 16" Target="PUID" Default="99" Mode="" Description="" Type="Variable" Display="always" Required="false" Mask="false">99</Config> <Config Name="Key 17" Target="PGID" Default="100" Mode="" Description="" Type="Variable" Display="always" Required="false" Mask="false">100</Config> <Config Name="Downloads" Target="/media" Default="" Mode="rw" Description="" Type="Path" Display="always" Required="false" Mask="false">/mnt/user/</Config> <Config Name="AppData Config Path" Target="/config" Default="/mnt/user/appdata/binhex-qbittorrentvpn" Mode="rw" Description="" Type="Path" Display="advanced-hide" Required="true" Mask="false">/mnt/user/appdata/binhex-qbittorrentvpn</Config> </Container> My work colleague has his own unraid server at home and is having the exact same issue as well. Any ideas? Thank you
-
I'm not familiar with how PS2s work but as long as it uses SMBv1 for its protocol to access network shares, I do not see why not.
-
You're completely right! I've now edited so it shows correctly. @letrain hopefully this solves your issue. Nice catch @JohnHedge!
-
As far as I can tell, it's still working (my initial use case scenario is still in production and it's being used actively).
-
Hi @letrain, Correct, I replied through there basically saying that I meant to keep that container private as it wasn't complete yet. As mentioned in the guide, you can use dperson's samba container for this -> https://github.com/dperson/samba Can you share your settings so I can figure out where your issue is?
-
In VPN Manager under Network Services in the Settings tab, when you create a new peer and say, put it as "Remote tunneled access", the settings (by clicking the "eye" icon") will show a DNS entry. If you then change the Peer type of access to LAN hub & Spoke access, the DNS entry remains in the settings when it shouldn't (and can cause issues by being there). If you create a new peer directly as LAN hub & Spoke access, the DNS entry isn't there which is expected behavior. I have not tested switch to different methods from a connection type that includes DNS entry details. Picture: The "DNS=" line should not be there when choosing "LAN hub & Spoke access" but remains when choosing said type when the peer is originally creatred with a connection type that does require it, such as "Remote tunneled access". server-fu-1-diagnostics-20240112-1145.zip
-
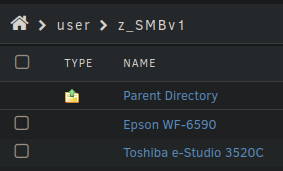
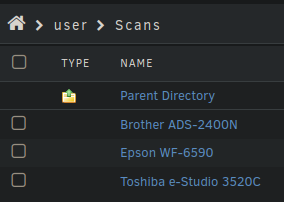
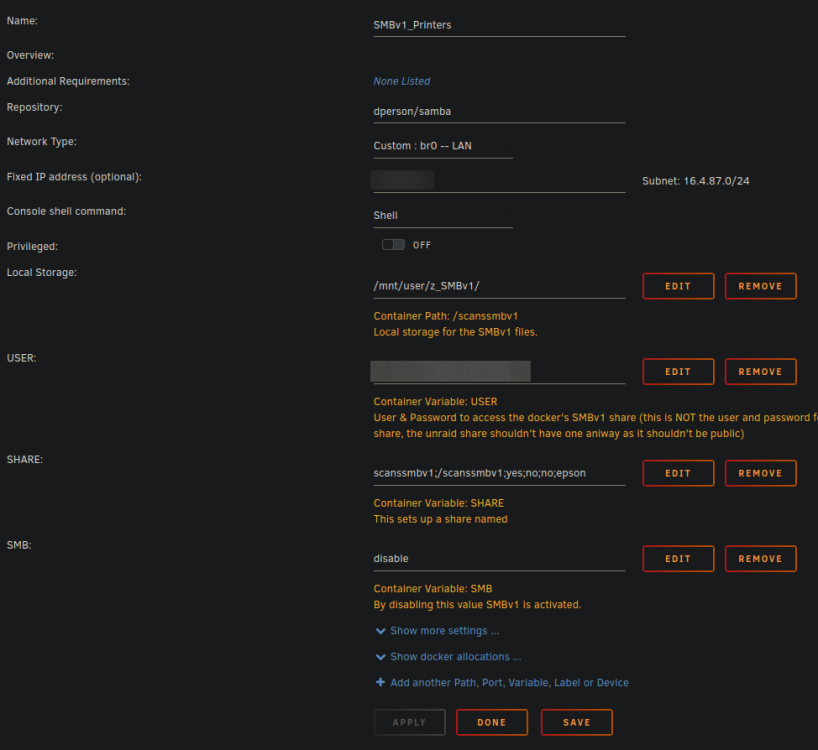
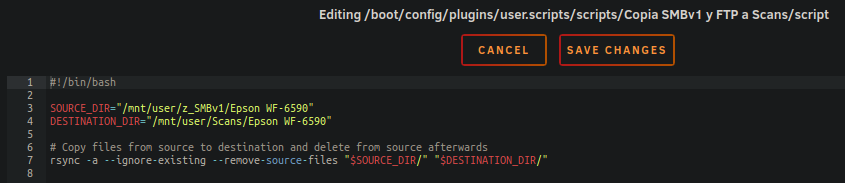
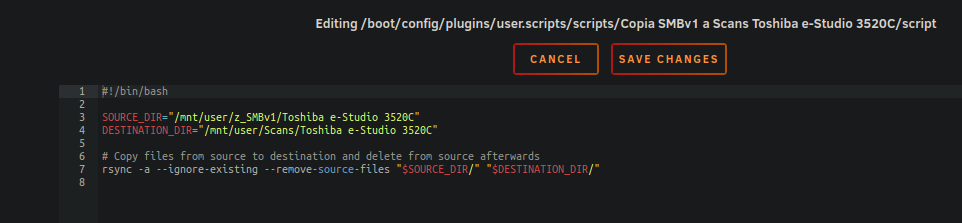
I was configuring a couple of old Multi-function printers today and realized they couldn't talk to UnRAID shares because by default, UnRAID doesn't have SMBv1 enabled (Netbios) and for good reason. Some printers can do FTP but that's a different can of worms. So, I figured I could dockerize Samba, set it up for SMBv1 and then, using a script, copying the files from there to an UnRAID share that network users can use. Note: I'm looking into presetting all this up and publishing it in Community Applications since there's no Samba docker already there but, in the meantime, you can follow these steps if you want to test it out. Suggestions are welcomed. Follow these steps: Create a Share in Unraid and name it "z_SMBv1" ("z_" is so it's at the end of your list). Set Export to "Yes (Hidden)" and Security to "Private". Do not give any user access. This share is our mount point for the container. Create a Share in Unraid and name it "Scans". Set Export to "Yes" and Security to "Private". Give access to whatever users you want to be able to access the scanned files from their PCs. Go to Dockers in UnRAID and click on "Add Container". Name it whatever you like (I've named it "SMBv1_Printers"). Set "Repository" to "dperson/samba" Give it its own Fixed IP address ("Custom" under "Network Type"). Click on "Add another Path, Port, Variable, Label or Device". Select "Path" as the Config type. Name it "Local Storage". Container Path: /scanssmbv1 Host Path: /mnt/user/z_SMBv1/ Click on Save. Click on "Add another Path, Port, Variable, Label or Device". Select "Variable" as the Config type. Name it "USER". Key: USER Value: USER_OF_YOUR_CHOICE;PASSWORD_OF_YOUR_CHOICE Click on Save. Click on "Add another Path, Port, Variable, Label or Device". Select "Variable" as the Config type. Name it "SHARE". Key: SHARE Value: scanssmbv1;/scanssmbv1;yes;no;no;USER_OF_YOUR_CHOICE_SPECIFIED_EARLIER Click on Save. Click on "Add another Path, Port, Variable, Label or Device". Select "Variable" as the Config type. Name it "SMB". Key: SMB Value: disable Click on Save. That's it. Save and apply the container. Once it starts up, go to your Printer/Scanner/MFC and tell it to send files to the docker container we just created: "CONTAINER_IP/scanssmbv1" and give it a try. You can also try the share on a PC first if you want to make sure it worked. If you have write permission errors, you can use the "Docker Safe New Perms" option under "Tools" in Unraid. This should fix that issue. Now, install the "User Scripts" app from Community Applications. Go to Settings within said app. Click on "Add New Script" Name it whatever you like. #!/bin/bash SOURCE_DIR="/mnt/user/z_SMBv1" DESTINATION_DIR="/mnt/user/Scans" # Copy files from source to destination and delete from source afterwards rsync -a --ignore-existing --remove-source-files "$SOURCE_DIR/" "$DESTINATION_DIR/" Save the script. Set the "Schedule" to "Custom". On the Cron tab, add 5 asterisk (like this: * * * * *) This script will move the scanned files from the SMBv1 Container share to the Scans Share and delete the source files every 60 seconds (this is the max amount of time you'll have to wait before seeing your scan in the Scans folder). That's it. In theory, you can now use your old multi function printers or scanners that have a Scan-to-file/network option without explicitly enabling SMBv1 in your UnRAID. In theory, obviously, this can work for any device that requires SMBv1 (the idea that led me to set this up to test, originally came from someone that had a Sonos device that wanted to read music files from an SMBv1 share from Unraid) so you can modify this accordingly. You can even get fancy and if you have multiple printers, add folders within the SMBv1 share and the Scans share and change the settings accordingly (this is what I did). You can also add more shares if needed. More info on samba variables to achieve other options here -> https://github.com/dperson/samba