


ZeroThirtySeven
Members
-
Joined
-
Last visited
-
Should i replace that drive with the first, or second method?
-
I have a Drive that is showing a lot of errors that needs replaced. I also want to replace the parity drive with a much larger drive and replace a smaller data Drive with a bigger one. I read through the documentation. There seem to be 2 different ways to replace drives depending on if the drive is the same size or will be bigger. The last time I attempted this I guess I did something wrong and ended up losing all the data that was contained on that drive but somehow managed to keep the array intact. This is the way I did it last time. Although I was replacing it with a bigger disk. To replace a failed disk or disks: 1. Stop the array. 2. Power down the unit. 3. Replace the failed disk(s) with a new one(s). 4. Power up the unit. 5. Assign the replacement disk(s) using the Unraid webGui. 6. Click the checkbox that says Yes I want to do this 7. Click Start to initiate the rebuild process.and the system will reconstruct the contents of the emulated disk(s) onto the new disk(s) and, if the new disk(s) is/are bigger, expand the file system. This next bit is if the replacement drive is bigger, but not necessarily failing. To perform the upgrade proceed as follows: 1. Run a parity check if you have not done so recently and make sure that zero errors are reported. Attempting an upgrade if parity is not valid will result in the file system on the upgraded disk being corrupt. 2. Stop the array. 3. Unassign the disk you want to upgrade. 4. Start the array to commit this change and make Unraid 'forget' the current assignment. 5. Unraid will now tell you that the missing disk is being emulated. It does this using the combination of the remaining data drives and a parity drive to dynamically reconstruct the contents of the emulated drive. From a user perspective the system will act as if the drive was still present albeit with a reduced level of protection against another drive failing. If you started the array in Maintenance mode then this will ensure no new files can be written to the drive during the upgrade process If you started the drive in Normal mode then you will be able to read and write to the Emulated drive as if it was still physically present 6. Stop the array. 7. At this point the array is in the same state as it would be if the drive you have stopped using had failed instead of being unassigned as part of the upgrade process. 8. Assign the (larger) replacement drive to the slot previously used for the drive you are upgrading. 9. Start the array to begin rebuilding the contents of the emulated drive on to the upgraded drive. Since the replacement drive is larger than the one it is replacing when the contents of the emulated drive have been put onto the replacement drive Unraid will automatically expand the file system on the drive so the full capacity of the drive becomes available for storing data. Which method(s) should I use to replace theses disks? Current setup is 7 disk array with 1 parity Using version 6.10.0-rc1 (but I am going to be updating this before undertaking the project) System is Custom built
-
Oh, for sure the computer will be powered down. Thanks for the clarification. I have a drive in the servers Boot drive bay, that is being used in the array since Unraid is booting from a thumbdrive. I currently have 7 4TB disks with one of them being Parity. I am going to install a 16TB disk as the Parity in preparation for future Expansion, but I wanted to make sure that the Parity drive was in the Boot drive slot, as that is not "Hot Swappable" and requires tools and a lot more effort to remove. So I just wanted to be 100% that doing this wasn't going to cause me a headache and a lot of Server downtime.
-
Quick Question. I just want to make sure I understand this correctly. Unraid tracks the drives based on Serial Number and not what Sata Channel they are using correct. If that is correct, I should then be able to take 2 drives in my server and Swap them to different hot swap locations and Unraid would not even skip a beat upon startup? I do not have a raid controller, and there is only 1 parity drive.
-
So the disk needs replaced. Start working on that.
-
I am pretty sure that was the first thing I did after the Rebuild.
-
All the Drives Report "Completed With Out Error" But on the Dash i still have a Thumbs Down on Disk five for the Pending Sector. I have attached new Diagnostics. diagnostics-20210903-0037.zip

-
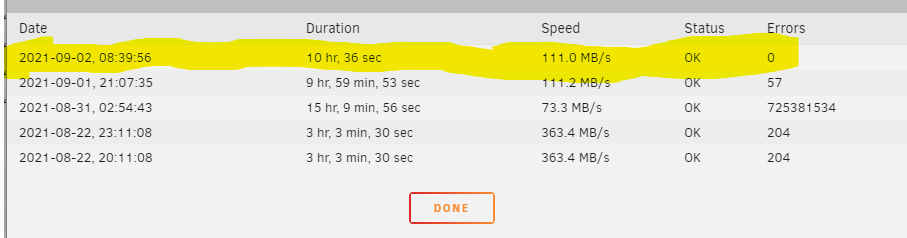
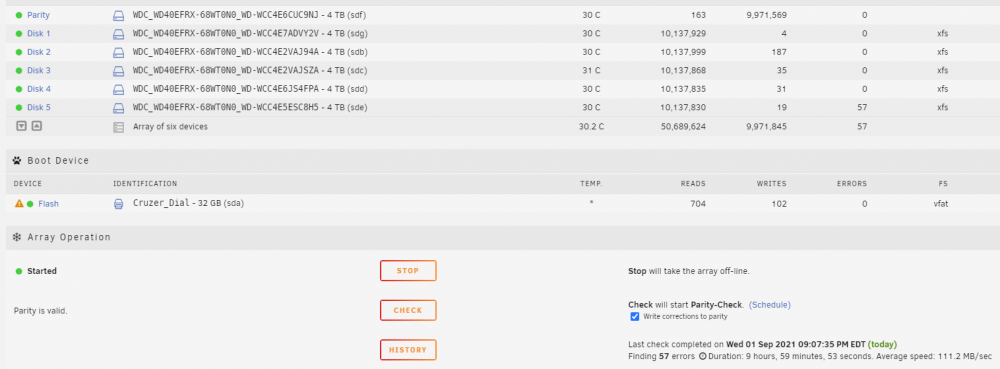
Ok, it Finished with 57 Errors diagnostics-20210901-2234.zip
-
I have gotten Errors on Disk 5 however.
-
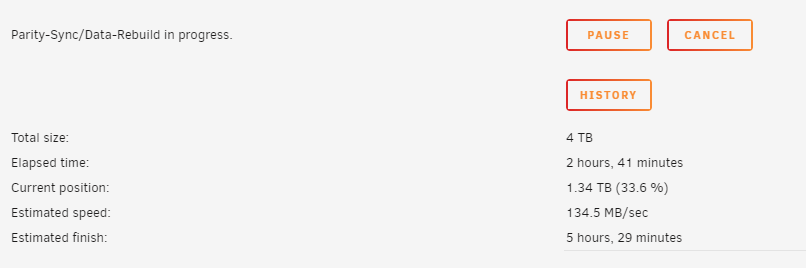
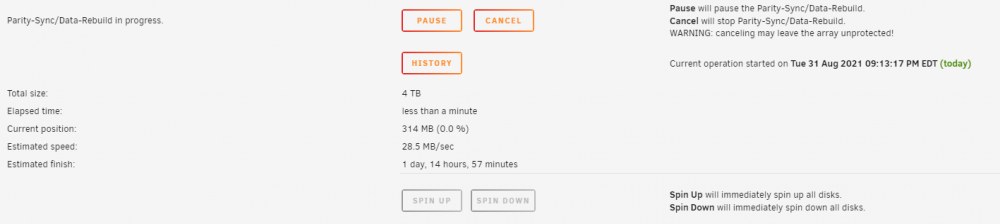
I didn't Clear the stats. I also lost power after I had gone to sleep. Upon booting back up, it started doing another Parity-sync/Data-Rebuild. So I am starting over.
-
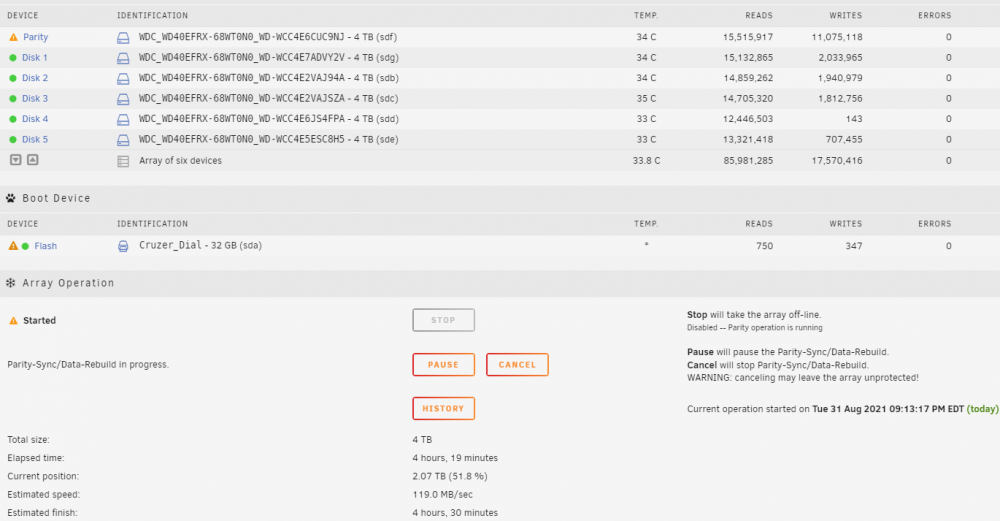
In My Previous issue with the DISK 1 slot not mounting/Formatting, the Marvel Controller was already brought up and I found that that Motherboard only uses thoes for the eSATA which are not being used in my configuration. I believe it is the standard AMD controller for the Motherboard SATA. The Speed definitely picked up after I posted. I have a bout 4 hours remaining. I will most likely not be awake when it finishes. I do not see it listing any errors as part of the Parity-check/Data-rebuild. There are also currently no disk errors listed.
-
Ok! Thanks for the Help, this looks like it will take awhile. I will let you know!
-
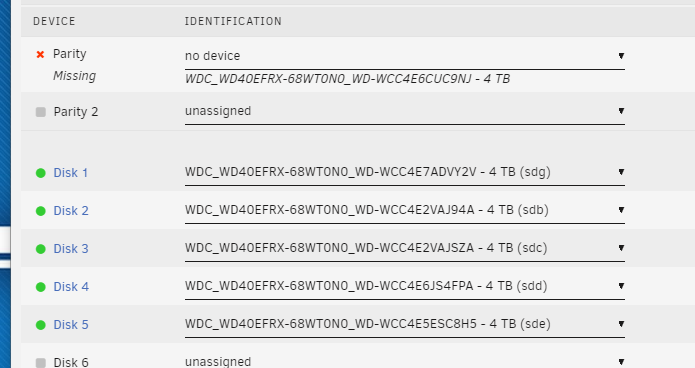
Is this Correct? No Device the same as Unassign?
-
Thanks For the Help! I will do these ASAP. Just so I am learning something, the Party Errors that i am seeing is because the first Parity check happened when I had random 1's and 0's on the drives?
-
Yea the Drives were definitly used before I got them, so they definitly were not zero'ed out. Is there any risk of Data loss performing these Steps? And Should I wait until I finish moving my data over or stop moving Data and do these now?


