


Nick Kos
Members
-
Joined
-
Last visited
-
You can find the workaround here:
-
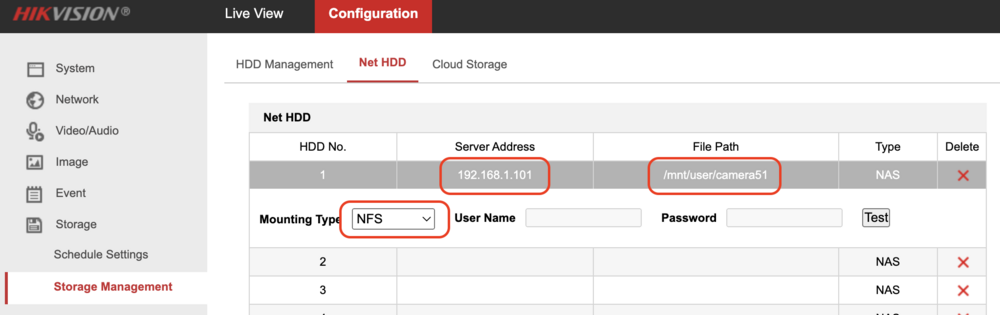
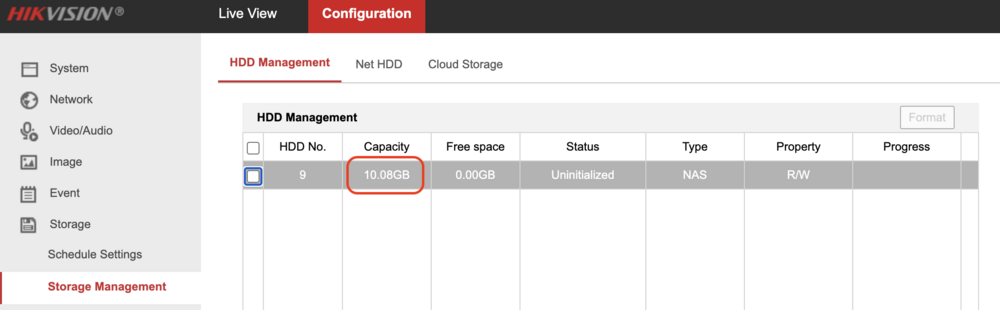
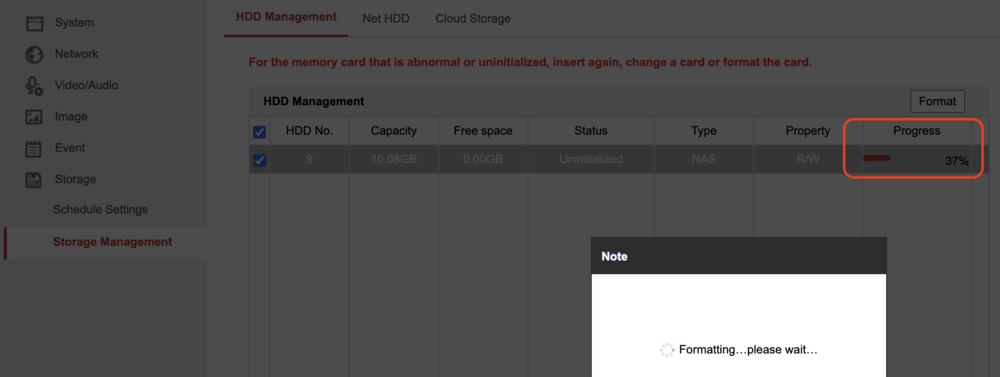
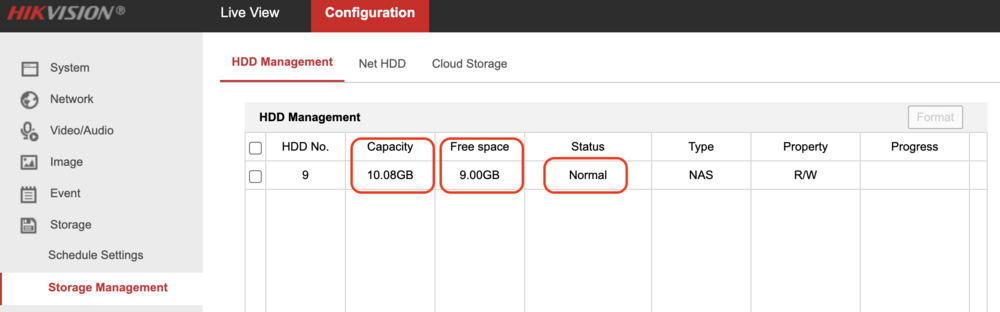
The workaround on how to make Unraid shares with quota. It will work with Hikvision cameras well. 1. Make the directory where you will store .img files for shares. I prefer to do this on cache (/mnt/cache), in the folder "system", to keep access fast. However, you can choose "/mnt/user" if you want, it is "more Unraid way". "cameras" is the name of folder where to store *.img files. Type the command in the terminal: mkdir -p /mnt/cache/system/cameras 2. Create .img files with the size (quota) you want. In my case, it is the 10 GB, but you can type any another size: fallocate -l10g /mnt/cache/system/cameras/51.img fallocate -l10g /mnt/cache/system/cameras/52.img fallocate -l10g /mnt/cache/system/cameras/53.img 3. Make the filesystems in the .imgs. I prefer ext4, but you can choose btrfs if you know why you need it - it will work as well: mkfs.ext4 /mnt/cache/system/cameras/51.img mkfs.ext4 /mnt/cache/system/cameras/52.img mkfs.ext4 /mnt/cache/system/cameras/53.img 4. Go to your Unraid Web GUI, to the tab "Shares". And make required shares, using "Add share" button. Enter your "Share name:", for example, "camera51". "Primary storage (for new files and folders):" - "cache" - actually, it does not matter, but I prefer to set "cache". Press "Add share" button. After creation, go to the section "NFS Security Settings" a bit below and choose "Export:" - "yes". Press Apply. Note 1: Hikvision works better with NFS, however, you can share Samba as well in the "SMB Security Settings" section. Note 2: If you have no NFS section - press "Add share" button, or read this official instruction: https://unraid.net/fr/blog/deploying-an-unraid-nfs-server Repeat this step as much as you made images (in my case I have camera51, camera52, camera53 shares). You should have one "share" for each one .img 5. Mount your .imgs in the corresponding shared folders. Double-check that no errors during the mounts, don't move to the next steps while you do not fix them. Pay attention - your file system (ext4) in mount should correspond to mkfs you did on step 3: mount -r -t ext4 -o loop,rw /mnt/cache/system/cameras/51.img /mnt/user/camera51/ mount -r -t ext4 -o loop,rw /mnt/cache/system/cameras/52.img /mnt/user/camera52/ mount -r -t ext4 -o loop,rw /mnt/cache/system/cameras/53.img /mnt/user/camera53/ It would be better to mount these folders to cache (/mnt/cache/camera51, ...), however, if somebody makes share on the array instead of cache it will not work. So, the "user" is more safe. 6. Add folder mount commands to the start script. Edit /boot/config/go and add to the end: # mount .imgs for cameras (sleep 20 && /sbin/mount -r -t ext4 -o loop,rw /mnt/cache/system/cameras/51.img /mnt/user/camera51/) & (sleep 20 && /sbin/mount -r -t ext4 -o loop,rw /mnt/cache/system/cameras/52.img /mnt/user/camera52/) & (sleep 20 && /sbin/mount -r -t ext4 -o loop,rw /mnt/cache/system/cameras/53.img /mnt/user/camera53/) & Where "sleep 20" is - wait 20 seconds while the system mounts all necessary drives and services, after which it will mount your .imgs. The "&" at the end sends these tasks to the background and allows the system to continue loading. If your system doesn't mount disks - check "mount" again for errors or try to set a higher number for "sleep", for example, 60. I know that this is not the best solution. Appreciate it if you could suggest better. However, it is work. 7. Optional: reboot Unraid to be sure that everything working properly, and .imgs mounts automatically. Congratulations! That's all. You have made quota shares in Unraid. Only for Hikvision: 8. ext4 makes "/lost+found" folder on the new drive automatically. It is a trouble, because you can't format drive on your Hikvision cameras. Drive must be empty. So delete "/lost+found" folders in each created shares: rmdir /mnt/user/camera51/lost+found rmdir /mnt/user/camera51/lost+found rmdir /mnt/user/camera51/lost+found 9. Assign your nfs drives to the Hikvision cameras, like this: Format drive. If the format fails - try this workaround: go to Unraid WebGUI, "Shares" -> your share. Edit "Minimum free space:", for example, set it to 1GB. Press "Apply'. This forces Unraid to reload share services, including NFS. After this Hikvison camera is able to format a drive, even despite the wrong free size. Yes, it is Hikvision, trouble with network drives existed a dozen+ years ago. Get luck! I would appreciate any improvements you can suggest.

-


