


Tanne
Members
-
Joined
-
Last visited
Everything posted by Tanne
-
I don't know if it will work with any mainboard, so considering that I can only say for mine that it definitely works. But I think as long as the IOMMU groups are seperated nicely it should work in theory. Even if they are not seperated you can set PCIe ACS Override to Both in the VM Manager Settings (Settings -> VM Manager). Then you should be able to seperately pass them through. If you are encountering crashes but the passthrough does work you might also want to use "video=efifb:off" as kernel parameter. For that you have to click on Main, then the Flashdrive and then you scroll down and add this parameter to the boot option that you use for unraid.
-
My motherboard is a gigabyte DS3H B550M
-
Hi, after reading this thread over and over and trying every method mentioned here it failed for me. As I didn't want to accept the fact that it worked for 6.9.2 but not for 6.10.3 and I absolutely didn't want to use a dedicated gpu I kept fiddling with the settings and finally got it to work for 6.10.3 as well as the 6.11.rc3, my 5700G is also the only gpu in the system, so no dedicated gpu is installed. But it only worked with windows 10 as I didn't find a way yet to prevent the RadeonResetBug in linux, once I tried fixing this for linux distros I will update my post. As I am using the german version of windows 10 it can be that i translated some buttons or window names wrong, if something stays unclear feel free to ask and I will supplement some pictures. The steps for both unraid versions were exactly the same. Prerequisites: 1. You need to extract the vbios for your igpu from the respective bios version of your mainboard, for this step I just followed the steps mentioned by wx-Rmt in this Post. Just download the bios version you have currently installed from your motherboard manufacturer and follow the steps: After extracting the vbios place it somewhere on your Cache drive, I like to have it close to the VMS so i placed it in a folder called vbios in the domains share from unraid. My extracted vbios had the ending .dat so i had to edit it and replace .dat by .rom 2. You have to bind your igpus vga controller and audio device to vfio at boot of unraid For that go to Tools -> System Devices Now your actions depend on what you are seeing, if the VGA controller and the audio controller for your IGPU are already in seperate groups you just mark them and hit "bind selected to vfio at boot" If they are not in seperate groups you can do multiple things - update your bios, more recent bios versions often have better iommu groupings - if the bios update alone did not help or you dont want to update your bios you go to Settings -> VM Manager and then select Both in the PCIe ACS override setting, as well as setting VFIO allow unsafe interrupts to yes After then rebooting your unraid server the IOMMU groups should be seperated So go back to Tools -> System Devices, there select your igpus VGA and Audio Controller and hit Bind selected to VFIO at boot, then reboot your unraid server again and you should be good to go. Once you have your Igpus vbios extracted and set up the iommu groups you can begin creating the vm 1. Create a windows 10 VM with the following settings: machine: Q35-6.2 bios: SeaBIOS hyper-V: yes The rest was completely standard settings, for now don't pass through the igpu yet, keep it on VNC to set everything up 2. Start the VM and install windows 10 During the installation Windows will not see the hard drive to install on until you have installed the virtio drivers, so you have to select the option to load drivers and then select them from the virtio cd. I have installed the virtio drivers in the following order: 1. Baloon 2. NetKVM 3. vioseriel 4. viostor Viostor makes windows able to see the virtual harddrive and the installation can continue. Just follow the installation until it is done. 3. Setting up Windows Once windows is installed and you booted into it you have to open System Control, in the top right select large symbols and then click on System. In the System Window you go to advanced system settings, in the then opened new window you click on Hardware, then on device installation settings and then select no, then press save settings. Still inside the advanced system settings open the device manager. If in network devices your lan connection is still not working you right click it and uninstall it with deleting drivers. After uninstalling your network device you go to the top of the device manager and look for the option "look for changed hardware", your network device that is not installed should then show up again. Right click your network device and click on update or install drivers, then you select the option to manually search for the driver on your computer and just select the virtio cd as source, then press ok and windows will automatically install the network device drivers. 4. Download the latest amd driver for your igpu as well as the RadeonResetBugFix https://drivers.amd.com/drivers/whql-amd-software-adrenalin-edition-22.5.1-win10-win11-may10.exe https://github.com/inga-lovinde/RadeonResetBugFix After downloading those 2 things just place the RadeonResetBugFixService.exe on your virtual windows harddrive (so just in C:/ ) 5. Activate Remote Desktop Again go to System Control, then click on System, then on Remote Desktop, activate Remote Desktop On the bottom you click on select user for Remote Desktop Access, in the new window you click add, then advanced and in the new window on the right you click search now, if Administrator is selected you just press ok, again ok and one more time ok. For being able to use Remote Desktop your User needs to have a password set, so if you did not set a login password in the installation go to System Control, Useraccounts and add a password for your user. Finally check your ip in your windows vm and test if the Remote Desktop connection is working by using Remotedesktop to login into your VM. If your Remote Desktop connection worked you can shut down the windows vm. 6. Changing the VM Settings for passthrough Once your VM is shut down you edit it, instead of VNC you now select your IGPU as Graphics Card Just below the Graphics Card in "Path to ROM BIOS file" you must now select the vbios you extracted earlier. (Remember that you had to change the .dat ending of your vbios to .rom, if you did skip this step unraid will not recognize the bbios file) Once you've selected the vbios file you also add your IGPU Audio Controller as Soundcard. Save the settings for the VM, but don't start it yet, we still need to edit the xml. After saving the VM click edit again and once the VM settings open again you click the button in the top right corner to get from "Form View" to "XML View" In the xml file we now have to add some lines and edit some as well. 6.1. add a random combination of letters and numbers for your vendor_id value, you should find it just above </hyperv> It should be exactly 12 letters and numbers in combination, they can be completely random as long as there are 12 <vendor_id state='on' value='3D6L09A17K3O'/> </hyperv> 6.2. add the following lines of code just below </hyperv> <kvm> <hidden state='on'/> </kvm> 6.3. add the following lines of code at the bottom just after </devices> and before </domain> <qemu:commandline> <qemu:arg value='-set'/> <qemu:arg value='device.hostdev0.x-vga=on'/> </qemu:commandline> 6.4. A bit above the last addition you should find your igpu device it should look something like this: Your selected busses or slots may have different numbers <hostdev mode='subsystem' type='pci' managed='yes'> <driver name='vfio'/> <source> <address domain='0x0000' bus='0x05' slot='0x00' function='0x0'/> </source> <rom file='/mnt/user/domains/Win10TV/5700G.rom'/> <address type='pci' domain='0x0000' bus='0x04' slot='0x00' function='0x0'/> </hostdev> <hostdev mode='subsystem' type='pci' managed='yes'> <driver name='vfio'/> <source> <address domain='0x0000' bus='0x05' slot='0x00' function='0x1'/> </source> <address type='pci' domain='0x0000' bus='0x05' slot='0x00' function='0x0'/> </hostdev> In this part we have to edit a few things and add something, you will have a adress in the source part and an adress outside of the source part for each hostdevice We only need to edit the adress part for the hostdevice, the adress in the source part should not be touched. In the hostdevice adress below the line with the rom file we have to add multifuntion='on' so after function='0x0' just add a space and add the parameter. This is your vga controller and it should look like this: <hostdev mode='subsystem' type='pci' managed='yes'> <driver name='vfio'/> <source> <address domain='0x0000' bus='0x05' slot='0x00' function='0x0'/> </source> <rom file='/mnt/user/domains/Win10TV/Cezanne.rom'/> <address type='pci' domain='0x0000' bus='0x04' slot='0x00' function='0x0' multifunction='on'/> </hostdev> Then we should edit the hostdevice for the audio controller below, we have to make sure that in the adress the bus and slot ids match up with the ids from your vga controller. Once you made sure to change the bus and slot ids to the same value as those of your vga controller you only have to edit the id for function from 0x0 to 0x1 After editing it should look like this: <hostdev mode='subsystem' type='pci' managed='yes'> <driver name='vfio'/> <source> <address domain='0x0000' bus='0x05' slot='0x00' function='0x1'/> </source> <address type='pci' domain='0x0000' bus='0x04' slot='0x00' function='0x1'/> </hostdev> After doing all the changes to the xml we can save the vm settings and start the vm again. If you encounter crashes booting the VM you might have to add the kernel parameter "video=efifb:off" For doing that you should click on Main, then your Flashdrive and then when you scroll down you add this parameter to the boot option that you use for booting unraid. 7. Once the vm has booted you may already have a video output on your display, but ignore that for now and use Remote Desktop to login into your VM. Once logged in you install the previosly downloaded AMD driver. IMPORTANT: After installing the driver DO NOT REBOOT YET!!! Once the driver installation is finished we still have to install the RadeonResetBugFix. If you have moved the RadeonResetBugFixService.exe into your Windows drive you can follow the following steps to install it: 7.1. In the searchbar type cmd, right click it and select start as administrator 7.2. In the cmd type "cd C:/" 7.2. In the cmd type "RadeonResetBugFixService.exe install" and wait for the installation of the service to finish, this can take a minute, IMPORTANT: do not delete the RadeonResetBugFixService.exe after installing it, because it will then stop working. That's it, your windows VM should now be working. When you start yourt VM it can sometimes take 1-2 minutes until the RadeonBugFix activates your GPU, so during that time your display could be black until it is activated, but most of the time the display should turn on immeadiately. I hope this explanation or more likely wall of text of the steps I took to get it working will help someone. It can be that some steps are not needed, but those are all the steps I used to get it working on my machine, so if someone with more knowledge about VMs can point out what maybe is not needed anymore I would appreciate it. If you have any questions or I used a wrong translation for something feel free to ask and I will try to clarify with pictures or better translations. Tanne
-
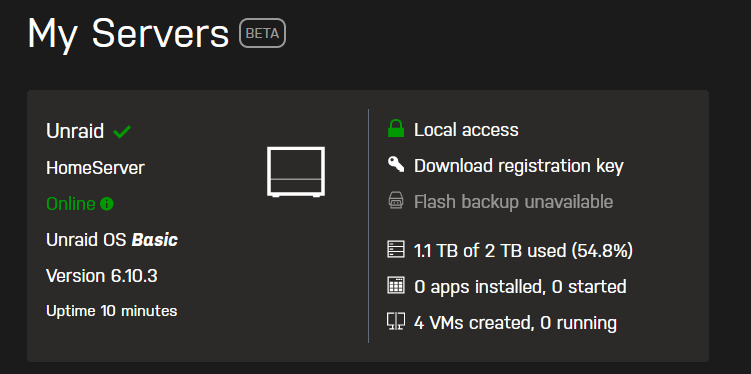
Hey i just logged out and signed back in, also I just reinitialized the flash backup function. I also restarted the server a few times because of fiddling around with vms, maybe I was offline when you checked. If i click on My Servers Dashboard this is what it shows: Remote Access etc. is also working if i turn it on, so some form of connection is definitely working. Just the backup function still does not work. Can it maybe help to reinstall the myservers Plugin? Or maybe update to the current rc-version of unraid? Thanks again for your help
-
Thanks for the quick answer, I guess the issues are still persisting as I still dont have the backups working.
-
Hello, I am having the same issue as a few others in the forum. I installed unraid and got everything up and running, but the flash backup from the my servers plugin won't do anything even though it is activated. I reinitialized a few times with no backup happening at the end, I also tried to manually click Update button, but no backup got done. On the my-servers site my server is shown as online, just the Flash backup option says "Flash backup unavailable" in grey. DNS Servers used are from google: 8.8.8.8 and 8.8.4.4 and their respective ipv6 versions: 2001:4860:4860::8888 and 2001:4860:4860::8844 I tried pinging backup.unraid.net from the terminal and the ip 54.70.72.154 got resolved but all packets transmitted were lost. I then used traceroute to find out weather there was a routing problem, it never arrived at 54.70.72.154 Here is part of my traceroute after that it just continues with * * * for every line Do I need to forward a port for the flash backup to work ? Is maybe my provider having problems so I cannot reach the backup server? I just don't know where to look for a solution as most others in the forum with the same problem had it resolved without doing anything. I hope you can help me fixing this problem Thanks in advance


