





Squazz
Members
-
Joined
-
Last visited
Everything posted by Squazz
-
Thanks! It was quite some time underway, but I got there at last Thank for the inputs, I'll look more closely at your suggestions Haha, yeah I know. Wiring is always my nemesis. I will get to it at some point, but right now I just reconfigure the setup on a bi-daily basis Do trust though that I will post an updated picture when I get everything sorted out
-
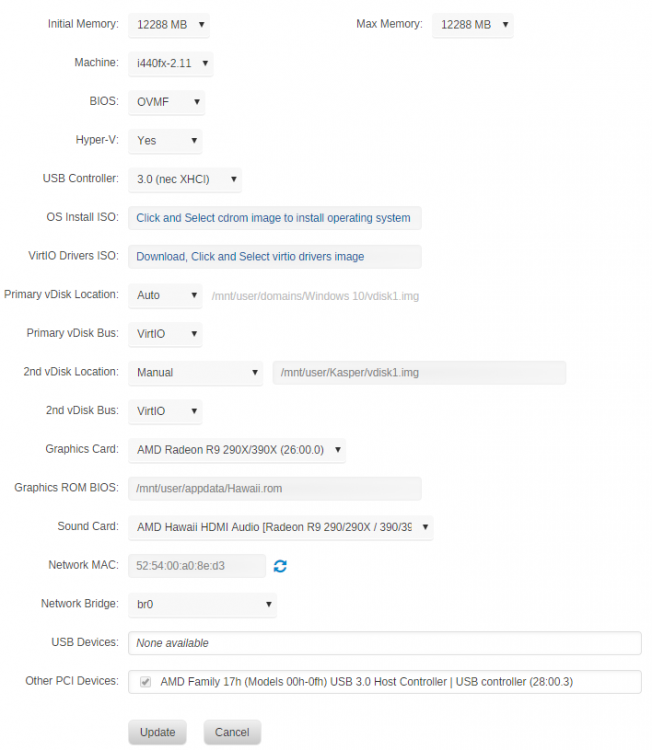
I had quite a lot of problems getting my GPU passthrough to work properly, so for reference is here the way my Win10 VM ended up being configured. I got a lot of help getting it working in this thread: But this was not enough. I still had problems with with extremely low framerates in games like League Of Legends. A little change here and there made it work in the end. One of the contributing factors to getting it to work, I think is the fact that I ended up stubbing an entire USB controller on the motherboard, and then just plug every USB device I had in there. Until I did that I had a lot of weird problems. I used the following Syslinux configuration: And I have the following system devices
-
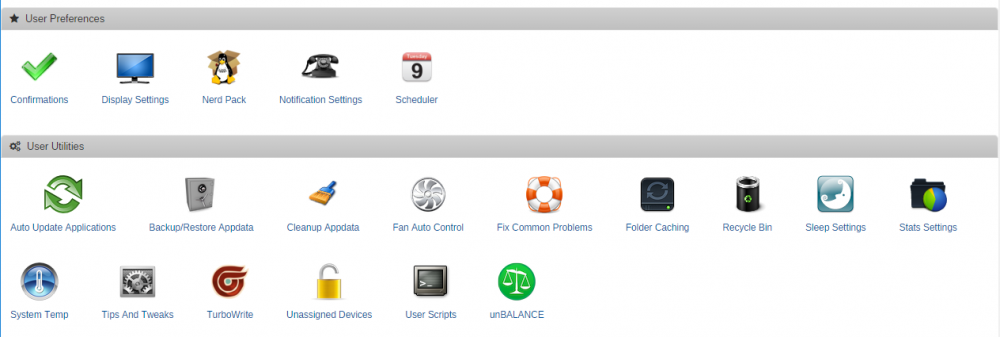
I will use this post to describe the software side of how I have everything set up. Unraid Plugins & Dockers - CA Auto Turbo Write Mode - Dynamix Auto Fan Control (My system is so quiet now) - Dynamix Cache Directories (Makes navigating foldes on the array faster, and possible without spinning up drives) - Dynamix S3 Sleep (Disabled now, never kicked into effect, gonna try to make this work at some time) - Dynamix SSD TRIM - Dynamix System Buttons - Dynamix System Statistics - Dynamix System Temperature - Tips and Tweaks (At little of this, and a little of that) - Recycle Bin (This one has saved me too many times) - Unassigned Devices (Used to move my VMs out of the cache, and unto an unassigned SSD) - unBALANCE (Perfect to move data between physical drives) - User Scripts (Used for Zenstates & automatic backups of VMs) - Nerd Pack (Used to install python) - Plex (Docker) - Binhex-Krusader (Docker) - MakeMKV (Docker) - SteamCacheBundle ( Docker) - Used for cache for Windows updates (I am the only gamer in the house) Plex plugins Agents to use Kodi / XBMC metadata: - XBMCnfoMoviesImporter - XBMCnfoTVImporter - Trakt Scrobbler Zenstates (Fixing the problem where gen1 Ryzen won't boost in unRaid) I had quite some problems with my speed and Cinebench score of my Ryzen 1700. I have made a post in General Support about this, but here is the post for your convenience. The first step is to use the plugin "TipsAndTweaks" to change the "CPU Scaling Guvenor" to "On Demand". In my case it was set to "Power Save" as default. This moved my from about 550 to 1170 in CineBench. A noticeable change. Looking at the at terminal with the following command, it was wasy to see that my Ryzen 1700 just wouldn't boost properly when using Cinebench: To fix this Download zenstates from https://github.com/r4m0n/ZenStates-Linux/blob/master/zenstates.py Save the script in a share under the name zenstates.py (I chose /mnt/user/appdata) Use NerdPack to install python (Needed for executing the python script) I used the UserScripts plugin to set up this script. Running every time that my array starts. I got the script from @david279 I only apply for P0 as that is the only state I'm interested in. The rest is up to CPU to downclock itself After all of these changes, CineBench score jumped from 550 to 1420. So I'd said everything worked out just fine Win10 VM related Steam Game files are on a separate share just for this. Most games runs as the administrator user. You'll have to map your share for that administrator user. Remember to map the share to the same drive-letter as your main-user has it. Dropbox, Google Drive & Blizzards Battle.NET These guys really don't want you to have your files on a network share. I created a 700Gb vDisk and assigned this one to my VM. Now it shows up as a perfectly normal drive in Windows. The vDisk is placed in a share with enough spare space. When this was set up, everything was set up as I would on any non-VM Win10 machine. Scrobbling Getting this working between different devices demands a little setup on every device / system used. Kodi: Plex: As mentioned earlier I use Trakt Scrobbler to scrobble between devices and keep Trakt updated with what I have watched. Make sure "Sync - Run every" is set to run at a fixed interval. I had to uncheck "Sync - Defer until server is idle", in order to make the sync run. It only takes 3 seconds for my setup anyway.
-
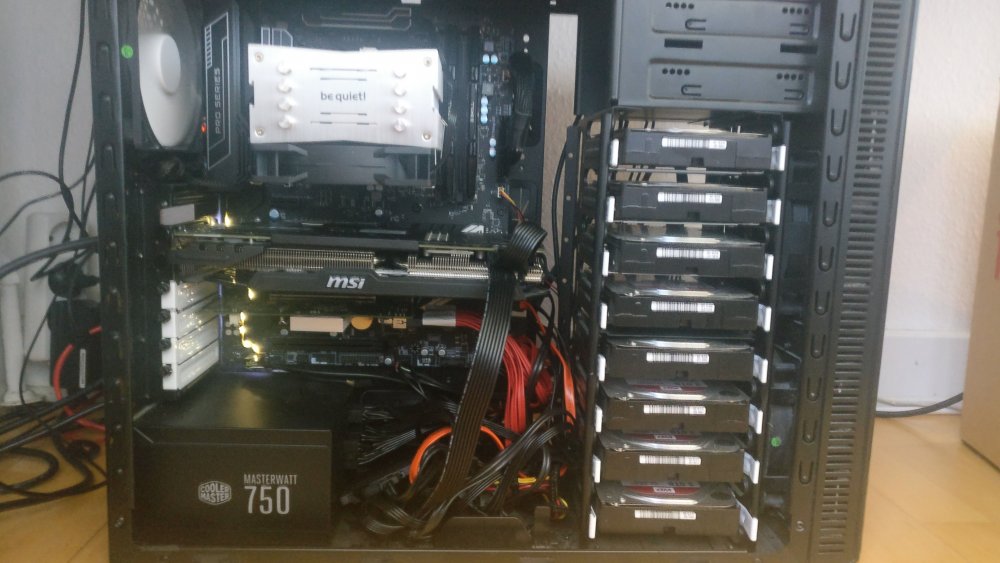
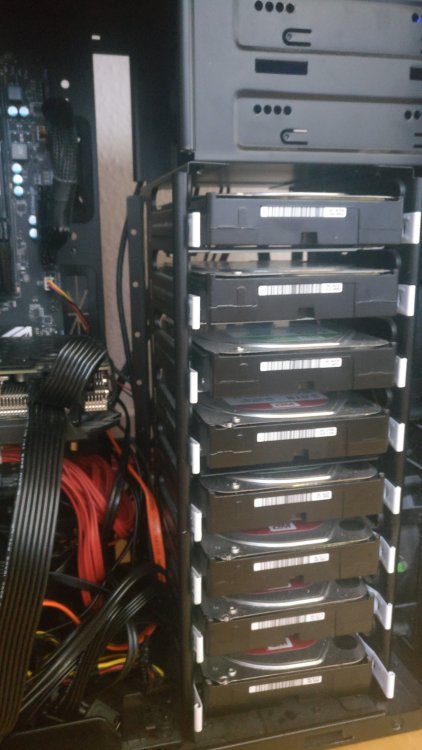
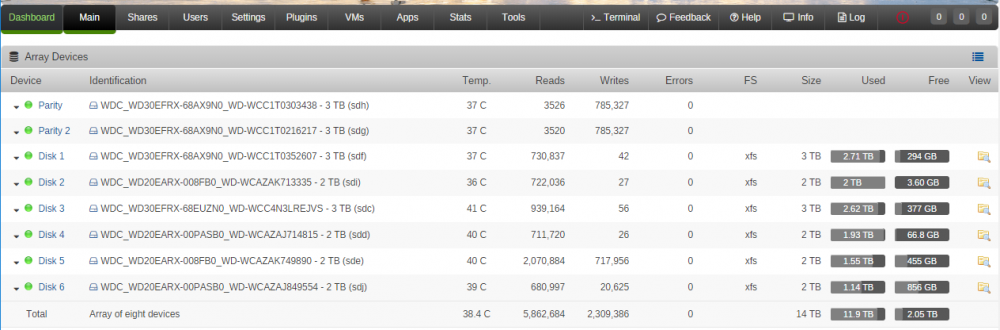
Now this build is only starting. I might expand this post in the time to come. There's a lot I want to add to the the system, but I thought I'd start out with what I got. Also, I see people thinking about building a Ryzen setup, so here's my take on it. Also, I'm using a AMD 290X GPU, for those wondering if that's working ok. I'm no big photographer, so you'll have to bear with the images. But before we begin, a warning for future Ryzen builders out there: This cannot be stressed enough. It generated me a lot of headaches that I didn't update the BIOS to begin with before I did anything else. Also: Lastly I know, I know, Ryzen LOVES memory speeds. And were you building a normal desktop computer it would be fine to cram up the speed of your memory sticks. But with unRaid, and everything else where you want reliability, you don't want to go out of the spec for your memory controller. Here is the spec for the Ryzen 1700: https://en.wikichip.org/wiki/amd/ryzen_7/1700#Memory_controller For Dual Rank memory, the memory controller on the Ryzen 1700 is only supporting 2400Mhz. The kit I have, is dual rank memory. You can check out if your memory is dual or single rank here: https://www.reddit.com/r/Amd/comments/649ay8/ram_collection_thread_please_post_your_ram/ Ok, with that out of the way, onwards with the build! The system is at the moment rocking the following hardware. Basics CPU: Ryzen 7 1700 (65W) CPU Cooler: BeQuiet Pure Rock Motherboard: MSI MS-7A33 motherboard Ram: 16GB (2x 8GB 2400Mhz) PSU: Cooler Master MasterWatt 750 Case: Fractal Design Define R5 Raid drive: LSI 9201-8i GPU: MSI Radeon 290X 8Gb Drives: Parity: 2x 3TB WD Red Cache: 1x 128Gb 840 EVO Data: 2x 3TB WD Red, 4x 2TB WD Red, 2x 2Tb Seagate Hybrid Drive Unassigned / VM-drive: 1x 128Gb 840 PRO (This solved SO many bottlenecks!) It's a mouthful of drives, but they are what I had laying around (I have a bunch of 2Tb drives laying around still), and it seemed stupid to buy new 8Tb drives when I had well functioning drives at hand. The drives are placed physically in the order they are shown in unRaid. It makes it SO MUCH easier when something goes wrong. The Origins My first NAS was a "ReadyNas" ultra 4 plus, nothing wild, but it got me going. For the past 10 years I have had a gaming computer. It was gradually upgraded with various components. At some point I figured I might be able to build a NAS stonger and better than the ReadyNas I had at the moment. As parts was replaced in my main gaming PC, I had enough spare parts to build myself a mini-server based on a 2600K CPU. I first tried out a Windows Server build, using storage spaces, but in the end I got too irritated at it, and my wife got tired of all of my hardware lying around. All of the hardware was sold, and the setup I have now was bought, time to combine everything into one case and save both space and power. The main reason I chose unRaid was that I needed a way to gradually expand the array, one drive at the time. Power readings 190w - Startup peak 100w - Watching movie (all drives but one spun down) 130w - Idle (Win10 Desktop open) 170w - Light use (Wathing Netflix on win10 VM) 350w - Gaming Current state The server functions as my gaming machine as well as my NAS. Nothing more at the moment. I have the following planned for some time in the future: TV server - It's about time... pfSense router - will take some reconfiguring of the home network Kodi MySQL database - I only have one Kodi machine at the moment, but I have always wanted to set it up with a MySQL database Plex - Almost done with the movie setup. Music has logistical problems. Storage expansion - I'm soon gonna run out of space Invest in more RAM Windows Server VM with Windows Server Update Services - to control all updates of my different Windows machines. This is now handled by SteamCache as that fits my needs and can run in a docker There seems to be problems with SteamCahce and Windows Update. Stopped using StamCache for now Set up webserver Find a good music streaming service tun run in a docker (maybe Plex can get me covered here) Find a way to have VMs running in other rooms Find a way to start turned off VMs without going through the unRaid interface Do feel free to write me about ideas for what to set up next, as well as plugins that I might find usable

-
Thank you for your response I might end up doing the same. I have looked into SyncBack and it seemed slow. Have you had any experience with this? For me it took 5 days to sync 800Gb on a 50MBit connection
-
I've looked into this solution myself. How did it go for you? And how about licensing, have you needed to keep the software upgraded in order to keep on using it?
-
Awesome!
-
Is it just me, or are none of the links in the first post working anymore?





