





mt3
Members
-
Joined
-
Last visited
Everything posted by mt3
-
So I just set up COPS, I pointed /books to my metadata.db file in calibre but nothing shows up in CCOPS. I get to the webui but all books says 0. I have no idea what else to do...any thoughts on what I am missing
-
Thanks, I'll give that a shot and see what happens. It's crashing anywhere from 1 day to 7 so it will be a bit but hopefully this dies the truck. Thanks again
-
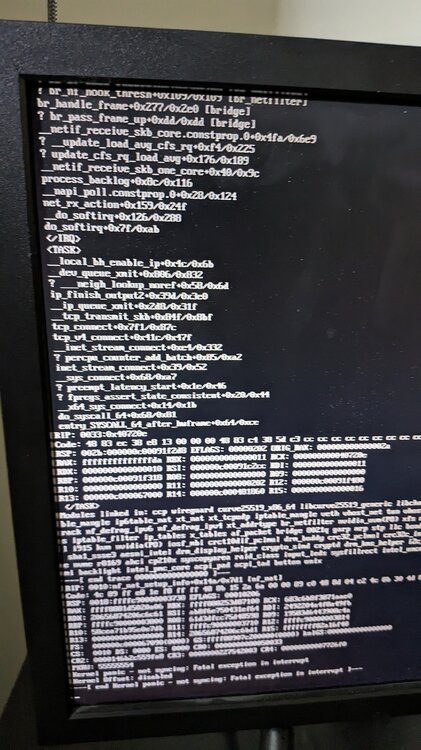
So it has crashed several times but nothing ends up in that log. I hooked up a monitor and took a picture after it crashed. I hope this helps.
-
-
So over the last few days I will go and access my server and can't access the webui or SSH into the server. The only way to get it back up and running is to manually shut ti down and power it back up again. This problem just started as soon as I moved into a new house, that's probably unreleated just seems like a weird coincidence. I have looked at the logs but I'm not smart enough to figure out what could be causing it so I was hoping somene could help push me in the right direction. mt3-diagnostics-20240405-0930.zip
-
I have had hardware transcoding working for over a year and a few weeks ago it stopped working, I just did a restart and it started working again. Yesterday it stopped working again and I have tried everything to get it up and running. My unraid server has a Nvidia GPU and Intel Quick Sync and I think for some reason Plex is trying to use the NVIDIA GPU even through I have it sert up for quick sync I do have the extra parameters and new device path set to Quick Sync but my Plex logs have this error in it when I try to transcode [Req#560d/Transcode] [FFMPEG] - Cannot load libcuda.so.1 [Req#560d/Transcode] [FFMPEG] - Could not dynamically load CUDA [Req#560d/Transcode] Codecs: hardware transcoding: opening hw device failed - probably not supported by this system, error: Operation not permitted [Req#560d/Transcode] Could not create hardware context for h264_nvenc [Req#560d/Transcode] MDE: Cannot direct stream video stream due to profile or setting limitations [Req#560d/Transcode] Codecs: testing hevc (decoder) with hwdevice vaapi [Req#560d/Transcode] Codecs: hardware transcoding: testing API vaapi [Req#560d/Transcode] [FFMPEG] - Failed to initialise VAAPI connection: -1 (unknown libva error). [Req#560d/Transcode] Codecs: hardware transcoding: opening hw device failed - probably not supported by this system, error: I/O error [Req#560d/Transcode] Could not create hardware context for hevc [Req#560d/Transcode] Codecs: testing hevc (decoder) with hwdevice nvdec [Req#560d/Transcode] Codecs: hardware transcoding: testing API nvdec any ideas? I am at a loss
-
Looks like that was it, for some reason there was a 2nd port configuration. Not sure how this happened but it reinstalled so thank you!
-
So I have had TDARR up and running for months now with zero issues. Today I noticed some of my new media was still in H.264 so I went to check and Tdarr was no longer in my docker list. I went to advanced and saw Tdarr and the node there as orphaned image. I went to reinstall and the install keeps failing. Anyone have any idea wat could have happened or how I can fix this?
-
I have been at this for awhile and I can't seem to figure this out. So all my drives will randomly spin up all together. Using the file activity plugin it shows that every media file across all the drives is being accessed. If I manually spin them down they will all spin up again within the hour. My first through was maybe a plex setting that is scanning all the files but I didn't seem to find anything. Any ideas would be greatly appreciated.
-
don't get that error anymore (I made a small syntax mistake) but after the change I still get the black screen. Attached is my diagnostic zip file mt3-diagnostics-20210814-1244.zip
-
I dumped my bios using the spaceinavder one user script, I tried making the xml change you suggested and got this error when I updated VM creation error XML error: Attempted double use of PCI Address 0000:04:00.0
-
Here is the XML if that helps <?xml version='1.0' encoding='UTF-8'?> <domain type='kvm'> <name>Windows 10 - GPU</name> <uuid>4133c049-be01-a066-2757-2e4c9d1358de</uuid> <metadata> <vmtemplate xmlns="unraid" name="Windows 10" icon="Win10_Nvidia.png" os="windows10"/> </metadata> <memory unit='KiB'>16777216</memory> <currentMemory unit='KiB'>16777216</currentMemory> <memoryBacking> <nosharepages/> </memoryBacking> <vcpu placement='static'>8</vcpu> <cputune> <vcpupin vcpu='0' cpuset='2'/> <vcpupin vcpu='1' cpuset='8'/> <vcpupin vcpu='2' cpuset='3'/> <vcpupin vcpu='3' cpuset='9'/> <vcpupin vcpu='4' cpuset='4'/> <vcpupin vcpu='5' cpuset='10'/> <vcpupin vcpu='6' cpuset='5'/> <vcpupin vcpu='7' cpuset='11'/> </cputune> <os> <type arch='x86_64' machine='pc-q35-5.1'>hvm</type> <loader readonly='yes' type='pflash'>/usr/share/qemu/ovmf-x64/OVMF_CODE-pure-efi.fd</loader> <nvram>/etc/libvirt/qemu/nvram/4133c049-be01-a066-2757-2e4c9d1358de_VARS-pure-efi.fd</nvram> </os> <features> <acpi/> <apic/> <hyperv> <relaxed state='on'/> <vapic state='on'/> <spinlocks state='on' retries='8191'/> <vendor_id state='on' value='none'/> </hyperv> </features> <cpu mode='host-passthrough' check='none' migratable='on'> <topology sockets='1' dies='1' cores='4' threads='2'/> <cache mode='passthrough'/> </cpu> <clock offset='localtime'> <timer name='hypervclock' present='yes'/> <timer name='hpet' present='no'/> </clock> <on_poweroff>destroy</on_poweroff> <on_reboot>restart</on_reboot> <on_crash>restart</on_crash> <devices> <emulator>/usr/local/sbin/qemu</emulator> <disk type='file' device='disk'> <driver name='qemu' type='raw' cache='writeback'/> <source file='/mnt/user/domains/Windows 10 - GPU/vdisk1.img'/> <target dev='hdc' bus='virtio'/> <boot order='1'/> <address type='pci' domain='0x0000' bus='0x03' slot='0x00' function='0x0'/> </disk> <disk type='file' device='cdrom'> <driver name='qemu' type='raw'/> <source file='/mnt/user/isos/Windows.iso'/> <target dev='hda' bus='sata'/> <readonly/> <boot order='2'/> <address type='drive' controller='0' bus='0' target='0' unit='0'/> </disk> <disk type='file' device='cdrom'> <driver name='qemu' type='raw'/> <source file='/mnt/user/isos/virtio-win-0.1.190-1.iso'/> <target dev='hdb' bus='sata'/> <readonly/> <address type='drive' controller='0' bus='0' target='0' unit='1'/> </disk> <controller type='usb' index='0' model='ich9-ehci1'> <address type='pci' domain='0x0000' bus='0x00' slot='0x07' function='0x7'/> </controller> <controller type='usb' index='0' model='ich9-uhci1'> <master startport='0'/> <address type='pci' domain='0x0000' bus='0x00' slot='0x07' function='0x0' multifunction='on'/> </controller> <controller type='usb' index='0' model='ich9-uhci2'> <master startport='2'/> <address type='pci' domain='0x0000' bus='0x00' slot='0x07' function='0x1'/> </controller> <controller type='usb' index='0' model='ich9-uhci3'> <master startport='4'/> <address type='pci' domain='0x0000' bus='0x00' slot='0x07' function='0x2'/> </controller> <controller type='pci' index='0' model='pcie-root'/> <controller type='pci' index='1' model='pcie-root-port'> <model name='pcie-root-port'/> <target chassis='1' port='0x8'/> <address type='pci' domain='0x0000' bus='0x00' slot='0x01' function='0x0' multifunction='on'/> </controller> <controller type='pci' index='2' model='pcie-root-port'> <model name='pcie-root-port'/> <target chassis='2' port='0x9'/> <address type='pci' domain='0x0000' bus='0x00' slot='0x01' function='0x1'/> </controller> <controller type='pci' index='3' model='pcie-root-port'> <model name='pcie-root-port'/> <target chassis='3' port='0xa'/> <address type='pci' domain='0x0000' bus='0x00' slot='0x01' function='0x2'/> </controller> <controller type='pci' index='4' model='pcie-root-port'> <model name='pcie-root-port'/> <target chassis='4' port='0x13'/> <address type='pci' domain='0x0000' bus='0x00' slot='0x02' function='0x3'/> </controller> <controller type='pci' index='5' model='pcie-root-port'> <model name='pcie-root-port'/> <target chassis='5' port='0x14'/> <address type='pci' domain='0x0000' bus='0x00' slot='0x02' function='0x4'/> </controller> <controller type='virtio-serial' index='0'> <address type='pci' domain='0x0000' bus='0x02' slot='0x00' function='0x0'/> </controller> <controller type='sata' index='0'> <address type='pci' domain='0x0000' bus='0x00' slot='0x1f' function='0x2'/> </controller> <interface type='bridge'> <mac address='52:54:00:d5:54:84'/> <source bridge='br0'/> <model type='virtio-net'/> <address type='pci' domain='0x0000' bus='0x01' slot='0x00' function='0x0'/> </interface> <serial type='pty'> <target type='isa-serial' port='0'> <model name='isa-serial'/> </target> </serial> <console type='pty'> <target type='serial' port='0'/> </console> <channel type='unix'> <target type='virtio' name='org.qemu.guest_agent.0'/> <address type='virtio-serial' controller='0' bus='0' port='1'/> </channel> <input type='tablet' bus='usb'> <address type='usb' bus='0' port='1'/> </input> <input type='mouse' bus='ps2'/> <input type='keyboard' bus='ps2'/> <hostdev mode='subsystem' type='pci' managed='yes'> <driver name='vfio'/> <source> <address domain='0x0000' bus='0x01' slot='0x00' function='0x0'/> </source> <rom file='/mnt/user/isos/vbios/EVGAGTX9801.rom'/> <address type='pci' domain='0x0000' bus='0x04' slot='0x00' function='0x0' multifunction='on'/> </hostdev> <hostdev mode='subsystem' type='pci' managed='yes'> <driver name='vfio'/> <source> <address domain='0x0000' bus='0x01' slot='0x00' function='0x1'/> </source> <address type='pci' domain='0x0000' bus='0x05' slot='0x00' function='0x0'/> </hostdev> <memballoon model='none'/> </devices> </domain>
-
So I set up a Windows VM with GPU passthrough today and everything worked fine and I was even playing a game. The I shut down the VM and I few hours loaded it up again and now the GPU won't pass through. I made no other changes. When I connect with RDP the device manager does not show my GPU, if I connect with splashtop or parsec I just get a black screen CPU - i5-10600k - I do use intel quick sync for hardware transcoding in plex GPU - NVIDIA GTX 980 my VM log when it boots up -nodefaults \ -chardev socket,id=charmonitor,fd=32,server,nowait \ -mon chardev=charmonitor,id=monitor,mode=control \ -rtc base=localtime \ -no-hpet \ -no-shutdown \ -boot strict=on \ -device pcie-root-port,port=0x8,chassis=1,id=pci.1,bus=pcie.0,multifunction=on,addr=0x1 \ -device pcie-root-port,port=0x9,chassis=2,id=pci.2,bus=pcie.0,addr=0x1.0x1 \ -device pcie-root-port,port=0xa,chassis=3,id=pci.3,bus=pcie.0,addr=0x1.0x2 \ -device pcie-root-port,port=0x13,chassis=4,id=pci.4,bus=pcie.0,addr=0x2.0x3 \ -device pcie-root-port,port=0x14,chassis=5,id=pci.5,bus=pcie.0,addr=0x2.0x4 \ -device ich9-usb-ehci1,id=usb,bus=pcie.0,addr=0x7.0x7 \ -device ich9-usb-uhci1,masterbus=usb.0,firstport=0,bus=pcie.0,multifunction=on,addr=0x7 \ -device ich9-usb-uhci2,masterbus=usb.0,firstport=2,bus=pcie.0,addr=0x7.0x1 \ -device ich9-usb-uhci3,masterbus=usb.0,firstport=4,bus=pcie.0,addr=0x7.0x2 \ -device virtio-serial-pci,id=virtio-serial0,bus=pci.2,addr=0x0 \ -blockdev '{"driver":"file","filename":"/mnt/user/domains/Windows 10 - GPU/vdisk1.img","node-name":"libvirt-3-storage","cache":{"direct":false,"no-flush":false},"auto-read-only":true,"discard":"unmap"}' \ -blockdev '{"node-name":"libvirt-3-format","read-only":false,"cache":{"direct":false,"no-flush":false},"driver":"raw","file":"libvirt-3-storage"}' \ -device virtio-blk-pci,bus=pci.3,addr=0x0,drive=libvirt-3-format,id=virtio-disk2,bootindex=1,write-cache=on \ -blockdev '{"driver":"file","filename":"/mnt/user/isos/Windows.iso","node-name":"libvirt-2-storage","auto-read-only":true,"discard":"unmap"}' \ -blockdev '{"node-name":"libvirt-2-format","read-only":true,"driver":"raw","file":"libvirt-2-storage"}' \ -device ide-cd,bus=ide.0,drive=libvirt-2-format,id=sata0-0-0,bootindex=2 \ -blockdev '{"driver":"file","filename":"/mnt/user/isos/virtio-win-0.1.190-1.iso","node-name":"libvirt-1-storage","auto-read-only":true,"discard":"unmap"}' \ -blockdev '{"node-name":"libvirt-1-format","read-only":true,"driver":"raw","file":"libvirt-1-storage"}' \ -device ide-cd,bus=ide.1,drive=libvirt-1-format,id=sata0-0-1 \ -netdev tap,fd=34,id=hostnet0 \ -device virtio-net,netdev=hostnet0,id=net0,mac=52:54:00:d5:54:84,bus=pci.1,addr=0x0 \ -chardev pty,id=charserial0 \ -device isa-serial,chardev=charserial0,id=serial0 \ -chardev socket,id=charchannel0,fd=35,server,nowait \ -device virtserialport,bus=virtio-serial0.0,nr=1,chardev=charchannel0,id=channel0,name=org.qemu.guest_agent.0 \ -device usb-tablet,id=input0,bus=usb.0,port=1 \ -device vfio-pci,host=0000:01:00.0,id=hostdev0,bus=pci.4,addr=0x0,romfile=/mnt/user/isos/vbios/EVGAGTX9801.rom \ -device vfio-pci,host=0000:01:00.1,id=hostdev1,bus=pci.5,addr=0x0 \ -sandbox on,obsolete=deny,elevateprivileges=deny,spawn=deny,resourcecontrol=deny \ -msg timestamp=on 2021-08-13 17:30:50.796+0000: Domain id=2 is tainted: high-privileges 2021-08-13 17:30:50.796+0000: Domain id=2 is tainted: host-cpu char device redirected to /dev/pts/0 (label charserial0)
-
So I set up a Windows VM with GPU passthrough today and everything worked fine and I was even playing a game. The I shut down the VM and I few hours loaded it up again and now the GPU won't pass through. I made no other changes. When I connect with RDP the device manager does not show my GPU, if I connect with splashtop or parsec I just get a black screen CPU - i5-10600k - I do use intel quick sync for hardware transcoding in plex GPU - NVIDIA GTX 980 my VM log when it boots up -nodefaults \ -chardev socket,id=charmonitor,fd=32,server,nowait \ -mon chardev=charmonitor,id=monitor,mode=control \ -rtc base=localtime \ -no-hpet \ -no-shutdown \ -boot strict=on \ -device pcie-root-port,port=0x8,chassis=1,id=pci.1,bus=pcie.0,multifunction=on,addr=0x1 \ -device pcie-root-port,port=0x9,chassis=2,id=pci.2,bus=pcie.0,addr=0x1.0x1 \ -device pcie-root-port,port=0xa,chassis=3,id=pci.3,bus=pcie.0,addr=0x1.0x2 \ -device pcie-root-port,port=0x13,chassis=4,id=pci.4,bus=pcie.0,addr=0x2.0x3 \ -device pcie-root-port,port=0x14,chassis=5,id=pci.5,bus=pcie.0,addr=0x2.0x4 \ -device ich9-usb-ehci1,id=usb,bus=pcie.0,addr=0x7.0x7 \ -device ich9-usb-uhci1,masterbus=usb.0,firstport=0,bus=pcie.0,multifunction=on,addr=0x7 \ -device ich9-usb-uhci2,masterbus=usb.0,firstport=2,bus=pcie.0,addr=0x7.0x1 \ -device ich9-usb-uhci3,masterbus=usb.0,firstport=4,bus=pcie.0,addr=0x7.0x2 \ -device virtio-serial-pci,id=virtio-serial0,bus=pci.2,addr=0x0 \ -blockdev '{"driver":"file","filename":"/mnt/user/domains/Windows 10 - GPU/vdisk1.img","node-name":"libvirt-3-storage","cache":{"direct":false,"no-flush":false},"auto-read-only":true,"discard":"unmap"}' \ -blockdev '{"node-name":"libvirt-3-format","read-only":false,"cache":{"direct":false,"no-flush":false},"driver":"raw","file":"libvirt-3-storage"}' \ -device virtio-blk-pci,bus=pci.3,addr=0x0,drive=libvirt-3-format,id=virtio-disk2,bootindex=1,write-cache=on \ -blockdev '{"driver":"file","filename":"/mnt/user/isos/Windows.iso","node-name":"libvirt-2-storage","auto-read-only":true,"discard":"unmap"}' \ -blockdev '{"node-name":"libvirt-2-format","read-only":true,"driver":"raw","file":"libvirt-2-storage"}' \ -device ide-cd,bus=ide.0,drive=libvirt-2-format,id=sata0-0-0,bootindex=2 \ -blockdev '{"driver":"file","filename":"/mnt/user/isos/virtio-win-0.1.190-1.iso","node-name":"libvirt-1-storage","auto-read-only":true,"discard":"unmap"}' \ -blockdev '{"node-name":"libvirt-1-format","read-only":true,"driver":"raw","file":"libvirt-1-storage"}' \ -device ide-cd,bus=ide.1,drive=libvirt-1-format,id=sata0-0-1 \ -netdev tap,fd=34,id=hostnet0 \ -device virtio-net,netdev=hostnet0,id=net0,mac=52:54:00:d5:54:84,bus=pci.1,addr=0x0 \ -chardev pty,id=charserial0 \ -device isa-serial,chardev=charserial0,id=serial0 \ -chardev socket,id=charchannel0,fd=35,server,nowait \ -device virtserialport,bus=virtio-serial0.0,nr=1,chardev=charchannel0,id=channel0,name=org.qemu.guest_agent.0 \ -device usb-tablet,id=input0,bus=usb.0,port=1 \ -device vfio-pci,host=0000:01:00.0,id=hostdev0,bus=pci.4,addr=0x0,romfile=/mnt/user/isos/vbios/EVGAGTX9801.rom \ -device vfio-pci,host=0000:01:00.1,id=hostdev1,bus=pci.5,addr=0x0 \ -sandbox on,obsolete=deny,elevateprivileges=deny,spawn=deny,resourcecontrol=deny \ -msg timestamp=on 2021-08-13 17:30:50.796+0000: Domain id=2 is tainted: high-privileges 2021-08-13 17:30:50.796+0000: Domain id=2 is tainted: host-cpu char device redirected to /dev/pts/0 (label charserial0)
-
I think this is the issue I am currently having. I have the same setup as you do delugeVPN using PIA but I am unsure on how to set it up to get it working, any chance you can share your setup?

