Kevin T
Members
-
Joined
-
Last visited
-
That doesn't work the way I want it to, it does not display files that are on the excluded disk under the shares. I still want the files visible, I just want them read only along with the disk.
-
I had multiple drives fail at once, I was only able to salvage part of the data on one of the disks from the parity so I want to put the partial copy of that data back in my array for read only access so it can be referenced temporarily until I can have a hardware recovery hopefully done then I can swap the disk out. I don't want any modifications made to any of the data on that disk and written to a different disk in the meantime. Only the temporary disk would be read only, the rest of the disks are read/write.
-
I know, I just want to ensure that the files on that disk can only be read and not written to (or any new ones added). Also is there a way to globally exclude drive sharing on all shares without having to individually go into each and exclude it? I haven't put it online yet.
-
Ok I will exclude the disk for sure under each share, I just wasn't sure if I have some appdata files on the drive that I just want to be read only if there's going to be an issue with Dockers reading them and to assure they won't write to the disk?
-
Hi, I had a drive that failed and I tried to recover from the parity as much as possible, I want to put the salvaged files back in my array on their own dedicated disk for now until I am able to do a physical recovery and can swap it out completely at that time, but I want to make the disk read only so nothing is modified on the disk (it has a few shared directories that span across multiple disks so if anything is added they will be added to the other disks). I don't see any way to make the entire disk read only, am I missing something or do I have to do it through the shares (and exclude the disk on the share directories on the disk)? I just want to make sure users, Dockers, etc. don't write anything to the disk. Thanks, Kevin
-
I would personally stay away, looks like a scam site. No contact information at all, all the pictures look different like they were taken elsewhere and there's legitimate sellers who have HGST 8TB refurbs with 5 year warranties for about $90-$100. If you want to try it I would suggest using a virtual card and see if it actually ships.
-
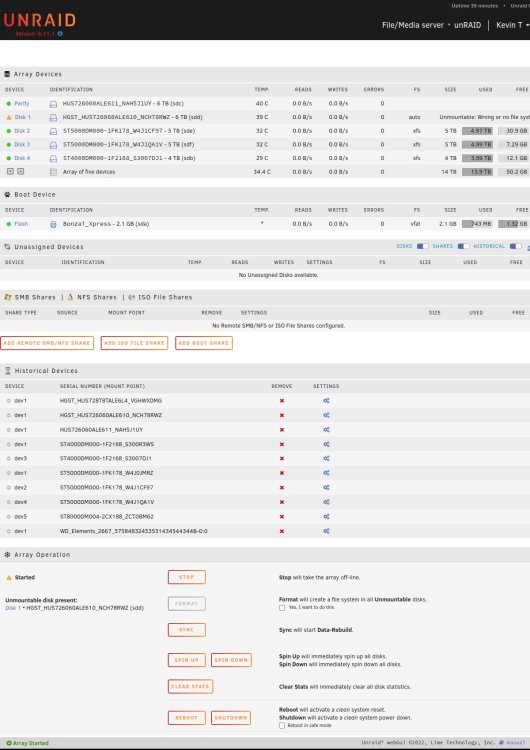
That's weird, it was working when it was pulled unless something went bad along the way, was my original 5TB shot during the parity copy? Not sure what I'm going to do now. The new 6TB Disk 1 is still only showing as 5TB and it didn't auto expand like they normally do when swapped, is there something I have to do to expand it?
-
I ran it with -L, then after it completed, stopped the array and restarted it for data-rebuild which shows the drive at 5TB and the XFS filesystem but there is nothing on the drive other than a lost+found directory with hardly anything in it and an empty appdata directory, total space used is only 8.18GB with 4.99TB free, so practically everything is gone. Any other options? I really thought with this being the parity drive replaced before issues started that most of everything would be recovered, so I'm really shocked and upset that it was basically empty.
-
When I ran xfs_repair -n /dev/md1, it gave several "bad agbno" and "imap claims in-use inode XXX is free, would correct imap" messages among other things, but now attempting xfs_repair -v /dev/md1 it is just doing this: root@unRAID:/boot# xfs_repair -v /dev/md1 Phase 1 - find and verify superblock... - block cache size set to 142528 entries Phase 2 - using internal log - zero log... zero_log: head block 3492062 tail block 3492060 ERROR: The filesystem has valuable metadata changes in a log which needs to be replayed. Mount the filesystem to replay the log, and unmount it before re-running xfs_repair. If you are unable to mount the filesystem, then use the -L option to destroy the log and attempt a repair. Note that destroying the log may cause corruption -- please attempt a mount of the filesystem before doing this. I'm keeping my fingers crossed and I don't want to do something wrong at this point, the array is started but unRAID is saying Unmountable disk present (Disk 1). I think you said on the previous (newer) parity drive I had to run -L but it only found about half the files and I'm hoping this parity drive version is more complete so I'm not sure if there's a way to try to mount it or has unRAID already tried that? So what commands do I do at this point and do I do it while the arrary is running or stop it and put in maintenance mode?
-
Ok I will cancel, I have to shutdown to replace disks so afterwards do I do New Config and check parity is valid or just replace Disk 1 and rebuild?
-
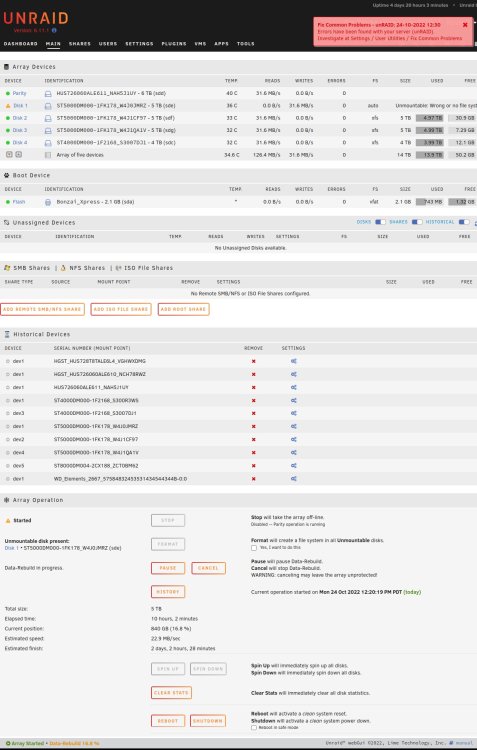
That's probably why I had to start over because I was unassigning disks. It's saying Disk 1 is unmountable right now so do I just let it run completely? There aren't any options other than to Pause or Cancel Data-Rebuild.
-
No, not yet, that's what I was asking about if I should let it complete because I thought you said something about stopping it after it started and I wanted to make sure the best way to proceed.
-
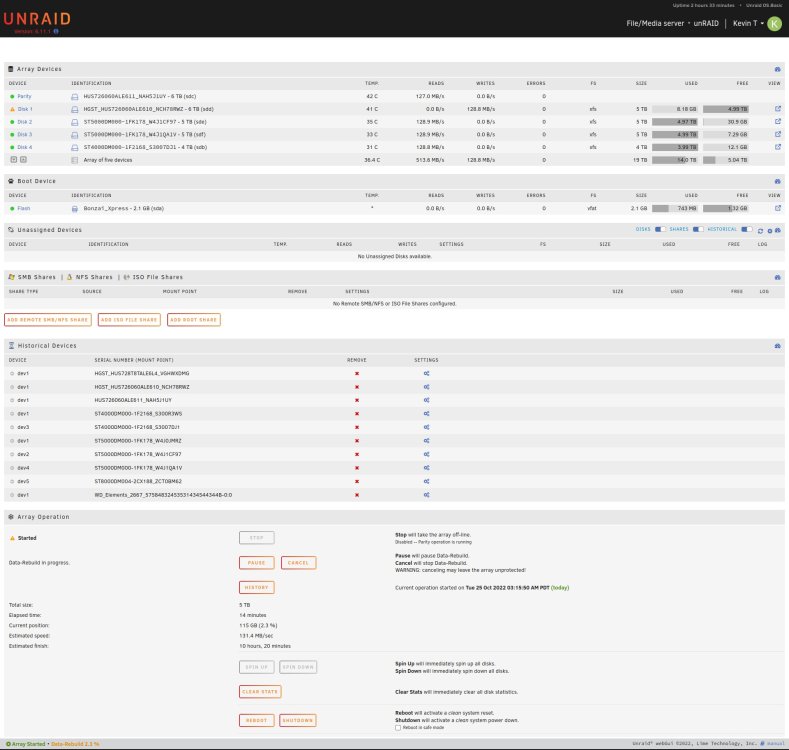
It got done copying the parity to the 6TB disk a few minutes ago, I attached a current screenshot, notice the message about Disk 1 being reconstructed and available for normal operation? If I highlight over the triangle next to Disk 1 it says device contents emulated. I'm just being cautious and again the original Disk 1 was the same made/model/size that is currently inserted for Disk 1 so do start the array as is and see what happens or do you think I have to use a 6TB for replacement for DIsk 1. Do I need to run xfs_repair at any point to check? I also attached another current diagnostics just in case. unraid-diagnostics-20221023-2311.zip

-
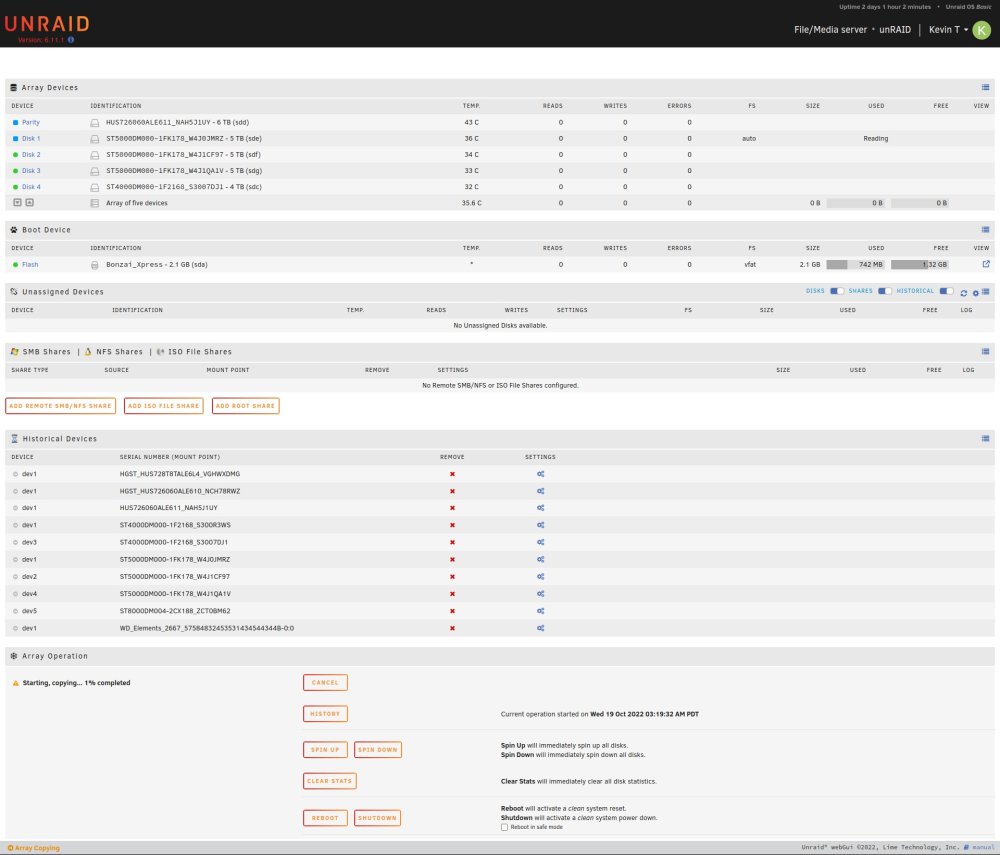
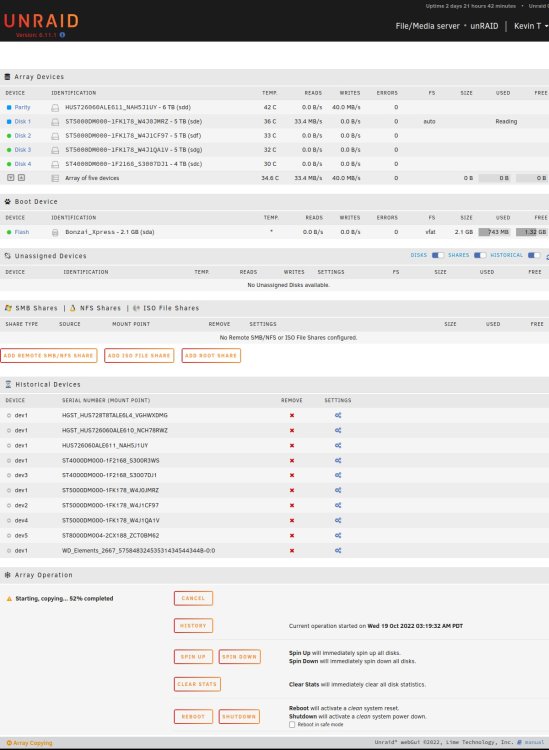
Here's an updated screenshot and current diagnostics, it's currently at 52% copying and I switched the view so it is showing writing throughput on the larger parity but still not saying Writing anywhere and just Reading next to Disk 1 (original parity). unraid-diagnostics-20221023-0003.zip
-
Ok I just started it again but notice how it says Reading but nothing about Writing? It was like that before as well. The video showed both and had Writing next to the Parity.