


fusselnerd
Members
-
Joined
-
Last visited
Everything posted by fusselnerd
-
Scrub of all disks resultet in four currupted files. I deleted the files and resetted the btrfs scrub stats, then run scrub again: 0 errors. Is there anything else I should check/do before bringing the server online?
-
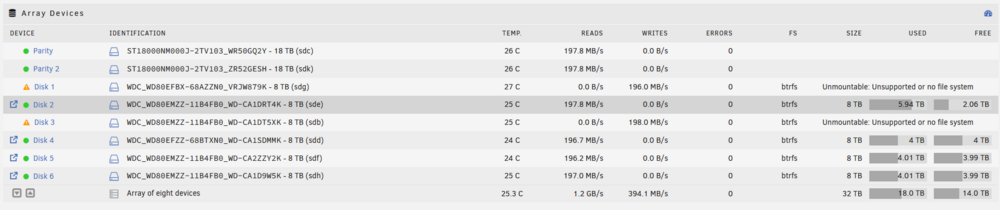
As you suggested here I checked the other disks for errors with btrfs dev stats /mnt/<disk> and it turned out that all disks have errors: root@GrayBigBerta:/mnt# btrfs dev stats /mnt/disk2 [/dev/md2p1].write_io_errs 0 [/dev/md2p1].read_io_errs 0 [/dev/md2p1].flush_io_errs 0 [/dev/md2p1].corruption_errs 22 [/dev/md2p1].generation_errs 0 root@GrayBigBerta:/mnt# btrfs dev stats /mnt/disk4 [/dev/md4p1].write_io_errs 359 [/dev/md4p1].read_io_errs 1 [/dev/md4p1].flush_io_errs 0 [/dev/md4p1].corruption_errs 71 [/dev/md4p1].generation_errs 0 root@GrayBigBerta:/mnt# btrfs dev stats /mnt/disk5 [/dev/md5p1].write_io_errs 0 [/dev/md5p1].read_io_errs 0 [/dev/md5p1].flush_io_errs 0 [/dev/md5p1].corruption_errs 287 [/dev/md5p1].generation_errs 0 root@GrayBigBerta:/mnt# btrfs dev stats /mnt/disk6 [/dev/md6p1].write_io_errs 0 [/dev/md6p1].read_io_errs 0 [/dev/md6p1].flush_io_errs 0 [/dev/md6p1].corruption_errs 12 [/dev/md6p1].generation_errs 0 except the recovered disks: root@GrayBigBerta:/mnt# btrfs dev stats /mnt/disk1 [/dev/md1p1].write_io_errs 0 [/dev/md1p1].read_io_errs 0 [/dev/md1p1].flush_io_errs 0 [/dev/md1p1].corruption_errs 0 [/dev/md1p1].generation_errs 0 root@GrayBigBerta:/mnt# btrfs dev stats /mnt/disk3 [/dev/md3p1].write_io_errs 0 [/dev/md3p1].read_io_errs 0 [/dev/md3p1].flush_io_errs 0 [/dev/md3p1].corruption_errs 0 [/dev/md3p1].generation_errs 0 Questions: I intend to run scrub in a small script to scrub all disks after one after another. What parameters should I use? Will this do (for each disk)? btrfs scrub start -B /dev/disk# As I understand array disks have single disk file systems. Therefore automatic repair should not be possible, right? Should I use the -r option?
-
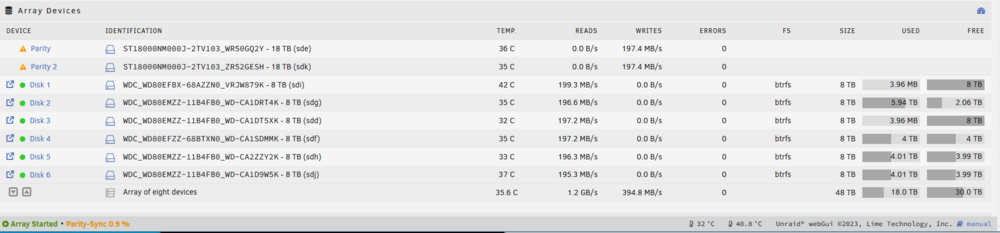
Hi, Sync and data restore finally finished without errors. Also no errors in syslog and drive logs. Respective shares are shown as protected.
-
oh sorry, here we go
-
Thanks a lot! I started the sync and formated both disks. Also, no other disks were listed.
-
Hi @trurl Oh I see, thank you for correcting me! I stopped the sync and did a New Config, again, and assigned the two disks. I would now start the array to start the parity-sync. Is this the correct order?
-
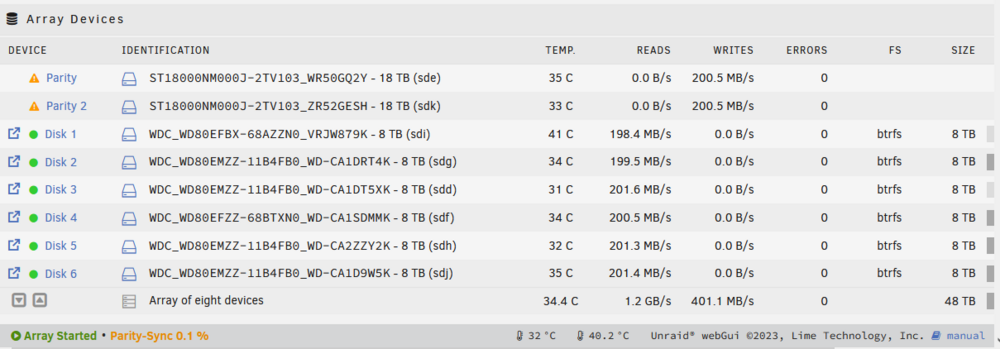
Allright, I did a new config with all disks assigned the same as before except the two disabled disks. Parity is syncing now. Then I'll format the two disks, assign them and recover the backed up data. This might take a couple of days. I'll get back to you when it's finished for the last steps (I guess), scrubbing and error-reset. Thank you so far.
-
Correct. If I mount them or start the array with emulated disks I get the error "Unmountable... missing file system" or so. In syslog it's shown that the BTRFS filesystem ist corruped (ERROR: superblock checksum mismatch). We tried to restore the superblock but it was not possible because I started the rebuild by mistake. Now, I restored the actual data by hand (UFS). I didn't assign the disks or started the array since then. PS: You also mentioned in a previous post that I should scrub the other disks and reset the errors.
-
Sure [...left out pool and single disks...]
-
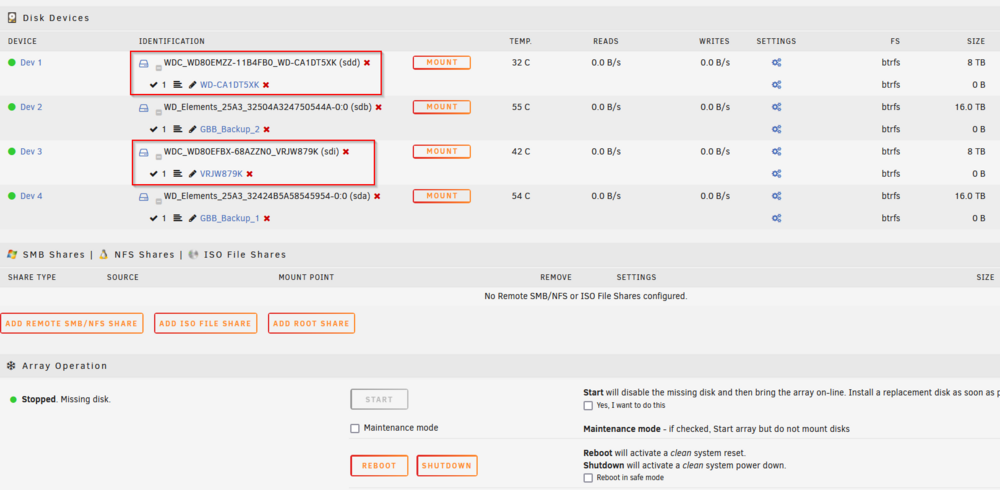
Hi @JorgeB Hi finally had time to do the recovery: with UFS I managed to restore almost all data and backed it up. Thank you very much for that tip. What will be the next step?
-
Thank you! 🙏
-
Yeah, it's the same result: root@GrayBigBerta:~# btrfs-select-super -s 2 /dev/md1p1 ERROR: superblock checksum mismatch ERROR: superblock checksum mismatch No valid Btrfs found on /dev/md1p1 ERROR: open ctree failed root@GrayBigBerta:~# btrfs-select-super -s 2 /dev/md3p1 ERROR: superblock checksum mismatch ERROR: superblock checksum mismatch No valid Btrfs found on /dev/md3p1 ERROR: open ctree failed
-
I see, thank you! Can you recommend a read about btrfs and Unraid array? I'm missing the fundamentals, obviously, so I'd like to dig into it a bit.
-
Here we go: root@GrayBigBerta:~# btrfs-select-super -s 1 /dev/md1p1 ERROR: superblock checksum mismatch ERROR: superblock checksum mismatch No valid Btrfs found on /dev/md1p1 ERROR: open ctree failed root@GrayBigBerta:~# btrfs-select-super -s 1 /dev/md3p1 ERROR: superblock checksum mismatch ERROR: superblock checksum mismatch No valid Btrfs found on /dev/md3p1 ERROR: open ctree failed
-
Hi @JorgeB Rebuild is complete. Next step is right? Could you please guide me through the process? Got it and I keep it in mind. I went through the Unraid docs again, it's mentioned there several times. Lesson learned the hard way... The only issue I have is, that I couldn't see if the drives are mountable before starting the array. And starting the array will automatically trigger the rebuild (though I might remember it wrong). So in the future, I will test a temporary failed disk before e.g. by mounting it separatly, before starting the array, if such a situation ever happens again. And of course, keep an eye open for fs errors. But maybe this is a topic for another discussion.
-
Ok, thx. Rebuild is resuming. They are the original ones in the original order.
-
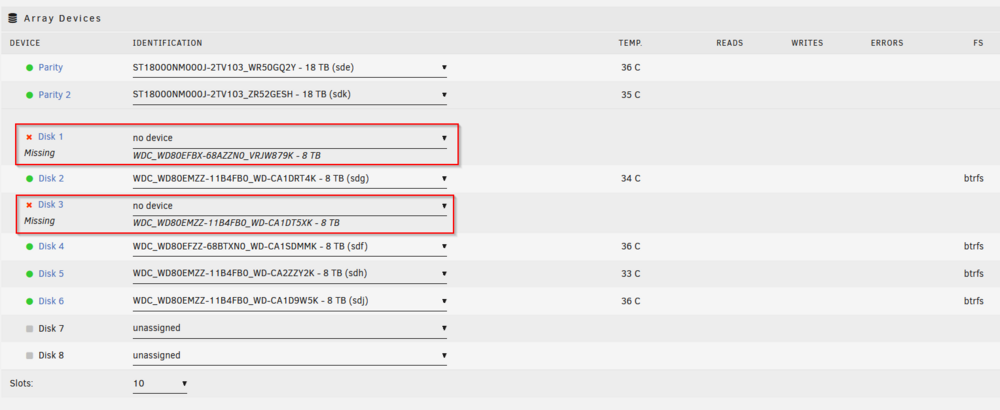
Ah, now I understand what you meant with "definitive" - letting memtest run until it finds an error. Sorry, english is not my first language 😅 Ok, I assigned both disks and started the array. Rebuild started automatically. But both disks are labled as "Unmountable: Unsupported or no file system". I read in another post that in this case, the rebuild will not actually write anything on the disks. I paused the rebuild for now. Shall I proceed?
-
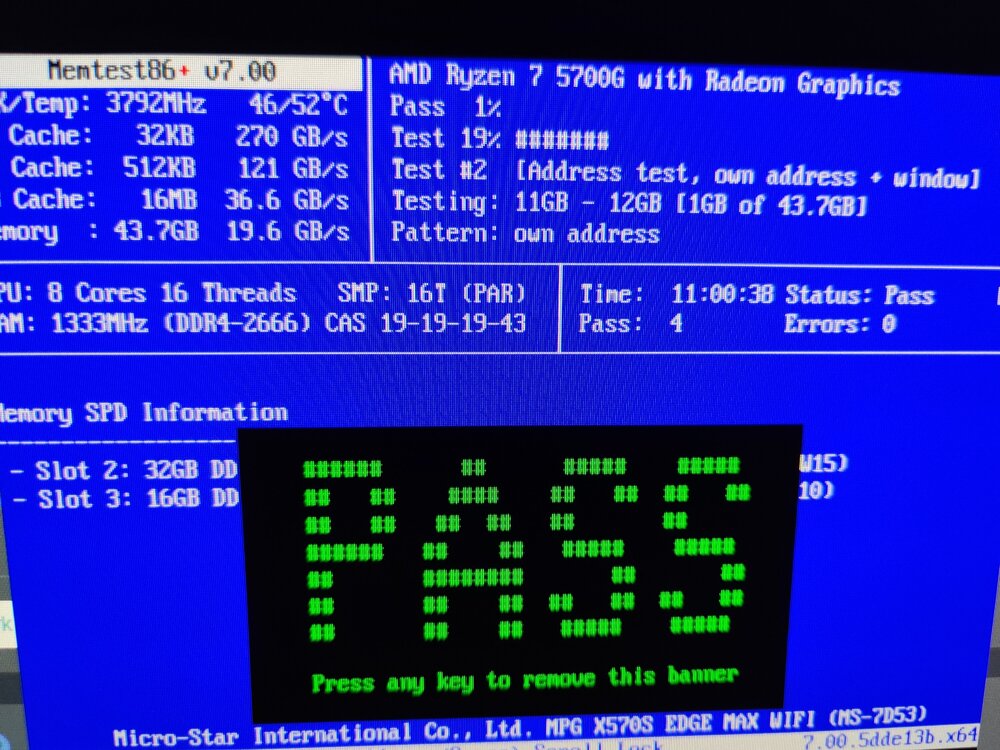
Hi JorgeB, memtest86 results attached. No errors after 4 passes.
-
So the whole btrfs filesystem of the array has a problem... ok, then that makes sence. Thank you for clarifying! btw. 2 memtest passes so far, no errors...
-
No they weren't. But this confuses me. Maybe you could help me understand in the meantime... From my understanding the Unraid array parity can buffer disk failures, similar to a raid parity: If I have an array with one parity and one array disk is failing for whatever reason, then the data on this failed disk is calculated from the parity and the remaining disks. So as long as there is not a second disk failing the data should be available (emulated disk). Same should apply to two parity disks and max of two array disks failing (which is the case at my setup). Do I fundamantaly misunderstand something here?
-
Thank you, memtest v7 is running now. I'll post the results after a couple of passes.
-
On a second look, the missing disks don't appear as locations in the shares anymore. Seems like the data is "lost" from the array. I guess that happend when the Unraid started to rebuild the array automatically a couple of days ago...
-
Diags after starting array attached. Kind of... I have a backup of most unraid shares and its content. So the content of both disks is included. Note: I made the backup from the emulated fs (gladly there are two parity disks...). Note 2: Shares are split automatically on directory level (High-water, standard configuration). So Sadyl, I don't have a copy or clone of the disks themself, if that's what you mean. graybigberta-diagnostics-20240703-1458.zip
-
No problem diags attached and here's the output from btrfs fi show (I skipped the other drives): root@GrayBigBerta:~# btrfs fi show ERROR: superblock checksum mismatch ERROR: cannot scan /dev/sdb1: Input/output error ERROR: superblock checksum mismatch ERROR: cannot scan /dev/sdg1: Input/output error [...] graybigberta-diagnostics-20240703-1405.zip
-
Here's the output: root@GrayBigBerta:~# echo 1 > /sys/block/sdb/device/delete root@GrayBigBerta:~# btrfs fi show ERROR: superblock checksum mismatch ERROR: cannot scan /dev/sdg1: Input/output error Label: none uuid: af3b39b5-c791-4ea4-880d-fc1ad26cfc2d Total devices 1 FS bytes used 3.64TiB devid 1 size 7.28TiB used 3.72TiB path /dev/sdf1 Label: none uuid: 39a4d42e-8ae1-436c-ae74-488cb24183bb Total devices 1 FS bytes used 685.45MiB devid 1 size 465.76GiB used 4.02GiB path /dev/nvme0n1p1 Label: none uuid: ffae4078-e89d-4329-b2b9-bdd13773a8ec Total devices 1 FS bytes used 3.64TiB devid 1 size 7.28TiB used 3.71TiB path /dev/sdd1 Label: none uuid: c40c0298-85ed-4130-aa76-cdacac9ccfa5 Total devices 1 FS bytes used 120.40GiB devid 1 size 465.76GiB used 177.02GiB path /dev/sdm1 Label: none uuid: 5f5f56e8-f435-4b81-9042-8cccd1fb7f8e Total devices 1 FS bytes used 76.42GiB devid 2 size 223.58GiB used 78.03GiB path /dev/sdi1 Label: none uuid: d326d8d7-9da5-4d55-b3ad-43541260b369 Total devices 1 FS bytes used 144.00KiB devid 1 size 931.51GiB used 3.02GiB path /dev/nvme2n1p1 Label: none uuid: cf55c94a-4fd3-4030-a415-1d96a475aa3c Total devices 1 FS bytes used 5.40TiB devid 1 size 7.28TiB used 5.47TiB path /dev/sde1 Label: none uuid: a93250e3-43bc-41c9-adbc-76ac0b3b0b16 Total devices 1 FS bytes used 46.88MiB devid 1 size 111.79GiB used 3.02GiB path /dev/sdl1 Label: none uuid: 2e238485-e144-4d1f-aa1a-13097d3a3e99 Total devices 1 FS bytes used 66.90GiB devid 1 size 232.88GiB used 83.02GiB path /dev/nvme1n1p1 Label: none uuid: 05612964-8ba0-475a-b544-e716f5a03167 Total devices 1 FS bytes used 196.00KiB devid 1 size 465.76GiB used 5.02GiB path /dev/sdj1 Label: none uuid: b43c9020-8d0b-4e0e-a3c3-39ec11f9e096 Total devices 1 FS bytes used 3.64TiB devid 1 size 7.28TiB used 3.70TiB path /dev/sdh1


