


CyberBlade
Members
-
Joined
-
Last visited
Everything posted by CyberBlade
-
Been a month of this issue now for me and No luck. As a poster said awhile ago swap the GPU drivers around to older versions and that did not work for me at all (Ampere (Quadro), and my other Pascal (Quadro)), Tried 3 other versions at that point. So with the weekend here a little tinkering; (Updated Unraid, 7.2.5 and the issue still persists, Nuked the docker, the image and the app data configs and issue still persists). so decided to tinker IN the container while it was crashing. just pull up the console, or bash into the container; apt remove sunshineAnd the container stopped crashing, of course not a fool proof solution but having it stable and going from there. Then inside the container, installing latest sunshine from the repo (which is what it runs on at boot but had to see) and running it, gave some predictable response; at which point the whole session crashes (VNC is taken down) and then restarts... So it's showing to be stable when you are not using Sunshine in the container at all, so either x11 support or something? Beyond my understanding at that point. SIDE NOTE: doing an apt update inside the container for giggles solved that stupid 'reaped' PID error showing in the logs... so, thats nice :D That is as far as I got up to at this point with this thing. maybe someone else can poke around with it at least being in a stable state and work from there. Unraid Ver:7.2.5 Current Unraid Nvidia Driver: 595.71.05 Other things: Same issue on GitHub Here, GitHub[Bug]: xorg exit status 1 · Issue #224 · Steam-Headless/d...Describe the Bug Do you know any reason for my log output? I am doubting my driver version(it is 550.120) is the reason, but as you know, change nvidia driver version may cause kernel unmatched, I ...
-
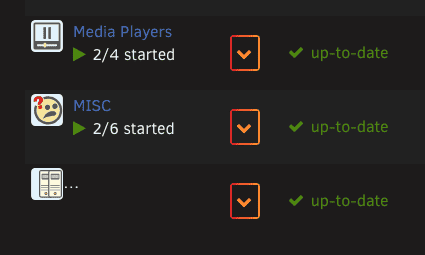
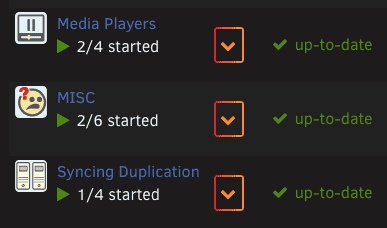
BUG:🐛 When setting the folder name with a 'slash' it fails to display it in the Docker page; Will not work: " Syncing / Duplication " Works: "Syncing Duplication Images Attached to display the difference. Other notes: Just Upgraded from FV2 to FV3 here, so yeah, that was seamless and other than this visual issue, flawless :D
-
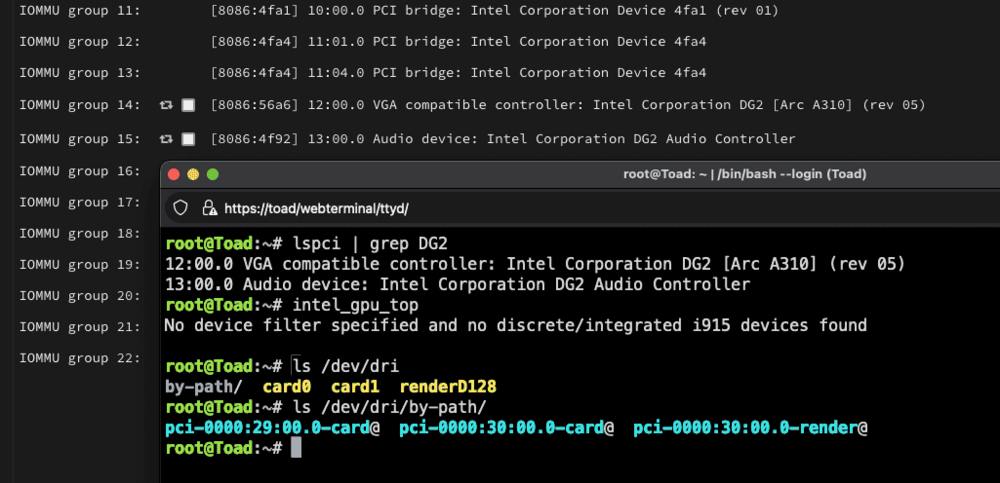
Well, Unraid 7, Beta3 is Alright, but Arc is not fully there yet for me it seems. Card: Arc 310 DG2 Revision 5 - Upon first install, Unraid does not visibly see the card. - Install the Plugin 'Intel Top' for system analysis and it can then see the PCI address, but cannot pull analytics. "Vendor command returned no data." - Swap out Intel card for Nvidia Pascal, Install NVDrivers, and system can see it alright, no issue. - Swap back to Arc310 card and Render 129 is absent from /dev/dri But atleast the card is seen under lspci. - IOMMU group 14:[8086:56a6] 12:00.0 VGA compatible controller: Intel Corporation DG2 [Arc A310] (rev 05) - IOMMU group 15:[8086:4f92] 13:00.0 Audio device: Intel Corporation DG2 Audio Controller (and no, These are not marked for VFIO) - IOMMU group 30:[1a03:1150] 28:00.0 PCI bridge: ASPEED Technology, Inc. AST1150 PCI-to-PCI Bridge (rev 04) - [1a03:2000] 29:00.0 VGA compatible controller: ASPEED Technology, Inc. ASPEED Graphics Family (rev 41) - IOMMU group 33:[1002:1638] 30:00.0 VGA compatible controller: Advanced Micro Devices, Inc. [AMD/ATI] Cezanne [Radeon Vega Series / Radeon Vega Mobile Series] (rev d8) - IOMMU group 34:[1002:1637] 30:00.1 Audio device: Advanced Micro Devices, Inc. [AMD/ATI] Renoir Radeon High Definition Audio Controller So, while it is Beta ATM, progress is being made, but still not 'FULLY' supporting INTEL ARC just yet. -- Edit: No, there is no function/Ability in the BIOS to disable the IMPI/BMC on this mainboard. (Asrock Rack x5704DU-2L2T) https://www.asrockrack.com/general/productdetail.asp?Model=X570D4U-2L2T
-
having just moved to Un-Fun-Raid yesterday, I managed to knuckle my way around this issue as it drove me nuts for 12 hours straight. (no I am not kidding) (I've seen two others post about this issue, no one seems to respond with how.. so here goes to help! Keep the array started. 1) Terminal - Make sure the mounted ZFS folder (in my case 3 of them, SSD, Seagate and Western) were all write access. (view this with a " ls -l " command) a - Root:Root for the Owner and Group, but you will need to " chmod 777 " the folders (mount points) themselves to enable everyone have read/write access. 2) Make a share in the web-UI of the same name to my mounts. (it will allocate the folders to the array, I know, we will edit it) a - Set the users/permissions and settings you wish to use for the folder b - (Be mindful here, as it will create additional config files in your /boot/config/shares folder, these reflect the unraid array shares but will be destroyed later to prevent conflicts) 3) Continuing within the UI, using the plugin 'Config file editor' go to the tools tab to Config File Editor and then using the right side file list navigate your flash storage to: " /etc/samba/smb-shares.conf " and click the write symbol next to the address you entered. it will present you with all your folder shares. a - highlight the content you want, copy it to a notepad/texteditor and save it (just incase) Example of mine. [SSD] path = /mnt/SSD comment = VM / Docker browseable = yes public = yes writeable = no write list = administator,synology vfs objects = catia fruit streams_xattr extd_audit recycle case sensitive = auto preserve case = yes short preserve case = yes recycle:repository = .Recycle.Bin recycle:directory_mode = 0777 recycle:keeptree = Yes recycle:touch = Yes recycle:touch_mtime = No recycle:minsize = 1 recycle:versions = Yes recycle:exclude = *.tmp recycle:exclude_dir = .Recycle.Bin 4) Remove those shares, and stop the array a - (At this point the excess files from point 2B above should be eradicated, any files in there NOT concerning the unraid array, delete them. we cannot have ZFS share configs in this /boot/config/shares folder) 5) Goto your settings tab, SMB, and paste that information into the SAMBA EXTRA CONFIG area, I've put mine above all the other commands there. Notice I have edited my path directory to reflect my mount point Save/Apply button and SMB will save the config. at which point, goto your dashboard, the SAMBA service will ignite and your ZFS shares should be there, ready and waiting to be written. Hopefully this works for you, I was screwing around with mine for ages and if I missed a step then I apologise, once I got it working I just had to goto bed at such an obscene hour. Might make a youtube video of it for my endeavours to help others and show them how to use a ZFS array on unraid, the level 1 techs guide and Gamers nexus video is nice but is not a step by step by a long shot. Hope it helps.


