




.jpg.cd0ee2faf0b1ddf75893cc24e561601d.jpg)
ZappyZap
Members
-
Joined
Everything posted by ZappyZap
-
i am planning to review this as the app evolve. stay tunne for all the correction needed
-
I did not experienced this , but i did not switch to 7.x.x train i will follow this issue on the github thanks for the report
-
@Max85 would be nice if you fire a pull request to https://github.com/devzwf/unraid-docker-templates/tree/main/guides would be awesome thanks
-
No worries gladd your are back in business
-
reserved
-
Overview: Support for Docker image Termix Application Name: Termix Application: https://github.com/LukeGus/Termix Documentation: https://github.com/LukeGus/Termix Termix is an open-source forever free self-hosted SSH (other protocols planned, see [Planned Features](#planned-features)) server management panel inspired by [Nexterm](https://github.com/gnmyt/Nexterm). Its purpose is to provide an all-in-one docker-hosted web solution to manage your servers in one easy place. I'm using this project to help me learn [React](https://github.com/facebook/react), [Vite](https://github.com/vitejs/vite-plugin-react), and [Docker](https://www.docker.com) but also because I could never settle on a server management software that I enjoyed to use. > [!WARNING] > This app is in the VERY early stages of development. Expect bugs, data loss, and unexplainable issues! For that reason, I recommend you securely tunnel your connection to Termix through a VPN. Make sure to look at the complete documentation Please post any questions/issues relating to this docker template you have in this thread.
-
the from should be an email address
-
the dev image : devzwf/pihole-dot-doh:2025.03.0-0.v6dev pihole update to : Pi-hole FTL v6.0.4, Web v6.0.2 and Core v6.0.5 few hours ago https://pi-hole.net/blog/2025/03/04/pi-hole-ftl-v6-0-4-web-v6-0-2-and-core-v6-0-5-released/#page-content and the docker image as well :
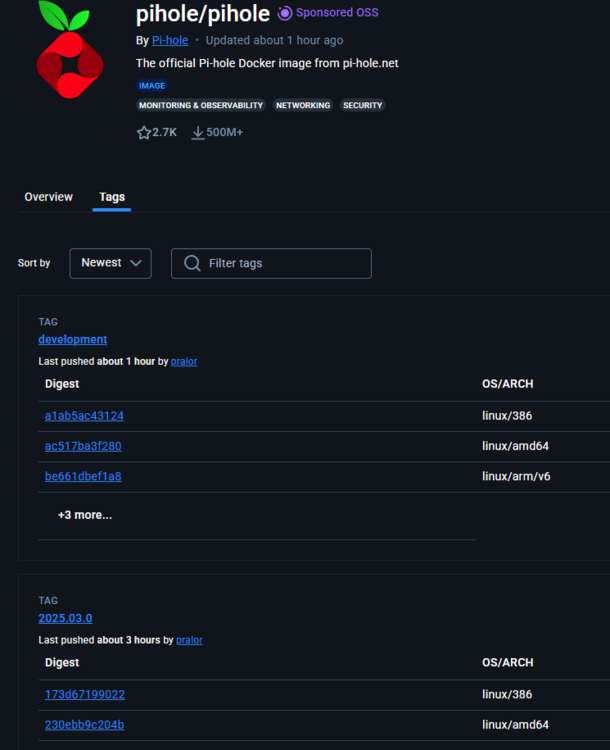
-
dev image update :
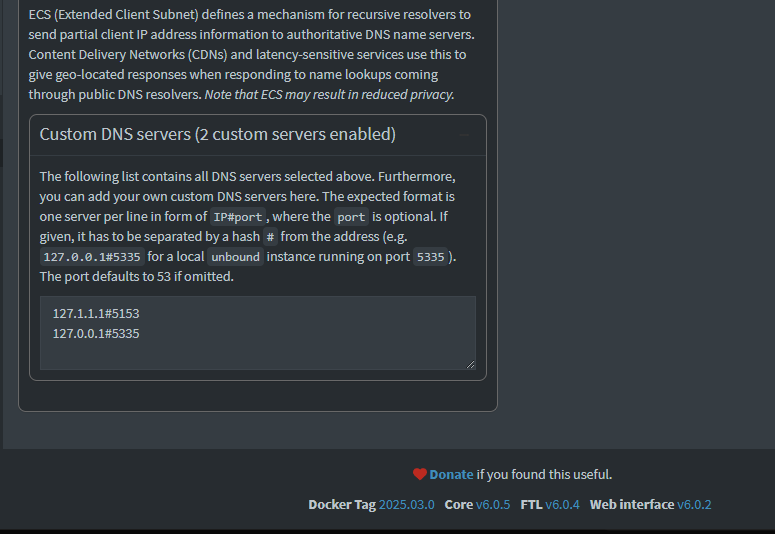
-
script has already beed iupdated in : 2025.02.6-v6dev01 Thanks
-
This is not compatible with V6 until said otherwise for v6 you should use nebula-sync
-
FTL will attempt to bind to port 80 for plain HTTP. If it cannot bind to this port, it will fallback to port 8080 (So you might need to access the web interface at http://pi.hole:8080/admin)
-
here what doc saiid about the dnsmasq dir :
-
that's correct you can add this --cap-add=CAP_SYS_NICE in Extra Parameters field if you want
-
Yeah i was reading this issue as well. Thanks for the update
-
i will check if the image have a health check and what is it what is in the log ?
-
I think i will create a new template for this , so it do not break the install of people who do not want to move to v6 (even if i dont see why anybody would go this route) i will also update my branch to github soon Thanks for the testing
-
Let me know. i am still tweaking a bit this images
-
@bmartino1 here is a dev container with v6 / unbound and cloudflared devzwf/pihole-dot-doh:2025.02.4-v6dev of course you need to adjust some env du to V6 here is a testing compose.... i will create a new template : services: pihole: container_name: pihole_v6 image: devzwf/pihole-dot-doh:2025.02.4-v6dev ports: # DNS Ports - "53:53/tcp" - "53:53/udp" # Default HTTP Port - "80:80/tcp" # Default HTTPs Port. FTL will generate a self-signed certificate - "443:443/tcp" # Uncomment the below if using Pi-hole as your DHCP Server #- "67:67/udp" environment: # Set the appropriate timezone for your location (https://en.wikipedia.org/wiki/List_of_tz_database_time_zones), e.g: TZ: 'America/Toronto' # Set a password to access the web interface. Not setting one will result in a random password being assigned FTLCONF_webserver_api_password: '<WEB_PASSWORD>' # DoT : unbound (127.0.0.1#5335) DoH: cloudflared (127.1.1.1#5153) FTLCONF_dns_upstreams: '127.1.1.1#5153;127.0.0.1#5335' FTLCONF_dns_listeningMode: 'all' # Volumes store your data between container upgrades volumes: # For persisting Pi-hole's databases and common configuration file - './etc-pihole:/etc/pihole' # Uncomment the below if you have custom dnsmasq config files that you want to persist. Not needed for most. - './etc-dnsmasq.d:/etc/dnsmasq.d' - './config/:/config' #cap_add: # See https://github.com/pi-hole/docker-pi-hole#note-on-capabilities # Required if you are using Pi-hole as your DHCP server, else not needed #- NET_ADMIN restart: unless-stopped let me know
-
Great that's all is in order now. enjoy
-
which IP are you trying ? for HOST-IPADRESS this should be the IP of your postgres DB or is the container is on the same docker network , just put the postgres conatiner name and let me know Also make sure your password do not contain special charaters like who can make this error?
-
@bmartino1 oh i know alpine very well i make image on alpine Just need to found some time to tackle this.
-
New container version is base on a completely new OS as well alpine instead of debian
-
IMPORTANT Since the latest version of the docker image of pihole is V6 , the 2024.07.0 will probably be the latest version for this template as it is the latest who support V5 i am currecntly working on a new container image with dot-doh and will also create a new template. if you want to help let me know Thanks
-
@DebrodeD thanks for note i will review and make the template adjustment accordingly.
.thumb.jpg.bec61e4e919a9235cc4475f8cb53d5e3.jpg)



