





MeatHammer1012
Members
-
Joined
-
Last visited
Everything posted by MeatHammer1012
-
It is also broken for me on unraid 7 beta 2. Uninstalling fixes the issue. Here are the logs: Aug 27 11:36:18 LilNASX move: mover: started Aug 27 11:37:43 LilNASX move: /usr/local/emhttp/plugins/ca.mover.tuning/age_mover: line 206: /usr/local/sbin/move: No such file or directory Aug 27 11:37:43 LilNASX move: cat: write error: Broken pipe Aug 27 11:37:44 LilNASX move: /usr/local/emhttp/plugins/ca.mover.tuning/age_mover: line 119: /usr/local/sbin/move: No such file or directory Aug 27 11:37:44 LilNASX move: /usr/local/emhttp/plugins/ca.mover.tuning/age_mover: line 119: /usr/local/sbin/move: No such file or directory Aug 27 11:37:44 LilNASX move: /usr/local/emhttp/plugins/ca.mover.tuning/age_mover: line 119: /usr/local/sbin/move: No such file or directory Aug 27 11:37:44 LilNASX move: /usr/local/emhttp/plugins/ca.mover.tuning/age_mover: line 119: /usr/local/sbin/move: No such file or directory Aug 27 11:37:44 LilNASX move: /usr/local/emhttp/plugins/ca.mover.tuning/age_mover: line 119: echo: write error: Broken pipe Aug 27 11:37:44 LilNASX move: /usr/local/emhttp/plugins/ca.mover.tuning/age_mover: line 119: /usr/local/sbin/move: No such file or directory Aug 27 11:37:44 LilNASX move: /usr/local/emhttp/plugins/ca.mover.tuning/age_mover: line 119: /usr/local/sbin/move: No such file or directory Aug 27 11:37:44 LilNASX move: /usr/local/emhttp/plugins/ca.mover.tuning/age_mover: line 119: /usr/local/sbin/move: No such file or directory Aug 27 11:37:44 LilNASX move: /usr/local/emhttp/plugins/ca.mover.tuning/age_mover: line 119: echo: write error: Broken pipe Aug 27 11:37:44 LilNASX move: /usr/local/emhttp/plugins/ca.mover.tuning/age_mover: line 119: /usr/local/sbin/move: No such file or directory Aug 27 11:37:44 LilNASX move: /usr/local/emhttp/plugins/ca.mover.tuning/age_mover: line 119: /usr/local/sbin/move: No such file or directory Aug 27 11:37:45 LilNASX move: /usr/local/emhttp/plugins/ca.mover.tuning/age_mover: line 119: /usr/local/sbin/move: No such file or directory Aug 27 11:37:45 LilNASX move: /usr/local/emhttp/plugins/ca.mover.tuning/age_mover: line 119: /usr/local/sbin/move: No such file or directory Aug 27 11:37:45 LilNASX move: /usr/local/emhttp/plugins/ca.mover.tuning/age_mover: line 119: /usr/local/sbin/move: No such file or directory Aug 27 11:37:45 LilNASX move: /usr/local/emhttp/plugins/ca.mover.tuning/age_mover: line 119: /usr/local/sbin/move: No such file or directory Aug 27 11:37:45 LilNASX move: /usr/local/emhttp/plugins/ca.mover.tuning/age_mover: line 119: /usr/local/sbin/move: No such file or directory Aug 27 11:37:45 LilNASX move: mover: finished
-
Thank you so much for this. I revisited trying to get this to work after a year, and this did the trick
-
Has anyone been able to get SQLite Database working as described in the 4.4.0 changenotes? It is supposed to improve performance when running 1k+ torrents. n 4.4.0 there was a new setting added: EXPERIMENTAL: Setting to store/load fastresume/torrent files in an SQLite database (glassez)
-
When you toggle VM manager on/off and dont change any settings you get this message: No settings are being changed, simply disabling and re-enabling the VM manager prompts the message. No restart is needed as nothing is being changed. Even when you toggle it back to whatever you started with the message remains. The message has no X on it, so its rather annoying as I would now need to restart my server to remove the message.
-
Hi Everyone, I am running into an issue where I need to instances of this container. I am at about 2500 torrents and the UI is slow as all hell. What I would like to do is more less create a 1:1 copy with all the same torrents in the new instance. I have everything labeled so I will just be able to go in and remove about 2300 torrents that I dont need to manage from the original instance and then just have them in the new instance. Obviously I would pause everything before I do this to make sure I am not double seeding while I am making the changes. Ive quickly tried this out by creating a new container with my old one as a template and incrementing all of the ports up by one. Well that did not work as it was just pulling the info from the old directory and not creating a separate folder. Can anyone help me on the correct way to do this? Thanks!
-
Anyone have issues with slowness in this container. For example when sorting by different settings like upload/download speed or date added it takes a while for it to update ~3-8 seconds. This is kinda for anything in the container, even switching to that tab in chrome and waiting for it to update. For reference: Server: 20c/40t 128GB RAM nothing dedicated - added like a standard container Seeding ~1000 torrents AppData is running on a SSD Is this common? And if it is is there any way to speed this up?
-
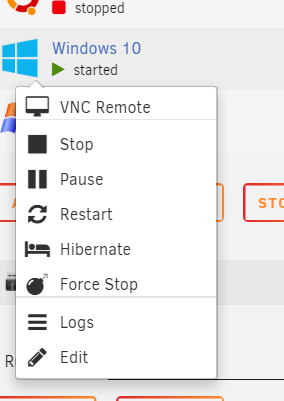
Relatively simple feature. I would like the ability to clone a VM when its off. This would be done off of the click menu: Lot of use cases for this and easier to implement then snapshots. Sometimes I want to test things in VM's and want to just be able to make a copy to then have in case I want to revert. Also useful for having a baseline image that is already configured to easy prop up a VM without doing the whole install. Recently I wanted to try Windows 11. Would have been nice to simply be able to duplicate my Win10 VM and upgrade that, then have both available to me to choose from.
-
This would be neat to do, I see there is official builds for RHEL and unofficial for Ubuntu. Just wondering if anyone has had success with this.
-
Hey Guys, Just looking for some advice here as I am migrating my unRAID server from consumer hardware to used enterprise and have a few questions for those who are more knowledgeable then me. Current system: i7 4790k 32GB Ram New system: Dell R530 2x E5-2660 v3 (20 cores 40 with HT) 128GB RAM (8x 16GB 2133) Firstly, The new system comes with 8 1.2TB 10k SAS drives. I currently have 4 14TB SATA drives. From what I have seen it looks like I can use both types of drives at once as long as they are not in the same array which is not an issue with unRAID. Would it be possible to have the 4 SATA drives set up in unRAID for my storage array then use the SAS drives for a secondary cache pool (I have a SSD I use for my cache pool now that I figure ill buy a low-profile PCIE card to connect that)? Also I have a GTX950 that I use now for Plex in transcoding. The server does not have any full height PCIE slots but it looks like I can just slap this in it: https://www.ebay.com/itm/185088641357?hash=item2b1824894d:g:8PsAAOSwQr9hW5wZ Is my assumption correct? Anything else I should be considering here? Thanks!
-
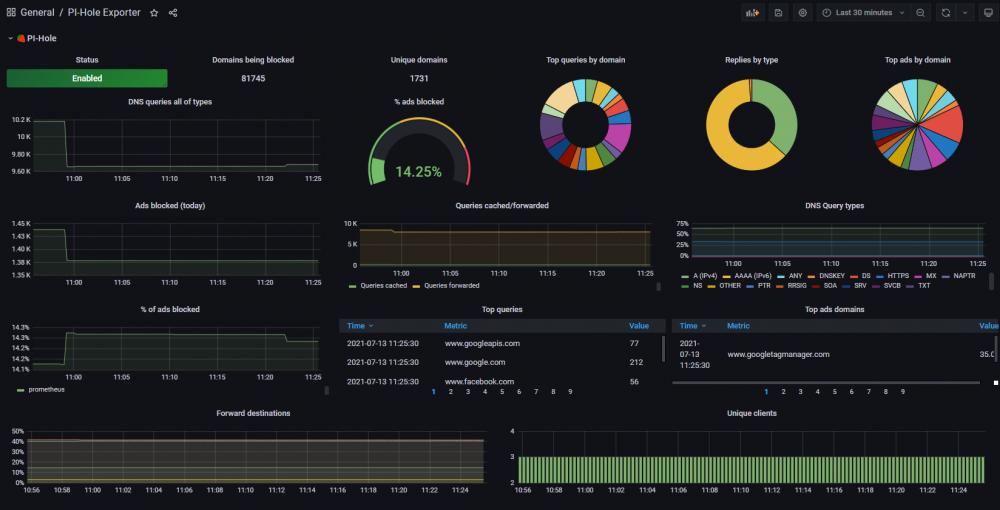
Perfect! All is working now!
-
Discovering the root cause is half the battle
-
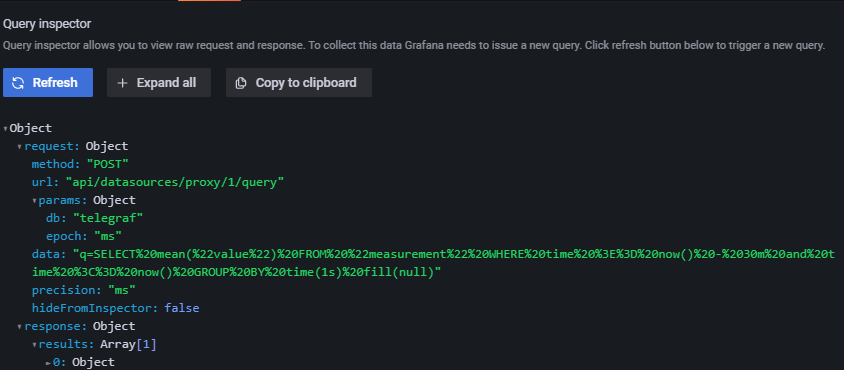
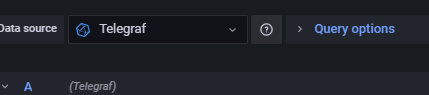
So I think I found the issue. After following your directions the Query inspector gives me the following: But then I noticed that it is trying to pull from Telegraf: I can change that to Prometheus and nothing happens still. I have deleted the dashboard a few times and dont see a place to enter what data source to pull from globally for the dashboard. Any idea why it is selecting Telegraf instead of Prometheus for all of these? Thanks again. You have been a big help
-
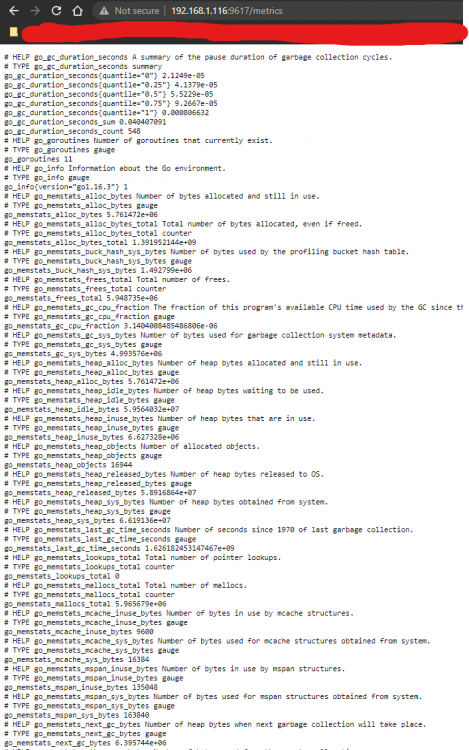
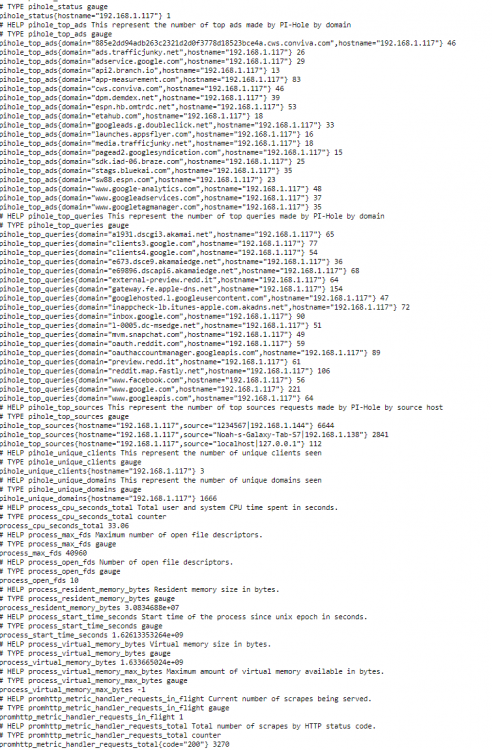
Here is what I get if I go to Prometheus and click the URL from the Exporter: I can tell its working as the numbers are right: I just deleted the dashboard and reimported it again. Still saying no data, but Ill give it some time again as you said before it can take a bit.
-
I gave it overnight and still no dice. It looks like its not getting any data to Grafana at all even though I can see that the plugin is working fine
-
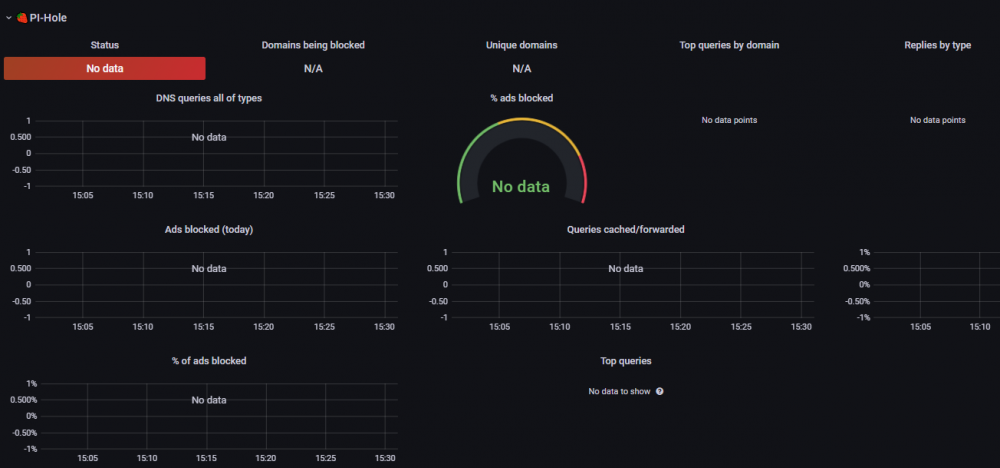
Thank you for your help that got it working in Prometheus!(Could of sworn I tried both lol) Do you have any idea why it would not be pulling the data into Grafana now that that is configured correctly. All of my other dashboards in Grafana that use Prometheus work fine but the piHole one just says no data. I have restarted all of the containers and deleted and re-imported the template.

-
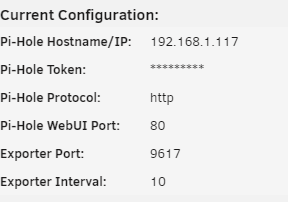
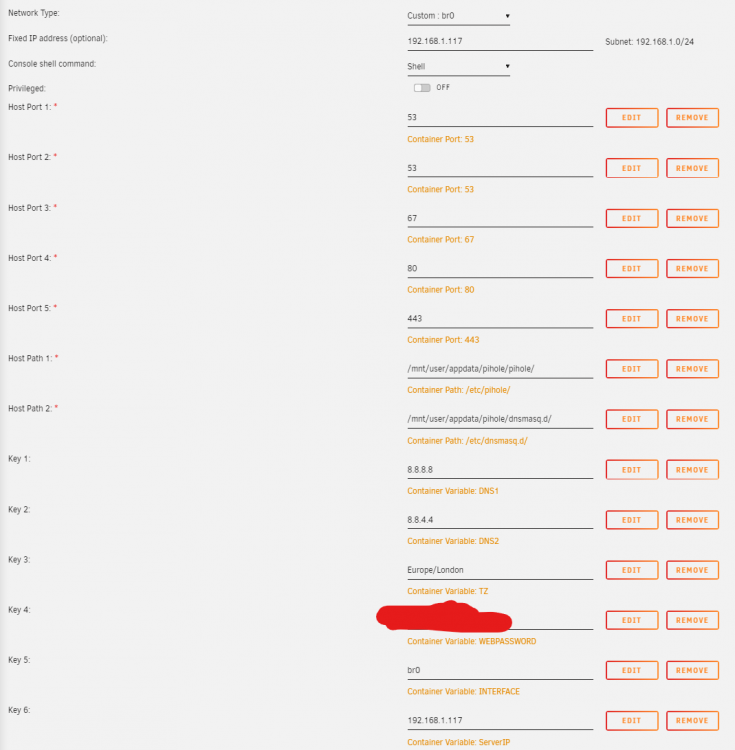
When I set up piHole I am getting an error of connection refused in Prometheus and then it is obviously not working in Grafana. Below are my configs, if someone sees something wrong any help would be appreciated. Error in Prometheus (4th one is piHole): piHole Exporter: PiHole: Thanks in advance

-
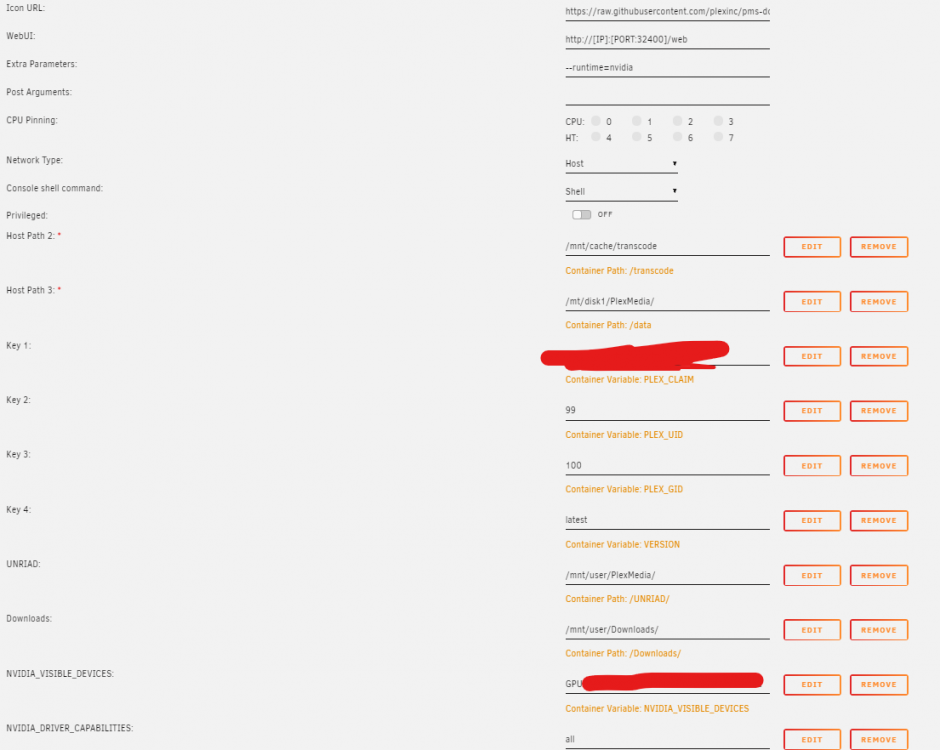
Hoping you guys could help me with this issue I am having. Recently whenever I watch a video that comes from a large file my entire server locks up after a little bit and I have to restart the Plex container. What I have come to notice is that basically Plex is filling my ram with whatever the file is I am watching as I am watching. For example if I am watching a 40GB BluRay movie that is 90 minutes, after 90 minutes my Plex container will be using 40GB, issue is I only have 32GB of ram in my server and I cant even give it all of that amount. When I stop watching the movie the ram is given back. Some notes that might help: DLNA is off Everything is generally direct play (exception of audio transcoding) I have updated to the newest verion of PMS When I stop watching the video all of the memory is given back. This is after watching Top Gun for 30 minutes: Here is the config if that helps: Let me know if I can pull any other logs that would help with this Any help is appreciated.

-
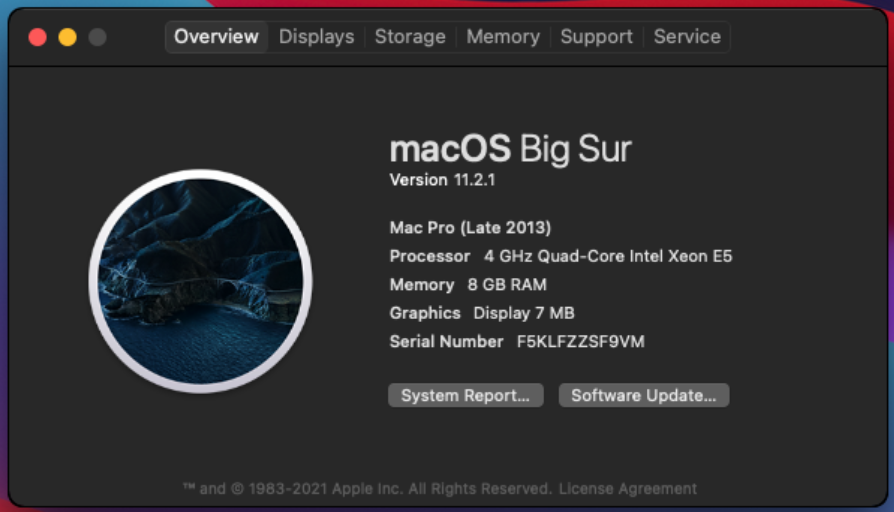
If someone could take a look at my XML it would be super helpful. I can not get my VM to sign into Apple Services. I have changed the network adaptor and tried a couple different configs. <?xml version='1.0' encoding='UTF-8'?> <domain type='kvm' id='23' xmlns:qemu='http://libvirt.org/schemas/domain/qemu/1.0'> <name>Macinabox BigSur</name> <uuid>88b75df0-9fdb-435d-b07f-f8d5ac24775f</uuid> <description>MacOS Big Sur</description> <metadata> <vmtemplate xmlns="unraid" name="Windows 10" icon="BigSur.png" os="osx"/> </metadata> <memory unit='KiB'>8388608</memory> <currentMemory unit='KiB'>8388608</currentMemory> <memoryBacking> <nosharepages/> </memoryBacking> <vcpu placement='static'>8</vcpu> <cputune> <vcpupin vcpu='0' cpuset='0'/> <vcpupin vcpu='1' cpuset='4'/> <vcpupin vcpu='2' cpuset='1'/> <vcpupin vcpu='3' cpuset='5'/> <vcpupin vcpu='4' cpuset='2'/> <vcpupin vcpu='5' cpuset='6'/> <vcpupin vcpu='6' cpuset='3'/> <vcpupin vcpu='7' cpuset='7'/> </cputune> <resource> <partition>/machine</partition> </resource> <os> <type arch='x86_64' machine='pc-q35-4.2'>hvm</type> <loader readonly='yes' type='pflash'>/mnt/user/system/custom_ovmf/Macinabox_CODE-pure-efi.fd</loader> <nvram>/etc/libvirt/qemu/nvram/88b75df0-9fdb-435d-b07f-f8d5ac24775f_VARS-pure-efi.fd</nvram> </os> <features> <acpi/> <apic/> </features> <cpu mode='host-passthrough' check='none' migratable='on'> <topology sockets='1' dies='1' cores='4' threads='2'/> <cache mode='passthrough'/> </cpu> <clock offset='utc'> <timer name='rtc' tickpolicy='catchup'/> <timer name='pit' tickpolicy='delay'/> <timer name='hpet' present='no'/> </clock> <on_poweroff>destroy</on_poweroff> <on_reboot>restart</on_reboot> <on_crash>restart</on_crash> <devices> <emulator>/usr/local/sbin/qemu</emulator> <disk type='file' device='disk'> <driver name='qemu' type='raw' cache='writeback'/> <source file='/mnt/user/domains/Macinabox BigSur/macos_disk.img' index='1'/> <backingStore/> <target dev='hdc' bus='sata'/> <boot order='1'/> <alias name='sata0-0-2'/> <address type='drive' controller='0' bus='0' target='0' unit='2'/> </disk> <controller type='usb' index='0' model='ich9-ehci1'> <alias name='usb'/> <address type='pci' domain='0x0000' bus='0x00' slot='0x07' function='0x7'/> </controller> <controller type='usb' index='0' model='ich9-uhci1'> <alias name='usb'/> <master startport='0'/> <address type='pci' domain='0x0000' bus='0x00' slot='0x07' function='0x0' multifunction='on'/> </controller> <controller type='usb' index='0' model='ich9-uhci2'> <alias name='usb'/> <master startport='2'/> <address type='pci' domain='0x0000' bus='0x00' slot='0x07' function='0x1'/> </controller> <controller type='usb' index='0' model='ich9-uhci3'> <alias name='usb'/> <master startport='4'/> <address type='pci' domain='0x0000' bus='0x00' slot='0x07' function='0x2'/> </controller> <controller type='pci' index='0' model='pcie-root'> <alias name='pcie.0'/> </controller> <controller type='pci' index='1' model='pcie-root-port'> <model name='pcie-root-port'/> <target chassis='1' port='0x10'/> <alias name='pci.1'/> <address type='pci' domain='0x0000' bus='0x00' slot='0x02' function='0x0' multifunction='on'/> </controller> <controller type='pci' index='2' model='pcie-root-port'> <model name='pcie-root-port'/> <target chassis='2' port='0x11'/> <alias name='pci.2'/> <address type='pci' domain='0x0000' bus='0x00' slot='0x02' function='0x1'/> </controller> <controller type='pci' index='3' model='pcie-root-port'> <model name='pcie-root-port'/> <target chassis='3' port='0x12'/> <alias name='pci.3'/> <address type='pci' domain='0x0000' bus='0x00' slot='0x02' function='0x2'/> </controller> <controller type='pci' index='4' model='pcie-root-port'> <model name='pcie-root-port'/> <target chassis='4' port='0x13'/> <alias name='pci.4'/> <address type='pci' domain='0x0000' bus='0x00' slot='0x02' function='0x3'/> </controller> <controller type='virtio-serial' index='0'> <alias name='virtio-serial0'/> <address type='pci' domain='0x0000' bus='0x02' slot='0x00' function='0x0'/> </controller> <controller type='sata' index='0'> <alias name='ide'/> <address type='pci' domain='0x0000' bus='0x00' slot='0x1f' function='0x2'/> </controller> <interface type='bridge'> <mac address='52:54:00:9e:76:8a'/> <source bridge='br0'/> <target dev='vnet0'/> <model type='e1000-82545em'/> <alias name='net0'/> <address type='pci' domain='0x0000' bus='0x01' slot='0x00' function='0x0'/> </interface> <serial type='pty'> <source path='/dev/pts/0'/> <target type='isa-serial' port='0'> <model name='isa-serial'/> </target> <alias name='serial0'/> </serial> <console type='pty' tty='/dev/pts/0'> <source path='/dev/pts/0'/> <target type='serial' port='0'/> <alias name='serial0'/> </console> <channel type='unix'> <source mode='bind' path='/var/lib/libvirt/qemu/channel/target/domain-23-Macinabox BigSur/org.qemu.guest_agent.0'/> <target type='virtio' name='org.qemu.guest_agent.0' state='connected'/> <alias name='channel0'/> <address type='virtio-serial' controller='0' bus='0' port='1'/> </channel> <input type='tablet' bus='usb'> <alias name='input0'/> <address type='usb' bus='0' port='1'/> </input> <input type='mouse' bus='ps2'> <alias name='input1'/> </input> <input type='keyboard' bus='ps2'> <alias name='input2'/> </input> <graphics type='vnc' port='5900' autoport='yes' websocket='5700' listen='0.0.0.0' keymap='en-us'> <listen type='address' address='0.0.0.0'/> </graphics> <video> <model type='qxl' ram='65536' vram='65536' vgamem='16384' heads='1' primary='yes'/> <alias name='video0'/> <address type='pci' domain='0x0000' bus='0x00' slot='0x01' function='0x0'/> </video> <memballoon model='virtio'> <alias name='balloon0'/> <address type='pci' domain='0x0000' bus='0x03' slot='0x00' function='0x0'/> </memballoon> </devices> <seclabel type='dynamic' model='dac' relabel='yes'> <label>+0:+100</label> <imagelabel>+0:+100</imagelabel> </seclabel> <qemu:commandline> <qemu:arg value='-usb'/> <qemu:arg value='-device'/> <qemu:arg value='usb-kbd,bus=usb-bus.0'/> <qemu:arg value='-device'/> <qemu:arg value='isa-applesmc,osk=xxxxxxxxxxxxxxxxxxxxxxxxxxxxxx'/> <qemu:arg value='-smbios'/> <qemu:arg value='type=2'/> <qemu:arg value='-cpu'/> <qemu:arg value='Penryn,kvm=on,vendor=GenuineIntel,+invtsc,vmware-cpuid-freq=on,+pcid,+ssse3,+sse4.2,+popcnt,+avx,+aes,+xsave,+xsaveopt,check'/> </qemu:commandline> </domain>
-
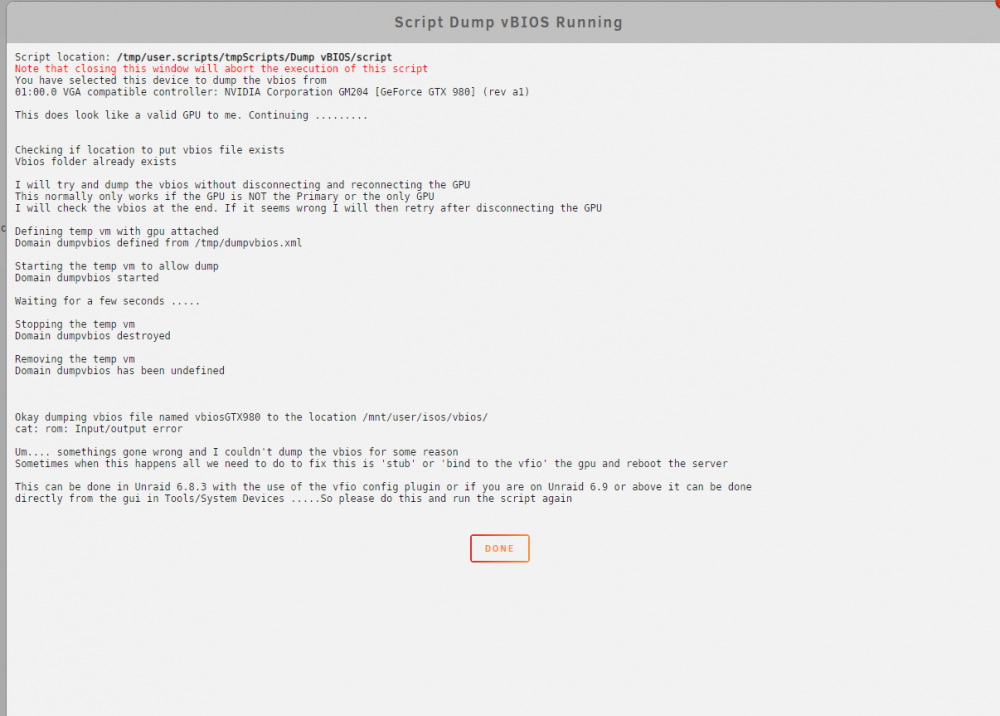
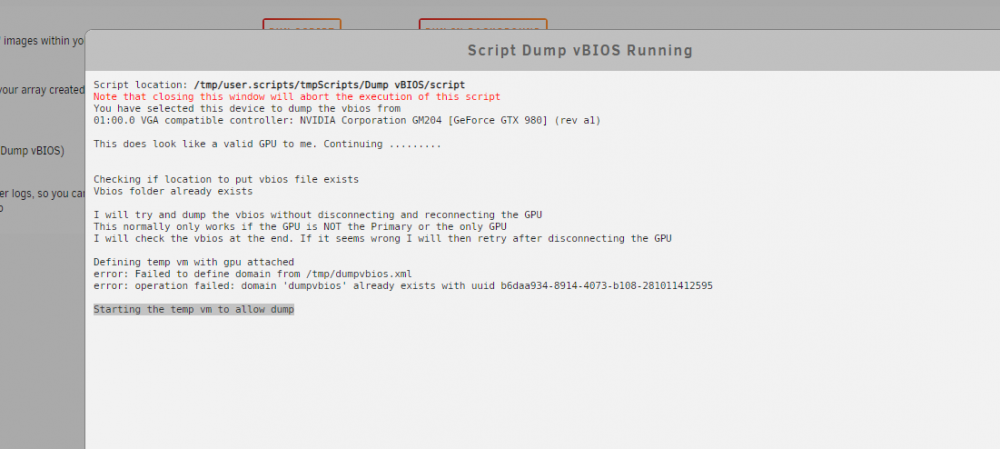
Still getting errors. I did bind the gpu to the vfio as it says. Any ideas? EDIT: I was able to manually edit a vbios I found online to get it to work in my VM. Turning off GUI mode did at least make that part of setting up a VM work, just cant get this script working.

-
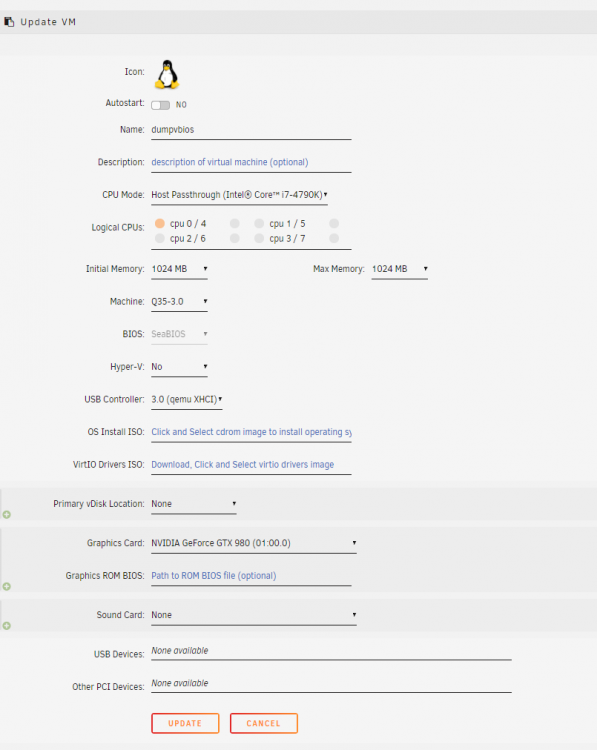
Getting stuck here every time. Any idea why it will not start the temp vm? I have already tried deleting the folder where it is supposed to save the vBIOS I have to force shutdown after this as you cant cancel the script correctly and the array will not unmount the disks. When restarting this VM was stood up, but starting it freezes everything as well.
-
Ah I get what you are saying, I just forwarded the TCP ports nord says they are using to the ports needed for Deluge. I guess I will try PIA and see if that works better. I have a year and a half left on the nordVPN subscription so that is to bad! Thanks for the help.
-
Thank you for the response. I have tried almost everything listed here. Port forwards are set up. Disabled in/out utp Disabled rate limit overhead It is writing to a cache SSD that is not in a pool. qBittorent on a different computer connected to the same router pulls more than 30Mb down. In Deluge it is a completely flat 1.1Mb. Is there a certain set of logs that would be helpful here to post?
-
I can not get above 1.2MB down using DelugeVPN in a container. I am connecting through NordVPN and I have tried more than 10 different servers, some p2p some not, some UDP and some TCP. I have another computer in the room that I can download the same torrents on qBittorent to the share at over 40MB (I have Gb/s fiber). I used these instructions for the install: 1) Grab the ovpn files from Nord by filling out your country and P2P from here: https://nordvpn.com/servers/tools/ I clicked my region, advanced and then p2p, and then OpenVPN TCP 2) Go to the docker containers and make sure you add binhex-delugevpn 3) I changed my "Host Path 2:" variable to a new share (done with spaceinvaderOnes tutorial mentioned in thread) which maps to: /mnt/user/Downloads/ 4) Make sure VPN_Enabled is yes 5) Enter your NordVPN user and pass for Key's 2 and 3 (VPN_USER, VPN_PASS) 6) Set VPN_PROV to Custom 7) Edit your LAN network to reflect your personal network (mine is 192.168.2.x so I changed LAN_NETWORK value to: 192.168.2.0/24 8) Click Apply to create the docker 9) Navigate to your Appdata/binhex-delugevpn/openvpn/ 10) Drop in the ovpn file from step 1 11) restart the delugeVPN docker and sign in, default pass is: deluge 12) Check that your IP is protected! in the bottom righthand corner it will show your Public facing IP, you can check the NORDVPN IP by doing a ping on the server address obtained from step1 to see about what it should be. It is all being written to a share on the cache drive that is a SSD, so no bottleneck there. Any ideas?




