


GeekFreak
Members
-
Joined
-
Last visited
Everything posted by GeekFreak
-
Yes, for the initial setup, you will have to boot the first VM and pass through the Stream Deck. Then, turn off that VM and open the VM you want to switch to, pass the Stream Deck through, and that's it. However, make sure you don't uncheck the Stream Deck from either VM.
-
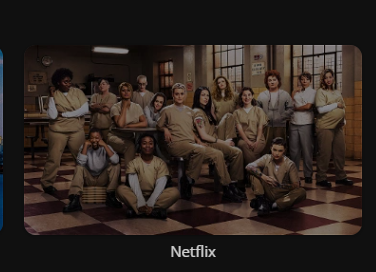
Hello, everyone! I'm excited to share a script I've developed that bridges the functionality of Overseer with Jellyfin, inspired by the seamless downloading feature available in Plex. My script enables users to list TV shows from any streaming provider, creating placeholder folders for these shows within Jellyfin. This makes the shows appear as if they are already downloaded, enhancing the browsing experience. Here is the GITHUB link: Overseer-and-Jellyfin-Bridged NOTE: i havent seen anything similar to this so dont attack me please 😇 As of right now this only work with TV shows, movies are coming next Here is the GITHUB link: Overseer-and-Jellyfin-Bridged How It Works: - Create a library in Jellyfin, such as "Netflix". This library will then display all Netflix shows as placeholders, giving the impression that they are available for streaming. - If you find a show you're interested in, simply mark it as a favorite. The script will automatically send a download request to Overseer, starting the download process. Initial Setup Requirements: 1. Manually create a folder for the streaming service (e.g., Netflix) in your main Jellyfin media directory. 2. Add the path of this newly created folder (e.g., the Netflix folder path) into the script. 3. Install the UserScripts plugin in Unraid. 4. Obtain the "network ID" from the Overseer URL when selecting a streaming service. Next Steps: After setting up, run the script and perform a library scan in Jellyfin. You'll see your library populate with content from the selected streaming services, ready for you to enjoy. Call for Collaboration: I'm looking forward to transforming this script into a Jellyfin plugin and would greatly appreciate any help with this project. This development aims to simplify the process, making it user-friendly for even those with no Python experience. Your input and collaboration would be incredibly valuable in making streaming more accessible and enjoyable for everyone. Excited to hear your thoughts and looking forward to making streaming better together!


-
Hello, everyone! I'm excited to share a script I've developed that bridges the functionality of Overseer with Jellyfin, inspired by the seamless downloading feature available in Plex. My script enables users to list TV shows from any streaming provider, creating placeholder folders for these shows within Jellyfin. This makes the shows appear as if they are already downloaded, enhancing the browsing experience. NOTE: i havent seen anything similar to this so dont attack me please 😇 As of right now this only work with TV shows, movies are coming next Here is the GITHUB link: Overseer-and-Jellyfin-Bridged How It Works: - Create a library in Jellyfin, such as "Netflix". This library will then display all Netflix shows as placeholders, giving the impression that they are available for streaming. - If you find a show you're interested in, simply mark it as a favorite. The script will automatically send a download request to Overseer, starting the download process. Initial Setup Requirements: 1. Manually create a folder for the streaming service (e.g., Netflix) in your main Jellyfin media directory. 2. Add the path of this newly created folder (e.g., the Netflix folder path) into the script. 3. Install the UserScripts plugin in Unraid. 4. Obtain the "network ID" from the Overseer URL when selecting a streaming service. Next Steps: After setting up, run the script and perform a library scan in Jellyfin. You'll see your library populate with content from the selected streaming services, ready for you to enjoy. Call for Collaboration: I'm looking forward to transforming this script into a Jellyfin plugin and would greatly appreciate any help with this project. This development aims to simplify the process, making it user-friendly for even those with no Python experience. Your input and collaboration would be incredibly valuable in making streaming more accessible and enjoyable for everyone. Excited to hear your thoughts and looking forward to making streaming better together!

-
Oh thats perfect. mine works for anyone who want to connect their elgato stream deck and wants to switch to whatever system, it's nice if you have multiple VM you want to switch between like i have MacOS, Ubuntu, and Windows that i switch for software testing and etc, and i could do that with elgato stream deck it makes my life a little bit easy lol.
-
Hey i have got the solution for you i able to create a nice script with webhook to switch between vm easily
-
Hello Everyone! 🌌 Ever since I stumbled upon SpaceInvader's video about VM switching, I've been absolutely captivated! Imagine this: I have two VMs – Ubuntu and Windows – both rigged with GPU passthrough, seamlessly toggling back and forth. It's like having the best of both worlds at my fingertips! 🚀 But here's the catch: SpaceInvader's method uses "sleep," and honestly, I'm not a fan. What if Windows decides to take a snooze for an update? There goes my seamless switch, right? Ubuntu would just be hanging there, waiting. So, I put on my thinking cap and crafted a nifty bash script paired with a webhook. And guess what? You can link it with your Elgato Stream Deck! Now you can flip between Windows, Linux, macOS, or any OS of your choice with just a tap. 🔥 Here's the cherry on top: My script comes with a variable array. You get to tell it which VMs to juggle and which ones are off-limits for shutdown. No more accidental power-offs for your always-on VMs like HomeAssistant! 🎉 Let's dive into the setup. It's easy-peasy! You can check out the Demo: 1. Grab the Goods: Head over to GitHub and download the necessary files. Remember to park them in `/mnt/user/<your chosen folder>`. Why, you ask? Because Unraid likes to tidy up after a restart, and we don't want our files to vanish! 2. Python Power-Up: Snag Python from the Unraid community app. 3. User Script Magic: Install the User Scripts plugin next. 4. Scripting Time: Create a new script in User Scripts and paste this baby in: pip install flask sleep 10 python3 /mnt/user/webhooks/webhook.py Pro Tip: Adjust the `sleep` duration as needed, but don't rush Python – it needs time to embrace Flask. And keep that `pip install flask` line; Unraid likes to forget Flask exists after a restart. 5. Background Buzz: Set this script to run in the background. 6. The Grand Finale: Craft a .bat file with this line: curl -X POST -H "Content-Type: application/json" -d '{"vm_name":"<VM_NAME>"}' http://<SERVER_IP>:5006/webhook Swap `<VM_NAME>` with your desired VM. This is where the script really struts its stuff, checking the array list to see which VMs can take a break before firing up your chosen one. And that's all, folks! You're now a maestro of VM switching, orchestrating a symphony of seamless transitions. Happy switching! 🌟 (Note: Don't forget to replace placeholders like `<VM_NAME>` and `<SERVER_IP>` with your actual VM names and server IP address.)
-
YOU ARE AMAZING THANK YOU SO MUCH IT WORKED


