

moose
-
Posts
226 -
Joined
-
Last visited
Content Type
Profiles
Forums
Downloads
Store
Gallery
Bug Reports
Documentation
Landing
Everything posted by moose
-

X9SCM-F slow write speed, good read speed
moose replied to moose's topic in General Support (V5 and Older)
I was having trouble getting the LAN2 NIC on the X9SCM-F to work and found a thread on the hardforum website (http://hardforum.com/showthread.php?p=1038927544) that indicated some people had the EPROM of the NIC get corrupted when the x9scm-f bios was upgraded from v1.x to v2.x, so I contacted Supermicro and they emailed me an EPROM flash utility to fix the corrupted NIC EPROM. I followed the instructions/re-flashed and on-board LAN2 worked, however I still got the slow write speed (~1.2 MB). I tried on-board LAN1, however now it doesn't work. I re-flashed the motherboard bios to 2.0a, and cleared CMOS by unplugging AC, shorting JBT1, plugging AC back in. Same results, LAN1 doesn't work, LAN2 works with ~1.2 MB write speed. I then used a fixed IP for the WIN7 client and connected the WIN7 client directly to LAN2 of the x9scm-f with a new CAT6 jumper (no switch) and got the same ~1.2 MB write speed. I then attempted to try a different LAN adapter (Intel expi9301ctblk), however unRAID only detects the on-board LAN2 (verified via MAC address output of ifconfig command). It seems the X9SCM-F is corrupted. I'm not sure if there is something that I can do to reset the bios, or if I should downgrade the bios to version 1.1a (I did see that some bricked their boards by attempting to downgrade from v2.x to v1.x bios), or should I RMA the board to Supermicro? Any advice? I see that dikkiedirk is also asking about the procedure downgrading x9scm-f bios from 2.0a to 1.1a here: http://lime-technology.com/forum/index.php?topic=22810.0 update: I successfully downgraded the bios from v2.0a to v1.1a, however still have the slow write speed and LAN1 still doesn't work in unRAID. No dropped RX packets. update #2: I disabled the two on-board LAN ports by moving JPL1/JPL2 to pins 2-3 and got the Intel expi9301ctblk LAN adapter to work in unRAID, however still having the slow write speed problem. No dropped RX packets. -
X9SCM-F slow write speed, good read speed
moose replied to moose's topic in General Support (V5 and Older)
update: with new CAT6 jumpers - Win7 client <-> GS748Tv4 (1 Gb switch) <-> unRAID server, I am getting the same results. Cabling does not appear to be the problem. I'll continue to troubleshoot. -
X9SCM-F slow write speed, good read speed
moose replied to moose's topic in General Support (V5 and Older)
Thanks dgaschk, will do. The wire closet (and switches) are upstairs and the unRAID server is in the basement. I retrofitted my house with CAT6. The CAT6 between the wire closet and basement is bundled in conduit, however I don't have all the CAT6 ends terminated in the basement. What I'll do is move the unRAID server upstairs and plug directly into the 1Gb switch with a new Monoprice CAT6 jumper and do the same with the WIN7 machine (directly into the switch with a new CAT6 jumper) and retest/troubleshoot to see if I can eliminate the dropped packet problem with the RX path. I appreciate the assistance. Thank you! -
X9SCM-F slow write speed, good read speed
moose replied to moose's topic in General Support (V5 and Older)
results below. root@Moose:~# ifconfig eth0 Link encap:Ethernet HWaddr 00:25:90:74:76:d0 inet addr:192.168.0.31 Bcast:192.168.0.255 Mask:255.255.255.0 UP BROADCAST RUNNING MULTICAST MTU:1500 Metric:1 RX packets:791743 errors:0 dropped:152 overruns:0 frame:0 TX packets:149471 errors:0 dropped:0 overruns:0 carrier:0 collisions:0 txqueuelen:1000 RX bytes:1122162714 (1.0 GiB) TX bytes:16276648 (15.5 MiB) Interrupt:16 Memory:f7900000-f7920000 lo Link encap:Local Loopback inet addr:127.0.0.1 Mask:255.0.0.0 UP LOOPBACK RUNNING MTU:16436 Metric:1 RX packets:209 errors:0 dropped:0 overruns:0 frame:0 TX packets:209 errors:0 dropped:0 overruns:0 carrier:0 collisions:0 txqueuelen:0 RX bytes:28690 (28.0 KiB) TX bytes:28690 (28.0 KiB) root@Moose:~# ethtool eth0 Settings for eth0: Supported ports: [ TP ] Supported link modes: 10baseT/Half 10baseT/Full 100baseT/Half 100baseT/Full 1000baseT/Full Supports auto-negotiation: Yes Advertised link modes: 10baseT/Half 10baseT/Full 100baseT/Half 100baseT/Full 1000baseT/Full Advertised pause frame use: No Advertised auto-negotiation: Yes Speed: 1000Mb/s Duplex: Full Port: Twisted Pair PHYAD: 1 Transceiver: internal Auto-negotiation: on MDI-X: on Supports Wake-on: pumbg Wake-on: g Current message level: 0x00000007 (7) Link detected: yes -
X9SCM-F slow write speed, good read speed
moose replied to moose's topic in General Support (V5 and Older)
I created a 1GB "dummy.txt" file and transferred it to the unRAID server from a Win7 PC via the 1Gb LAN connection with no parity. Attached is the syslog (without parity) after the file transfer was complete. The observed write speed was ~ 1.4 MB/s. I hope you didn't want me to attach a syslog after transferring with parity since now I think I would have to rebuild parity and that would take a bit of time. I can do that if needed. syslog-2012-09-22_no_parity.txt -
I'm running 5.0-rc8a and having very slow write speeds with my X9SCM-F motherboard. I'm experiencing ~ 1.2 MB write speed and ~ 110 MB read speed. Parity check is ~ 140 MB/s. I have two drives: (1) 3TB parity and (1) 2TB data connected directly to the (2) 6Gb ports on the motherboard. Both disks (parity & data) are empty. Complete rig specs are in my signature (with this problem I am running bare metal, no ESXi), but note that I removed the 2x SAS2LP-MV8, 1x SASLP-MV8 and EXPI9301CT (add-on SATA controller/Ethernet cards) from the motherboard and still experience the above write slow speed. (Note: I also tried with the parity and data drive using a SAS2LP-MV8 controller in a PCI-E x8 slot with the same write speed results.) I have a 1Gb network and the X9SCM-F is connected via LAN1 port only (Intel 82579LM). Edit: This issue is solved with 5.0-rc15. syslog-2012-09-21.txt Smart_Status_Report_parity.txt Smart_Status_Report_data.txt
-
I'm seeing 80-90 MBps with a parity check.
-
Very good points. Thank you.
-
Caveat: Unless it's a solid-state drive (SSD) used as a cache disk because pre-clearing a SSD will cause the SSD to fail prematurely (add unnecessary wear and tear), right Joe?
-
Experimental fix/test for mpt2sas controllers (LSI)
moose replied to limetech's topic in Announcements
Thank you drew.c! This was the problem. I found a similar post (prior to your reply) http://lime-technology.com/forum/index.php?topic=22201.0 Upgrading the Seagate ST3000DM001-9YN166 parity drive firmware from CC46 to CC4H solved the LED problem on the CSE-M35T cage! I believe the LED was operating in "inverse" mode, meaning that the LED was solid when the drive was inactive and off when the drive was active, upgrading the drive firmware reversed the LED behavior to normal. (Thanks also to Frank1940 and jonathanm for idea of using the metal bar to "listen", however there are so many fans running in the room where the test server is located, I couldn't hear the subtle noise of the motor....great idea however.) Since this topic did not specifically apply to 5.0-rc6-r8168-test2, but was resolved with a drive firmware update, the moderators might want to move it to another area. -
Thank you onehunghig! Upgrading the Seagate ST3000DM001-9YN166 drive firmware to CC4H solved the LED problem!
-
I have a test server with two drives (parity and data) that are both installed in a CSE-M35T cage. Running unRAID 5.0-rc6-r8168-test2 Parity = Seagate ST3000DM001-9YN166, type = SATA 3.0, firmware = CC46 Data = Seagate ST2000DL003-9VT166, type = SATA 3.0, firmware = CC3C The data drive LED functions properly (green with activity, dark (non-lit) with no-activity), however the parity drive LED is constantly green. The unRAID web interface (main tab) indicates the parity drive is spun down however the LED is constantly green. I'm going to see if I can determine if the LED goes dark with activity (reversed condition mentioned above). Do you think the parity drive might need a firmware update to properly function with the CSE-M35T cage LED?
-
Experimental fix/test for mpt2sas controllers (LSI)
moose replied to limetech's topic in Announcements
ok, if this is the case, do I trust the unRAID web-interface which has a blinking green status (spun-down) for the 3TB drive versus the drive cage LED (solid green)? I'll search for reports of inaccurate drive cage disk status LEDs, specifically for the Super Micro CSE-M35T-1B. -
Experimental fix/test for mpt2sas controllers (LSI)
moose replied to limetech's topic in Announcements
I setup a test server running v5.0-rc6-r8168-test2. Only plugin is unmenu. I have a 3TB parity and 2TB data disk. The 3TB disk does not spin down (constant green activity LED). The 2 disks are in a 5-in-3 cage and I've moved the 3TB to several different slots and had the same result...no spin down. Both drives are using interfacing via a Super Micro AOC-SAS2LP-MV8 controller. 2TB spins down fine. Any suggestions? The specs for this rig are in my signature...it's the test server. syslog and smart report for subject server/drive are attached. syslog-2012-08-26.txt Smart_report.txt -
Where 4096 in the two lines below denotes 4K alignment, correct? If a disk was 1k-aligned the 4096 would be 1024, correct? Sector size (logical/physical): 512 bytes / 4096 bytes I/O size (minimum/optimal): 4096 bytes / 4096 bytes
-
Can someone please tell me how to determine if a particular array disk is 4k-aligned or not? I've searched the forums but not been successful in the process of how to determine.
-
Blackhole 2.0 - 60TB v.Now with 100% more ESXi
moose replied to kevinsyn's topic in Unraid Compulsive Design
I must admit i'm impressed with the SSD mount. That is an awesome idea. I dont have an SSD in there but that definitely works. is it stable since its only mounted on one side? Yes, since the SSDs are very light, mounting with screws on one side (via this method/case) yields stable attachment. I have a Plextor model M3 Pro Series PX-256M3P 2.5" 256GB SATA III MLC and specs indicate it weighs 57 grams. -
I'm also interested in knowing the compatibility of rc4 with the AOC-SAS2LP-MV8 and AOC-SASLP-MV8 cards. Thank you!
-
Blackhole 2.0 - 60TB v.Now with 100% more ESXi
moose replied to kevinsyn's topic in Unraid Compulsive Design
See the dimensions in this picture. As far as I know they are regular c-clamps. I believe I only used the 6" c-clamp.
-
Blackhole 2.0 - 60TB v.Now with 100% more ESXi
moose replied to kevinsyn's topic in Unraid Compulsive Design
If you flatten the ~ 9 tabs in the top section with a c-clamp (see attached picture) and remove the horizontal dividers between each section, you won't have any trouble inserting the Supermicro CSE-M35T-1B 5-in-3 drive cages, no forcing required. I had both 4" and 6" c-clamps. I think I used only the 6" clamp since the clamping surface area was greater (compared to the 4" clamp). I would think these c-clamps would be readily available in Holland at a hardware store. They cost ~ $10 here in the USA.
-
5.0RC3 - BLK_EH_NOT_HANDLED causes freeze
moose replied to hmatos's topic in General Support (V5 and Older)
I know RobJ mentioned the possibility of a firmware update, but just "for the record" what firmware revision are you running on the AOC-SASLP-MV8 cards? -
Blackhole 2.0 - 60TB v.Now with 100% more ESXi
moose replied to kevinsyn's topic in Unraid Compulsive Design
I found solution to mounting SSDs in the Lian Li PC-A77FB case. With a microATX motherboard in this case, there are 4 unused PCI slots towards the bottom of the case. The PCI slot covers that come with the case have diagonal slots that line up perfectly with the side mounting holes on the SSD. I mounted the SSD to the PCI slot cover and installed it in the case with the power and SATA connectors facing upward/outward. (See attached pictures.)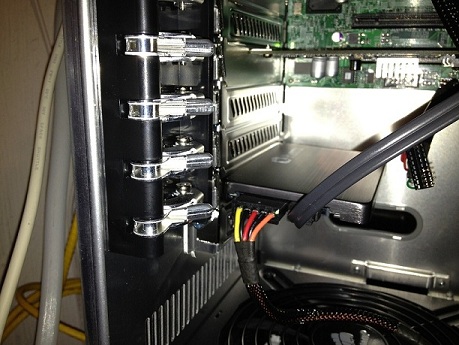

-
Blackhole 2.0 - 60TB v.Now with 100% more ESXi
moose replied to kevinsyn's topic in Unraid Compulsive Design
Glad to hear it. Yes the top 3 drive bays need to be flatten. But since it is an aluminum case it was very easy to mold and work with so i didn't have much difficulties. Man it is a very very tight fit for the CSE. I spent a good 3 hours getting all 4 of them inside. I dont even know how i did it really just pushed really hard. To be honest i don't think they are coming out as it seems to be a one way trip Yes i usually use IPMI to powercycle. I've had no problems with the PSU compatibility with the motherboard. I used a big pair of needle nose pliers to start a very slight downward bend on the tab and then used a multiple passes with a 6" c-clamp to flatten each tab. I torqued down the c-clamp to get all the tabs essentially flat. The flattening process with the 6" c-clamp did leave a slight imprint of the clamp ends in the case but that's OK. Took a while to do this and was a bit of a pain but the good news is its a "one-time" step. If I remember correctly there were a few tabs towards the back of case where I had to get a bit creative with the c-clamp placement but it's definitely doable. I also removed all of the horizontal aluminum dividers before installing each Supermicro CSE-M35T-1B 5-in-3 drive cage. This gives more room to work with to install each cage. (I had problems inserting the cages (too tight) until I removed the horizontal dividers.) You can remove the screws holding each horizontal aluminum divider with a small screw driver. The top horizontal divider was a bit trickier (for me) since the access holes were slightly misaligned with the screws, but if you have an assortment of small flathead and phillips screwdrivers you can get all the screws out and then remove all the horizontal aluminum dividers. Adding the Supermicro CSE-M35T-1B 5-in-3 drive cages in the PC-A77FB case reinforces the vertical structures without the horizontal aluminum dividers, so your case will be solid even without the horizontal dividers. I didn't have any trouble installing (3) Supermicro CSE-M35T-1B 5-in-3 drive cages. I still have a 4th drive cage to install from my other unRAID server. I'll install the 4th drive cage in the bottom slot once version 5.0 final is released and I port everything over from my existing 4.7 pro server to the new server (2nd unRAID server in the Lian Li PC-A77FB case).
-
Wanting to buy a Scythe Kama Stay. Thank you!
-
Blackhole 2.0 - 60TB v.Now with 100% more ESXi
moose replied to kevinsyn's topic in Unraid Compulsive Design
Yes that would work. I checked and there is a large screened opening on the bottom of the case to provide ample outside airflow into the PSU fan, so that would seem to work quite well. I suppose there might be some negligible loss of airflow from within the case through the PSU, however with 4x Super Micro 5-in-3 cages and the 2 top case fans and 1 back case fan, there is probably considerable air movement (throughout the case) to negate any air flow loss by flipping the power supply over. Thank you for the ideas!


