






yayitazale
Members
-
Joined
-
Last visited
Everything posted by yayitazale
-
First of all, please keep your communications in English which, as you can see, is the language we use on this site. Unfortunately I do not understand French. Secondly, in this forum we deal with the problems you may have to launch the frigate docker container in unraid. Using a VM is not part of the instructions so you will have to ask in the appropriate place, which is the section related to the VM engine: https://forums.unraid.net/forum/51-vm-engine-kvm/
-
Sorry but this is out of my knowledge, I don't know why is not working, everything looks good except you had installed the driver, but theoretically with a uninstall and reboot should work again.
-
Maybe you need to reboot the host...
-
You should select the nvidia brunch when installing frigate from CA APPs, then read the instructions of the template and fill the required entries with the required information. You should also edit the config file following the instructions of the frigate docs and then check if everything works. If you have specific doubts I would try to help you. PS: if you only plan to use nvidia card for hard. accel, you don't need to install the nvidia branch, but the rest of the steps are the same.
-
Did you follow the steps of the requirements? - Create a new folder to save the models (for example on /appdata/trt-models) - Download the script and save it in the previously created path (https://raw.githubusercontent.com/blakeblackshear/frigate/dev/docker/tensorrt_models.sh) - Open the unraid console and launch the following command without quotes(pointing to your script path): chmod +x /mnt/user/appdata/trt-models/tensorrt_models.sh - Then launch the container that will run the script and stop then container at the end.
-
Do you install the coral driver on the host? If yes, uninstall it.
-
Are you using the original cable and a 3.0 USB port?
-
Try with privileged mode I think.
-
Can you test it with another computer with any of the examples of https://coral.ai/examples/#code-examples? Can you see it listed on the devices on unraid?
-
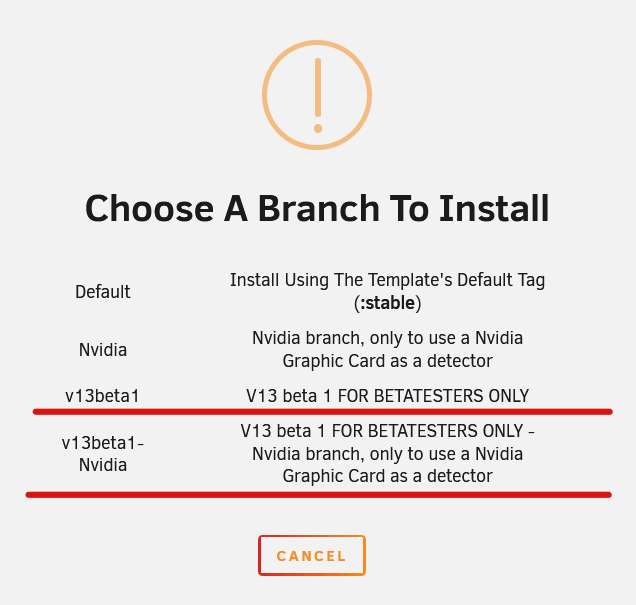
Pushed a change to the template to replace beta 1 with beta 2, anyone who wants to try has to reinstall it again following the same steps as for beta 1. Will be available in the CA store shortly.

-
@ich777 do you have any advice for virtualized unraids?
-
Did you followed the steps to make the required changes on the frigate config in all the cameras that are you going to use alongside whosatmyfeeder? https://github.com/mmcc-xx/WhosAtMyFeeder/
-
Is not exactly like that, E6 is just a higher level in the same family. https://en.wikipedia.org/wiki/List_of_Intel_Xeon_processors To use QSV or VAAPI your CPU needs a integrated GPU. Yes installing a discrete video card will lower your CPU consumption, but the bigger is your number of cameras and its resolution, the bigger is going to be the difference. If you have have several cameras you can have a look to the nvidia compatibility matrix and try to find a second hand old GPU, you can find good deals in the Quadro series that have unlimited concurrent sessions like the P2000 or go to mid-low range desktop GPU like a gtx 750. If you already have a old GPU in a box or a drawer take a look maybe it's enough for your needs.
-
Did you test it deleting the username and password lines? It is not able to open a connection with the MQTT broker.
-
Test this, you have several things wrong: frigate: frigate_url: http://192.168.100.69:5000 mqtt_server: 192.168.100.69 mqtt_auth: false mqtt_username: mqtt_password: main_topic: frigate camera: - Remi_Cam object: bird classification: model: model.tflite threshold: 0.7 webui: port: 7766 host: 0.0.0.0 I'm not sure if MQTT is with auth = false if you have to remove the mqtt_username and mqtt_password lines.
-
The MQTT server doesn't accept the port at the end so you should have something like: mqtt_server: 192.168.100.69
-
I didn't test it yet but I understand that tensorrt docker is not longer going to be needed as the frigate itself is going to create the models at the startup process. I'll update the description, requirements and entries (delete the "trt-models" path and add the "YOLO_MODELS" and "USE_FP16" environmental variables) docs when this version is released to the general public in a stable form. If you can test the model generation with several yolo models I'll appreciate it.
-
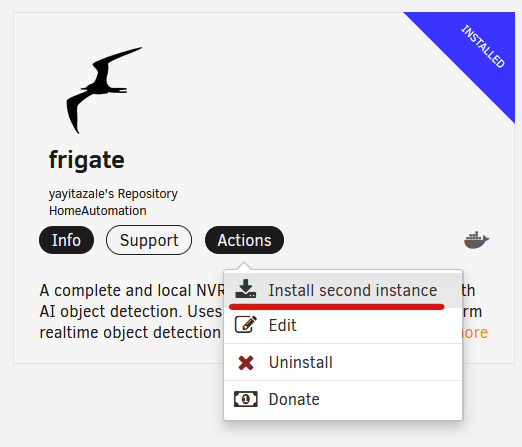
Now that the beta1 is official I have added the beta1 and beta1-tensor tags to the deploy selector. Anyone interested can test the beta1 just installing a second instance with the beta tag. I strongly suggest you to use a different paths than the stable frigate for config and media folders. Steps to securely test betas: Create a new folder on appdata called frigate-beta. Create a new media folder again with a different name. Just stop the running stable frigate app, don't delete. Copy and paste the config file in the new folder and edit it modifying it with the new requirements. Optionally, copy and paste the database file in the new folder. Launch the new frigate beta as a second instance with a different name, like "frigate-beta" and change the path of the config file and media path to the new ones. In this way you can have both old and new frigate (only one running but both containers): You can make trials to make beta to work, but if you don't make it in just one try, you can just stop the frigate beta and start the stable one as many times as you need. Don't forget to delete the unused orphan images clicking in the advanced view in the docker container page:
-
Click on advanced mode and then add the corresponding tag to the repository
-
Some people had similar problems in the past and it was a device issue...
-
For the USB Coral there is no need to install any drivers in unraid. The things you have to check: Did plug in to a USB-C port? Are you using the original cable or another one? Do you have enough power in the server? Anyway, I never did that "full power mode", I just use it in a regular way as it has enough power to run frigate so I'm not sure if there is something there.
-
Very nice recommendation, I didn't know about this project. I have added a template and you have it already available in the CA store. If you see something to be changed you can just make PRs here: https://gitlab.com/yayitazale/unraid-templates/-/blob/main/yayitazale/whosatmyfeeder.xml
-
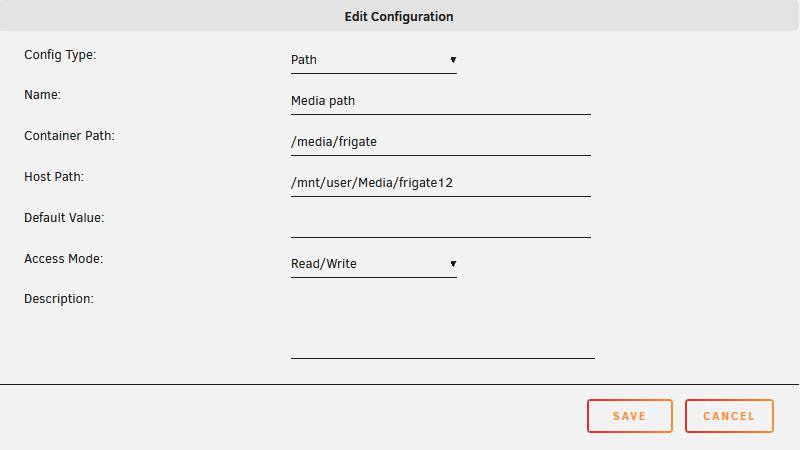
In the folders mapping you should have this, as inside the container there is no difference between the dockers. That is the point of using containers, that for the container itself everything is where it has to be but you can tinker the things from outside.
-
Sorry I don't have frigate exposed to the outside, I use home assistant webrtc integration.
-
You don't have recordings turned on. You should put a specific entry as a global config (in the same way/level as detectors) inside the config as you can see here: https://docs.frigate.video/configuration/record I also suggest you to try to use FFMPEG hardware acceleration as you will see a noticeable decrease of the CPU usage.



