





GameKing505
Members
-
Joined
-
Last visited
Everything posted by GameKing505
-
I have the exact same device as your screenshot and am passing it through the exact same way (by the /dev/serial/by-id path) and it's still not registering in my docker app (Home Assistant). Any ideas why that would be? I've been pulling my hair out over this for a while. At first I thought it was passing through correctly since "lsusb" output in the docker container included the device, but then I noticed that even when I wasn't passing it through explicitly in the unraid UI, lsusb still listed the zigbee dongle.
-
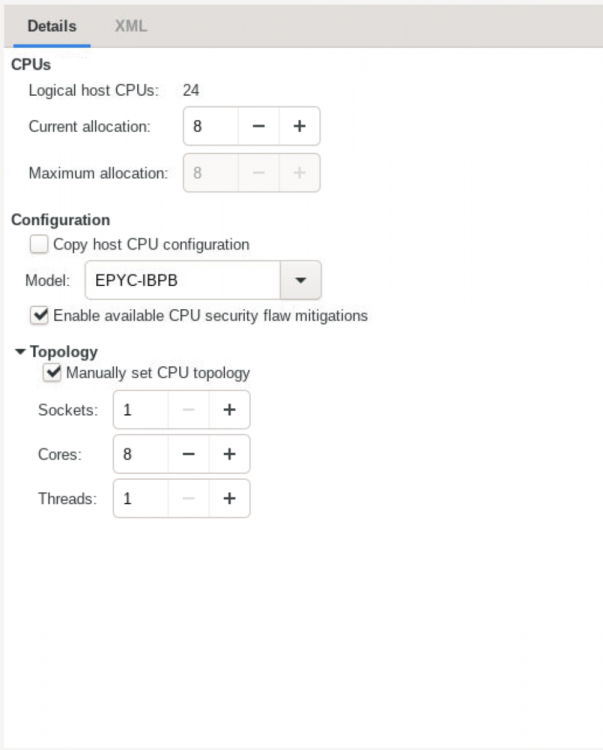
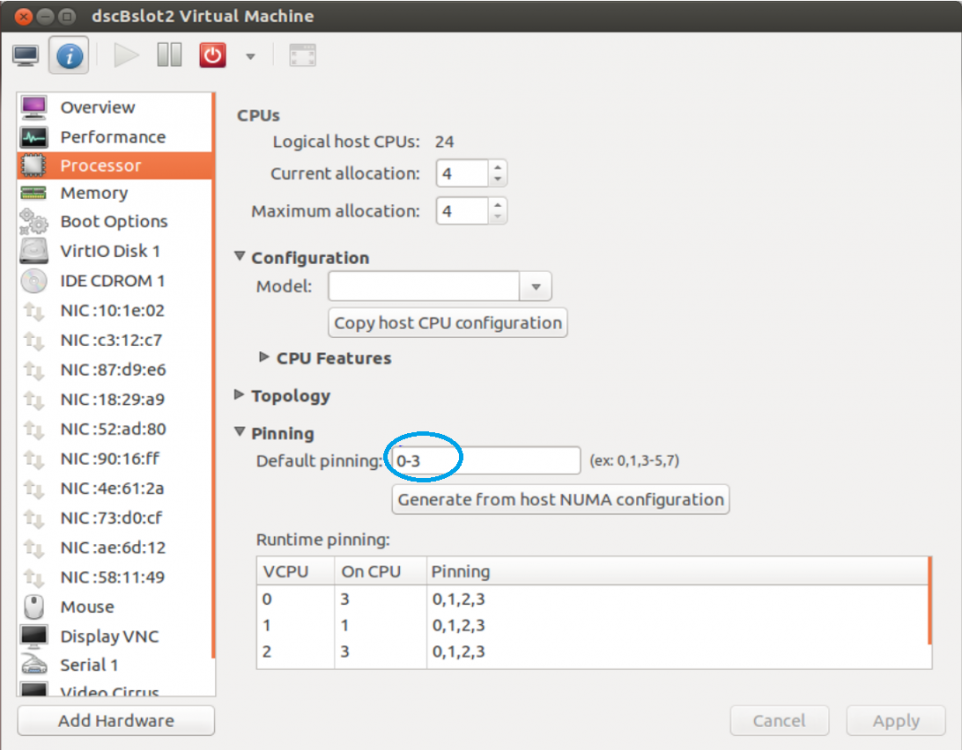
Ideally I'd like to be able to modify for example, how many cores I've assigned to my OSX Virtual Machine, without needing to re-add in all of the custom XML that is needed to make the osx VM run. If I make these changes with the unraid UI, then my understanding is that custom XML would be overwritten. I was hoping that using virt-manager would let me make those edits while preserving the custom XML, but it appears you can't assign individual logical cores to a VM using the virt-manager docker?
-
So there's no way to achieve CPU pinning using the virt-manager docker? That's disappointing... I thought the whole idea was that you got /more/ control than the default unraid GUI for VMs.
-
In Virt-Manager I don't see a way to modify which logical cores are assigned to a VM (like in the native unraid UI). I see a way to assign a "current allocation" and "maximum allocation" of logical cores, as well as manually setting CPU topology, but nowhere do I see where to actually just set which logical cores are assigned to the VM. Am I missing something? I've seen screenshots of virt-manager that include this functionality. What I see in the docker: What I've seen of Virt-Manager elsewhere:
-
I managed to get it all working with a passed through GTX 1080 on High Sierra but then mistakenly allowed the Mac App Store to make updates (not a full OS update but some sort of security patch). Now my display is messed up again at boot, even though the correct Nvidia web drivers are installed. OSX VMs seem like a PITA... Thoughts on how to fix it?
-
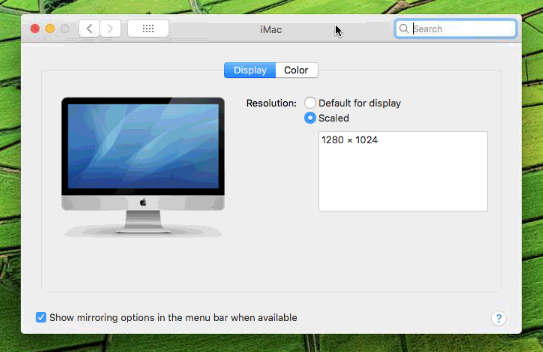
Thanks SpaceInvader! I started over, followed those^ instructions, and got a working 2-core VM with passthrough. The key issue was just installing the nvidia drivers remotely when the screen was garbled. THEN I went and tried to change the # of cores in the VM (and made all the right edits to the XML again) and somehow this resulted in the VM not outputting to the display. It boots with a black monitor at 1280x1024 resolution. I can Splashtop in and use the VM no problem, but it won't even show me the full 2560x1440 resolution option in osx preferences. Any thoughts? Here is what I see in display preferences:
-
Unfortunately I have tried that and it hasn’t worked. The only difference is that my paths are for the High Sierra OVMF flies and not the Catalina ones- but I assume that is as it should be. I’m still getting the graphical glitches...
-
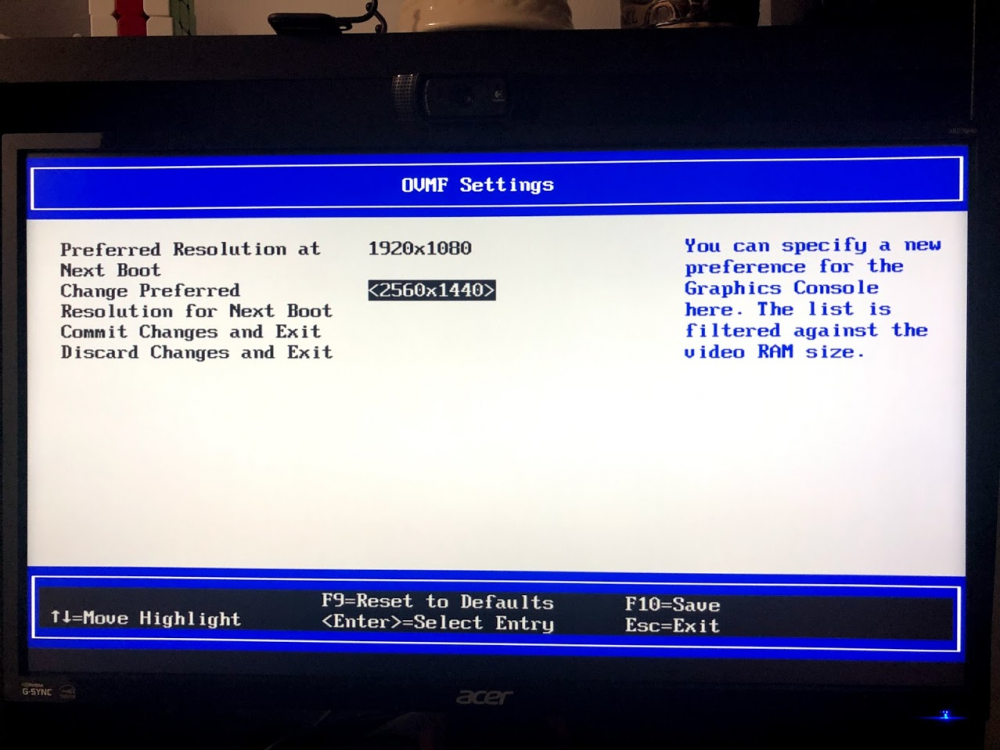
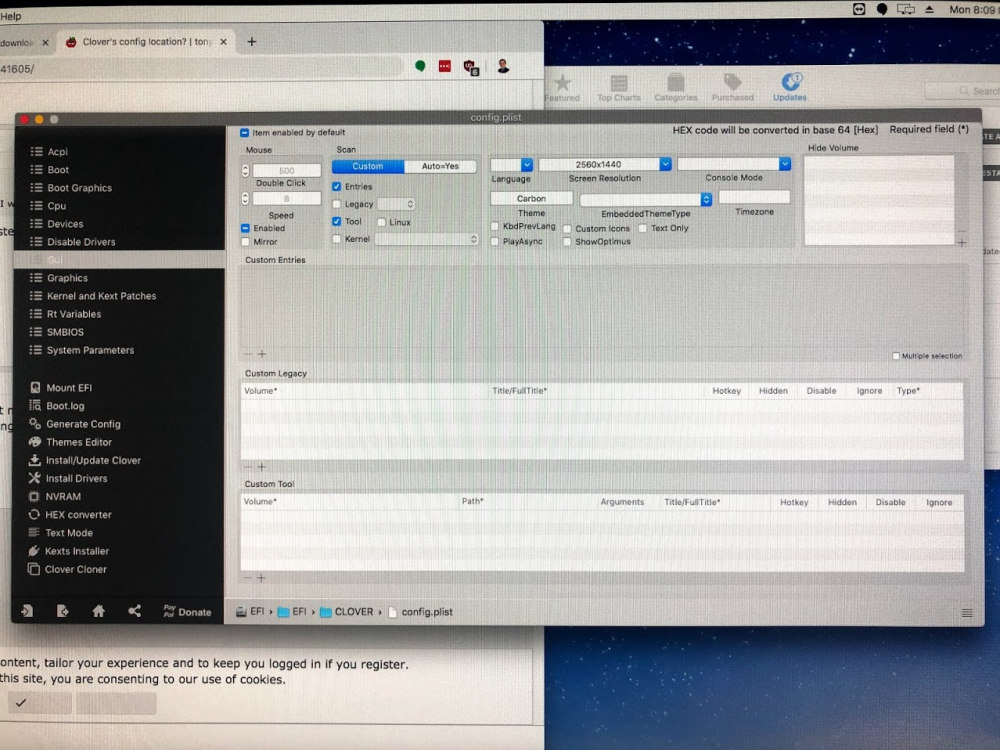
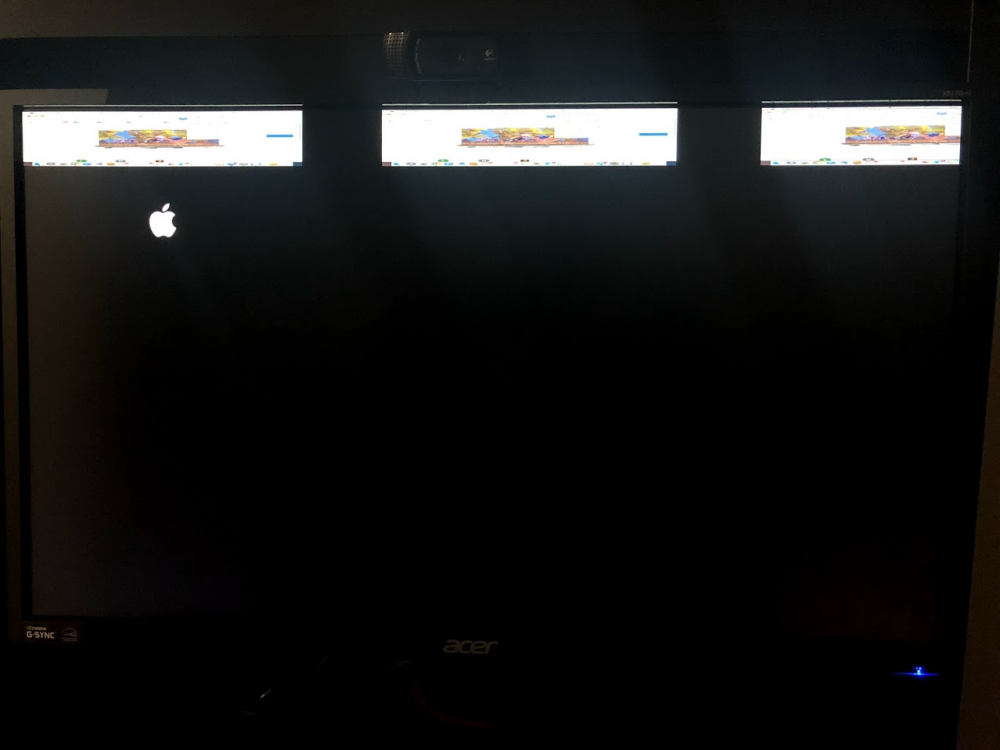
Thanks for the help! I am new to OSX VMs, clover, etc. so some of what you suggested may have gone over my head (my apologies). What I did - I mashed escape upon booting the VM to get to the VM BIOS. Then I poked around looking for resolution settings and found this screen: It seems the "preferred resolution at next boot" is 1080p and I seemingly can't change that option in the bios, but the "change preferred resolution for next boot" is set to the correct 1440p resolution. Is this right? Next I booted the VM and installed Clover Configurator (which I found via googling). Then I mounted the EFI partition and opened up the config.plist file (is that right?) on there within clover configurator. Then I changed the screen resolution setting to 2560x1440, like so: After making these changes, I attempted to pass through the GPU but I got the same graphical error I described earlier. I can technically use the mouse and keyboard etc, but it's impossible to see what I'm doing, and the image is repeated 3x: Any other thoughts?
-
I created a High Sierra VM and I am able to edit the # of cores in the VM Manager UI and then re-add all the changes to the XML, and the VM performs just fine (via VNC). However as soon as I add my GTX 1080 GPU for pass-through, I get a bizarre repeated and compressed image on the monitor. It's like the screen height is shrunk by 3x, and then the image repeats 3 times from left to right. Any thoughts on why this would be? I've seen others in this thread complain about the same issue, which they claimed was solved by adding the "<os>" section of the XML back in. I've done this but nothing has helped. Open to thoughts. ALSO: is there any way to modify the boot order in the clover boot menu? It seems to default to the installation rather than booting the actual already-installed OSX. Kind of annoying - I'm sure it's an easy fix but I can't for the life of me find it in the options.





