OsoPolar
Members
-
Joined
-
Last visited
-
Summary The User Scripts plugin shows a “Custom” schedule (*/30 * * * *) and “Run in background,” but no cron entry is created. Scripts run manually fine, yet never run on schedule. EnvironmentUnraid: 7.1.4 (Pro) User Scripts plugin: current as of 26 Oct 2025 (standard; not Enhanced) Hardware: standard build (nothing exotic) The script (works manually)Script path: /boot/config/plugins/user.scripts/scripts/Tailscale Serve Reapply/script What it does: resets Tailscale “serve” table and reapplies mappings; runs docker exec nextcloud occ status; writes a log to: /var/log/tailscale-serve-reapply.log Manual run works: /boot/config/plugins/user.scripts/scripts/Tailscale\ Serve\ Reapply/script tailscale serve status # shows expected ports Expected vs actualExpected: After setting Schedule → Custom → */30 * * * * and clicking Apply, the plugin writes a cron entry and the script runs every 30 minutes. Actual: The UI looks set, but there is no cron entry anywhere, and the script never runs on schedule. Evidence: # cron is alive pgrep -x crond # /boot is writable mount | grep ' /boot ' touch /boot/.rwtest && echo OK && rm /boot/.rwtest # no cron entry created grep -H . /etc/cron.d/* /var/spool/cron/* /var/spool/cron/crontabs/* 2>/dev/null || echo "no cron entries" Results: cron running, /boot RW, but no user-scripts cron line present. Reproduction stepsCreate script under User Scripts → “Tailscale Serve Reapply.” Set Schedule: Custom, value */30 * * * *. Tick Run in background. Click Apply. Check cron paths above. No entry is created. Script only runs manually. Notes / likely causes seen by other usersScripts with names containing ! or () can break the gear menu and/or scheduler for all scripts. Renaming those directories under /boot/config/plugins/user.scripts/scripts/ can restore saving behavior. Some users report missing csrf_token in logs when clicking Apply; schedules then fail to save. The plugin executes scripts from /tmp/user.scripts/tmpScripts/... via PHP; PATH differences are normal, but unrelated to schedules not writing. Workaround (safe, reversible)Wire the cron entry directly and recreate it at boot (without moving or renaming the script). Add a cron snippet now: SCRIPT="/boot/config/plugins/user.scripts/scripts/Tailscale Serve Reapply/script" cat > /etc/cron.d/tailscale-serve-reapply <<EOF */30 * * * * root sh -lc '$SCRIPT >> /var/log/tailscale-serve-reapply.log 2>&1' EOF killall -HUP crond 2>/dev/null || true # verify grep -n tailscale-serve-reapply /etc/cron.d/* Persist across reboot (append to /boot/config/go): cp /boot/config/go /boot/config/go.bak # backup once cat >> /boot/config/go <<'BOOTBLOCK' # re-add Tailscale Serve cron at boot cat > /etc/cron.d/tailscale-serve-reapply <<'EOF' */30 * * * * root sh -lc '/boot/config/plugins/user.scripts/scripts/Tailscale Serve Reapply/script >> /var/log/tailscale-serve-reapply.log 2>&1' EOF killall -HUP crond 2>/dev/null || true BOOTBLOCK To remove later: rm -f /etc/cron.d/tailscale-serve-reapply killall -HUP crond 2>/dev/null || true cp /boot/config/go.bak /boot/config/go # if you want to roll back the go edit What we tried before postingVerified cron is running and /boot is writable. Confirmed the script runs and logs when executed manually. Confirmed no cron entries are created by the plugin after clicking Apply. Renamed any “cursed” script names (removed ! and parentheses) and retried Apply. Still no cron entry. Request to maintainersPlease advise on known issues where Apply does not write schedules (e.g., CSRF token failures, UI state desync). If there’s a canonical location the plugin writes cron (system vs user crontab), please document it. If certain script names can block scheduler generation, can the UI enforce allowed characters or warn? Happy to provide diagnostics or specific logs (syslog around Apply time, plugin PHP logs) if needed.
-
Summary The User Scripts plugin shows a “Custom” schedule (*/30 * * * *) and “Run in background,” but no cron entry is created. Scripts run manually fine, yet never run on schedule. EnvironmentUnraid: 7.1.4 (Pro) User Scripts plugin: current as of 26 Oct 2025 (standard; not Enhanced) Hardware: standard build (nothing exotic) The script (works manually)Script path: /boot/config/plugins/user.scripts/scripts/Tailscale Serve Reapply/script What it does: resets Tailscale “serve” table and reapplies mappings; runs docker exec nextcloud occ status; writes a log to: /var/log/tailscale-serve-reapply.log Manual run works: /boot/config/plugins/user.scripts/scripts/Tailscale\ Serve\ Reapply/script tailscale serve status # shows expected ports Expected vs actualExpected: After setting Schedule → Custom → */30 * * * * and clicking Apply, the plugin writes a cron entry and the script runs every 30 minutes. Actual: The UI looks set, but there is no cron entry anywhere, and the script never runs on schedule. Evidence: # cron is alive pgrep -x crond # /boot is writable mount | grep ' /boot ' touch /boot/.rwtest && echo OK && rm /boot/.rwtest # no cron entry created grep -H . /etc/cron.d/* /var/spool/cron/* /var/spool/cron/crontabs/* 2>/dev/null || echo "no cron entries" Results: cron running, /boot RW, but no user-scripts cron line present. Reproduction stepsCreate script under User Scripts → “Tailscale Serve Reapply.” Set Schedule: Custom, value */30 * * * *. Tick Run in background. Click Apply. Check cron paths above. No entry is created. Script only runs manually. Notes / likely causes seen by other usersScripts with names containing ! or () can break the gear menu and/or scheduler for all scripts. Renaming those directories under /boot/config/plugins/user.scripts/scripts/ can restore saving behavior. Some users report missing csrf_token in logs when clicking Apply; schedules then fail to save. The plugin executes scripts from /tmp/user.scripts/tmpScripts/... via PHP; PATH differences are normal, but unrelated to schedules not writing. Workaround (safe, reversible)Wire the cron entry directly and recreate it at boot (without moving or renaming the script). Add a cron snippet now: SCRIPT="/boot/config/plugins/user.scripts/scripts/Tailscale Serve Reapply/script" cat > /etc/cron.d/tailscale-serve-reapply <<EOF */30 * * * * root sh -lc '$SCRIPT >> /var/log/tailscale-serve-reapply.log 2>&1' EOF killall -HUP crond 2>/dev/null || true # verify grep -n tailscale-serve-reapply /etc/cron.d/* Persist across reboot (append to /boot/config/go): cp /boot/config/go /boot/config/go.bak # backup once cat >> /boot/config/go <<'BOOTBLOCK' # re-add Tailscale Serve cron at boot cat > /etc/cron.d/tailscale-serve-reapply <<'EOF' */30 * * * * root sh -lc '/boot/config/plugins/user.scripts/scripts/Tailscale Serve Reapply/script >> /var/log/tailscale-serve-reapply.log 2>&1' EOF killall -HUP crond 2>/dev/null || true BOOTBLOCK To remove later: rm -f /etc/cron.d/tailscale-serve-reapply killall -HUP crond 2>/dev/null || true cp /boot/config/go.bak /boot/config/go # if you want to roll back the go edit What we tried before postingVerified cron is running and /boot is writable. Confirmed the script runs and logs when executed manually. Confirmed no cron entries are created by the plugin after clicking Apply. Renamed any “cursed” script names (removed ! and parentheses) and retried Apply. Still no cron entry. Request to maintainersPlease advise on known issues where Apply does not write schedules (e.g., CSRF token failures, UI state desync). If there’s a canonical location the plugin writes cron (system vs user crontab), please document it. If certain script names can block scheduler generation, can the UI enforce allowed characters or warn? Happy to provide diagnostics or specific logs (syslog around Apply time, plugin PHP logs) if needed.
-
Can i thank everybody for there great help back up and running and will get 2 drives precleared ready for next time
-
HI Everything finished Partity transfer no errors and rebuild no errors bit i a seeing this now its doing a parity check Can i now use Uraid as normal ? Or do i have to wait another day ?
-
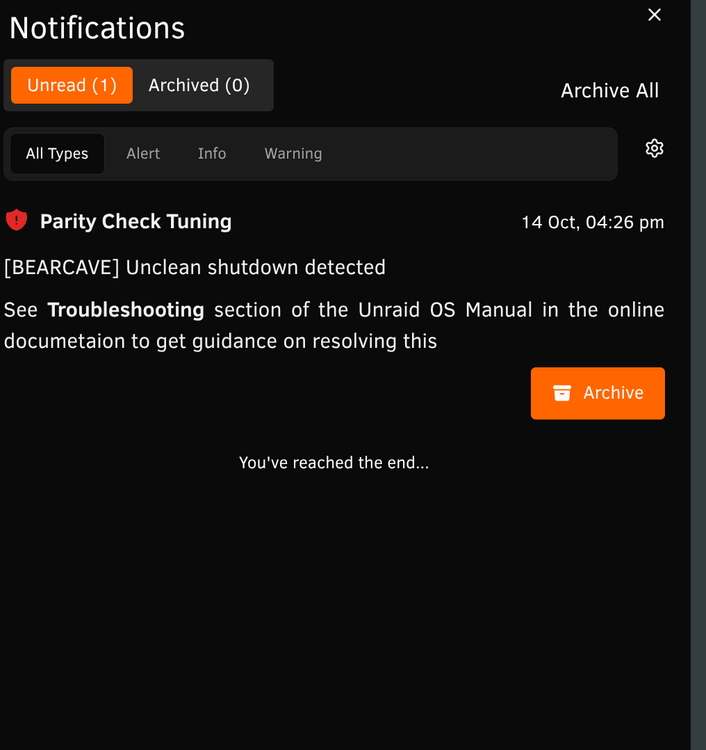
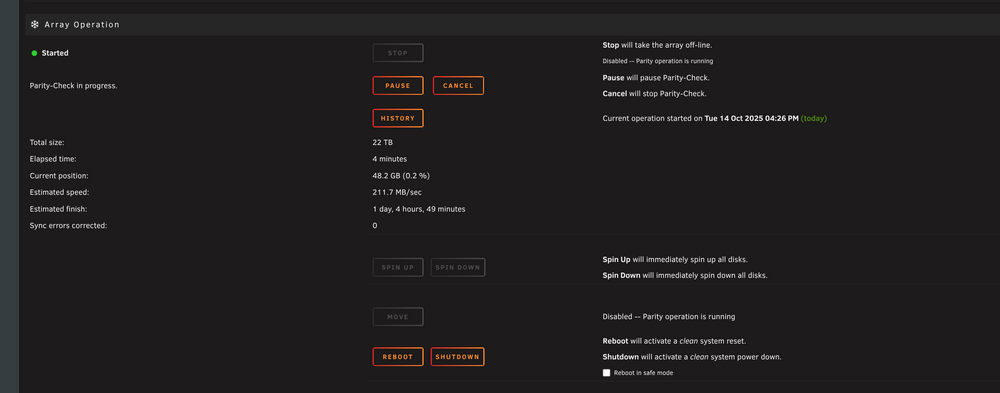
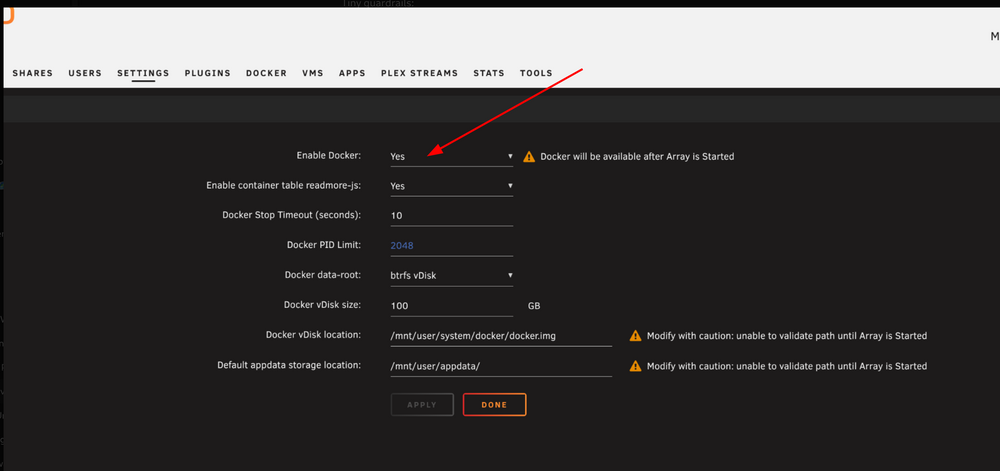
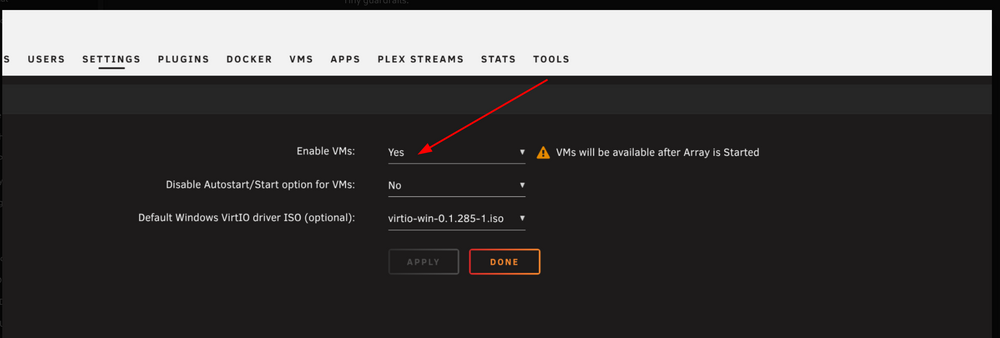
HI Jorge Yes i see the copy see image 1but i need to check if when i start this does this fire up the array ? But if it does fire up the array does will it start docker and VM or do i need to set these to off ? as in image 2 and 3 ? To avoid data writing disks is this the best option ? Image 1
-
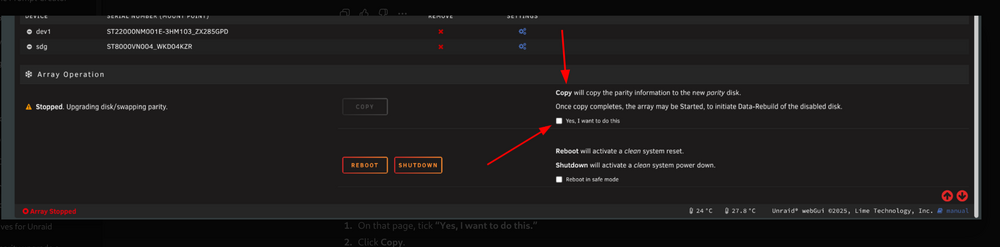
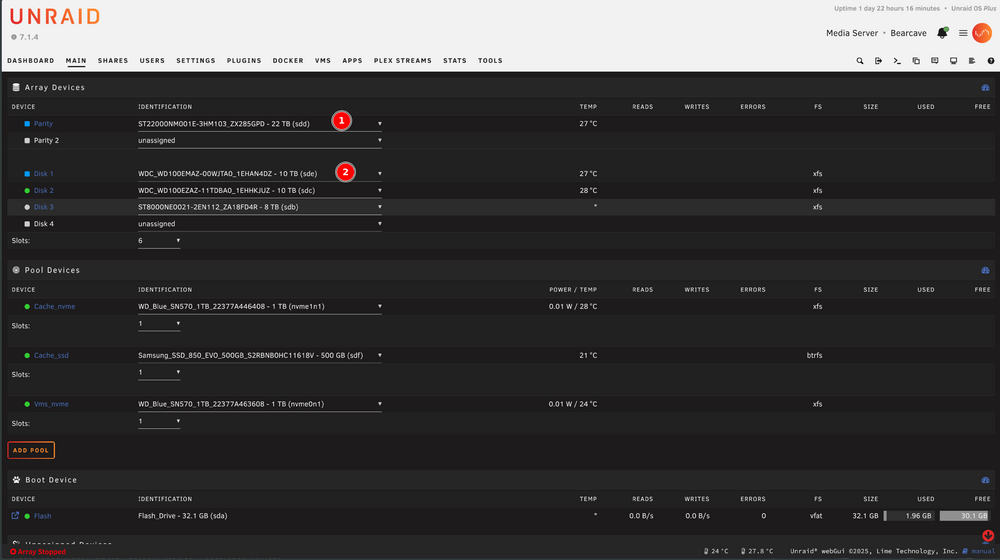
HI Sorry to be a noob about this but i have never had to do this before. See image attached this the brand-new parity you can see is marked by 1 22 TB The old parity is seated in Disk 1 now where the broken disk was. I have not had the array on or rebooted. So how do i get the old parity to the new parity correctly ? Then how does the former broken disk 1 get rebuilt onto the new disk 1(which was the old parity) What do i actually do in Unsaid to get it running ?
-
🧮 Phase 3: Run the parity-swap rebuildClick Start on the array. Unraid begins Stage 1: copy parity from the old 10 TB to the new 22 TB. When that finishes, it automatically starts Stage 2: rebuild Disk 1’s data onto the old 10 TB drive. Let both stages complete without interruption. Expect roughly 30–45 hours total. Monitor temps (<45 °C) and speed occasionally. ✅ Phase 4: Verify everythingWhen Unraid says “Array operation completed successfully,” stop and exhale. Go to Main → Array Operation → Parity Check. Run a non-correcting parity check — this reads everything and ensures the new parity data is perfect but doesn’t change it. It should finish with 0 errors. Once that’s clean, your array is fully rebuilt and protected again. 🪄 Optional final touchesAdd the spare 10 TB as an Unassigned Device and preclear it so you’ve got a ready-to-go standby. Label each drive (slot, serial, install date). Back up the flash drive (Main → Flash → Flash Backup). Do all that in order and you’ll end up Monday or Tuesday with: ✔ a verified 22 TB parity, ✔ a rebuilt 10 TB Disk 1, ✔ zero parity errors, ✔ one precleared spare drive ready for the next inevitable drama.
-
Thanks thats why i only ever went with one as i only had 3 drives at least now i have a spare 10tb and i can add bigger drives upto 22tb in future but i have enough for my use thank you i think if i only use 3 or 4 drives the chance of 2 failing same time is slim Just for clarity Frank Does my current plan look ok ? I have never added a new drive or moved any parity about ?
-
So do you mean get another 22tb for parity 2 and keep the 10tb spare for another failure. If pick up a 22tb on a BF Deal can i just add that? Also on my current plan does that look ok ? I have never added a new drive or moved any parity about ?
-
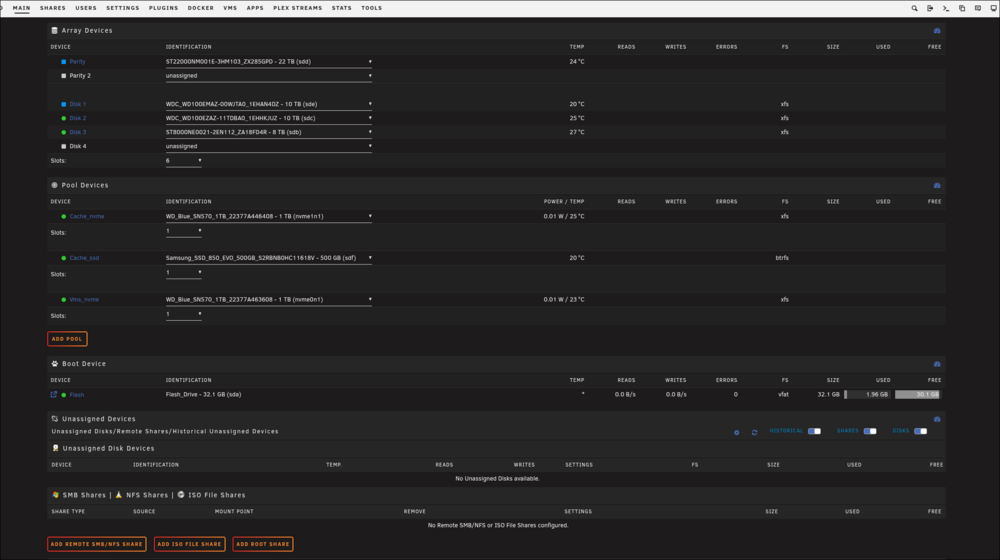
Hey all, quick update after some cable and power gymnastics. I’ve managed to recover my old 10 TB parity drive — turns out it was a shucked unit being blocked by the 3.3 V pin issue. After switching PSUs, it’s now fully visible and passing SMART. Current state: Parity: 22 TB Seagate Exos (new) Disk 1: 10 TB WD100EMAZ (old parity) Disk 2: 10 TB WD100EZAZ (healthy) Disk 3: 8 TB Seagate (healthy) Array has never been started since drives were rearranged One new spare 10 TB drive still unused Plan going forward: Run an extended SMART test on the 22 TB to confirm it’s clean. Proceed with a parity-swap rebuild — copy existing parity from the old 10 TB onto the new 22 TB, then rebuild Disk 1’s contents onto the old 10 TB drive. After completion, run a non-correcting parity check to verify zero errors. Optionally pre-clear and add the spare 10 TB as a new data disk once the array is healthy. Just want to confirm this sequence is still the safest approach before starting the swap. Diagnostics from this current state are attached (bearcave-diagnostics-20251010-1127.zip). Thanks again for the guidance so far — it’s been a saga, but the drives are finally all visible. bearcave-diagnostics-20251010-1127.zip
-
How do I get to the diags ? So what should I do I was going to just add the 22tb and copy parity over from the old 10tb parity then add the new 10tb and re run parity. But your saying that’s nit going to work what should I do next. I have no idea I had 1 8tb that’s failed I can hear it running but it clicking and not spinning up all the other had a green tick and smart check was fine in all of them. I find it weird another 10 tb just gone dead it’s like a brick
-
Hi all, I’ve hit a double failure and want to confirm the safest way to perform a parity-swap and sequential rebuilds. I’ve read the Unraid docs thoroughly but would appreciate experienced eyes on this plan before I commit. SystemUnraid OS: 7.1.4 Server: “Bearcave” Motherboard: MSI Z590-A PRO (4 SATA ports) HBA: ASM1166 PCIe SATA card PSU: Be Quiet! 1000 W Cache: Samsung 850 EVO 500 GB (SATA) + Dual NVMe WD SN570 1 TB (BTRFS RAID1) Disk SituationRole Model Capacity Status Old Parity WD100EMAZ 10 TB Healthy New Parity Seagate Exos X22 22 TB Installed Data Disk 1 WD100EZAZ 10 TB Dead Data Disk 2 ST8000VN004 8 TB Failed Data Disk 3 ST8000NE0021 (IronWolf Pro) 8 TB Healthy New drive arriving tomorrow: Seagate Exos X16 10 TB (to replace the dead WD100EZAZ). Current State22 TB Exos assigned as new Parity (array stopped). Old 10 TB parity temporarily assigned to Disk 1 but array never started, no format performed. Docker + VMs disabled. UPS configured. Both failed data drives physically removed until replacements arrive. GoalsRun a parity-swap: copy parity from the old 10 TB → new 22 TB. Once that copy finishes, rebuild the failed 8 TB data disk onto the old 10 TB parity drive. After that completes, replace the dead 10 TB data disk with the new Exos X16 10 TB and rebuild again from the freshly-built 22 TB parity. Finish with a non-correcting parity check before re-enabling Docker / VMs. QuestionsSince the old 10 TB parity was briefly assigned to Disk 1 (array never started), it’s still valid for parity-swap use, correct? Any metadata or config changes just from assigning a disk without starting the array? Will Unraid automatically expand parity when moving from 10 TB → 22 TB during the swap, or is manual intervention required? Best order to handle two failed data drives—perform parity-swap first, rebuild one disk, then the other? Any issues or limitations in 7.1.4 related to the ASM1166 controller during parity-swap / rebuilds? Should the old 10 TB parity remain untouched (no preclear) so Unraid can use its existing parity data for the swap? Is it useful or redundant to run a non-correcting parity check after the parity-swap copy but before the first rebuild? Any extra diagnostics, SMART checks, or log monitoring you’d recommend before starting? Diagnostics and SMART reports are ready if needed. I just want to ensure this dual-rebuild chain is the right and safest approach before touching Start. Thanks for any expert insight—trying to keep this resurrection to one attempt.
-
HI Guys I see this version is only 1.103.2 i have tried adding n8nio/n8n:latest or n8nio/n8n:stable but that breaks my install. What is the current best way to upgrade to a newer version as i am having issues with code node
-
HI Guys Should i wait for release of new plugin before i update to Ver 7? I am confused some say its fine some says it breaks plus the info says the plugin was updated 2025.01.11.1 Fix with issues What is the situation of this plugin is it fixed or not ?
-
HI GUys Just updated to 6.12.14 and now the plugin does not seem to work i had it running 30 min it just stops with a spinning icon. Normally if i run it takes like 10 seconds!