Ancalagon
Members
-
Joined
-
Last visited
Everything posted by Ancalagon
-
With the responsive UI update in 7.2, the dashboard screen no longer fills the available width of the screen. On my monitor, it appears in two columns that fill slightly more than 2/3 of the screen width. I am unable to drag tiles over to a third column. I tested different display scaling sizes to increase the available screen size and all of the sizes I tested still only had two columns which used less and less of the available screen width. I would expect the number of columns to be the maximum possible for a specific screen width, with a layout saved for each possible number of columns. If the window size changes, then it increases or decreases the column layout displayed as necessary. Whatever the number of columns displayed, they would fully fill the available screen width. So the column widths would stretch or shrink until a column is added or removed.
-
I ran into this myself after removing an AX200 Wi-Fi adapter from being passed through to a Windows 11 VM. It didn't appear in the Unraid network settings with an iwlwifi error -110. I found this solution is what fixed it. I just needed to shut the server down. Turn off the power to the power supply. Press the power button a few times. And wait a few minutes before booting back up. The Wi-Fi worked afterwards. (Just rebooting or even shutting down and rebooting didn't work. It was important to remove all power to fully reset the Wi-Fi device.)
-
The main VMs page shows a green triangle or red square next to VMs depending on their running state. There is also the VM Usage Statistics at the top of the page. When a VM is shutdown, the VM no longer appears in the VM Usage Statistics, but the green triangle does not automatically switch to the red square icon indicating it is stopped. It would make sense for this state to be updated along with the VM Usage Statistics state.
-
While copying files from my disk array to my cache pool using the Unraid file manager, I found that the same file seems to be copied multiple times redundantly. This doesn't seem to happen every time, but I've witnessed it several times now while moving files to and from my cache pool and storage array. I'm also thinking this feature request is actually unintentional behavior now. This is what I did one of the times I saw this occur. I selected a directory to copy from /mnt/disk3. The directory contains a couple subdirectories and about a dozen files total. Most of the files are small, but one of the files is ~750 GB. I selected to copy to /mnt/cache and selected "use sparse option", as the large file is a .qcow2 disk image, vdisk1.qcow2. The copy operation progress displayed and the operation eventually completed. But I still found that there was unusual disk activity. Looking in the destination directory under /mnt/cache, I saw two files named similarly to .vdisk1.qcow2.g81E4S (the last 6 characters being unique to each file) in addition to the ~750 GB copied vdisk1.qcow2. Each of these additional hidden files were several hundred GBs and growing. Running htop, I could see there were 4 rsync processes that were still running, despite the file manager job having completed. I watched as the bigger of the .vdisk1.img.###### files reached the vdisk1.qcow2 ~750 GB size and disappeared. Two of the rsync processes completed at this same time. Then the next .vdisk1.img.###### file reached the ~750 GB size and disappeared as well, along with the other two rsync processes. I haven't been able to consistently reproduce this buggy behavior, but again I've witnessed it several times. Another time I saw the behavior was when my system crashed during a file move operation. When I observed the state of one of the destination directories, I once again observed a copied vdisk1.img file, as well as four .vdisk1.img.###### files, all of different sizes less than the size of vdisk1.img.
-
When editing a VM configuration, there are settings that are grouped closely together that deserve space between and space between settings that should be grouped together. For example, see this screenshot, where the arrows indicate space should not exist and lines indicate where dividing space should exist between vDisk and 9p shares. This seems to be due to the "show inline XML" option, which is creating space between the first setting of a section and the other lines of settings for the same XML section. With "show inline XML" turned off, there are no dividing spaces between sections at all. It could be helpful to have some physical space or dividing line to delineate between settings.
-
I don't see a way to restore a minimized file operation job, or a way to cancel the currently running job either. (Unraid 7.1.2)
-
I need to move all the contents of my cache pool to my storage array in order to update the firmware on my NVMe drives (as a precaution more than full necessity), as I'll be removing the drives from the pool and passing them into a Windows VM. I found the mover was extremely slow, so I opted to use the Unraid file manager to move the contents of /mnt/cache to /mnt/disk3 directly. I also checked "use sparse option" for copying VM qcow2 disk images to preserve the sparseness metadata. While this seemed to be at least slightly faster than the mover, it's still incredibly slow, averaging in the single digit MB/s. Sequential writes to my HDDs are usually over 100 MB/s in comparison. When I run htop I can see there are at least 16 unique rsync processes running, which is likely a big reason for the slow write speed, with so many concurrent writes to the same disk. The number 16 may be a result of my 16-core CPU. But these file operations are definitely I/O-bound and not receiving any benefit from increased parallelism, rather the concurrent file operations are only slowing each other down. It would be helpful if there was a way to control this parallelism in file manager operations in some way to improve performance. The default choice also seems naive at best. I'd expect it to take into account the type of disk being written to and read from and avoid concurrent writes to and reads from the same hard disk.
-
I was finally able to fix this macOS VM. I'm not sure exactly what combination of things it was that fixed it (some things I eventually undid before it worked). I had to boot into a new macOS VM installation rescue environment and scan the broken VM's disk for errors, which it found and fixed. That may have been the main problem, but it wasn't the only thing required because it still wasn't working afterwards.
-
My Unraid server recently has experienced several hard shutdown/reboots which seem to be caused by a RDP connection to my Ubuntu Linux VM. After the last time this occurred, my macOS VM will no longer boot. It was running when the server crashed. After the first reboot, the VM was pegged at ~50% CPU usage. After rebooting the server again, the CPU usage is lower, but the VM still hangs on the initial boot screen. Running qemu-img check vdisk1.qcow2 indicates no errors in the disk image. I've attached my server diagnostics. One thing that stands out in logs/libvirt.txt are these lines: 2025-04-02 08:25:08.529+0000: 13236: error : virFileIsSharedFsFUSE:3503 : unable to canonicalize /mnt/user/domains/macOS/vdisk1.img: No such file or directory 2025-04-02 08:25:08.530+0000: 13236: error : virQEMUFileOpenAs:12154 : Failed to open file '/mnt/user/domains/macOS/vdisk1.img': No such file or directory 2025-04-02 08:25:08.530+0000: 13233: error : virFileIsSharedFsFUSE:3503 : unable to canonicalize /mnt/user/domains/macOS/vdisk1.img: No such file or directory 2025-04-02 08:25:08.531+0000: 13233: error : virQEMUFileOpenAs:12154 : Failed to open file '/mnt/user/domains/macOS/vdisk1.img': No such file or directory 2025-04-02 08:25:08.537+0000: 13236: error : virFileIsSharedFsFUSE:3503 : unable to canonicalize /mnt/user/domains/macOS/vdisk1.img: No such file or directory 2025-04-02 08:25:08.537+0000: 13236: error : virQEMUFileOpenAs:12154 : Failed to open file '/mnt/user/domains/macOS/vdisk1.img': No such file or directory 2025-04-02 08:25:09.848+0000: 13234: error : virFileIsSharedFsFUSE:3503 : unable to canonicalize /mnt/user/domains/macOS/vdisk1.img: No such file or directory 2025-04-02 08:25:09.848+0000: 13234: error : virQEMUFileOpenAs:12154 : Failed to open file '/mnt/user/domains/macOS/vdisk1.img': No such file or directory 2025-04-02 08:25:10.397+0000: 13236: error : virFileIsSharedFsFUSE:3503 : unable to canonicalize /mnt/user/domains/macOS/vdisk1.img: No such file or directory 2025-04-02 08:25:10.397+0000: 13236: error : virQEMUFileOpenAs:12154 : Failed to open file '/mnt/user/domains/macOS/vdisk1.img': No such file or directory 2025-04-02 08:25:10.410+0000: 13234: error : virFileIsSharedFsFUSE:3503 : unable to canonicalize /mnt/user/domains/macOS/vdisk1.img: No such file or directory 2025-04-02 08:25:10.411+0000: 13234: error : virQEMUFileOpenAs:12154 : Failed to open file '/mnt/user/domains/macOS/vdisk1.img': No such file or directory 2025-04-02 08:25:10.411+0000: 13232: error : virFileIsSharedFsFUSE:3503 : unable to canonicalize /mnt/user/domains/macOS/vdisk1.img: No such file or directory 2025-04-02 08:25:10.412+0000: 13232: error : virQEMUFileOpenAs:12154 : Failed to open file '/mnt/user/domains/macOS/vdisk1.img': No such file or directory 2025-04-02 08:25:10.412+0000: 13235: error : virFileIsSharedFsFUSE:3503 : unable to canonicalize /mnt/user/domains/macOS/vdisk1.img: No such file or directory 2025-04-02 08:25:10.413+0000: 13235: error : virQEMUFileOpenAs:12154 : Failed to open file '/mnt/user/domains/macOS/vdisk1.img': No such file or directory 2025-04-02 08:25:10.415+0000: 13236: error : virFileIsSharedFsFUSE:3503 : unable to canonicalize /mnt/user/domains/macOS/vdisk1.img: No such file or directory 2025-04-02 08:25:10.415+0000: 13236: error : virQEMUFileOpenAs:12154 : Failed to open file '/mnt/user/domains/macOS/vdisk1.img': No such file or directory 2025-04-02 08:25:10.417+0000: 13235: error : virFileIsSharedFsFUSE:3503 : unable to canonicalize /mnt/user/domains/macOS/vdisk1.img: No such file or directory 2025-04-02 08:25:10.417+0000: 13235: error : virQEMUFileOpenAs:12154 : Failed to open file '/mnt/user/domains/macOS/vdisk1.img': No such file or directory 2025-04-02 08:25:16.456+0000: 13231: error : virNetSocketReadWire:1781 : End of file while reading data: Input/output error The vdisk for the VM is actually named vdisk1.qcow2. I renamed it when this became the default for qcow2 formatted vdisk files in Unraid 7. Both the filename and the VM XML define it as vdisk1.qcow2. So I don't know where it's getting this old vdisk1.img filename. I tried renaming the file back to vdisk1.img and changing it in the XML, but it continues to log the same error and the VM doesn't boot. (The VM was previously working fine with the vdisk1.qcow2 filename before the hard system reboot.) My next thought would be to delete the VM and recreate it. But I would like to know what the issue is and where the VM state is corrupted. Any idea what the issue is that's preventing the VM from booting and how to fix it? hobbes-diagnostics-20250402-0243.zip
-
Set ShowPicker to false in your config.plist.
-
See my messages above about installing the VMHide kext. It's needed to be able to authenticate with your Apple account.
-
If all you're using OpenCore Configurator for is mounting the EFI partition, you can ignore that version warning. It applies to using the configurator to modify the OpenCore bootloader. I'd still recommend updating your OpenCore bootloader anyway though. It's similar to updating kexts, but a little more involved. There are detailed instructions in the guide. The basic steps are: Backup your vdisk in case anything goes wrong, so you can revert Mount the EFI partition (as described above) Download the latest OpenCore version Copy and replace the files from the release's X64 folder to the EFI partition Compare your EFI/OC/config.plist file with the Docs/Sample.plist in the release using a file comparison utility Add any new keys from the Sample.plist to your config.plist You can look up the purpose of the keys and potentially change the values as needed Reboot and confirm everything's working as expected I also recommend updating any other kexts that you have in your EFI/OC/Kexts folder to their latest versions.
-
You'll need to edit your EFI partition. You can use a tool like OpenCore Configurator to mount the partition or just run this command from the terminal: sudo diskutil mount EFI Kexts are located under EFI/OC/Kexts. Download the latest VMHide-X.X.X-RELEASE.zip and extract. Copy VMHide.kext to EFI/OC/Kexts. You'll also need at least Lilu 1.7.0+. Download the latest Lilu-X.X.X-RELEASE.zip and extract. Copy and replace Lilu.kext in EFI/OC/Kexts. In order to load a Kext, it needs to be configured in OpenCore's configuration, located at EFI/OC/config.plist. You can open it in a plist editor, like ProperTree, or just a text editor. Under Kernel->Add add an item for VMHide.kext, similar to the other entries (Lilu should already be there), after the last entry and before </array>. The entry should look like this: <dict> <key>Arch</key> <string>Any</string> <key>BundlePath</key> <string>VMHide.kext</string> <key>Comment</key> <string></string> <key>Enabled</key> <true/> <key>ExecutablePath</key> <string>Contents/MacOS/VMHide</string> <key>MaxKernel</key> <string></string> <key>MinKernel</key> <string>23.0.0</string> <key>PlistPath</key> <string>Contents/Info.plist</string> </dict> Note Enabled is set to true, so the kext is loaded and MinKernel set to 23.0.0 since it's only required in macOS Sequoia+. Save the config.plist file and reboot. The VMHide kext should be loaded and working now.
-
Installing the VMHide kext resolves the issue with Apple accounts on macOS Sequoia. After installing the kext, I was able to click continue on the "Update Apple account settings" prompt and it succeeds.
-
I keep seeing this same error on VMs after updating to Unraid 7. The VM also works fine after editing the XML directly or using virt-manager. For example, this XML gives the error. (I get a similar output to virt-xml-validate as above.) <?xml version='1.0' encoding='UTF-8'?> <domain type='kvm'> <name>Windows</name> <uuid>c5fafdf0-2897-de05-b6c1-226f5cbaef79</uuid> <description>Windows 11</description> <metadata> <vmtemplate xmlns="unraid" name="Windows 11" icon="windows11.png" os="windowstpm"/> </metadata> <memory unit='KiB'>33554432</memory> <currentMemory unit='KiB'>33554432</currentMemory> <memoryBacking> <nosharepages/> </memoryBacking> <vcpu placement='static'>32</vcpu> <cputune> <vcpupin vcpu='0' cpuset='0'/> <vcpupin vcpu='1' cpuset='16'/> <vcpupin vcpu='2' cpuset='1'/> <vcpupin vcpu='3' cpuset='17'/> <vcpupin vcpu='4' cpuset='2'/> <vcpupin vcpu='5' cpuset='18'/> <vcpupin vcpu='6' cpuset='3'/> <vcpupin vcpu='7' cpuset='19'/> <vcpupin vcpu='8' cpuset='4'/> <vcpupin vcpu='9' cpuset='20'/> <vcpupin vcpu='10' cpuset='5'/> <vcpupin vcpu='11' cpuset='21'/> <vcpupin vcpu='12' cpuset='6'/> <vcpupin vcpu='13' cpuset='22'/> <vcpupin vcpu='14' cpuset='7'/> <vcpupin vcpu='15' cpuset='23'/> <vcpupin vcpu='16' cpuset='8'/> <vcpupin vcpu='17' cpuset='24'/> <vcpupin vcpu='18' cpuset='9'/> <vcpupin vcpu='19' cpuset='25'/> <vcpupin vcpu='20' cpuset='10'/> <vcpupin vcpu='21' cpuset='26'/> <vcpupin vcpu='22' cpuset='11'/> <vcpupin vcpu='23' cpuset='27'/> <vcpupin vcpu='24' cpuset='12'/> <vcpupin vcpu='25' cpuset='28'/> <vcpupin vcpu='26' cpuset='13'/> <vcpupin vcpu='27' cpuset='29'/> <vcpupin vcpu='28' cpuset='14'/> <vcpupin vcpu='29' cpuset='30'/> <vcpupin vcpu='30' cpuset='15'/> <vcpupin vcpu='31' cpuset='31'/> </cputune> <os> <type arch='x86_64' machine='pc-q35-7.1'>hvm</type> <loader readonly='yes' type='pflash'>/usr/share/qemu/ovmf-x64/OVMF_CODE-pure-efi-tpm.fd</loader> <nvram>/etc/libvirt/qemu/nvram/c5fafdf0-2897-de05-b6c1-226f5cbaef79_VARS-pure-efi-tpm.fd</nvram> </os> <features> <acpi/> <apic/> <hyperv mode='custom'> <relaxed state='on'/> <vapic state='on'/> <spinlocks state='on' retries='8191'/> <vendor_id state='on' value='none'/> </hyperv> </features> <cpu mode='host-passthrough' check='none' migratable='on'> <topology sockets='1' dies='1' clusters='1' cores='16' threads='2'/> <cache mode='passthrough'/> <feature policy='require' name='topoext'/> </cpu> <clock offset='localtime'> <timer name='hypervclock' present='yes'/> <timer name='hpet' present='no'/> </clock> <on_poweroff>destroy</on_poweroff> <on_reboot>restart</on_reboot> <on_crash>restart</on_crash> <devices> <emulator>/usr/local/sbin/qemu</emulator> <disk type='file' device='disk'> <driver name='qemu' type='qcow2' cache='writeback' discard='unmap'/> <source file='/mnt/user/domains/Windows/vdisk1.img'/> <target dev='hdc' bus='virtio'/> <boot order='1'/> <address type='pci' domain='0x0000' bus='0x03' slot='0x00' function='0x0'/> </disk> <controller type='usb' index='0' model='qemu-xhci' ports='15'> <address type='pci' domain='0x0000' bus='0x00' slot='0x07' function='0x0'/> </controller> <controller type='pci' index='0' model='pcie-root'/> <controller type='pci' index='1' model='pcie-root-port'> <model name='pcie-root-port'/> <target chassis='1' port='0x10'/> <address type='pci' domain='0x0000' bus='0x00' slot='0x02' function='0x0' multifunction='on'/> </controller> <controller type='pci' index='2' model='pcie-root-port'> <model name='pcie-root-port'/> <target chassis='2' port='0x11'/> <address type='pci' domain='0x0000' bus='0x00' slot='0x02' function='0x1'/> </controller> <controller type='pci' index='3' model='pcie-root-port'> <model name='pcie-root-port'/> <target chassis='3' port='0x12'/> <address type='pci' domain='0x0000' bus='0x00' slot='0x02' function='0x2'/> </controller> <controller type='pci' index='4' model='pcie-root-port'> <model name='pcie-root-port'/> <target chassis='4' port='0x13'/> <address type='pci' domain='0x0000' bus='0x00' slot='0x02' function='0x3'/> </controller> <controller type='pci' index='5' model='pcie-root-port'> <model name='pcie-root-port'/> <target chassis='5' port='0x14'/> <address type='pci' domain='0x0000' bus='0x00' slot='0x02' function='0x4'/> </controller> <controller type='pci' index='6' model='pcie-root-port'> <model name='pcie-root-port'/> <target chassis='6' port='0x15'/> <address type='pci' domain='0x0000' bus='0x00' slot='0x02' function='0x5'/> </controller> <controller type='pci' index='7' model='pcie-to-pci-bridge'> <model name='pcie-pci-bridge'/> <address type='pci' domain='0x0000' bus='0x05' slot='0x00' function='0x0'/> </controller> <controller type='pci' index='8' model='pcie-root-port'> <model name='pcie-root-port'/> <target chassis='8' port='0x16'/> <address type='pci' domain='0x0000' bus='0x00' slot='0x02' function='0x6'/> </controller> <controller type='pci' index='9' model='pcie-root-port'> <model name='pcie-root-port'/> <target chassis='9' port='0x17'/> <address type='pci' domain='0x0000' bus='0x00' slot='0x02' function='0x7'/> </controller> <controller type='pci' index='10' model='pcie-root-port'> <model name='pcie-root-port'/> <target chassis='10' port='0x18'/> <address type='pci' domain='0x0000' bus='0x00' slot='0x03' function='0x0'/> </controller> <controller type='pci' index='11' model='pcie-root-port'> <model name='pcie-root-port'/> <target chassis='11' port='0x8'/> <address type='pci' domain='0x0000' bus='0x00' slot='0x01' function='0x0' multifunction='on'/> </controller> <controller type='pci' index='12' model='pcie-root-port'> <model name='pcie-root-port'/> <target chassis='12' port='0x9'/> <address type='pci' domain='0x0000' bus='0x00' slot='0x01' function='0x1'/> </controller> <controller type='pci' index='13' model='pcie-root-port'> <model name='pcie-root-port'/> <target chassis='13' port='0xa'/> <address type='pci' domain='0x0000' bus='0x00' slot='0x01' function='0x2'/> </controller> <controller type='pci' index='14' model='pcie-root-port'> <model name='pcie-root-port'/> <target chassis='14' port='0xb'/> <address type='pci' domain='0x0000' bus='0x00' slot='0x01' function='0x3'/> </controller> <controller type='pci' index='15' model='pcie-root-port'> <model name='pcie-root-port'/> <target chassis='15' port='0xc'/> <address type='pci' domain='0x0000' bus='0x00' slot='0x01' function='0x4'/> </controller> <controller type='pci' index='16' model='pcie-root-port'> <model name='pcie-root-port'/> <target chassis='16' port='0xd'/> <address type='pci' domain='0x0000' bus='0x00' slot='0x01' function='0x5'/> </controller> <controller type='virtio-serial' index='0'> <address type='pci' domain='0x0000' bus='0x02' slot='0x00' function='0x0'/> </controller> <controller type='sata' index='0'> <address type='pci' domain='0x0000' bus='0x00' slot='0x1f' function='0x2'/> </controller> <controller type='scsi' index='0' model='virtio-scsi'> <address type='pci' domain='0x0000' bus='0x08' slot='0x00' function='0x0'/> </controller> <interface type='bridge'> <mac address='52:54:00:21:5c:90'/> <source bridge='br0'/> <model type='virtio'/> <address type='pci' domain='0x0000' bus='0x01' slot='0x00' function='0x0'/> </interface> <serial type='pty'> <target type='isa-serial' port='0'> <model name='isa-serial'/> </target> </serial> <console type='pty'> <target type='serial' port='0'/> </console> <channel type='unix'> <target type='virtio' name='org.qemu.guest_agent.0'/> <address type='virtio-serial' controller='0' bus='0' port='1'/> </channel> <input type='tablet' bus='usb'> <address type='usb' bus='0' port='3'/> </input> <input type='mouse' bus='ps2'/> <input type='keyboard' bus='ps2'/> <tpm model='tpm-tis'> <backend type='emulator' version='2.0' persistent_state='yes'/> </tpm> <audio id='1' type='none'/> <hostdev mode='subsystem' type='pci' managed='yes'> <driver name='vfio'/> <source> <address domain='0x0000' bus='0x0c' slot='0x00' function='0x0'/> </source> <rom file='/mnt/user/domains/GPU ROM/AMD.RX7900XT.022.001.002.008.000001.rom'/> <address type='pci' domain='0x0000' bus='0x04' slot='0x00' function='0x0' multifunction='on'/> </hostdev> <hostdev mode='subsystem' type='pci' managed='yes'> <driver name='vfio'/> <source> <address domain='0x0000' bus='0x0c' slot='0x00' function='0x1'/> </source> <address type='pci' domain='0x0000' bus='0x04' slot='0x00' function='0x1'/> </hostdev> <hostdev mode='subsystem' type='pci' managed='yes'> <driver name='vfio'/> <source> <address domain='0x0000' bus='0x0c' slot='0x00' function='0x2'/> </source> <address type='pci' domain='0x0000' bus='0x04' slot='0x00' function='0x2'/> </hostdev> <hostdev mode='subsystem' type='pci' managed='yes'> <driver name='vfio'/> <source> <address domain='0x0000' bus='0x0c' slot='0x00' function='0x3'/> </source> <address type='pci' domain='0x0000' bus='0x04' slot='0x00' function='0x3'/> </hostdev> <hostdev mode='subsystem' type='pci' managed='yes'> <driver name='vfio'/> <source> <address domain='0x0000' bus='0x07' slot='0x00' function='0x0'/> </source> <address type='pci' domain='0x0000' bus='0x06' slot='0x00' function='0x0' multifunction='on'/> </hostdev> <hostdev mode='subsystem' type='pci' managed='yes'> <driver name='vfio'/> <source> <address domain='0x0000' bus='0x07' slot='0x00' function='0x1'/> </source> <address type='pci' domain='0x0000' bus='0x06' slot='0x00' function='0x1'/> </hostdev> <hostdev mode='subsystem' type='pci' managed='yes'> <driver name='vfio'/> <source> <address domain='0x0000' bus='0x07' slot='0x00' function='0x3'/> </source> <address type='pci' domain='0x0000' bus='0x06' slot='0x00' function='0x3'/> </hostdev> <hostdev mode='subsystem' type='pci' managed='yes'> <driver name='vfio'/> <source> <address domain='0x0000' bus='0x0e' slot='0x00' function='0x0'/> </source> <address type='pci' domain='0x0000' bus='0x09' slot='0x00' function='0x0' multifunction='on'/> </hostdev> <hostdev mode='subsystem' type='pci' managed='yes'> <driver name='vfio'/> <source> <address domain='0x0000' bus='0x0e' slot='0x00' function='0x1'/> </source> <address type='pci' domain='0x0000' bus='0x09' slot='0x00' function='0x1'/> </hostdev> <hostdev mode='subsystem' type='pci' managed='yes'> <driver name='vfio'/> <source> <address domain='0x0000' bus='0x0e' slot='0x00' function='0x4'/> </source> <address type='pci' domain='0x0000' bus='0x09' slot='0x00' function='0x4'/> </hostdev> <hostdev mode='subsystem' type='scsi' managed='no'> <source> <adapter name='scsi_host2'/> <address bus='0' target='0' unit='0'/> </source> <readonly/> <address type='drive' controller='0' bus='0' target='0' unit='0'/> </hostdev> <watchdog model='itco' action='reset'/> <memballoon model='none'/> </devices> </domain>
-
I just updated to Unraid v7 and checking out the new VM manager features, I noticed the vDisk discard drop down is not populating properly and does not allow selecting either value. My vDisk XML is: <disk type='file' device='disk'> <driver name='qemu' type='qcow2' cache='writeback' discard='unmap'/> <source file='/mnt/user/domains/Windows/vdisk1.img'/> <target dev='hdc' bus='virtio'/> <boot order='1'/> <address type='pci' domain='0x0000' bus='0x03' slot='0x00' function='0x0'/> </disk> The discard dropdown is blank and after selecting a value, it momentarily flashes as the selected value and then immediately disappears again. It does the same even if I remove the discard value from the XML. Saving the config sets the XML value to ignore, even when it's already present as unmap. Also, when using the inline XML view, the XML doesn't update after changing a selection in the UI. I'd expect it to reflect the currently selected UI values. One more minor thing, it would make sense to remove the excess indentation in the inline XML. For example, the vDisk XML above is shown as: <disk type='file' device='disk'> <driver name='qemu' type='qcow2' cache='writeback' discard='unmap'/> <source file='/mnt/user/domains/Windows/vdisk1.img'/> <target dev='hdc' bus='virtio'/> <boot order='1'/> <address type='pci' domain='0x0000' bus='0x03' slot='0x00' function='0x0'/> </disk> The indentation is removed from the first line, but an extra four spaces are present on all the other lines. I'd expect it to be formatted as it is above.
-
Another helpful option would be a select all / deselect all for logical CPU cores. I often want all logical cores enabled for a VM and for a 16-core/32-thread CPU, this requires a lot of tedious clicking. An option to quickly select 4/8/12/16/20/24/28/etc. cores, that correctly selects the optimal combination of logical cores, would also be nice.
-
Would it make sense to separate out the number of displays from the memory, as two independent dropdowns?
-
It would be nice to have a VM manager GUI option to increase the video memory for the QXL video driver. The default <model type='qxl' ram='65536' vram='65536' vgamem='16384' heads='1' primary='yes'/> is not enough to support high resolutions. I use <model type='qxl' ram='65536' vram='131072' vram64='131072' vgamem='65536' heads='1' primary='yes'/> in my VM config. Something simple that sets these values appropriate for high resolutions would be a nice option.
-
The issue persists with and without graphics acceleration enabled in Chrome. It's also the same with both VNC and SPICE virtual graphics. I'm not passing a GPU through to this VM. I can only select QXL or Cirrus for video driver. vmvga is on the list, but disabled. The issue is the same with both QXL and Cirrus. But if I edit the XML directly and change the video model type to virtio: <video> <model type='virtio' heads='1' primary='yes'/> <address type='pci' domain='0x0000' bus='0x00' slot='0x01' function='0x0'/> </video> this fixes the issue! Red and blue colors are now correct in Chrome. The problem is, virtio performs quite a bit worse than QXL does with SPICE and a high resolution (2880x1775) display. Screen refreshes take seconds. Just scrolling a web page is unbearably slow. This is the QXL XML configuration that performs better, but has the color bug in Chrome: <video> <model type='qxl' ram='65536' vram='131072' vram64='131072' vgamem='65536' heads='1' primary='yes'/> <address type='pci' domain='0x0000' bus='0x00' slot='0x01' function='0x0'/> </video> Thank you for your help!
-
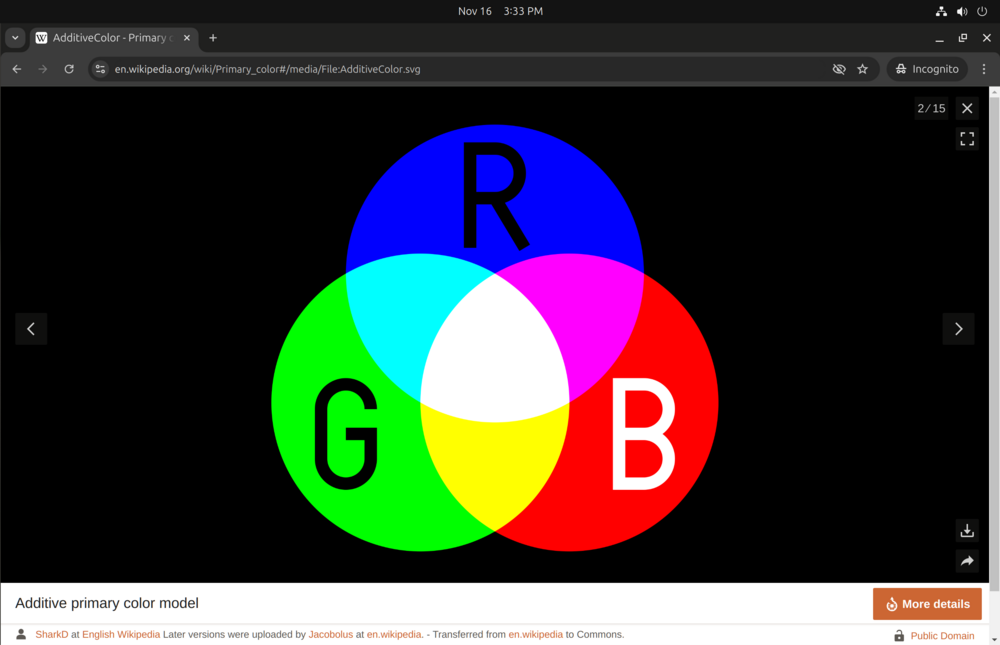
No, changing the theme has no effect on this. Everywhere in the Chrome UI, blue and red are swapped. For example, this is how this RGB image appears:
-
I just updated an Ubuntu VM to 24.10 and found Chrome is swapping the colors red and blue, exactly as described here. This wasn't an issue with 24.04 though. I installed Ubuntu 24.10 and 24.04 on clean VMs and found the same behavior after installing Chrome. Colors are correct in 24.04, but red and blue are swapped in 24.10. This is with the default Ubuntu VM template. Any idea how to fix this?
-
This appears to only be a problem with VNC. If I switch to SPICE, it scales correctly.
-
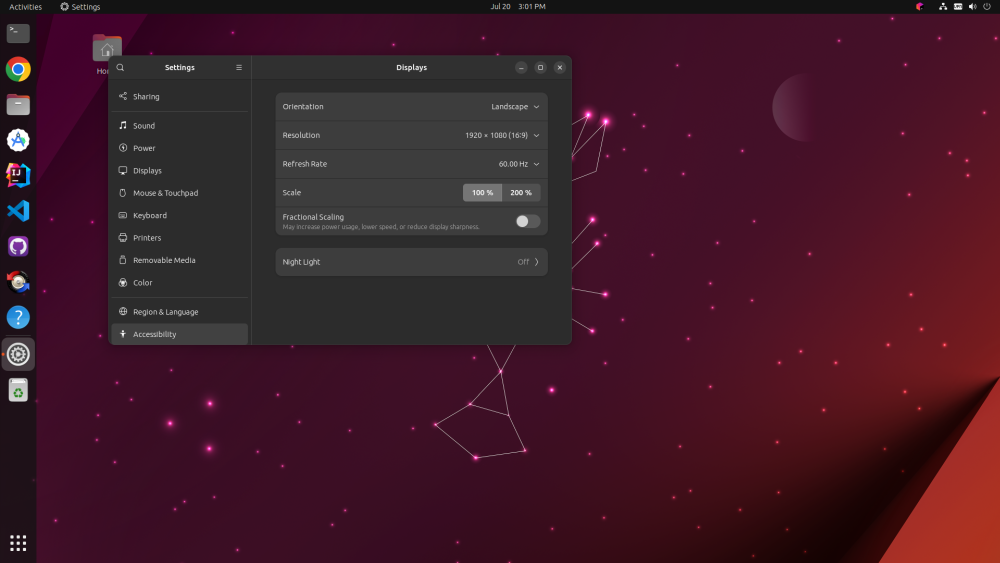
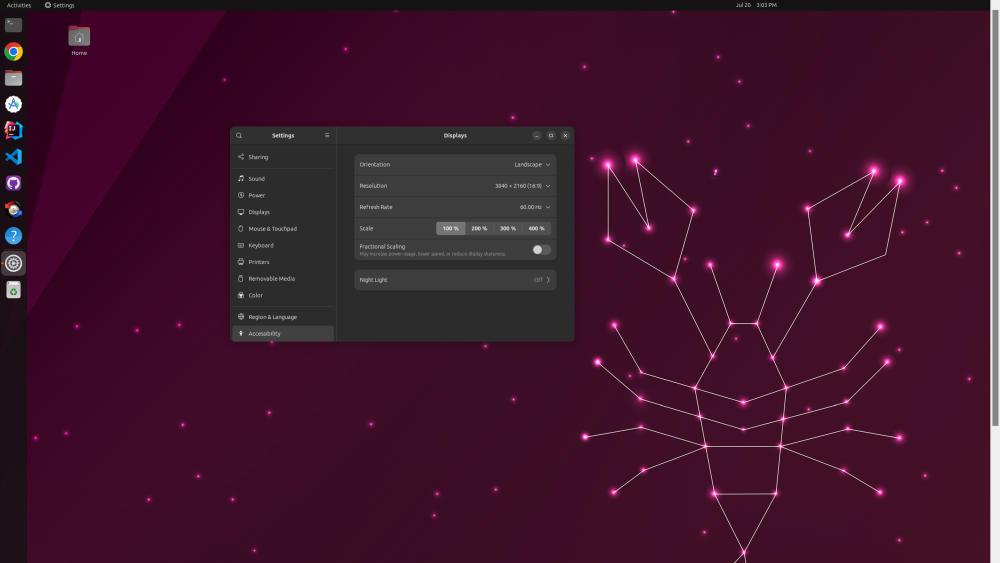
I have an Ubuntu Linux VM that I've been using at 1920x1080 resolution, but I'd like it to be 3840x2160 for full resolution on my 4K monitors. The default QXL video driver doesn't support resolutions that high. But if I change the video model type to virtio in either XML or virt-manager, I can select resolutions up to 5120x2160. The only problem is selecting 3840x2160 or higher has a bug where it scales wrong, making the screen too large and cutting off the right third of the screen. VNC will scroll up and down to access the bottom area of the cutoff screen. But it's impossible to access the horizontal portion that's cut off. It behaves the same no matter what VNC client I use. Also, the mouse cursor alignment is not scaled wrong, so clicks don't line up with where the mouse cursor appears, rather with the area of the screen that should be under the mouse if scaled properly. This makes it difficult to confirm the resolution or switch it back once confirmed, except with the keyboard. Has anyone else experienced this? Which part of the virtualization stack would be responsible for this bug? The virtio video driver? And could that component be upgraded hopefully with a fix? 1920x1080 3840x2160 (right side cut off) Note, the "Scale" option doesn't make a difference. 100% and 200% both behave the same way. I'd like 4K resolution with 200% scaling when using on my smaller 4K laptop monitor and lower scaling on my larger 4K external display.
-
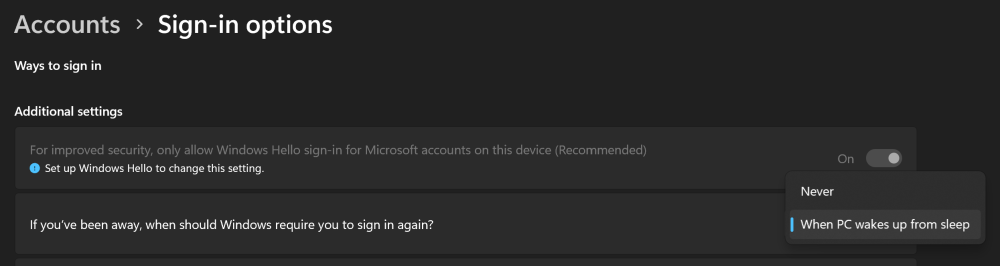
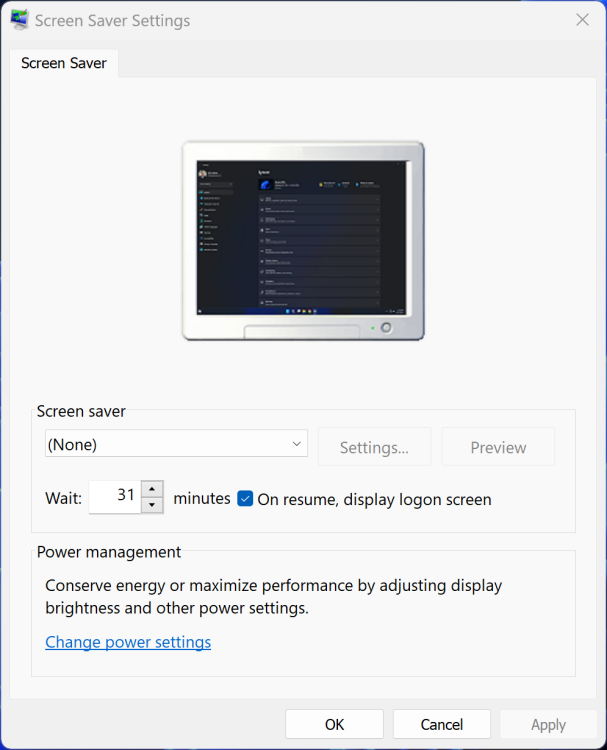
After reinstalling Windows 11 on a new VM recently, I realized that the settings for timing out the display no longer lock the console as well. It used to lock the console 1 minute after the display timeout. The power setting for my VM is set to never sleep (since the Unraid host doesn't sleep anyway) and no matter what I change the display timeout to, the screen is not locked after waking the screen. In Settings -> Accounts -> Sign-in options, there's the setting If you've been away, when should Windows require you to sign in again?, but the only options are Never or When PC wakes up from sleep. Neither of these options include when the display times out! On my laptop, this setting is selected as Every Time, although it's disabled from changing with the message Windows Hello is preventing some options from being shown. From searching around, it seems like this may have something to do with the VM not supporting S0 low power idle sleep mode. You can see the listed modes with the powercfg /a command. Seems like Microsoft has just broken this functionality for a VM's hardware configuration. The only workaround I've been able to find is to use the old Screen Saver settings to select On resume, display logon screen and set a Wait timeout to 1 minute after the display timeout (to replicate the old lock behavior), with the screen saver itself set to (None). Has anyone else run into this issue and found a better workaround?