


carltonwb
Members
-
Joined
-
Last visited
Everything posted by carltonwb
-
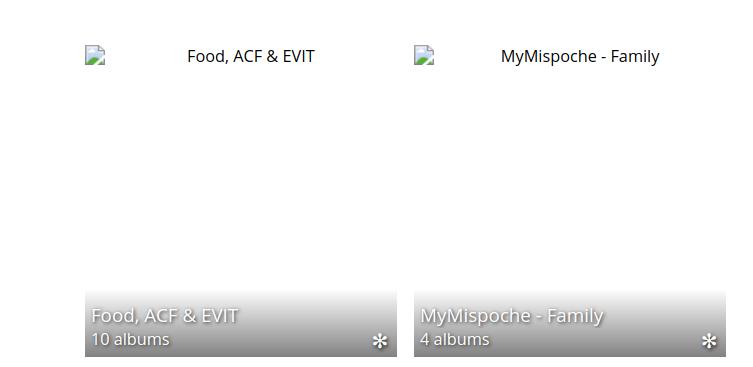
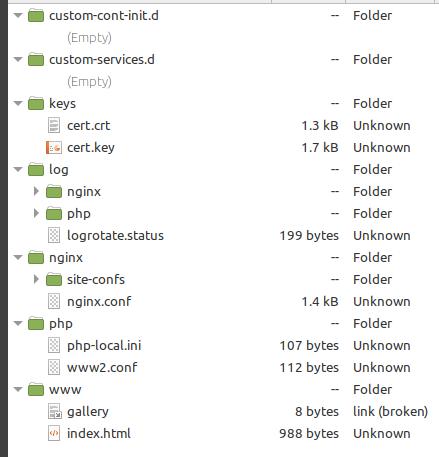
I am somewhat at a loss. I did a plain install of piwigo from the app in unraid. I used my own custom network type and port 8087. I created a data base and installed the program with no other changes. The program installed and started. I created a few albums and uploaded a 1000 plus pictures as a test. This is what displays. I tried to sync the files no luck. I went looking for the gallery and could not find it in any folder in unraid. This is what the appdata piwigo folder looks like. What am I doing wrong and where do I find the gallery. Thanks
-
I will continue to monitor it and I greatly thank you for sticking with me and providing some guidance. I will have to see what else I can tweak to get better response times. Carlton
-
I ran a comparison of the two ways. One with all processes stopped Apache/MySql etc, and one with everything running. These are the results. All processes stopped total used free shared buff/cache available Mem: 3931 205 2378 1 1347 3469 Swap: 0 0 0 All processes started total used free shared buff/cache available Mem: 3931 518 2992 3 421 3175 Swap: 0 0 0
-
Here is the one from inside the VM total used free shared buff/cache available Mem: 3931 520 2944 3 467 3171 Swap: 0 0 0
-
The free memory is (thanks I am learning a lot) root@Micah:~# free -m total used free shared buff/cache available Mem: 64252 13157 17220 1343 33874 49082 Swap: 0 0 0
-
Excuse me for asking but I have never checked the ram before. How do I check the amount free.
-
Thanks for sticking with me. This is what is in the /etc/mysql/conf.d/mysql.cnf [mysql] This is from the /etc/mysql/mysql.conf.d/mysql.cnf # The MySQL database client configuration file # # Ref to https://dev.mysql.com/doc/refman/en/mysql-command-options.html [mysql] Should there be more in these files?
-
The name of the file you are asking about is called my.cnf. This is the file /etc/mysql/my.cnf It seems that both files are identical. # # The MySQL database server configuration file. # # You can copy this to one of: # - "/etc/mysql/my.cnf" to set global options, # - "~/.my.cnf" to set user-specific options. # # One can use all long options that the program supports. # Run program with --help to get a list of available options and with # --print-defaults to see which it would actually understand and use. # # For explanations see # http://dev.mysql.com/doc/mysql/en/server-system-variables.html # # * IMPORTANT: Additional settings that can override those from this file! # The files must end with '.cnf', otherwise they'll be ignored. # !includedir /etc/mysql/conf.d/ !includedir /etc/mysql/mysql.conf.d/ This is my /etc/mysql directory structure drwxr-xr-x 4 root root 4096 Jul 1 19:01 . drwxr-xr-x 102 root root 4096 Jul 1 06:31 .. drwxr-xr-x 2 root root 4096 Jul 1 17:15 conf.d -rw------- 1 root root 317 Jun 28 17:19 debian.cnf -rwxr-xr-x 1 root root 120 May 11 12:49 debian-start lrwxrwxrwx 1 root root 24 Jun 28 17:19 my.cnf -> /etc/alternatives/my.cnf -rw-r--r-- 1 root root 839 Aug 3 2016 my.cnf.fallback -rw-r--r-- 1 root root 682 Nov 6 2019 mysql.cnf drwxr-xr-x 2 root root 4096 Jul 1 17:16 mysql.conf.d
-
Thanks for helping. The database size is 36.0041 mb The mysql.cnf file is. GNU nano 4.8 mysql.cnf # # The MySQL database server configuration file. # # You can copy this to one of: # - "/etc/mysql/my.cnf" to set global options, # - "~/.my.cnf" to set user-specific options. # # One can use all long options that the program supports. # Run program with --help to get a list of available options and with # --print-defaults to see which it would actually understand and use. # # For explanations see # http://dev.mysql.com/doc/mysql/en/server-system-variables.html # # * IMPORTANT: Additional settings that can override those from this file! # The files must end with '.cnf', otherwise they'll be ignored. # !includedir /etc/mysql/conf.d/ !includedir /etc/mysql/mysql.conf.d/ The debian.cnf mysql file is. # Automatically generated for Debian scripts. DO NOT TOUCH! [client] host = localhost user = debian-sys-maint password = FR2x6lu7OlCzDvxw socket = /var/run/mysqld/mysqld.sock [mysql_upgrade] host = localhost user = debian-sys-maint password = FR2x6lu7OlCzDvxw socket = /var/run/mysqld/mysqld.sock
-
I am running an Ubuntu Server VM that is being used for a website test development platform. I am using Apache, MariaDB, PHP and such. It has it's own IP and is using a br0 network bridge. I have devoted 4096 mb of ram and 4 cores to running it. It is not the only VM that is STARTED. My problem is that when I click on most internal links it takes over a minute to load the information from the database. Comparing this to my same data on a hosted live site which loads in a few seconds. What can I check to see what is causing the problem. Thanks.
-
Thanks
-
I have Nextcloud setup in unraid. I am also trying to go through Nginx Proxy Manager and to Cloudflare but I am having troubles. In the Nextcloud config.php what ip is supposed to go in the config for trusted proxies. I currently have the following 'trusted_proxies' => array ( 0 => '192.168.1.90', ), where 192.168.1.90 is the ip of my unraid server. Is this ip or another supposed to go there. Out of about a dozen posts on redit and the nextcloud forum, there are lots of different suggestions. Can somone please set me straight. Thanks
-
After a house fire and losing my unraid server (but not my offsite backup) I rebuilt the system. I did change from a supervised version to the home assistant core version. I have been able to use a lot of the docker containers, but MQTT has me perplexed. I have read through almost all of this thread but can not find something similar. MQTT is set as shown below. My server is at 192.168.1.90. I have created the password file. As suggested in other posts I made chmod the directory to 777, also chown to nobody:user. There is nothing in my log file. Home assistant allows me to add the MQTT integration but it does not discover my test devices. Can someone point me in a direction. Thanks.
-
Thank you dtctechs. I am using a the same custom proxy on both nextcloud and vaultwarden. The only one that is working (meaning that it takes me to my https instance of nextcloud) if I click the source in the proxy hosts is nextcloud. If I click the WebUI in nextcloud it takes me to the site (https://nextcloud.micah5123.com/apps/dashboard/) (IP is 192.168.1.90:444). If I click the vaultwarden WebUI it takes me to (http://192.168.1.90:8086/#/). If I click the nextcloud source (nextcloud.micah5123.com) in NPM it takes me to my https page. If I click the vaultwarden source (vaultwarden.micah5123.com) in NPM it takes me to my nextcloud https page. Both nextcloud and vaultwarden have the exact cname setup in cloudflare, as well as the same setup and ssl cert. In NPM Nextcloud having port 444 and vaultwarden 8086 in share the same ssl cert. Please let me know if you need more info and what I might be able to try. I have not changed to both using bridge. I will wait for your response before doing that.
-
Let me start off by saying that I have looked at almost all the 55+ pages of this thread and I may have missed my exact problem but I am having troubles. I have been using Letsencrypt setup for two years, now I have setup NPM with Cloudflare, and I am having issues. I started off setting up nextcloud with an SSL cert from Cloudflare, after a bunch of tinkering for a few days I finally got it working with the SSL certificate so it displays as https. BTW using a custom proxy a la Spaceinvaders setup, using port 444. Now I have setup vaultwarden exactly the way I setup my nextcloud, though using port 8086, the same Cloudflare SSL cert and so on. I can get into the site as 192.168.1.90:8086 (no https). My biggest problem is that if I go into the unraid docker and click the vaultwarden WEB UI it takes me to my nextcloud instance. I do not understand why and I have no idea of what to look for. Any help is very much appreciated.
-
Followed Spaceinvaders a year or so ago and got bitwarden set up. Everthing worked fine until my home was destroyed in a fire. I had great offsite backups, but decided to rebuild the server from scratch and only use the data files. Well anyway with Vaultwarden what do I need to change in the nginx proxyconfs file to take advantage of vault warden. Here is the old file I had. #BITWARDEN # make sure that your domain has dns has a cname or a record set for the subdomain bitwarden # This config file will work as is when using a custom docker network the same as letesencrypt (proxynet). # However the container name is expected to be "bitwardenrs" as it is by default the template as this name is used to resolve. # If you are not using the custom docker network for this container then change the line "server bitwardenrs:80;" to "server [YOUR_SERVER_IP]:8086;" Also remove line 7 resolver 127.0.0.11 valid=30s; upstream bitwarden { server bitwardenrs:80; } server { listen 443 ssl; server_name bitwarden.*; include /config/nginx/ssl.conf; client_max_body_size 128M; location / { proxy_pass http://bitwarden; proxy_set_header Host $host; proxy_set_header X-Real-IP $remote_addr; proxy_set_header X-Forwarded-For $proxy_add_x_forwarded_for; proxy_set_header X-Forwarded-Proto $scheme; } location /notifications/hub { proxy_pass http://bitwarden; proxy_set_header Upgrade $http_upgrade; proxy_set_header Connection "upgrade"; } location /notifications/hub/negotiate { proxy_pass http://bitwarden; } } So what in the above file needs to be changed to take advantage of vaultwarden. Thanks for the help


