





pille
Members
-
Joined
-
Last visited
Everything posted by pille
-
Hey there, I have som issues with the Auto Fan Plugin. I can not find any PWM Controllers. Drop down only says "none". System Temp Plugin works fine. Anyone has an idea how to fix the Fan error? I do use PWM Fans all attached directly to the mainboard. M/B:ASUSTeK COMPUTER INC. PRIME H370-A Version Rev 1.xx - BIOS:American Megatrends Inc. Version 1901. Dated: 02/20/2020 CPU:Intel® Core™ i5-8500 CPU @ 3.00GHz Best regards
-
Ja genau. Ich habe nur PMW Lüfter verbaut und die sind alle dirkekt am Mainboard angeschlossen. Angezeigt wird aber leider nichts.
-
Danke für die Rückmeldung! Leider wird mit da nichts angezeigt. Im DropDown Menü steht nur "none"
-
Soo. Ein halbes Jahr später habe ich es einfach nochmal probiert und siehe da, nun klappt es ohne Probleme...zumindest das System Temp Plugin. Beim Fan Auto Control Plugin bekomme ich aber weiterhin nichts angezeigt und dei "detect" Felder sind ausgegraut. Hat noch jemand eine Idee?
-
Ja ich konnte irgendwie vorher die Parity Disk nicht zuweisen. Ok ich probiere es aus und hoffe, dass es klappt. Vielen lieben Dank. Parity wird jetzt gerade gebaut. Rest sieht gut aus
-
Hallo zusammen, ich wollte eine zweite Paritätsplatte haben und mir entsprechend neue Platte(n) geholt. Die Platten ergänzen ein bereits bestehendes System Eine Platte soll als Parität dienen die andere als normaler Array Speicher. Da ich das Array so direkt nicht starten konnte musste ich diese zunächst formatieren etc. Anschließend wurden beide Platten edm Array hinzugefügt. Dann habe ich das Array gestoppt, die eine Platte unasigend und dann als Paritätsplatte wieder hinzugefügt und das Array gestartet. So weit so gut. Die Platten wurde als Paritätsplatte erkennt und auch steht in der Fußzeile, dass der Data-Rebuild in Gange ist. Jetzt steht aber bei einer der Platten ein rotes x in der Liste und dahinter "not installed". Der Speicher wird dennoch im Array angezeigt. Kann ich diese Platte irgendwie "entfernen" ohne die Paritätsplatten neu schreiben zu müssen? Daten waren ja sowieso keine auf der drauf. Ist eine komplett neue Platten gewesen. Liebe Grüße
-
Thanks for the replies. Does not matter anymore. Is running now with clean install. Unfortunately I deleted all appdata, so also the cfg config is gone (with history )
-
Seems to work with a new installation. Will try to import the cfg files again.
-
I can try this, is it possible to install two versions to keep the settings I have right now?
-
I just deleted the port, to be able to use it with gluetun vpn. Thanks for the hint. I imported the .cfg files from my old windows machine. Maybe that might cause the problems? Any idea what to change there?
-
Sorry, my fault. Should have mentioned that it was about the jdownloader docker
-
EDIT: referring to jDownloader Docker How is it possible to set general settings? I want to set a value for max chunks and max simultanous,but always if I restart the container these values are changed back. Also tried editing the GeneralSettings.json without success. Same thing with the downloadpath. It always changes back to default (I already changed the path in the docker itself).
-
works just fine now. Strange, that it did work before since a couple of weeks. Anyway, thanks a lot
-
I never removed any default ports anywhere I guess. It just worked Will try the provived solution and let you know if that worked. Thanks for the quick reply
-
Hey there, is there any way to change the default ports? I just noticed, that it seems, that I am having a problem in connection with gluetenvpn. Once I add the --net=container:GluetunVPN arameter the Docker will dissapear and if I am trying to reinstall it , I always get the message, that there is a conflict with ports beeing used by other apps. docker: Error response from daemon: conflicting options: port publishing and the container type network mode. See 'docker run --help'. Then it is just possible to reinstall it fresh and without the parameter it will work. I added a TCP port 8080 in GluetunVPN for the jDownloader container. port 8000 seems to be set by default in GluetunVPN. Since yesterday everything worked fine. My settings in Gluetun are looking like this. Have not changed anything there. Do you have an idea how to solve this?
-
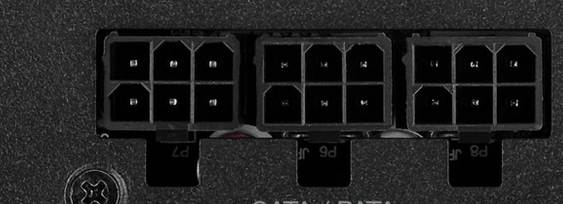
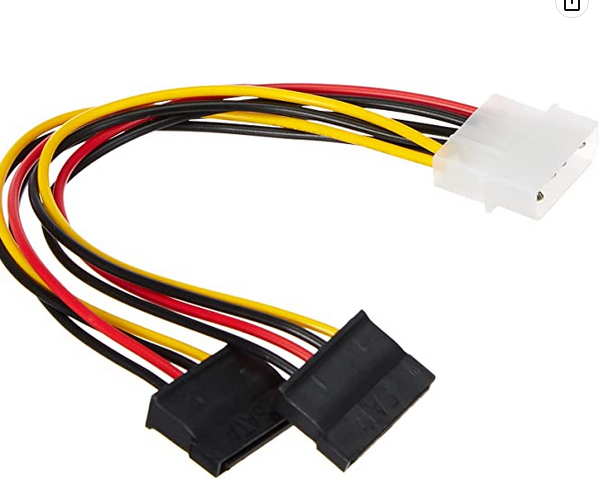
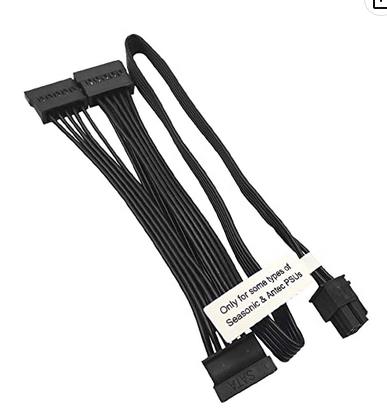
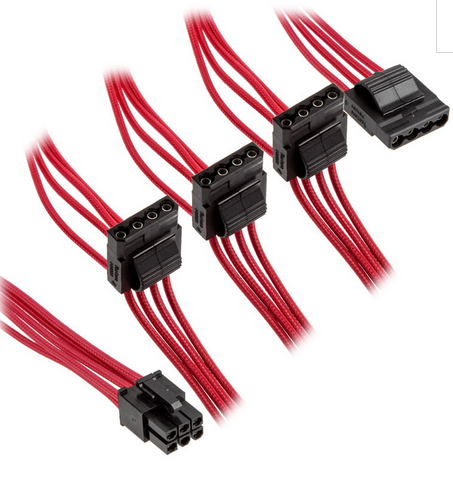
Thanks for the info. So one just need to know that or how to determine that? Am I missing something here? There are 3 of these plugins. which are connected with these kind of cables So this is 3 cables with 4 connectors. Adding up to 12drives being able to be powered Or do you mean buying these kind of cables and connect each of them to a cable like this one? That would add up in 24 drives, if that works voltage wise.
-
Sounsd great. Thanks a lot, will give it a try. Can I just interchange the HBA with a card like this? SATA Card Or might that cause any problems to my array? Or are there any recommendations? What might be a downside, since I always read that one should use HBA instead of SATA cards (not consumption wise). Do you know how much the power supply change will lower the W approximately? Asking because if it is just some W I might need to run it a couple of years to have a benefit. Guess in that period I am going to buy a new PSU anyway. Also saw, that the RM550x has only 3 SATA plugs, which means, that one can not add more then 12 drives, if I am correct?
-
How are you doing this? I am not able to run mkvpropedit. Would appreciate some help
-
I am also trying to get my idle consumption as low as I can and maybe someone has some helpful info to share. My system: i5 8500 Asus Prime H370-A 2x 8 GB RAM 1x HBA LSI 9200-16e 1x 500GB Cache NVME 11x HDD PSU: Corsair HX750i CPU Cooler: Artic Freezer 11 LP 3x 120mm fan Noctua Low Noise Adapter 1x 80mm fan with Noctua Low Noise Adapter powertop shows, that the maximum c-state reached is c3 in Pkg(HW) ...if powertop is correct I am idleing at around 45W with drives spun down
-
Kann es sein, dass sich in der auch irgendwas verstellt hat?
-
Hmm. Unter dem angegebenen Pfaden waren jeweils keine config Dateien mehr. Und auch von Corsair habe ich soweit nichts finden können (auch in den Pluggins Ordnern). nach Ausführung von Sensors-detect Neuinstallation des Dynamix Plugins wurden weiterhin die letzten 3 Einträge des Bildes angezeigt. Der Sensors-detect Befehl ertrug am Ende eine Datei unter /etc/Sysconfig. Nachdem ich den Ordner gelöscht habe werden mir wieder alle Sensoren (inkl. Corsair) angezeigt). nur in dem Ordner Plugins-removed konnte ich noch was finden. Soll ich das einfach mal löschen? Jetzt bekomme ich aber für das Dynamic Plugin eine Warnung angezeigt. Warning: copy(/etc/sensors.d/sensors.conf): failed to open stream: No such file or directory in /usr/local/emhttp/plugins/dynamix/include/DefaultPageLayout.php(693):eval()'d code on line94
-
Ich habe unter /etc noch eine sensors3.conf muss die auch weg?
-
Ich glaube ich hab das was "rausgefunden". Nachdem ich das Plugin deinstalliert und alle Dateien gelöscht habe, habe ich es nochmal neu installiert und gestartet. Dann bekomme ich auch entsprechende Sensoren angezeigt. Gleiches gilt, wenn ich die /etc/sensors.d/sensors.conf lösche und den Vorgang nochmal starte. Sobald ich allerdings einen Sensor (in dem Falle coretemp - Package id 0 wähle ,wird in die /etc/sensors.d/sensors.conf folgendes geschrieben: # sensors chip "corsairpsu-hid-3-1" ignore "fan1" chip "coretemp-isa-0000" label "temp2" "CPU Temp" Ich hatte mal das Corsair PSU Statistics Pluggin installiert. Habe es aber (weil ich dachte, dass es ggf. was mit den Sensoren zu tun haben könnte) wieder deinstalliert. Will lieber meine CPU Temps als den Verbrauch im Blick behalten. Wobei beides natürlich am schönsten wäre. Scheinbar nimmt das Dynamic Pluggin aber weiterhin von da irgendwelche Sensoren!? ______________________________________________________________________________________________ jetz hab ich nochmal irgendwelche Sch*** gebaut. Habe den sensors.d Ordner und die .conf Dateien gelöscht. Jetzt bekomme ich in der Auswahlliste nur noch die letzten drei Einträge vom oberen Bild angezeigt.
-
Dank dir erstmal für deine Rückmeldung! Das sieht dann wohl leider nicht so gut aus. Habe auch das von dir erwähnte Plugin installiert. Was mich nur wundert ist, dass er ja ab und an paar Sensoren erkennen zu scheint. Falls die nochmal in der Liste auftauchen, versuche ich davon einen Screenshot zu machen. Vielen Dank für den Hinweis mit Fan Control. Da bleibt dann vermutlich nur die Steuerung direkt übers BIOS? Oder gibt es noch andere Plugins?
-
Hi zusammen, wenn ich es richtig gelesen habe wird für das Dynamic System Temperature Pluggin Perl benötigt. Ich nutze Unraid 6.11.3. Hier sollte meines Wissens nach Perl bereits nativ integriert sein. Ich bekomme es aber leider irgendwie einfach nich hin die entsprechenden Sensoren auszuwählen. Hardware ist folgende: M/B:ASUSTeK COMPUTER INC. PRIME H370-A Version Rev 1.xx - BIOS:American Megatrends Inc. Version 1901. Dated: 02/20/2020 CPU:Intel® Core™ i5-8500 CPU @ 3.00GHz Im System Temperature Plugin wird über detect "coretemp nct6775" erkannt. Unter den entsprechenden Sensoren kann ich aber nichts auswählen. Via sensor-detect im CLI bekomme ich als Ausgabe "Intel digital thermal sensor... Success! (driver `coretemp')" Aber auch wenn ich im Dynamix Plugin nur coretemp eintrage kann ich unter den Sensoren nicht auswählen. Ich meine, dass ich die Pluggins neulich auf die neuste Version geupdated habe und seither nichts mehr angezeigt wird. Nach einem Neustart des unRaid Servers wurden wir auch entsprechende Sensoren in der Auswahl angezeigt, sobald ich diese jedoch ausgewählt und gespeichert habe wurde nicht angezeigt und anschließend waren wieder alle Sensoren auf "not used" gesetzt und die Auswahlmöglichkeiten waren verschwunden. Irgendwie scheint er also sporadisch Sensoren und entsprechende Treiber zu erkenne. Hat hier jemand eine Idee, was ich hier falsch mache? __________________________________________________________________________ Beim Dynamix Auto Fan Control Pluggin wird mir ebenfalls nichts angezeigt, obwohl ich entsprechende PWM Lüfter direkt ans Mainboard angeschlossen habe. Gerade die Einstellung der Lüfter für CPU und das Auslesen der Temperatur wären schon ein schönes Feature. Gibt es sonst andere Möglichkeiten das zu realisieren?

