


Tucubanito07
Members
-
Joined
-
Last visited
-
Good morning Unraider's, Since upgraded to 7.3.1 I see that one of my disk has 132 errors. I performed a SMART extended self-test and came back with no errors. So I am confused on if is reporting something is not supposed to or if is legit. I uploaded the extended smart test on the drive. @JorgeB on the bug report site recommended to post this issue here. @JorgeB You recommended new cables and I just got those cables when I switched the Intel 265K when we were troubleshooting not too long ago. Are you able to tell me if we can fix those errors or do I need to replace the disk? The SMART Extended Self-Test came clean and don't want to lose any of the data. I just got two refurbished that still have not gotten to my house, they both have a 5 year warranty and seems to just be drives sitting in the shelf for big companies that don't need them any more. I am thinking on adding another 18TB Parity so like that in case one or two drives don't work any more, my data is safe. I can move the 132 errors drive to another space on my 45Drive X15 to see if the issue persists. Any guidance from anyone is really appreciated it. Thank you all. eleanor-y-diana-diagnostics-20260626-1647.zip ST10000VN0008-2JJ101_ZPW05Q4E-20260626-1059.txt
-
Good evening Community, I want to stop using port forwarding for my Jellyfin Network. I know Tailscale does not need port forwarding and I want to go that route. What I am trying to accomplish is route all my Jellyfin traffic through Tailscale. I already have Cloudflare setup and Jellyfin working in NGINX Proxy Manager but I can't get it to forward to the domain I want to use. I know I can use the domain Tailscale has available and use it with HTTPS, however, I still want users to be able to go to my domain and go to Jellyfin or any other exposed application through Tailscale. I have switch the Cloudflare to point to the NGINX Proxy Manager IP Address in Tailscale but nothing happens. Has anyone been able to get this to work with their own domain instead of Tailscale domains? I did see that space invader has one for SWAG but I don't want to use that container and everything is already kind of setup just missing something. If anyone can help that would be great. Thank you.
-
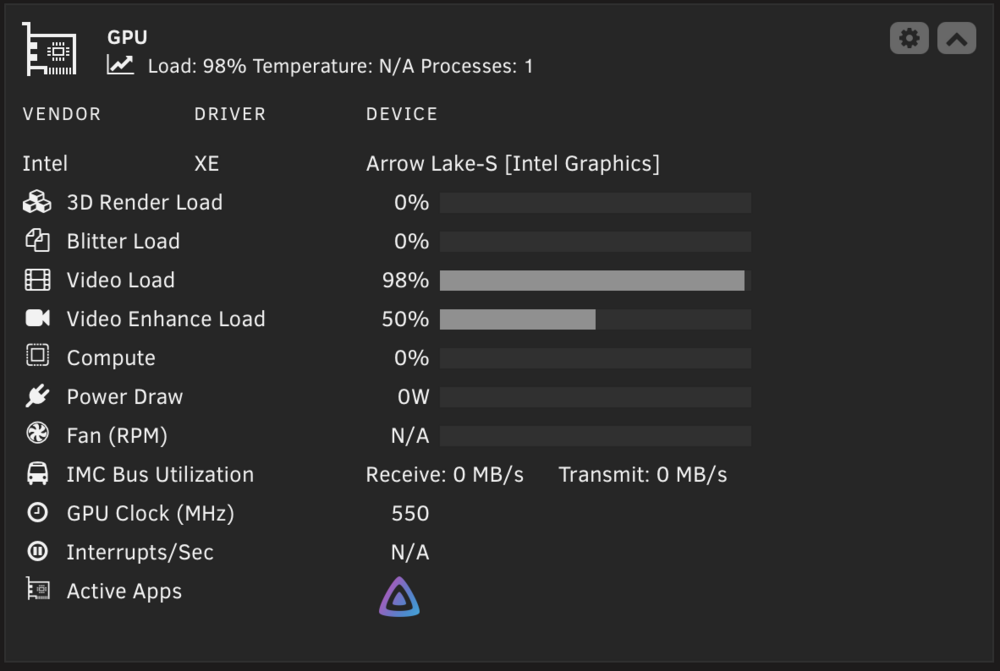
I just went back again to Plex container and in the settings -> transcoding section, I now see an option for the intel IGPU which I have never had the option to select.

-
I mean it was working before so I would think it should work and is on the version that allows it. Also, I did see on the linuxserver template the version was set to docker and I changed it to latest and I will report if that fixes the issue. Thank you for all your help.
-
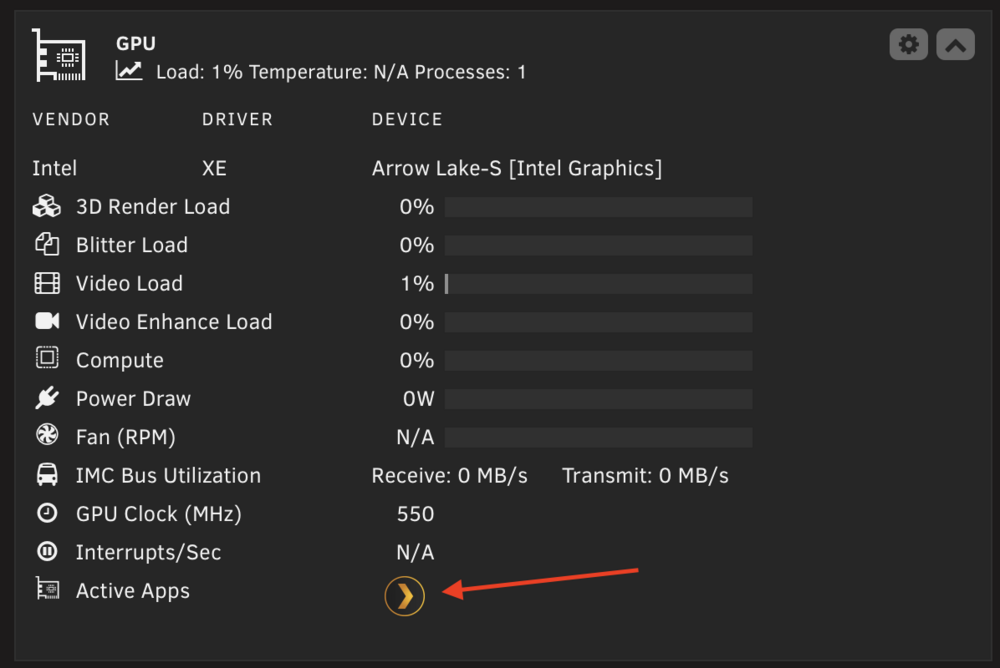
I do see my Jellyfin using it. What in the world is going on with the plex container. I do s
-
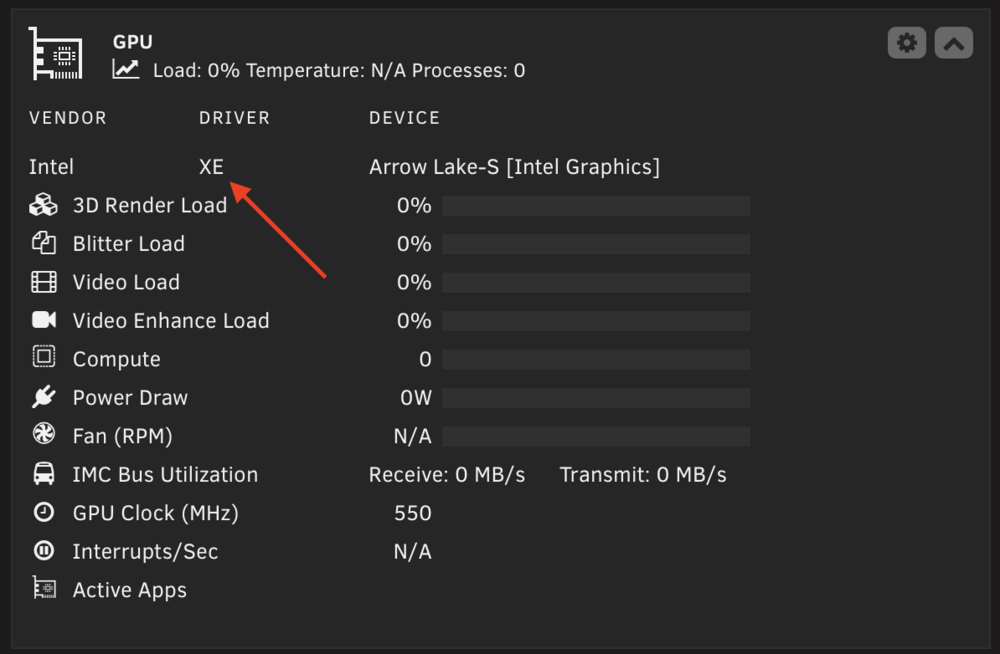
Thank you for the how to. It now looks like it loaded the XE Drivers. However, the Plex Container is still using CPU for transcoding.
-
I also see this. Is set to None, It has an option to 7 but I don't know what that means? Will it create 7 new IMMOU groups for the IGPU which I can use? No idea.

-
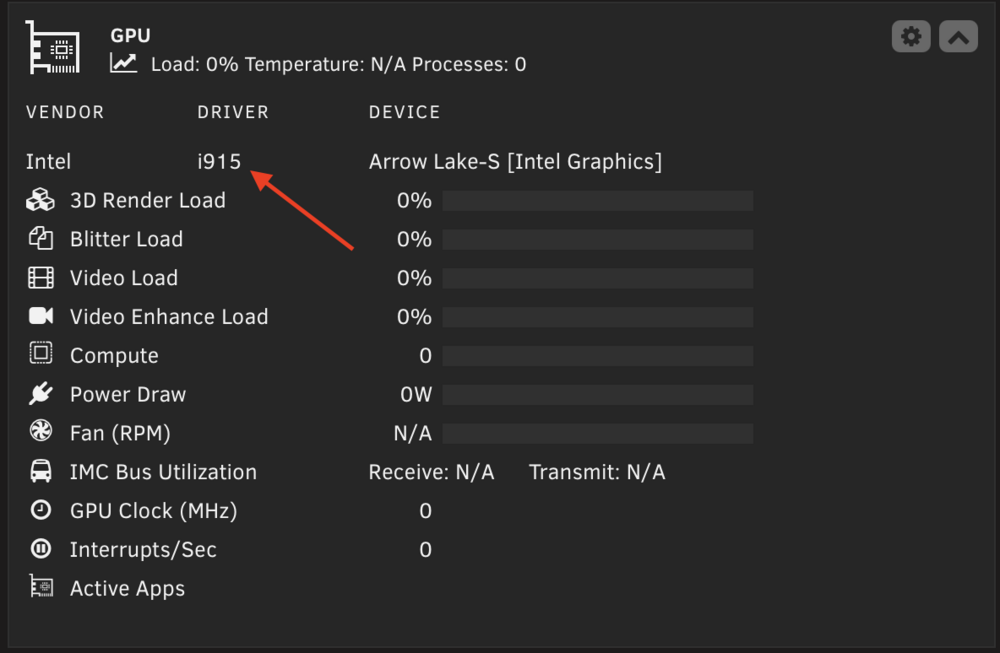
In system drivers it says is IN USE.

-
Do you happen to know where I go to disable I915 one enable XE drivers? I didn't see it on my GO file.
-
Should this say XE Drivers?
-
I do have the betta version, It was working before.
-
@JorgeB so on 7.2.4 and 7.2.5 it was working of the I915. However, It stopped working once I got to 7.3.0. Here is the newest support file. I wonder we have to change something since now the newest kernel should see the Intel 265K IGPU? Do we have to removed something we did prior to 7.3.0 to make it work now? eleanor-y-diana-diagnostics-20260516-1313.zip
-
Updated and 7.3.0 and everything works. Switching tabs from dashboard to main to settings to share is instant. I was able to switch the flash drive to internal boot and TPM for licensing. Great job Unraid team.
-
Updated today to 7.3.0 and got this message. { "request": { "operation": "CreateInternalBootPool", "variables": { "poolName": "boot", "devices": [ "INTEL_MEMPEK1J016GAL_PHBT90950652016N" ], "bootSizeMiB": 0, "updateBios": true, "reboot": false } }, "response": { "ok": false, "code": 1, "output": "assignableDisks snapshot: [{\"id\":\"INTEL_MEMPEK1J016GAL_PHBT90950652016N\",\"serialNum\":\"INTEL_MEMPEK1J016GAL_PHBT90950652016N\",\"device\":\"/dev/nvme0n1\"}]\nassignableDisks resolved serialNum->device: [[\"INTEL_MEMPEK1J016GAL_PHBT90950652016N\",{\"bootId\":\"INTEL_MEMPEK1J016GAL_PHBT90950652016N\",\"devicePath\":\"/dev/nvme0n1\"}]]\nRunning: emcmd debug=cmdCreatePool,cmdAssignDisk,cmdMakeBootable\nRunning: emcmd cmdCreatePool=apply&poolName=boot&poolSlots=1\nmkbootpool: command failed or timed out\nemcmd request fa...[truncated]" }, "status": 1, "error": { "name": "Error", "code": 1, "message": "Internal boot setup returned ok=false", "category": "unknown", "networkError": { "status": 1, "result": { "ok": false, "code": 1, "output": "assignableDisks snapshot: [{\"id\":\"INTEL_MEMPEK1J016GAL_PHBT90950652016N\",\"serialNum\":\"INTEL_MEMPEK1J016GAL_PHBT90950652016N\",\"device\":\"/dev/nvme0n1\"}]\nassignableDisks resolved serialNum->device: [[\"INTEL_MEMPEK1J016GAL_PHBT90950652016N\",{\"bootId\":\"INTEL_MEMPEK1J016GAL_PHBT90950652016N\",\"devicePath\":\"/dev/nvme0n1\"}]]\nRunning: emcmd debug=cmdCreatePool,cmdAssignDisk,cmdMakeBootable\nRunning: emcmd cmdCreatePool=apply&poolName=boot&poolSlots=1\nmkbootpool: command failed or timed out\nemcmd request fa...[truncated]" } } } }
-
Awesome. I will be doing the upstate as soon as my parity sync is done.


