SpaceInvaderOne
Community Developer
-
Joined
Everything posted by SpaceInvaderOne
-
Also please look in the template. Click show more settings and look at the Userscripts Location: it should be
-
please can you type in the unraid terminal ls /boot/config/plugins/user.scripts/scripts/ and paste back what you get
-
Did you install the userscripts plugin beforehand?
-
I am thinking of closing this thread and starting a new one for this version of macinabox. Directing people from this thread to there. I think it would be cleaner to have a support thread for the new version separate to this. I wondered what you guys think is that a good idea or not ? 😀
-
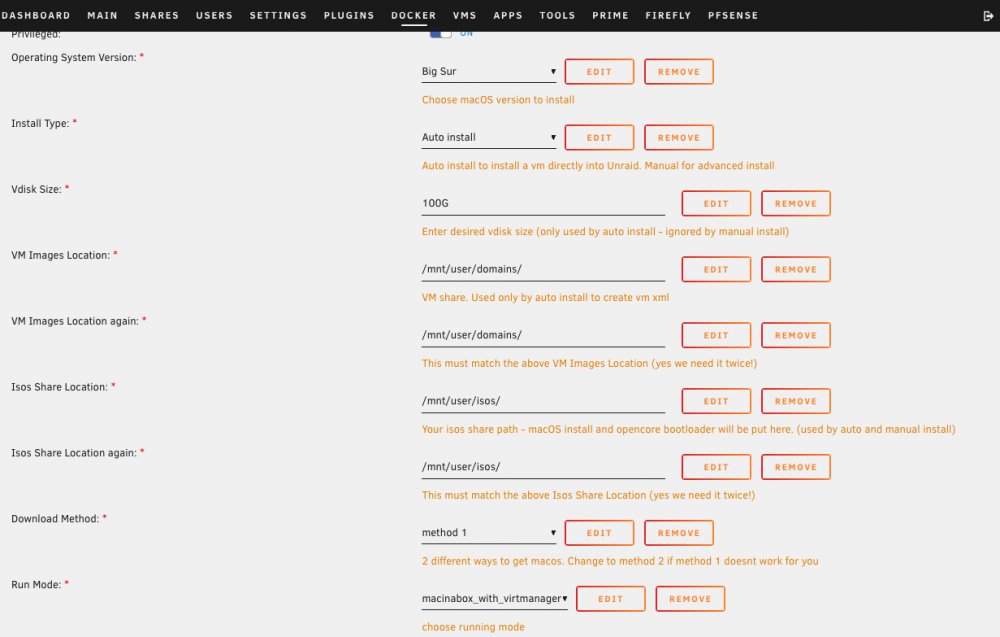
Ok so new Macinabox is now on CA. Please watch this video for how to use the container. It is not obvious from just installing the container. Now it is really important to delete the old macinabox, especially its template else the old and new template combine. Whilst this wont break macinabox you will have old variables in the template that are not used anymore. I recommend removing the old macinabox appdata aswell. Basic usage instructions. Macinabox needs the following other apps to be installed. CA User Scripts (macinabox will inject a user script. This is what fixes the xml after edits made in the Unraid VM manager) Custom VM icons (install this if you want the custom icons for macOS in your vm) Install the new macinabox. 1. In the template select the OS which you want to install 2. Choose auto (default) or manual install. (manual install will just put the install media and opencore into your iso share) 3. Choose a vdisk size for the vm 4. In VM Images: Here you must put the VM image location (this path will put the vdisk in for the vm) 5. In VM Images again : re enter the same location as above. Here its stored as a variable. This will be used when macinabox generate the xml template. 6. In Isos Share Location: Here you must put the location of your iso share. Macinabox will put named install media and opencore here. 7. In Isos Share Location Again: Again this must be the same as above. Here its stored as a variable. Macinabox will use this when it genarates the template. 8. Download method. Leave as default unless for some reason method 1 doesnt work 9. Run mode. Choose between macinabox_with_virtmanager or virtmanager only. ( When I started rewriting macinabox i was going to only use virtmanager to make changes to the xml. However I thought it much easier and better to be able to use the Unraid vm manager to add a gpu cores ram etc, then have macinabox fix the xml afterwards. I deceided to leave vitmanager in anyway, in case its needed. For example there is a bug in Unraid 6.9.beta (including beta 35.) When you have any vm that uses vnc graphics then you change that to a passed through gpu it adds the gpu as a second gpu leaving the vnc in place. This was also a major reason i left virtmanger in macinabox. For situations like this its nice to have another tool. I show all of this in the video guide. ) After the container starts it will download the install media and put it in the iso share. Big Sur seems to take alot longer than the other macOS versions. So to know when its finished goto userscripts and run the macinabox notify script (in background) a message will pop up on the unraid webui when its finished. At this point you can run the macinabox helper script. It will check to see if there is a new autoinstall ready to install then it will install the custom xml template into the VM tab. Goto the vm tab now and run the vm This will boot up into the Opencore bootloader and then the install media. Install macOS as normal. After install you can change the vm in the Unraid VM Manager. Add cores ram gpu etc if you want. Then go back to the macinabox helper script. Put in the name of the vm at the top of the script and then run the script. It will add back all the custom xml to the vm and its ready to run. Hope you guys like this new macinabox
-
What it does is when the first template is created it makes an xml file using the variables from the container template. The container also installs a custom userscript into unraid. This script grabs the xml from the vm using virsh. Then with that it uses a combination of sed and tee to find add and swap the necessary xml putting into another xml file which is then put back into the server defining the vm again with virsh. You can see the scripts on my github here https://github.com/SpaceinvaderOne/Macinabox
-
Yes there is a big update for macinabox. I should have the new version up tomorrow along with a video on how to use. I deceided to make more changes again to the container before releasing it hense the delay. Major changes are. Switched to Opencore. Supports Big Sur, Catalina, Mojave and High Sierra. Xml for template generated on the fly setting any custom locations you use for vm images or iso images. Installing vm no longer requires having to stop array/vm service before seeing the vm in vm tab. Being able to edit the vm in Unraid vm manager. Add cores, ram gpu usb controller ect without having to edit xml after. Auto fixes for unusual core counts in mac vms. Auto fixing network type for both install and post install Able to use both custom and stock unraid ovmf files When you use the new version the existing template is not compatable with the new Macinabox. So please make sure to delete the container, the template and the appdata. New template looks like this. If yours doesnt look like this its not the correct one.
-
Yeah i have the same. I havent had time to look into this as yet but a quick fix is roll back to the earlier container. In the template change repository to add :6.0 on the end so onlyoffice/documentserver:6.0
-
Sure is. When Big Sur is released officially a new Macinabox will be out. With a bunch of new features and choice between opencore and clover bootloaders.
-
So evdev passthrough is used for passing through a keyboard and mouse to a vm. Yep we can easily do this by just passing through the usb device. However this works slightly differently. As well as having extremely low latency, it allows us to passthough any keyboard or mouse. That includes UBS and the old PS2 devices. Hit both control keys and the input will switch between the host and vm on the fly. If you like running old operating systems as vms the evdev is for you. Some old systems dont support usb. So using evdev you can still pass it through to those old systems. Hope you find this useful
-
Yes the extra variables in the template may need you to delete the old template from the server so the new one is pulled down from community applications if on updating the container it doesnt change. So you have filled in the 2 variables driver capabilities to all and the id number of your gpu from the nvidia plugin. But you didnt say if you set the extra parameter (advanced view) to --runtime=nvidia If all these are set then please post screen shots of how the template is filled in.
-
Update to the container. Changing tag to :nvidia will allow you to use you nvidia gpu with the container. Thankyou @gshlomi for your message regarding this. There are some changes to the template too which should be updated in the com apps feed in the next hour or two. Details are now at the beginning of this post.
-
I find the easiest way to move to a larger disk is not expanding the existing disk but to migrate to a new disk instead. 1. Create new macOS vm with larger disk. (ie 200G) 2. Stop new VM 3. Add the old macOS vm's vdisk (100g disk) as an additional disk to the new vm in its template. 4. Boot into new vm 5. Run migration assistant (applications/utilities/migration assistant) 6. Now you can migrate all programmes data and settings from the old vdisk to the new larger vdisk 7. After migration complete shutdown vm. 8 Remove old vdisk from template 9. delete old vdisk or keep as backup.
-
Hi, I think it would be really great to be able to set individual mover schedules that are specific to each cache pool. As i would find it useful to have some pools move files more often than others.
-
Ah i was writing the reply when you posted this. Glad its working for you
-
Ah its an easy mistake to make , I have done the same before myself many times before You can change the grafana port or the rocket chat port. If you change the rocket chat port you will have to make a change in reverse proxy config file too as the confile file expects the port that Rocket chat is using to be 3000. So its this bit here you would need to change. server { listen 443 ssl; server_name rocketchat.*; include /config/nginx/ssl.conf; client_max_body_size 0; location / { resolver 127.0.0.11 valid=30s; set $upstream_app Rocket.Chat; set $upstream_port 3000; <<<<<<<<<<<<<<<<<<<<<<<<you would have to change the port here to match whats specified in the template>>>>>>> set $upstream_proto http; proxy_pass $upstream_proto://$upstream_app:$upstream_port; proxy_http_version 1.1; proxy_set_header Upgrade $http_upgrade; proxy_set_header Connection "upgrade"; proxy_set_header Host $http_host; proxy_set_header X-Real-IP $remote_addr; proxy_set_header X-Forwarded-For $proxy_add_x_forwarded_for; proxy_set_header X-Forwarded-Proto http; proxy_set_header X-Nginx-Proxy true; proxy_redirect off; } } server { listen 80; server_name rocket.*; return 301 https://$host$request_uri; }
-
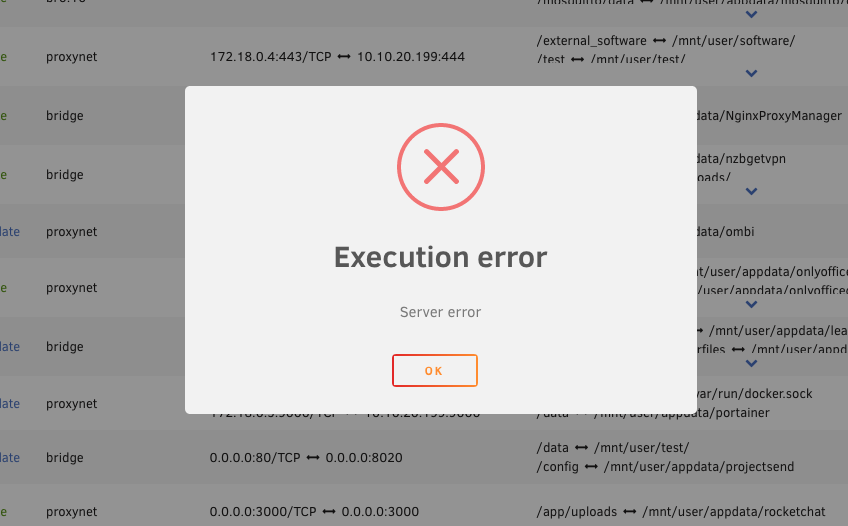
So you get an error like this when you click on start for the container? Most likely you have another container running with the same port in use. Is anything else using port 3000? Grafana also uses port 3000 by default.
-
Here is a guide showing how to setup Rocket chat running through a reverse proxy. Also you can update the container but when you setup the mongoDB you must specify the hostname in the container when you create it. That way when the container is ever recreated it keeps the same name and so doesnt cause the database to break. If you already have rocket chat installed and have disabled updates then see a fix that will allow you to update as normal at the end of my video.
-
Heres a video showing how to setup Rocket chat . Three conatiners are needed a mongoDB, linuxserver's letsencrypt reverse proxy and of course the Rocket Chat container. Hope you find this useful
-
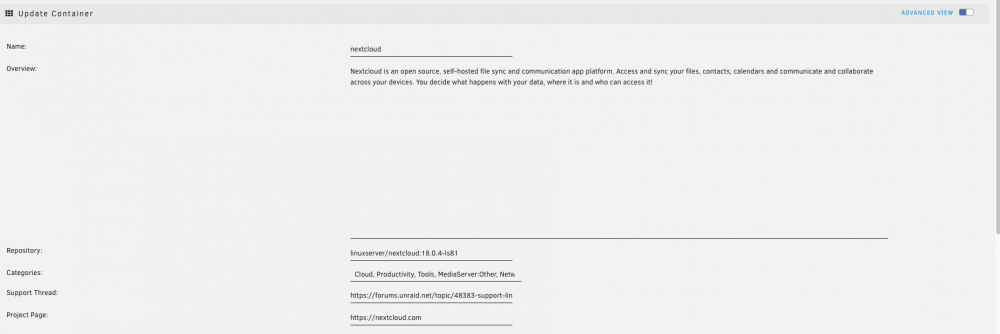
I just updated to the the nextcloud container to latest. After which i couldnt access nextcloud and was getting 400 bad request error So if anyone else has this error you can fix by rolling the container back To do that change the repository line in the template to linuxserver/nextcloud:18.0.4-ls81 as below
-
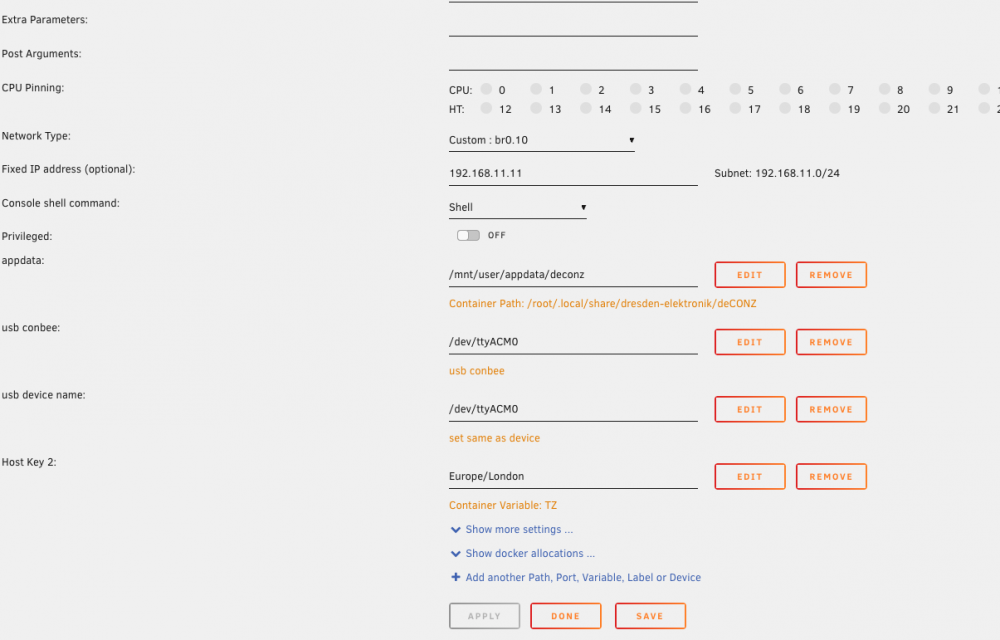
@tomwhi @jazzyjeff yeah I should have added more variables for sure. Extra variables have been added to the template now. All can be left as default settings and should work. Personally I think using a custom ip is better than running as host (just so you dont have to change the web port and can access the container just by ip in a browser.) but if you run as host network then you will need to change the listing port. VNC now enabled by default to view Zigbee mesh. Add vnc password if you wish. To see debug and upnp options these are hidden by default so click show more settings at the bottom of the template.
-
@kskoba your welcome
-
A container for explain shell to run on your server (as a self hosted alternative to using the explainshell website.) What is it? Not everyone, especially people new to Linux and Unraid, know what a command that they type will actually do. Especially when reading online commands to type into their servers. So just paste the command into the search box and click explain and explainshell will breakdown the command explaining what each part does. Quite a useful tool.
-
There will be a video series (soon) for setting up Home assistant in docker (rather than hassio vm) along with deconz, mosquitto etc
-
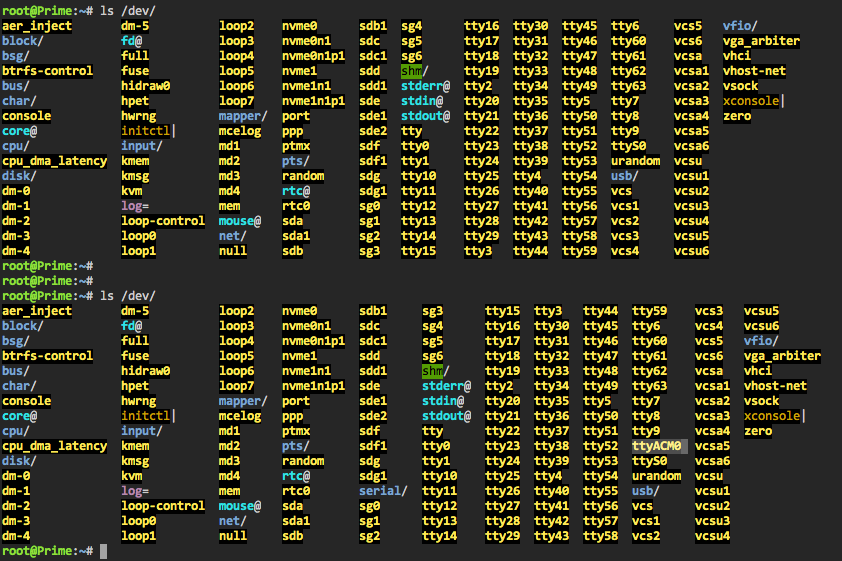
This container needs a ConbeeII usb zigbee stick to work This container is for the deCONZ software from Dresden Elektronik. It is used to control a conbee zigbee usb stick and can be used with home assistant. Setup. 1. Without conbee usb stick plugged into the server run the following command in a terminal window ls /dev/ 2. Plug your conbee usb stick into the unraid server. Then run the above again. You will now see an extra device here. This is your conbee zigbee stick. Most likely ttyACM0 (unless you have maybe a zwave stick plugged in aswell then it might not be) 3. Now add the name of the stick to the template. (default is already ttyACM0) Add it to both usb conbee: and usb device name: 4. I think it best to set a static ip for the container. You can then access the container from http://xxx.xxx.xxx.xxx (the ip you set) 5. Now you can add your zigbee devices in the webui and connect deconz to home assistant for it to be able to access you zigbee devices.