





venicenerd
Members
-
Joined
-
Last visited
Everything posted by venicenerd
-
Hallo @ich777 um noch mal kurz das Thema vom Anfang des Threads aufzugreifen: um AMD Vendor Reset zu benutzen muss ich es lediglich aus dem app store installieren und das war es? Oder muss ich noch irgendetwas anderes konfigurieren? Ich versuche damit den restart bug von meiner 5600XT zu eliminieren. LG
-
AMD VENDOR RESET I just installed this app from the CA store. Is there anything else I need to do to make it work or just install and that's it? This is to prevent the AMD restart bug, right?
-
Guys, I think I actually may be getting somewhere... I followed this video: Particularly minute 4:00 - 8:45. Once I created a new VM with that change I was able to install the AMD driver without crashing my system. Still testing to make sure that this was really the culprit but just giving everyone a heads up in case this helps.
-
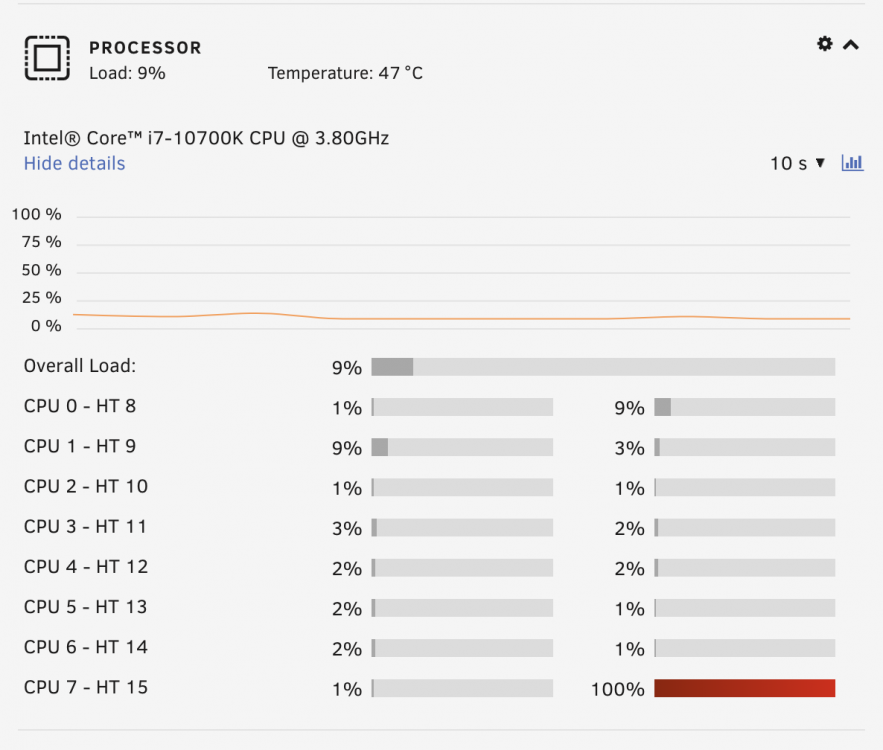
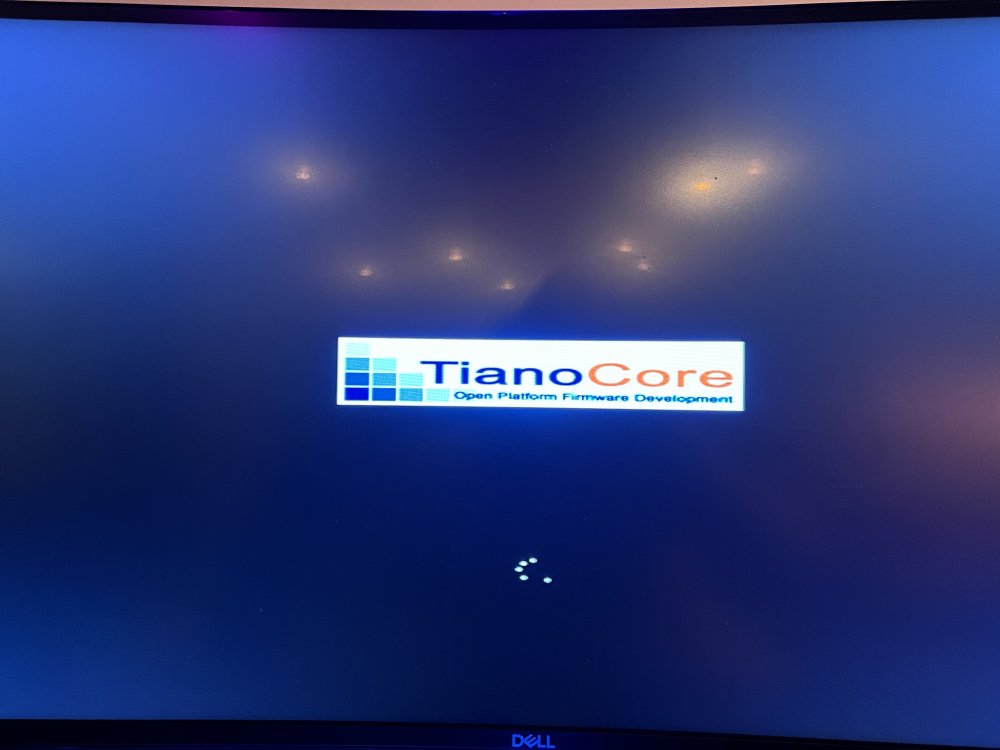
I'm new to Unraid and Virtual Machines but finally followed some tutorials to get started with my first VM. I am passing through my AMD 5700XT (by selecting it as my graphics and sound card in the VM settings) and am able to install Windows through my monitor that is connected to my 5700XT. Once Windows boots up I install all the missing virtual drivers and can use Windows through the GPU. However, as soon as I try to install the AMD drivers the screen black and and one of my CPU's seems to get stuck at 100%: I then have to force stop the VM. Upon restarting the VM it gets stuck on the loading screen (the circle is not animating): I have tried to install BOTH Windows 10 and Windows 11 VM's and the exact same issue happens in either. As soon as I exchange the AMD 5700XT for the VNC graphic card I can get windows to boot again. I have no idea how to trouble shoot this. The GPU passthrough must be working since I can do the entire installation through the montiro that is connected to my GPU, correct? I just don't know why it all falls apart as soon as I try to install the GPU driver. Any help would be appreciated! Hardware configuration: PowerColor AMD Radeon RX 5700 XT Red Dragon 8GB GDDR6 ASUSTeK COMPUTER INC. ROG STRIX Z490-I GAMING Intel® Core™ i7-10700K CPU @ 3.80GHz 64 GB DDR4 RAM XML for my Windows 10 VM: <?xml version='1.0' encoding='UTF-8'?> <domain type='kvm'> <name>Windows 10 (VMDISK)</name> <uuid>ef1c3af1-be80-d97f-7817-d3c92cdf4f94</uuid> <metadata> <vmtemplate xmlns="unraid" name="Windows 10" icon="windows.png" os="windows10"/> </metadata> <memory unit='KiB'>33030144</memory> <currentMemory unit='KiB'>16777216</currentMemory> <memoryBacking> <nosharepages/> </memoryBacking> <vcpu placement='static'>12</vcpu> <cputune> <vcpupin vcpu='0' cpuset='1'/> <vcpupin vcpu='1' cpuset='9'/> <vcpupin vcpu='2' cpuset='3'/> <vcpupin vcpu='3' cpuset='11'/> <vcpupin vcpu='4' cpuset='4'/> <vcpupin vcpu='5' cpuset='12'/> <vcpupin vcpu='6' cpuset='5'/> <vcpupin vcpu='7' cpuset='13'/> <vcpupin vcpu='8' cpuset='6'/> <vcpupin vcpu='9' cpuset='14'/> <vcpupin vcpu='10' cpuset='7'/> <vcpupin vcpu='11' cpuset='15'/> </cputune> <os> <type arch='x86_64' machine='pc-i440fx-6.2'>hvm</type> <loader readonly='yes' type='pflash'>/usr/share/qemu/ovmf-x64/OVMF_CODE-pure-efi.fd</loader> <nvram>/etc/libvirt/qemu/nvram/ef1c3af1-be80-d97f-7817-d3c92cdf4f94_VARS-pure-efi.fd</nvram> </os> <features> <acpi/> <apic/> <hyperv mode='custom'> <relaxed state='on'/> <vapic state='on'/> <spinlocks state='on' retries='8191'/> <vendor_id state='on' value='none'/> </hyperv> </features> <cpu mode='host-passthrough' check='none' migratable='on'> <topology sockets='1' dies='1' cores='6' threads='2'/> <cache mode='passthrough'/> </cpu> <clock offset='localtime'> <timer name='hypervclock' present='yes'/> <timer name='hpet' present='no'/> </clock> <on_poweroff>destroy</on_poweroff> <on_reboot>restart</on_reboot> <on_crash>restart</on_crash> <devices> <emulator>/usr/local/sbin/qemu</emulator> <disk type='file' device='disk'> <driver name='qemu' type='raw' cache='writeback'/> <source file='/mnt/user/domains/Windows 10 (VMDISK)/vdisk1.img'/> <target dev='hdc' bus='virtio'/> <boot order='1'/> <address type='pci' domain='0x0000' bus='0x00' slot='0x04' function='0x0'/> </disk> <disk type='file' device='cdrom'> <driver name='qemu' type='raw'/> <source file='/mnt/user/isos/Win10_21H2_English_x64.iso'/> <target dev='hda' bus='ide'/> <readonly/> <boot order='2'/> <address type='drive' controller='0' bus='0' target='0' unit='0'/> </disk> <disk type='file' device='cdrom'> <driver name='qemu' type='raw'/> <source file='/mnt/user/isos/virtio-win-0.1.221-1.iso'/> <target dev='hdb' bus='ide'/> <readonly/> <address type='drive' controller='0' bus='0' target='0' unit='1'/> </disk> <controller type='usb' index='0' model='ich9-ehci1'> <address type='pci' domain='0x0000' bus='0x00' slot='0x07' function='0x7'/> </controller> <controller type='usb' index='0' model='ich9-uhci1'> <master startport='0'/> <address type='pci' domain='0x0000' bus='0x00' slot='0x07' function='0x0' multifunction='on'/> </controller> <controller type='usb' index='0' model='ich9-uhci2'> <master startport='2'/> <address type='pci' domain='0x0000' bus='0x00' slot='0x07' function='0x1'/> </controller> <controller type='usb' index='0' model='ich9-uhci3'> <master startport='4'/> <address type='pci' domain='0x0000' bus='0x00' slot='0x07' function='0x2'/> </controller> <controller type='pci' index='0' model='pci-root'/> <controller type='ide' index='0'> <address type='pci' domain='0x0000' bus='0x00' slot='0x01' function='0x1'/> </controller> <controller type='virtio-serial' index='0'> <address type='pci' domain='0x0000' bus='0x00' slot='0x03' function='0x0'/> </controller> <interface type='bridge'> <mac address='52:54:00:da:7f:f4'/> <source bridge='br0'/> <model type='virtio-net'/> <address type='pci' domain='0x0000' bus='0x00' slot='0x02' function='0x0'/> </interface> <serial type='pty'> <target type='isa-serial' port='0'> <model name='isa-serial'/> </target> </serial> <console type='pty'> <target type='serial' port='0'/> </console> <channel type='unix'> <target type='virtio' name='org.qemu.guest_agent.0'/> <address type='virtio-serial' controller='0' bus='0' port='1'/> </channel> <input type='mouse' bus='ps2'/> <input type='keyboard' bus='ps2'/> <audio id='1' type='none'/> <hostdev mode='subsystem' type='pci' managed='yes'> <driver name='vfio'/> <source> <address domain='0x0000' bus='0x03' slot='0x00' function='0x0'/> </source> <address type='pci' domain='0x0000' bus='0x00' slot='0x05' function='0x0'/> </hostdev> <hostdev mode='subsystem' type='pci' managed='yes'> <driver name='vfio'/> <source> <address domain='0x0000' bus='0x03' slot='0x00' function='0x1'/> </source> <address type='pci' domain='0x0000' bus='0x00' slot='0x06' function='0x0'/> </hostdev> <hostdev mode='subsystem' type='usb' managed='no'> <source> <vendor id='0x1b1c'/> <product id='0x1b66'/> </source> <address type='usb' bus='0' port='1'/> </hostdev> <hostdev mode='subsystem' type='usb' managed='no'> <source> <vendor id='0x1b1c'/> <product id='0x1b7c'/> </source> <address type='usb' bus='0' port='2'/> </hostdev> <memballoon model='none'/> </devices> </domain>
-
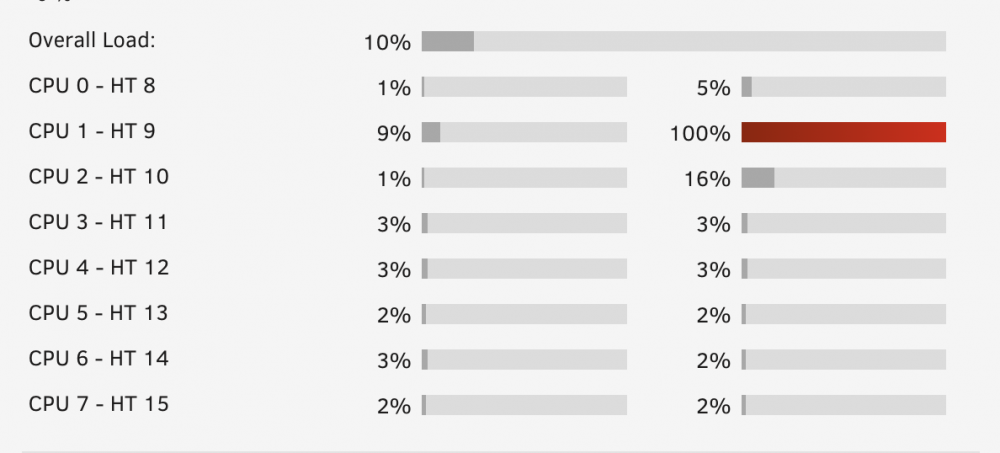
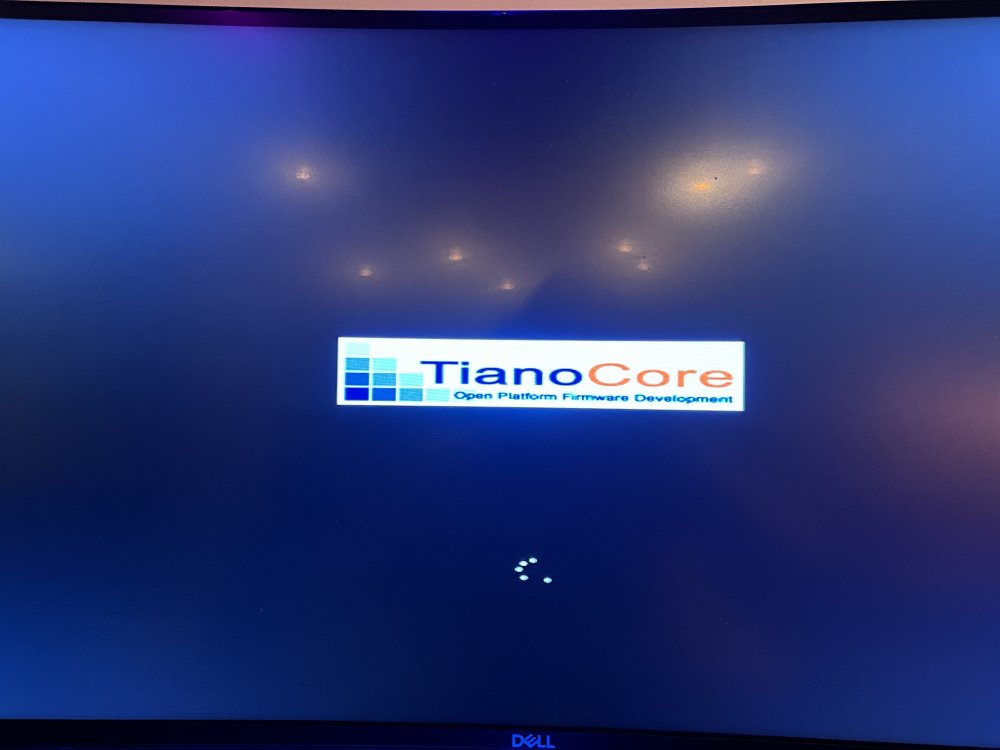
Have you guys found a solution to this? I have a AMD Radeon RX 5700XT and I have this issue with both Windows 10 and Windows 11. I can install the VM just fine and I see picture on my monitor throughout the entire installation and windows setup so I assume that my GPU passthrough is working? However, as soon as I try to install the AMD driver one of my CPU's SPIKES to 100% and the screen blacks out: I then have to force stop the VM and when I try to restart it I get stuck on the loading screen (the spinning circle doesn't move): One of my CPU cores also gets stuck at 100% again until I force stop the VM.
-
Now THAT worked!!!! Thank you @ilarion and @JorgeB. I am curious, though, why it didn't work to just replace the entire string. Also, after I placed "<boot order='1'/>" in between <hostdev> and </hostdev> and checked afterwards the new code was still in there but it had moved in another location than where I had put it. Is it normal for Unraid to change up the code?
-
Hmmm that's actually not quite true. It allowed me to remove this from the XML <sound model='ich9'> <alias name='sound0'/> <address type='pci' domain='0x0000' bus='0x00' slot='0x06' function='0x0'/> </sound> which I had added previously (minus the address line... not sure how that ended up in there...) but it won't let me add your code or remove this line, for example: <audio id='1' type='none'/> So it seems my XML is very selective on the changes it allows me to make. Is that normal?
-
Seems like it's a general issue for me. It won't save ANY changes I make via the XML view. Only changes I make via the form view. This is so bizarre. I just made an XML change 30 minutes ago and that worked but now I am no longer able to save any changes.
-
Hey @JorgeBthank you so much for the quick reply! Unfortunately the changes don't seem to take. I right click on the VM and select "edit" then in XML View I replace the existing hostdev code with the one you posted and click "update". Unfortunately, when I click edit again, to check if the changes were made it has gone back to the original code. It won't let me save your changes. Any idea why that may be?
-
Hey @jortan and @Deep Insights I think I may have the same issue as you guys: I installed Windows 11 VM on a passthrough NVME drive and it keeps booting into the UEFI Shell. It seems like @jortan fixed this but I'm not 100% sure I understand the solution. I am pretty new to all of this. Am I having the same issue as you guys and if so what can I do to fix it? Any help would be appreciated!
-
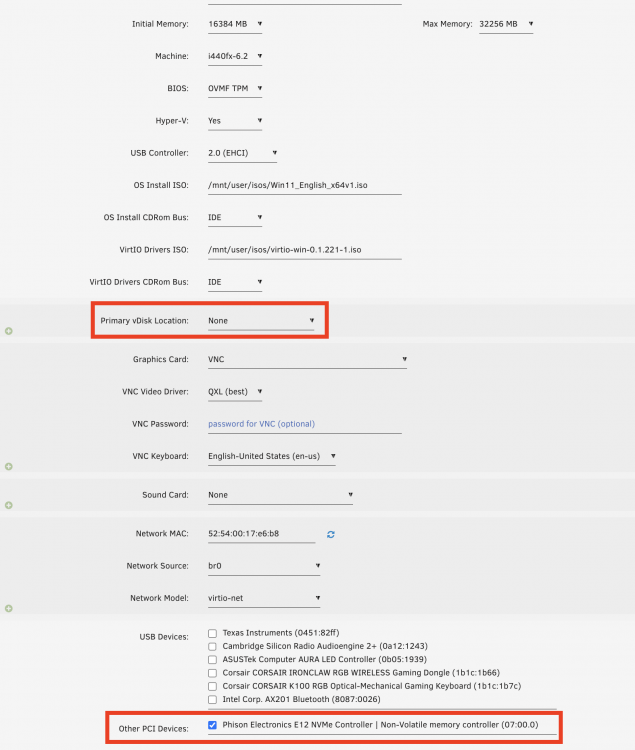
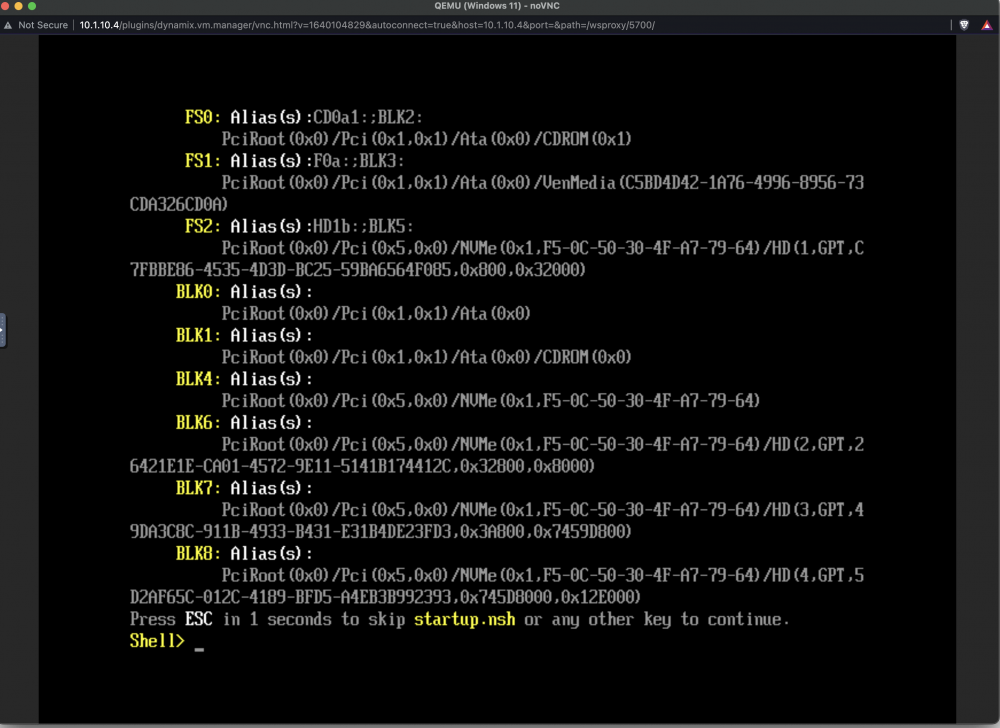
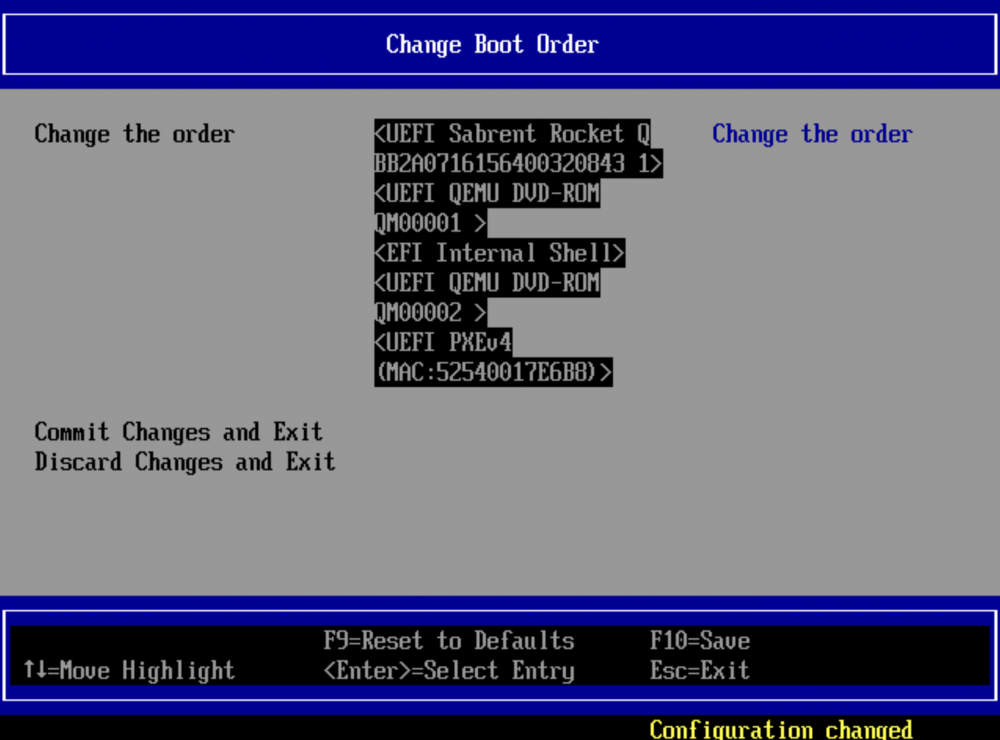
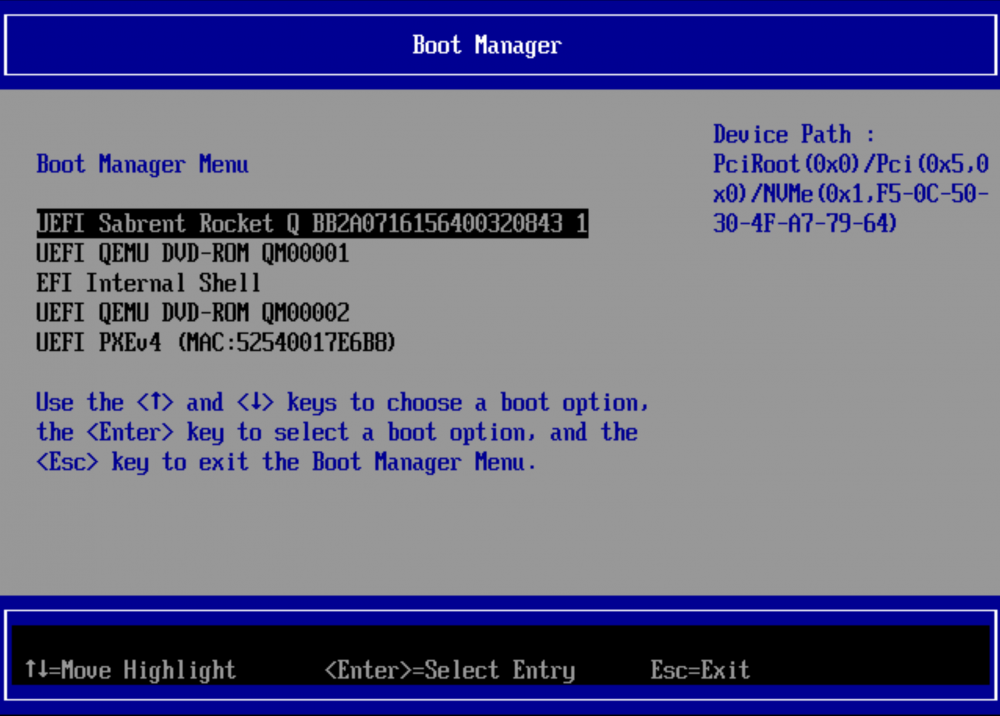
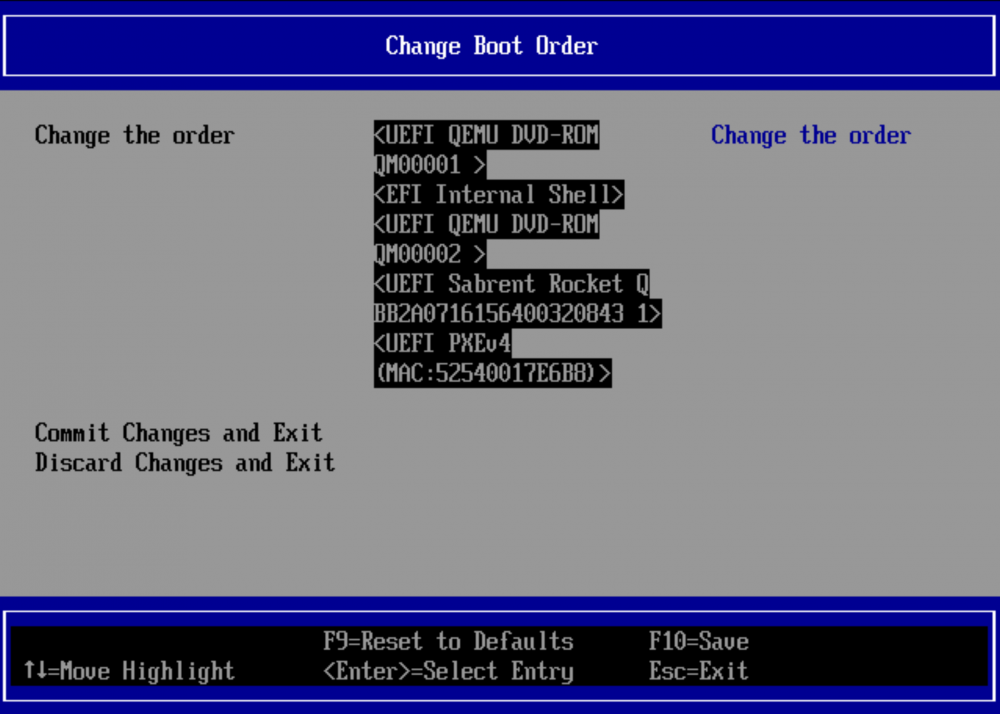
I just installed a Windows 11 VM on Unraid 6.10.3. I set primary vdisk location to "none" and passed through my NVME drive, instead: Install went well and everything seems to work. However, every time I boot up my VM it boots me into the UEFI Interactive Shell instead of Windows: I have to exit the shell and then set the boot order in Boot Device Manager -> Boot Options --> Change Boot Order to boot from my NVME drive first: Then I select "Boot Manager" and select my NVME again to re-boot into windows: Now Windows boots correctly. However, my boot order selection doesn't stick. When I boot up my VM the next time it again boots into the UEFI interactive shell and the boot order has been reset once again: Is there any way I can get my VM to boot directly into Windows when using a passthrough disk? Here is my VM XML: <?xml version='1.0' encoding='UTF-8'?> <domain type='kvm' id='8'> <name>Windows 11</name> <uuid>866d248b-f751-5434-4fe4-3aab913d584e</uuid> <metadata> <vmtemplate xmlns="unraid" name="Windows 11" icon="windows11.png" os="windowstpm"/> </metadata> <memory unit='KiB'>33030144</memory> <currentMemory unit='KiB'>33030144</currentMemory> <memoryBacking> <nosharepages/> </memoryBacking> <vcpu placement='static'>12</vcpu> <cputune> <vcpupin vcpu='0' cpuset='1'/> <vcpupin vcpu='1' cpuset='9'/> <vcpupin vcpu='2' cpuset='3'/> <vcpupin vcpu='3' cpuset='11'/> <vcpupin vcpu='4' cpuset='4'/> <vcpupin vcpu='5' cpuset='12'/> <vcpupin vcpu='6' cpuset='5'/> <vcpupin vcpu='7' cpuset='13'/> <vcpupin vcpu='8' cpuset='6'/> <vcpupin vcpu='9' cpuset='14'/> <vcpupin vcpu='10' cpuset='7'/> <vcpupin vcpu='11' cpuset='15'/> </cputune> <resource> <partition>/machine</partition> </resource> <os> <type arch='x86_64' machine='pc-i440fx-6.2'>hvm</type> <loader readonly='yes' type='pflash'>/usr/share/qemu/ovmf-x64/OVMF_CODE-pure-efi-tpm.fd</loader> <nvram>/etc/libvirt/qemu/nvram/866d248b-f751-5434-4fe4-3aab913d584e_VARS-pure-efi-tpm.fd</nvram> </os> <features> <acpi/> <apic/> <hyperv mode='custom'> <relaxed state='on'/> <vapic state='on'/> <spinlocks state='on' retries='8191'/> <vendor_id state='on' value='none'/> </hyperv> </features> <cpu mode='host-passthrough' check='none' migratable='on'> <topology sockets='1' dies='1' cores='6' threads='2'/> <cache mode='passthrough'/> </cpu> <clock offset='localtime'> <timer name='hypervclock' present='yes'/> <timer name='hpet' present='no'/> </clock> <on_poweroff>destroy</on_poweroff> <on_reboot>restart</on_reboot> <on_crash>restart</on_crash> <devices> <emulator>/usr/local/sbin/qemu</emulator> <disk type='file' device='cdrom'> <driver name='qemu' type='raw'/> <source file='/mnt/user/isos/Win11_English_x64v1.iso' index='2'/> <backingStore/> <target dev='hda' bus='ide'/> <readonly/> <boot order='2'/> <alias name='ide0-0-0'/> <address type='drive' controller='0' bus='0' target='0' unit='0'/> </disk> <disk type='file' device='cdrom'> <driver name='qemu' type='raw'/> <source file='/mnt/user/isos/virtio-win-0.1.221-1.iso' index='1'/> <backingStore/> <target dev='hdb' bus='ide'/> <readonly/> <alias name='ide0-0-1'/> <address type='drive' controller='0' bus='0' target='0' unit='1'/> </disk> <controller type='usb' index='0' model='ich9-ehci1'> <alias name='usb'/> <address type='pci' domain='0x0000' bus='0x00' slot='0x07' function='0x7'/> </controller> <controller type='usb' index='0' model='ich9-uhci1'> <alias name='usb'/> <master startport='0'/> <address type='pci' domain='0x0000' bus='0x00' slot='0x07' function='0x0' multifunction='on'/> </controller> <controller type='usb' index='0' model='ich9-uhci2'> <alias name='usb'/> <master startport='2'/> <address type='pci' domain='0x0000' bus='0x00' slot='0x07' function='0x1'/> </controller> <controller type='usb' index='0' model='ich9-uhci3'> <alias name='usb'/> <master startport='4'/> <address type='pci' domain='0x0000' bus='0x00' slot='0x07' function='0x2'/> </controller> <controller type='pci' index='0' model='pci-root'> <alias name='pci.0'/> </controller> <controller type='ide' index='0'> <alias name='ide'/> <address type='pci' domain='0x0000' bus='0x00' slot='0x01' function='0x1'/> </controller> <controller type='virtio-serial' index='0'> <alias name='virtio-serial0'/> <address type='pci' domain='0x0000' bus='0x00' slot='0x04' function='0x0'/> </controller> <interface type='bridge'> <mac address='52:54:00:17:e6:b8'/> <source bridge='br0'/> <target dev='vnet7'/> <model type='virtio-net'/> <alias name='net0'/> <address type='pci' domain='0x0000' bus='0x00' slot='0x03' function='0x0'/> </interface> <serial type='pty'> <source path='/dev/pts/0'/> <target type='isa-serial' port='0'> <model name='isa-serial'/> </target> <alias name='serial0'/> </serial> <console type='pty' tty='/dev/pts/0'> <source path='/dev/pts/0'/> <target type='serial' port='0'/> <alias name='serial0'/> </console> <channel type='unix'> <source mode='bind' path='/var/lib/libvirt/qemu/channel/target/domain-8-Windows 11/org.qemu.guest_agent.0'/> <target type='virtio' name='org.qemu.guest_agent.0' state='connected'/> <alias name='channel0'/> <address type='virtio-serial' controller='0' bus='0' port='1'/> </channel> <input type='tablet' bus='usb'> <alias name='input0'/> <address type='usb' bus='0' port='1'/> </input> <input type='mouse' bus='ps2'> <alias name='input1'/> </input> <input type='keyboard' bus='ps2'> <alias name='input2'/> </input> <tpm model='tpm-tis'> <backend type='emulator' version='2.0' persistent_state='yes'/> <alias name='tpm0'/> </tpm> <graphics type='vnc' port='5900' autoport='yes' websocket='5700' listen='0.0.0.0' keymap='en-us'> <listen type='address' address='0.0.0.0'/> </graphics> <sound model='ich9'> <alias name='sound0'/> <address type='pci' domain='0x0000' bus='0x00' slot='0x06' function='0x0'/> </sound> <audio id='1' type='none'/> <video> <model type='qxl' ram='65536' vram='65536' vgamem='16384' heads='1' primary='yes'/> <alias name='video0'/> <address type='pci' domain='0x0000' bus='0x00' slot='0x02' function='0x0'/> </video> <hostdev mode='subsystem' type='pci' managed='yes'> <driver name='vfio'/> <source> <address domain='0x0000' bus='0x07' slot='0x00' function='0x0'/> </source> <alias name='hostdev0'/> <address type='pci' domain='0x0000' bus='0x00' slot='0x05' function='0x0'/> </hostdev> <memballoon model='none'/> </devices> <seclabel type='dynamic' model='dac' relabel='yes'> <label>+0:+100</label> <imagelabel>+0:+100</imagelabel> </seclabel> </domain>

-
Hi @jang430did you ever figure this out? I'm in the same boat as you. I'd like to install Windows 11 directly on my NVME but I'm a bit lost. Would love if you could update us on your results.
-
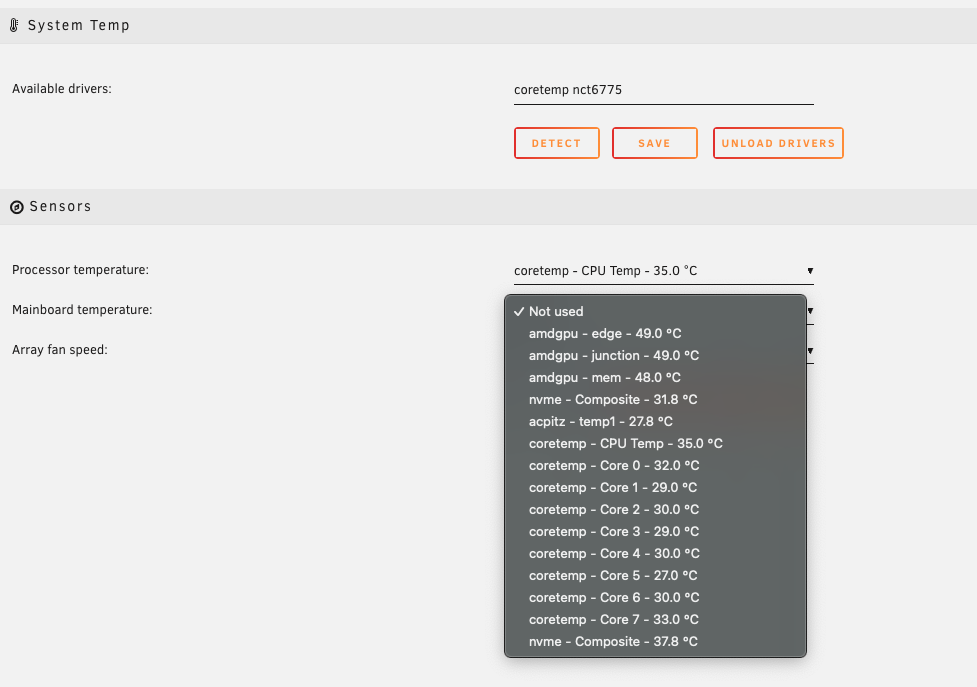
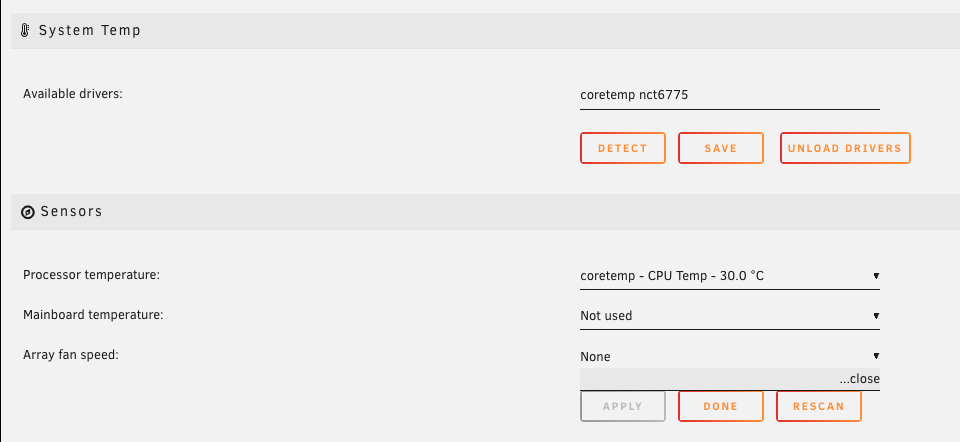
Thanks @FlippinTurt. It still just lets me choose the CPU temp, though. Nothing in mainboard temp: I think I did it right? Are you able to see the motherboard temp on your end? Do I have anything else set wrong?
-
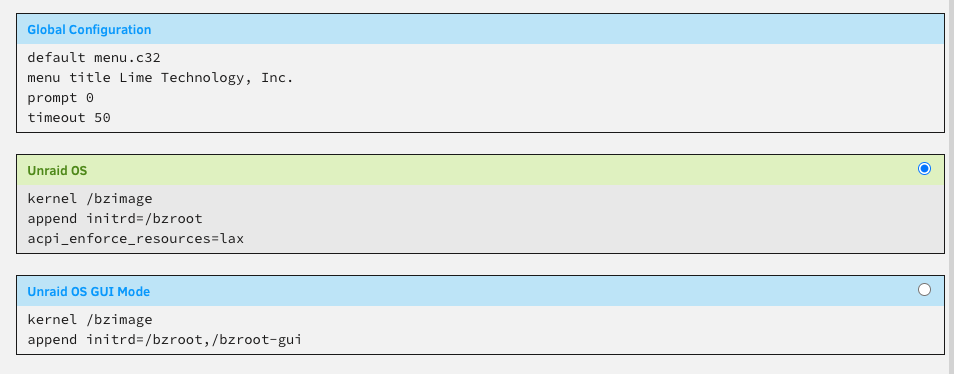
@FlippinTurt I seem to have the Nuvoton NCT6798D chip and I only get CPU temps but not the Motherboard temp or fan speeds. I assume I may have the same issue as you? Could you tell me where and how exactly I would need to enter "acpi_enforce_resources=lax"? You mention you added this to boot but I'm new to Unraid so I'm not exactly sure that this means.
-
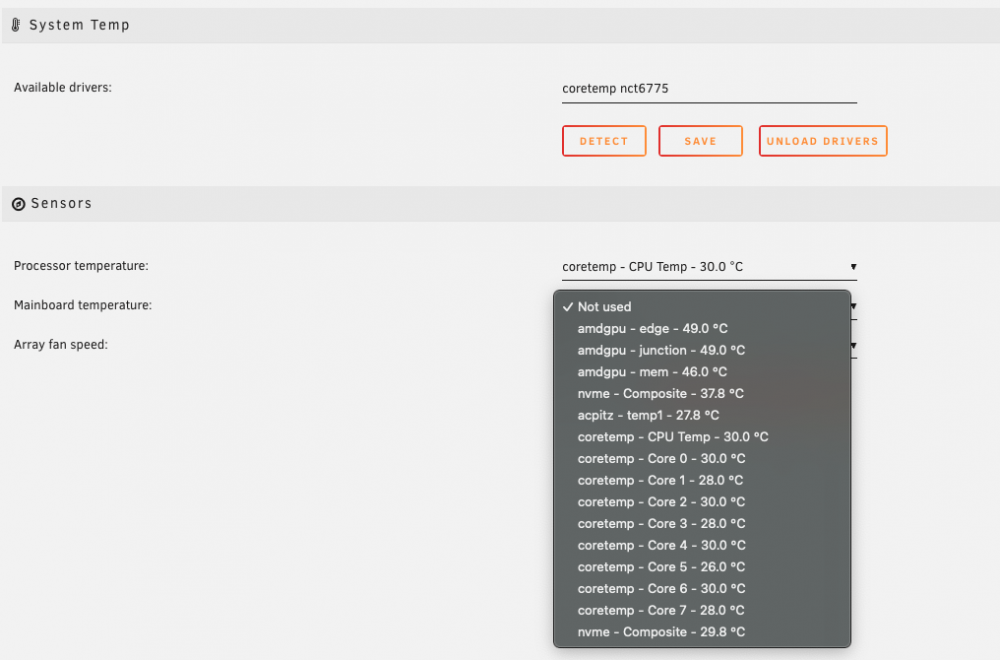
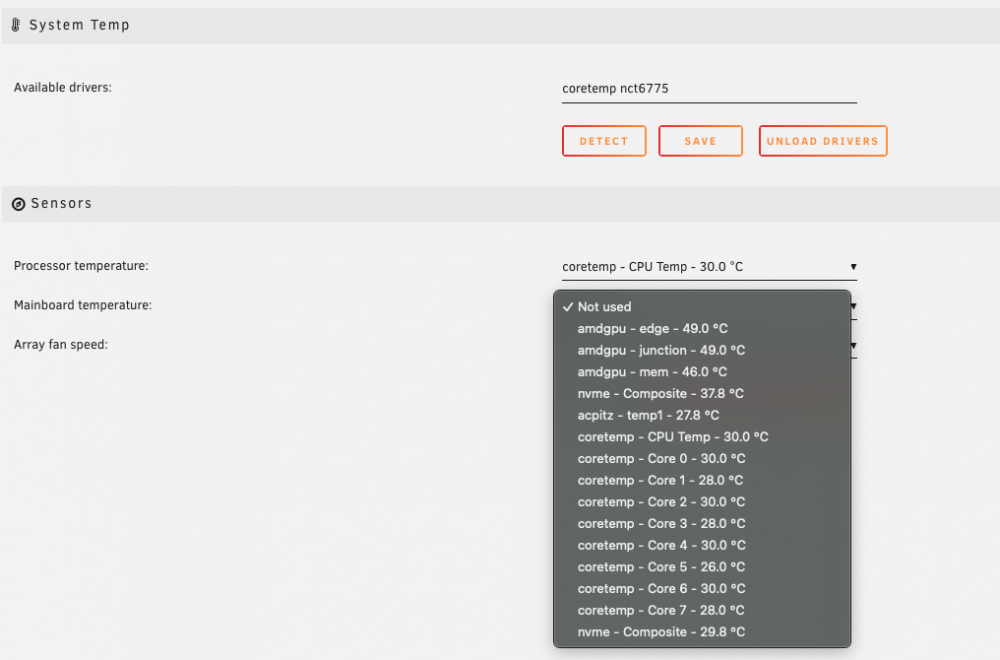
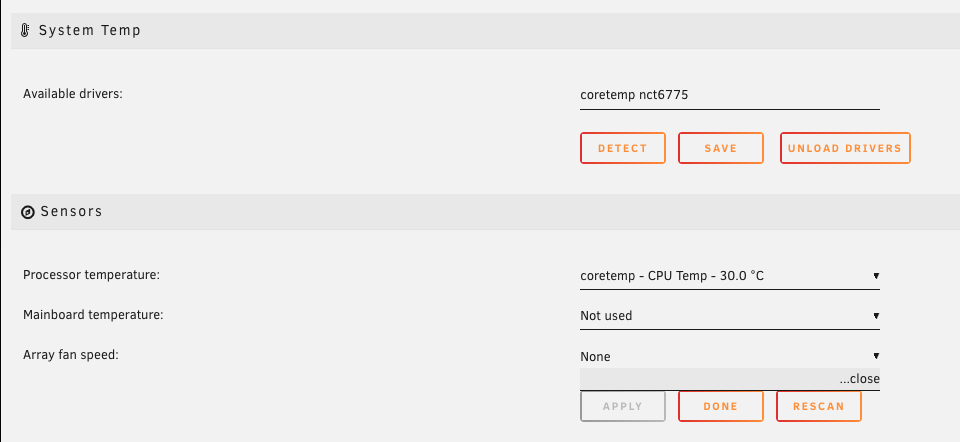
SYSTEM TEMP PLUGIN Hardware: Asus ROG STRIX Z490-i Unraid: 6.10.3 I installed the Dynamix System Temperature Plugin and it correctly recognizes the CPU temp of my system but it doesn't seem to find the motherboard temp: It also doesn't detect my fans: The "sensors" command showed the following output: amdgpu-pci-0300 Adapter: PCI adapter vddgfx: 725.00 mV edge: +49.0°C (crit = +100.0°C, hyst = -273.1°C) (emerg = +105.0°C) junction: +49.0°C (crit = +110.0°C, hyst = -273.1°C) (emerg = +115.0°C) mem: +46.0°C (crit = +105.0°C, hyst = -273.1°C) (emerg = +110.0°C) slowPPT: 10.00 W (cap = 170.00 W) nvme-pci-0700 Adapter: PCI adapter Composite: +37.9°C (low = -20.1°C, high = +74.8°C) (crit = +79.8°C) acpitz-acpi-0 Adapter: ACPI interface temp1: +27.8°C (crit = +119.0°C) coretemp-isa-0000 Adapter: ISA adapter CPU Temp: +30.0°C (high = +82.0°C, crit = +100.0°C) Core 0: +31.0°C (high = +82.0°C, crit = +100.0°C) Core 1: +28.0°C (high = +82.0°C, crit = +100.0°C) Core 2: +29.0°C (high = +82.0°C, crit = +100.0°C) Core 3: +28.0°C (high = +82.0°C, crit = +100.0°C) Core 4: +30.0°C (high = +82.0°C, crit = +100.0°C) Core 5: +27.0°C (high = +82.0°C, crit = +100.0°C) Core 6: +29.0°C (high = +82.0°C, crit = +100.0°C) Core 7: +29.0°C (high = +82.0°C, crit = +100.0°C) nvme-pci-0400 Adapter: PCI adapter Composite: +30.9°C (low = -20.1°C, high = +74.8°C) (crit = +79.8°C) I also ran sensor detect (answered "yes" to everything) and got the following output: root@B-List:~# sensors-detect # sensors-detect version 3.6.0 # Board: ASUSTeK COMPUTER INC. ROG STRIX Z490-I GAMING # Kernel: 5.15.46-Unraid x86_64 # Processor: Intel(R) Core(TM) i7-10700K CPU @ 3.80GHz (6/165/5) This program will help you determine which kernel modules you need to load to use lm_sensors most effectively. It is generally safe and recommended to accept the default answers to all questions, unless you know what you're doing. Some south bridges, CPUs or memory controllers contain embedded sensors. Do you want to scan for them? This is totally safe. (YES/no): yes Silicon Integrated Systems SIS5595... No VIA VT82C686 Integrated Sensors... No VIA VT8231 Integrated Sensors... No AMD K8 thermal sensors... No AMD Family 10h thermal sensors... No AMD Family 11h thermal sensors... No AMD Family 12h and 14h thermal sensors... No AMD Family 15h thermal sensors... No AMD Family 16h thermal sensors... No AMD Family 17h thermal sensors... No AMD Family 15h power sensors... No AMD Family 16h power sensors... No Hygon Family 18h thermal sensors... No Intel digital thermal sensor... Success! (driver `coretemp') Intel AMB FB-DIMM thermal sensor... No Intel 5500/5520/X58 thermal sensor... No VIA C7 thermal sensor... No VIA Nano thermal sensor... No Some Super I/O chips contain embedded sensors. We have to write to standard I/O ports to probe them. This is usually safe. Do you want to scan for Super I/O sensors? (YES/no): yes Probing for Super-I/O at 0x2e/0x2f Trying family `National Semiconductor/ITE'... No Trying family `SMSC'... No Trying family `VIA/Winbond/Nuvoton/Fintek'... Yes Found `Nuvoton NCT6798D Super IO Sensors' Success! (address 0x290, driver `nct6775') Probing for Super-I/O at 0x4e/0x4f Trying family `National Semiconductor/ITE'... No Trying family `SMSC'... No Trying family `VIA/Winbond/Nuvoton/Fintek'... No Trying family `ITE'... No Some systems (mainly servers) implement IPMI, a set of common interfaces through which system health data may be retrieved, amongst other things. We first try to get the information from SMBIOS. If we don't find it there, we have to read from arbitrary I/O ports to probe for such interfaces. This is normally safe. Do you want to scan for IPMI interfaces? (YES/no): yes Probing for `IPMI BMC KCS' at 0xca0... No Probing for `IPMI BMC SMIC' at 0xca8... No Some hardware monitoring chips are accessible through the ISA I/O ports. We have to write to arbitrary I/O ports to probe them. This is usually safe though. Yes, you do have ISA I/O ports even if you do not have any ISA slots! Do you want to scan the ISA I/O ports? (yes/NO): yes Probing for `National Semiconductor LM78' at 0x290... Success! (confidence 6, driver `lm78') Probing for `National Semiconductor LM79' at 0x290... No Probing for `Winbond W83781D' at 0x290... No Probing for `Winbond W83782D' at 0x290... No Lastly, we can probe the I2C/SMBus adapters for connected hardware monitoring devices. This is the most risky part, and while it works reasonably well on most systems, it has been reported to cause trouble on some systems. Do you want to probe the I2C/SMBus adapters now? (YES/no): yes Found unknown SMBus adapter 8086:06a3 at 0000:00:1f.4. Sorry, no supported PCI bus adapters found. Module i2c-dev loaded successfully. Next adapter: SMBus I801 adapter at efa0 (i2c-0) Do you want to scan it? (YES/no/selectively): yes Client found at address 0x50 Probing for `Analog Devices ADM1033'... No Probing for `Analog Devices ADM1034'... No Probing for `SPD EEPROM'... Yes (confidence 8, not a hardware monitoring chip) Probing for `EDID EEPROM'... No Client found at address 0x52 Probing for `Analog Devices ADM1033'... No Probing for `Analog Devices ADM1034'... No Probing for `SPD EEPROM'... Yes (confidence 8, not a hardware monitoring chip) Next adapter: i915 gmbus dpb (i2c-1) Do you want to scan it? (yes/NO/selectively): yes Next adapter: i915 gmbus dpc (i2c-2) Do you want to scan it? (yes/NO/selectively): yes Next adapter: i915 gmbus misc (i2c-3) Do you want to scan it? (yes/NO/selectively): yes Next adapter: i915 gmbus dpd (i2c-4) Do you want to scan it? (yes/NO/selectively): yes Next adapter: AUX B/DDI B/PHY B (i2c-5) Do you want to scan it? (yes/NO/selectively): yes Client found at address 0x4a Probing for `National Semiconductor LM75'... No Probing for `National Semiconductor LM75A'... No Probing for `Dallas Semiconductor DS75'... No Probing for `National Semiconductor LM77'... No Probing for `Analog Devices ADT7410/ADT7420'... No Probing for `Analog Devices ADT7411'... No Probing for `Maxim MAX6642'... No Probing for `Texas Instruments TMP435'... No Probing for `National Semiconductor LM73'... No Probing for `National Semiconductor LM92'... No Probing for `National Semiconductor LM76'... No Probing for `Maxim MAX6633/MAX6634/MAX6635'... No Probing for `NXP/Philips SA56004'... No Client found at address 0x4b Probing for `National Semiconductor LM75'... No Probing for `National Semiconductor LM75A'... No Probing for `Dallas Semiconductor DS75'... No Probing for `National Semiconductor LM77'... No Probing for `Analog Devices ADT7410/ADT7420'... No Probing for `Analog Devices ADT7411'... No Probing for `Maxim MAX6642'... No Probing for `Texas Instruments TMP435'... No Probing for `National Semiconductor LM92'... No Probing for `National Semiconductor LM76'... No Probing for `Maxim MAX6633/MAX6634/MAX6635'... No Probing for `NXP/Philips SA56004'... No Probing for `Analog Devices ADT7481'... No Next adapter: AUX C/DDI C/PHY C (i2c-6) Do you want to scan it? (yes/NO/selectively): yes Next adapter: AMDGPU SMU (i2c-7) Do you want to scan it? (yes/NO/selectively): yes Next adapter: AMDGPU DM i2c hw bus 0 (i2c-8) Do you want to scan it? (yes/NO/selectively): yes Next adapter: AMDGPU DM i2c hw bus 1 (i2c-9) Do you want to scan it? (yes/NO/selectively): yes Next adapter: AMDGPU DM i2c hw bus 2 (i2c-10) Do you want to scan it? (yes/NO/selectively): yes Next adapter: AMDGPU DM i2c hw bus 3 (i2c-11) Do you want to scan it? (yes/NO/selectively): yes Next adapter: AMDGPU DM aux hw bus 0 (i2c-12) Do you want to scan it? (yes/NO/selectively): yes Next adapter: AMDGPU DM aux hw bus 1 (i2c-13) Do you want to scan it? (yes/NO/selectively): yes Next adapter: AMDGPU DM aux hw bus 2 (i2c-14) Do you want to scan it? (yes/NO/selectively): yes Now follows a summary of the probes I have just done. Just press ENTER to continue: Driver `coretemp': * Chip `Intel digital thermal sensor' (confidence: 9) Driver `nct6775': * ISA bus, address 0x290 Chip `Nuvoton NCT6798D Super IO Sensors' (confidence: 9) Do you want to overwrite /etc/sysconfig/lm_sensors? (YES/no): yes Copy prog/init/lm_sensors.init to /etc/init.d/lm_sensors for initialization at boot time. You should now start the lm_sensors service to load the required kernel modules. Unloading i2c-dev... OK Unfortunately, I don't know what to do with any of this information since I am new to Unraid. Any suggestions on what I can do to get my motherboard temps and the fans to show up?
-
SYSTEM TEMP PLUGIN Hardware: Asus ROG STRIX Z490-i Unraid: 6.10.3 The System temp plugin recognizes the CPU temp of my system but it doesn't seem to find the motherboard temp: It also doesn't detect my fans: The "sensors" command showed the following output: amdgpu-pci-0300 Adapter: PCI adapter vddgfx: 725.00 mV edge: +49.0°C (crit = +100.0°C, hyst = -273.1°C) (emerg = +105.0°C) junction: +49.0°C (crit = +110.0°C, hyst = -273.1°C) (emerg = +115.0°C) mem: +46.0°C (crit = +105.0°C, hyst = -273.1°C) (emerg = +110.0°C) slowPPT: 10.00 W (cap = 170.00 W) nvme-pci-0700 Adapter: PCI adapter Composite: +37.9°C (low = -20.1°C, high = +74.8°C) (crit = +79.8°C) acpitz-acpi-0 Adapter: ACPI interface temp1: +27.8°C (crit = +119.0°C) coretemp-isa-0000 Adapter: ISA adapter CPU Temp: +30.0°C (high = +82.0°C, crit = +100.0°C) Core 0: +31.0°C (high = +82.0°C, crit = +100.0°C) Core 1: +28.0°C (high = +82.0°C, crit = +100.0°C) Core 2: +29.0°C (high = +82.0°C, crit = +100.0°C) Core 3: +28.0°C (high = +82.0°C, crit = +100.0°C) Core 4: +30.0°C (high = +82.0°C, crit = +100.0°C) Core 5: +27.0°C (high = +82.0°C, crit = +100.0°C) Core 6: +29.0°C (high = +82.0°C, crit = +100.0°C) Core 7: +29.0°C (high = +82.0°C, crit = +100.0°C) nvme-pci-0400 Adapter: PCI adapter Composite: +30.9°C (low = -20.1°C, high = +74.8°C) (crit = +79.8°C) I also ran sensor detect (answered "yes" to everything) and got the following output: root@B-List:~# sensors-detect # sensors-detect version 3.6.0 # Board: ASUSTeK COMPUTER INC. ROG STRIX Z490-I GAMING # Kernel: 5.15.46-Unraid x86_64 # Processor: Intel(R) Core(TM) i7-10700K CPU @ 3.80GHz (6/165/5) This program will help you determine which kernel modules you need to load to use lm_sensors most effectively. It is generally safe and recommended to accept the default answers to all questions, unless you know what you're doing. Some south bridges, CPUs or memory controllers contain embedded sensors. Do you want to scan for them? This is totally safe. (YES/no): yes Silicon Integrated Systems SIS5595... No VIA VT82C686 Integrated Sensors... No VIA VT8231 Integrated Sensors... No AMD K8 thermal sensors... No AMD Family 10h thermal sensors... No AMD Family 11h thermal sensors... No AMD Family 12h and 14h thermal sensors... No AMD Family 15h thermal sensors... No AMD Family 16h thermal sensors... No AMD Family 17h thermal sensors... No AMD Family 15h power sensors... No AMD Family 16h power sensors... No Hygon Family 18h thermal sensors... No Intel digital thermal sensor... Success! (driver `coretemp') Intel AMB FB-DIMM thermal sensor... No Intel 5500/5520/X58 thermal sensor... No VIA C7 thermal sensor... No VIA Nano thermal sensor... No Some Super I/O chips contain embedded sensors. We have to write to standard I/O ports to probe them. This is usually safe. Do you want to scan for Super I/O sensors? (YES/no): yes Probing for Super-I/O at 0x2e/0x2f Trying family `National Semiconductor/ITE'... No Trying family `SMSC'... No Trying family `VIA/Winbond/Nuvoton/Fintek'... Yes Found `Nuvoton NCT6798D Super IO Sensors' Success! (address 0x290, driver `nct6775') Probing for Super-I/O at 0x4e/0x4f Trying family `National Semiconductor/ITE'... No Trying family `SMSC'... No Trying family `VIA/Winbond/Nuvoton/Fintek'... No Trying family `ITE'... No Some systems (mainly servers) implement IPMI, a set of common interfaces through which system health data may be retrieved, amongst other things. We first try to get the information from SMBIOS. If we don't find it there, we have to read from arbitrary I/O ports to probe for such interfaces. This is normally safe. Do you want to scan for IPMI interfaces? (YES/no): yes Probing for `IPMI BMC KCS' at 0xca0... No Probing for `IPMI BMC SMIC' at 0xca8... No Some hardware monitoring chips are accessible through the ISA I/O ports. We have to write to arbitrary I/O ports to probe them. This is usually safe though. Yes, you do have ISA I/O ports even if you do not have any ISA slots! Do you want to scan the ISA I/O ports? (yes/NO): yes Probing for `National Semiconductor LM78' at 0x290... Success! (confidence 6, driver `lm78') Probing for `National Semiconductor LM79' at 0x290... No Probing for `Winbond W83781D' at 0x290... No Probing for `Winbond W83782D' at 0x290... No Lastly, we can probe the I2C/SMBus adapters for connected hardware monitoring devices. This is the most risky part, and while it works reasonably well on most systems, it has been reported to cause trouble on some systems. Do you want to probe the I2C/SMBus adapters now? (YES/no): yes Found unknown SMBus adapter 8086:06a3 at 0000:00:1f.4. Sorry, no supported PCI bus adapters found. Module i2c-dev loaded successfully. Next adapter: SMBus I801 adapter at efa0 (i2c-0) Do you want to scan it? (YES/no/selectively): yes Client found at address 0x50 Probing for `Analog Devices ADM1033'... No Probing for `Analog Devices ADM1034'... No Probing for `SPD EEPROM'... Yes (confidence 8, not a hardware monitoring chip) Probing for `EDID EEPROM'... No Client found at address 0x52 Probing for `Analog Devices ADM1033'... No Probing for `Analog Devices ADM1034'... No Probing for `SPD EEPROM'... Yes (confidence 8, not a hardware monitoring chip) Next adapter: i915 gmbus dpb (i2c-1) Do you want to scan it? (yes/NO/selectively): yes Next adapter: i915 gmbus dpc (i2c-2) Do you want to scan it? (yes/NO/selectively): yes Next adapter: i915 gmbus misc (i2c-3) Do you want to scan it? (yes/NO/selectively): yes Next adapter: i915 gmbus dpd (i2c-4) Do you want to scan it? (yes/NO/selectively): yes Next adapter: AUX B/DDI B/PHY B (i2c-5) Do you want to scan it? (yes/NO/selectively): yes Client found at address 0x4a Probing for `National Semiconductor LM75'... No Probing for `National Semiconductor LM75A'... No Probing for `Dallas Semiconductor DS75'... No Probing for `National Semiconductor LM77'... No Probing for `Analog Devices ADT7410/ADT7420'... No Probing for `Analog Devices ADT7411'... No Probing for `Maxim MAX6642'... No Probing for `Texas Instruments TMP435'... No Probing for `National Semiconductor LM73'... No Probing for `National Semiconductor LM92'... No Probing for `National Semiconductor LM76'... No Probing for `Maxim MAX6633/MAX6634/MAX6635'... No Probing for `NXP/Philips SA56004'... No Client found at address 0x4b Probing for `National Semiconductor LM75'... No Probing for `National Semiconductor LM75A'... No Probing for `Dallas Semiconductor DS75'... No Probing for `National Semiconductor LM77'... No Probing for `Analog Devices ADT7410/ADT7420'... No Probing for `Analog Devices ADT7411'... No Probing for `Maxim MAX6642'... No Probing for `Texas Instruments TMP435'... No Probing for `National Semiconductor LM92'... No Probing for `National Semiconductor LM76'... No Probing for `Maxim MAX6633/MAX6634/MAX6635'... No Probing for `NXP/Philips SA56004'... No Probing for `Analog Devices ADT7481'... No Next adapter: AUX C/DDI C/PHY C (i2c-6) Do you want to scan it? (yes/NO/selectively): yes Next adapter: AMDGPU SMU (i2c-7) Do you want to scan it? (yes/NO/selectively): yes Next adapter: AMDGPU DM i2c hw bus 0 (i2c-8) Do you want to scan it? (yes/NO/selectively): yes Next adapter: AMDGPU DM i2c hw bus 1 (i2c-9) Do you want to scan it? (yes/NO/selectively): yes Next adapter: AMDGPU DM i2c hw bus 2 (i2c-10) Do you want to scan it? (yes/NO/selectively): yes Next adapter: AMDGPU DM i2c hw bus 3 (i2c-11) Do you want to scan it? (yes/NO/selectively): yes Next adapter: AMDGPU DM aux hw bus 0 (i2c-12) Do you want to scan it? (yes/NO/selectively): yes Next adapter: AMDGPU DM aux hw bus 1 (i2c-13) Do you want to scan it? (yes/NO/selectively): yes Next adapter: AMDGPU DM aux hw bus 2 (i2c-14) Do you want to scan it? (yes/NO/selectively): yes Now follows a summary of the probes I have just done. Just press ENTER to continue: Driver `coretemp': * Chip `Intel digital thermal sensor' (confidence: 9) Driver `nct6775': * ISA bus, address 0x290 Chip `Nuvoton NCT6798D Super IO Sensors' (confidence: 9) Do you want to overwrite /etc/sysconfig/lm_sensors? (YES/no): yes Copy prog/init/lm_sensors.init to /etc/init.d/lm_sensors for initialization at boot time. You should now start the lm_sensors service to load the required kernel modules. Unloading i2c-dev... OK Unfortunately, I don't know what to do with any of this information since I am new to Unraid. Any suggestions on what I can do to get my motherboard temps and the fans to show up?
-
FIXED by using the Linuxserver repository. Apparently there was some sort of problem with some drivers and Linuxserver already implemented the fix: https://github.com/linuxserver/docker-plex/issues/318#issuecomment-1187584352
-
FIXED by using the Linuxserver repository. Apparently there was some sort of problem with some drivers and Linuxserver already implemented the fix: https://github.com/linuxserver/docker-plex/issues/318#issuecomment-1187584352
-
@freekie and @totoleouf did you ever get this HDR hardware transcoding to work? I also use Hotio's Plex container and am using the i7-10700k. Hardware transcoding works well for all content that doesn't need Tone Mapping. Any content that requires tone mapping won't hardware transcode. According to this Plex Support Article HDR HW transcoding should be supported inside docker. It does mention this, however: So maybe some libraries are missing? When I run "docker exec -it plex ls -lh /dev/dri" in unraid terminal I get the following output: total 0 crwxrwxrwx 1 root video14115 226, 0 Jul 24 14:29 card0 crw-rw---- 1 root video14115 226, 1 Jul 24 14:29 card1 crwxrwxrwx 1 root video14115 226, 128 Jul 24 14:29 renderD128 crwxrwxrwx 1 root video14115 226, 129 Jul 24 14:29 renderD129 When Tone Mapping is enabled in Plex and I attempt to transcode HDR material the following output shows up in my Plex log: beignet-opencl-icd: no supported GPU found, this is probably the wrong opencl-icd package for this hardware (If you have multiple ICDs installed and OpenCL works, you can ignore this message) beignet-opencl-icd: no supported GPU found, this is probably the wrong opencl-icd package for this hardware (If you have multiple ICDs installed and OpenCL works, you can ignore this message) beignet-opencl-icd: no supported GPU found, this is probably the wrong opencl-icd package for this hardware (If you have multiple ICDs installed and OpenCL works, you can ignore this message)
-
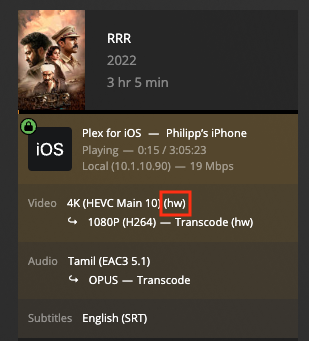
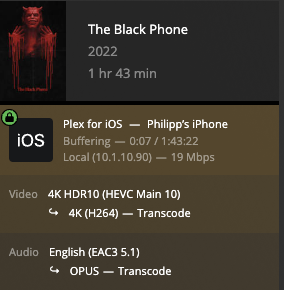
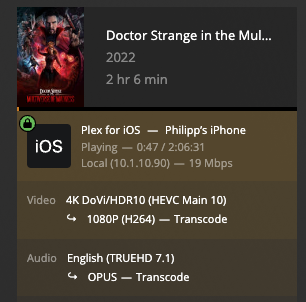
CPU: i7-10700k OS: Unraid 6.10.3 Docker Container: Hotio's Plex Repository I just installed my first Docker container on Unraid. I used Hotio's Plex repository and everything seems to be working fine, including 4K hardware transcoding: However, HDR 10 and DoVI doesn't seem to utilize hardware transcoding: According to this Plex Support Article HDR HW transcoding should be supported inside docker. It does mention this, however: Maybe I am missing some libraries on unraid to be able to make use of HDR HW transcoding? Now, I am completely new to Unraid and don't just want to start installing random stuff via terminal so I'd rather check in with the community to see what is required to get this working on my system. EDIT 1: When I run "docker exec -it plex ls -lh /dev/dri" in unraid terminal I get the following output: total 0 crwxrwxrwx 1 root video14115 226, 0 Jul 24 14:29 card0 crw-rw---- 1 root video14115 226, 1 Jul 24 14:29 card1 crwxrwxrwx 1 root video14115 226, 128 Jul 24 14:29 renderD128 crwxrwxrwx 1 root video14115 226, 129 Jul 24 14:29 renderD129 When Tone Mapping is enabled in Plex and I attempt to transcode HDR material the following output shows up in my Plex log: beignet-opencl-icd: no supported GPU found, this is probably the wrong opencl-icd package for this hardware (If you have multiple ICDs installed and OpenCL works, you can ignore this message) beignet-opencl-icd: no supported GPU found, this is probably the wrong opencl-icd package for this hardware (If you have multiple ICDs installed and OpenCL works, you can ignore this message) beignet-opencl-icd: no supported GPU found, this is probably the wrong opencl-icd package for this hardware (If you have multiple ICDs installed and OpenCL works, you can ignore this message)
-
Hi @Teejoo! I would love to hear how that build worked out for you! Do you happen to run any Windows VM's on that machine? Really interested to hear about your experience as I am also considering this motherboard.



