Xaero
-
Posts
413 -
Joined
-
Last visited
-
Days Won
3
Content Type
Profiles
Forums
Downloads
Store
Gallery
Bug Reports
Documentation
Landing
Everything posted by Xaero
-
You are misunderstanding the layered nature of the filesystem. So unraid has 3 layers that get sandwiched together: Raw volumes: `/mnt/disk##` Which all get sandwiched together into the parity array: `/mnt/user0` And Cache: `/mnt/cache` Which get's sandwiched into the user share volume `/mnt/user` The SHFS uses logic to determine whether or not data should be written to a spinning platter or the cache. The samba server always references /mnt/user since it contains all data both data on and off the cache. The /mnt/user/domains folder exists as /mnt/cache/domains as well. The domains share being set to cache only will prevent SHFS from moving any data from cache to the parity array.
-
Another thing to test: \\rik-tower. With a period at the end.
-
Possibly, I'd still recommend a secondary dedicated management connection. If you make a configuration change that breaks stuff, now you have to wait until you have physical access to the server to fix it. If you have a dedicated remote management option you can get in still. For example in my case I have the remote desktop VM, which is only ok as long as it can access the internet. If I screw that up, I'm done. Except I have IPMI2.0 KVM. That isn't accessible from outside my network so I have to be able to get in still. For that I have a raspberry pi with ssh and key only authentication to get in. I use it to create a tunnel when needed, which isn't often. It's nice being able to reset stuff when I'm out of the state haha.
-
So this happens because of the way the unraid webgui works. Your connection is interrupted when you make the change so you can't send the next request to start the service. My suggestion would be to have a dedicated management profile on a separate tunnel. This way you have a way to change settings on the tunnel that actual does the work. Currently I have a windows 10 VM running chrome remote desktop in curtain mode that I use for making remote changes. But if you wanted to stay low resource consumption and be able to do things from the VPN connection like this, a dedicated management profile on a different tunnel would be needed. I'm not sure if it's possible to work around this on unraid's side.
-
I would suggest a P2000 given your earlier dual/single slot concerns. It's not much more new than the 1660ti, and it's cheaper than the 1660ti used on fleabay. It's single slot, lower power consumption, and similar vram with no stream limits.
-
Here's a neat trick I wanted a shared folder unique to each of my Wireguard clients. You know - somewhere people can drop their own files, without it being publicly visible to everyone else with access to the server. Samba is pretty flexible, so I decided to take a whack at it. I created a new share, "Personal" and set export to no in the Shares tab. Then I added this entry to smb-extra.conf in the samba settings tab: [Personal Folder] access based share enum = yes allow hosts = 10.253.0. root preexec = /bin/bash -c '[[ -d "/mnt/user/Personal/%I" ]] || mkdir -m 0777 "/mnt/user/Personal/%I" && chown nobody:users "/mnt/user/Personal/%I"' browseable = yes writable = yes hide unreadable = yes path = /mnt/user/Personal/%I What does this do? Have a line by line breakdown: Name - how it shows up in the file explorer. access based share enum - Only show this if the user has permission to view it. allow hosts = 10.253.0. - allow any client with an IP matching 10.253.0.* to view this share root preexec - execute this code before showing the root of the folder. This can be expanded substantially. Currently it just makes a new folder for the IP of the client if one doesn't already exist. You could enforce quotas here by making a new image if one doesn't exist, and then mounting said image or any other number of crazy things. The rest is pretty standard aside from the path also using the variable "%I" Also note that you can use this same trick outside of wireguard and clients, with pxe boot clients to have individual write shares.
-
[Version: 6.8.1] - Permission issues - Virutal Machine / Samba
Xaero replied to Bifur's topic in General Support
Cool, so it did work to allow two different users to write to the directory. Yes, those permissions more or less look correct, you could recursively do this with chmod -R. That said, I see that it's creating the files with rw for owner in the FTP permissions. What do the permissions for that file look like on unraid? It might be that employing FACLS or some other robust solution is needed, or that we need to tell the FTP server to create files with the correct user and group IDs (this can be done, using umask to force the FTP server to use that UID/GID) There's a lot of ways to approach this, I'm not sure which is the best approach. EDIT: If your FTP uploads are setting -RW-R--R-- I think you need to change the FTP create mask on the ftp server side. This can be accomplished with setting the create mask to 000 rather than the current of 022 -
[Docker] Same container always fails to start after reboot
Xaero replied to xorinzor's topic in General Support
If you move the medusa container to start before the other two containers, does it work? I'm curious to know if this is a timing thing, or if the network is getting re-created over and over with a new ID each time a docker joins the network? I'm still learning docker stuff myself haha. -
[Version: 6.8.1] - Permission issues - Virutal Machine / Samba
Xaero replied to Bifur's topic in General Support
So, you want to run this on Unraid, via SSH. That's the correct way of thinking. First you'll want to make sure the directory is owned by the correct user, and the correct group for samba read/write to work. I don't know what this is in your case, but for stock unraid is nobody and the group users. From there you want to set the GID bit on that directory. Any files or folders created within that directory from ANY user will automatically have the correct group. -
Indeed, I'm thinking I'll add echo "include = /boot/config/smb-override.conf" >> /etc/samba/smb.conf In `go` for the sake of brevity in the conf file. Depending on how complicated my needs get, that may become a reality though.
-
Not a bad idea for a workaround.
-
[Version: 6.8.1] - Permission issues - Virutal Machine / Samba
Xaero replied to Bifur's topic in General Support
setgid: Binary executables with the setgid bit (chmod g+s path) can be executed with the privileges of the file's group. A useful property is to set the setgid bit on a directory so that all files and directories newly created within it inherit the group from that directory. In octal, the setgid bit is represented by 2000 e.g: "chmod 2755 path". setgid has no effect if the group does not have execute permissions. setgid is represented with a lower-case "s" in the output of ls. In cases where it has no effect it is represented with an upper-case "S". I would test this on a single directory and see if it resolves the issue: chmod g+s /path/to/testdir -
[Docker] Same container always fails to start after reboot
Xaero replied to xorinzor's topic in General Support
EDIT: That wouldn't make sense. I forgot that you are getting a "No Such Container" message. -
[Docker] Same container always fails to start after reboot
Xaero replied to xorinzor's topic in General Support
--net='vpn' Indeed; whatever container is defined as 'vpn' needs to be started before Medusa. If that network isn't ready medusa might be failing to start properly. If that's the case you might start it using a user script with a delay. -
ConBee II USB stick stopped functioning with my Docker container
Xaero replied to gotcher's topic in General Support
You may have run into an old XHCI legacy support bug on Linux. Do you have any USB 2.0 ports you can use? If so try those and see if it solves the issue. -
[Docker] Same container always fails to start after reboot
Xaero replied to xorinzor's topic in General Support
Post the docker run command. That'll help identify the problem. Not much we can do with just guessing at it. Usually I see this with my custom network docker containers that connect to another docker as their network (I have a VPN docker, which other dockers use as their network) And the solution is also identical: edit the docker, change something and hit apply. To fix this for startup: Make the medusa container start after the container it depends on. This can be achieved by dragging it LOWER on the list in the WebUI (the order they are shown in is the order they start in) -
Description This is an issue I had crop up when attempting to override default unraid settings or add additional settings to unraid shares. Basically the samba configuration file is loaded top to bottom in order, and includes are handled inline following the same logic. This allows tiered configuration files to override one another for different settings and creates a robust settings architecture. I want to override settings for several user shares to restrict wireguard clients to specific shares via IP, and to eventually create per-user storage volumes for quota based individual usage. Seems easy enough - add a new entry like so: [ShareName] Key = Value in the smb-extra configuration section in the settings menu! The problem is that these settings are loaded before the unraid shares are defined, which means my new entry is defining the share: /etc/samba/smb.conf: # hook for user-defined samba config include = /boot/config/smb-extra.conf # auto-configured shares include = /etc/samba/smb-shares.conf This is a problem because this new share has no path, so samba marks it unavailable and doesn't list it anymore: testparm WARNING: No path in service Backups - making it unavailable! NOTE: Service Backups is flagged unavailable. Simply reversing the order that these two conf files are included resolves this and allows settings to be overridden or added at will. Steps to Reproduce: Add an entry matching the name of any existing Unraid auto-configured share to smb-extra.conf Restart the SMB service or stop/start the array
-
I think so, I'll open one when I'm able to with proper documentation of what is wrong, why it happens, and how changing the order fixes it. It may be that this is intentional, but there should still be a way to override the basic functionality without making such changes. I did switch the order on my system, and it is working properly with the order switched. I was also able to add a feature I think unraid should have as an option: access based shares enum = yes This makes it so that if the user access the samba directory listing, they only see the shares they have access to. Even with smbtree. So for example, I have the appdata, system shares as browseable=yes,and private with only my user for any access. I then also added allow hosts=192.168.1. As a result of this, if I am NOT at home, and try to access my server - those shares aren't available, or listed (which is good, because I can't screw anything up remotely.) Similarly, if I connect as any other user - they aren't even present. Results in a very polished experience for other clients as well - they only see the folders they need, rather than a bunch of folders they don't have permission to view.
-
So, I did a little bit of testing (see my edits above) and found that instead of it overriding the auto config from unraid, it ends up disabling the shares all-together. Executing `testparm` reveals the reason: WARNING: No path in service Backups - making it unavailable! NOTE: Service Backups is flagged unavailable. WARNING: No path in service Games - making it unavailable! NOTE: Service Games is flagged unavailable. WARNING: No path in service isos - making it unavailable! NOTE: Service isos is flagged unavailable. WARNING: No path in service Software - making it unavailable! NOTE: Service Software is flagged unavailable. WARNING: No path in service Video - making it unavailable! NOTE: Service Video is flagged unavailable. *snip* Wait, I know there's paths because Unraid generates these entries by default. What's happening here?! So I took a look at /etc/samba/smb.conf: /etc/samba/smb.conf [global] # configurable identification include = /etc/samba/smb-names.conf # log stuff only to syslog log level = 0 syslog = 0 syslog only = Yes # we don't do printers show add printer wizard = No disable spoolss = Yes load printers = No printing = bsd printcap name = /dev/null # misc. invalid users = root unix extensions = No wide links = Yes use sendfile = Yes aio read size = 0 aio write size = 4096 allocation roundup size = 4096 # ease upgrades from Samba 3.6 acl allow execute always = Yes # permit NTLMv1 authentication ntlm auth = Yes # hook for user-defined samba config include = /boot/config/smb-extra.conf # auto-configured shares include = /etc/samba/smb-shares.conf And I see that the smb-extra is loaded before smb-shares This means that I can't apply any advanced configuration to shares. Is this intentional, @limetech?
-
If I want to add some options to the shares created by unraid, do I just use [share-name] and then put the additional delegations underneath? What I'm trying to accomplish is using "hosts allow" and "hosts deny" to allow and deny access to certain shares for Wireguard clients using ip addresses (since all wireguard clients in my case are static IPs) If I can use SMB Extra Settings in this manner then that solves the problem without needing extra legwork. I was thinking about submitting a feature request, but it may be kind of a niche case. Edit: I ended up testing this, it works exactly as I anticipated. If I add an entry like so: [ShareName] hosts allow = <Wireguard ClientIP> That client can see that share. If I add an entry like so: [ShareName] hosts deny = <WireGuard ClientIP> That client can no longer see that share. This modfies existing settings set by unraid automatically. This was wrong. And just makes the shares completely unavailable, because there is no path defined for them.
-
Excellent, it is working as intended now. I do wonder how this wasn't a problem, perhaps I had manually done this prior to it being a supported feature and just never touched it until now haha.
-
I found the mistake: iptables -t nat -A POSTROUTING -s 10.253.0.0/24 -o br0 -j MASQUERADE;iptables -N WIREGUARD_DROP_WG0;iptables -A WIREGUARD -o br0 -j WIREGUARD_DROP_WG0;iptables -A WIREGUARD_DROP_WG0 -s 10.253.0.0/24 -d 192.168.1.254 -j ACCEPT,iptables -A WIREGUARD_DROP_WG0 -s 10.253.0.0/24 -d 192.168.1.74 -j ACCEPT,iptables -A WIREGUARD_DROP_WG0 -s 10.253.0.0/24 -d 192.168.1.93 -j ACCEPT;iptables -A WIREGUARD_DROP_WG0 -s 10.253.0.0/24 -j DROP;iptables -A WIREGUARD_DROP_WG0 -j RETURN The ACCEPT rules for the "Allow" filter are separated by a comma instead of a semicolon.
-
I think iptables is confused: wg-quick up wg0 [#] ip link add wg0 type wireguard [#] wg setconf wg0 /dev/fd/63 [#] ip -4 address add 10.253.0.1 dev wg0 [#] ip link set mtu 1420 up dev wg0 [#] ip -4 route add 10.253.0.6/32 dev wg0 [#] ip -4 route add 10.253.0.5/32 dev wg0 [#] ip -4 route add 10.253.0.4/32 dev wg0 [#] ip -4 route add 10.253.0.3/32 dev wg0 [#] ip -4 route add 10.253.0.2/32 dev wg0 [#] logger -t wireguard 'Tunnel WireGuard-wg0 started' [#] iptables -t nat -A POSTROUTING -s 10.253.0.0/24 -o br0 -j MASQUERADE;iptables -N WIREGUARD_DROP_WG0;iptables -A WIREGUARD -o br0 -j WIREGUARD_DROP_WG0;iptables -A WIREGUARD_DROP_WG0 -s 10.253.0.0/24 -d 192.168.1.254 -j ACCEPT,iptables -A WIREGUARD_DROP_WG0 -s 10.253.0.0/24 -d 192.168.1.74 -j ACCEPT,iptables -A WIREGUARD_DROP_WG0 -s 10.253.0.0/24 -d 192.168.1.93 -j ACCEPT;iptables -A WIREGUARD_DROP_WG0 -s 10.253.0.0/24 -j DROP;iptables -A WIREGUARD_DROP_WG0 -j RETURN iptables v1.8.4 (legacy): Cannot use -A with -A Try `iptables -h' or 'iptables --help' for more information. [#] ip link delete dev wg0 Was iptables updated in 6.8.1? Thats a pretty silly error. for now I'll stop using the allow filter, since I think it's the source of my frustration.
-
I disabled NAT, changed the firewall rules back to deny and deleted all my ips. Hit apply. Afterward checked iptables -L -v -n, the chain was still there. Changed the rule back to allow, added my IPs back in, and hit apply. Tried to start the tunnel, which it did not. Checked iptables again and the chain was still there. This is the latest version of the plugin on 6.8.1 EDIT: I need to read better. Let me retry with a start and stop of the tunnel between haha. EDIT2: Okay, so that didn't work, either. The chain remains with the tunnel stopped, so it vomits when trying to add the chain.
-
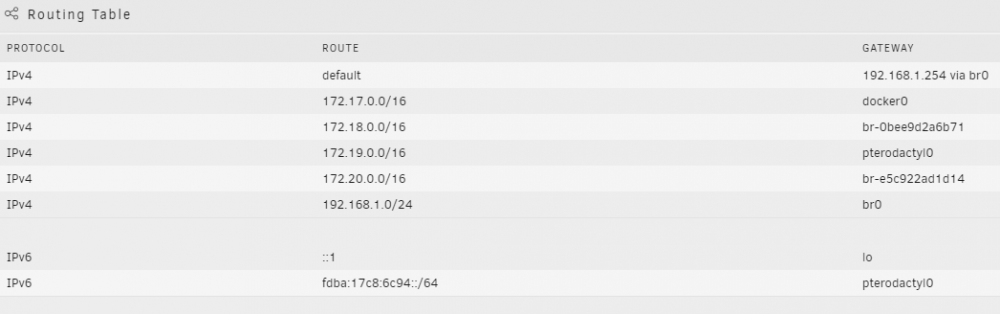
wg-quick up wg0 [#] ip link add wg0 type wireguard [#] wg setconf wg0 /dev/fd/63 [#] ip -4 address add 10.253.0.1 dev wg0 [#] ip link set mtu 1420 up dev wg0 [#] ip -4 route add 10.253.0.6/32 dev wg0 [#] ip -4 route add 10.253.0.5/32 dev wg0 [#] ip -4 route add 10.253.0.4/32 dev wg0 [#] ip -4 route add 10.253.0.3/32 dev wg0 [#] ip -4 route add 10.253.0.2/32 dev wg0 [#] logger -t wireguard 'Tunnel WireGuard-wg0 started' [#] iptables -t nat -A POSTROUTING -s 10.253.0.0/24 -o br0 -j MASQUERADE;iptables -N WIREGUARD_DROP_WG0;iptables -A WIREGUARD -o br0 -j WIREGUARD_DROP_WG0;iptables -A WIREGUARD_DROP_WG0 -s 10.253.0.0/24 -d 192.168.1.254 -j ACCEPT,iptables -A WIREGUARD_DROP_WG0 -s 10.253.0.0/24 -d 192.168.1.74 -j ACCEPT,iptables -A WIREGUARD_DROP_WG0 -s 10.253.0.0/24 -d 192.168.1.93 -j ACCEPT;iptables -A WIREGUARD_DROP_WG0 -s 10.253.0.0/24 -j DROP;iptables -A WIREGUARD_DROP_WG0 -j RETURN iptables: Chain already exists. [#] ip link delete dev wg0 It looks like the iptables chain is somehow already present? Looking at network settings in the Routing Table I don't see it: Listing iptables rules (iptables -L -v -n): iptables -L -v -n Chain INPUT (policy ACCEPT 32857 packets, 4938K bytes) pkts bytes target prot opt in out source destination 58614 11M LIBVIRT_INP all -- * * 0.0.0.0/0 0.0.0.0/0 Chain FORWARD (policy ACCEPT 0 packets, 0 bytes) pkts bytes target prot opt in out source destination 6239K 6624M LIBVIRT_FWX all -- * * 0.0.0.0/0 0.0.0.0/0 6239K 6624M LIBVIRT_FWI all -- * * 0.0.0.0/0 0.0.0.0/0 6239K 6624M LIBVIRT_FWO all -- * * 0.0.0.0/0 0.0.0.0/0 6239K 6624M DOCKER-USER all -- * * 0.0.0.0/0 0.0.0.0/0 6239K 6624M DOCKER-ISOLATION-STAGE-1 all -- * * 0.0.0.0/0 0.0.0.0/0 3432K 1589M ACCEPT all -- * docker0 0.0.0.0/0 0.0.0.0/0 ctstate RELATED,ESTABLISHED 1297 72041 DOCKER all -- * docker0 0.0.0.0/0 0.0.0.0/0 2804K 5034M ACCEPT all -- docker0 !docker0 0.0.0.0/0 0.0.0.0/0 147 10731 ACCEPT all -- docker0 docker0 0.0.0.0/0 0.0.0.0/0 0 0 ACCEPT all -- * br-0bee9d2a6b71 0.0.0.0/0 0.0.0.0/0 ctstate RELATED,ESTABLISHED 0 0 DOCKER all -- * br-0bee9d2a6b71 0.0.0.0/0 0.0.0.0/0 0 0 ACCEPT all -- br-0bee9d2a6b71 !br-0bee9d2a6b71 0.0.0.0/0 0.0.0.0/0 0 0 ACCEPT all -- br-0bee9d2a6b71 br-0bee9d2a6b71 0.0.0.0/0 0.0.0.0/0 0 0 ACCEPT all -- * br-e5c922ad1d14 0.0.0.0/0 0.0.0.0/0 ctstate RELATED,ESTABLISHED 0 0 DOCKER all -- * br-e5c922ad1d14 0.0.0.0/0 0.0.0.0/0 0 0 ACCEPT all -- br-e5c922ad1d14 !br-e5c922ad1d14 0.0.0.0/0 0.0.0.0/0 0 0 ACCEPT all -- br-e5c922ad1d14 br-e5c922ad1d14 0.0.0.0/0 0.0.0.0/0 0 0 ACCEPT all -- * pterodactyl0 0.0.0.0/0 0.0.0.0/0 ctstate RELATED,ESTABLISHED 0 0 DOCKER all -- * pterodactyl0 0.0.0.0/0 0.0.0.0/0 0 0 ACCEPT all -- pterodactyl0 !pterodactyl0 0.0.0.0/0 0.0.0.0/0 0 0 ACCEPT all -- pterodactyl0 pterodactyl0 0.0.0.0/0 0.0.0.0/0 Chain OUTPUT (policy ACCEPT 29406 packets, 6627K bytes) pkts bytes target prot opt in out source destination 52058 15M LIBVIRT_OUT all -- * * 0.0.0.0/0 0.0.0.0/0 Chain DOCKER (4 references) pkts bytes target prot opt in out source destination 0 0 ACCEPT tcp -- !docker0 docker0 0.0.0.0/0 172.17.0.2 tcp dpt:80 0 0 ACCEPT tcp -- !docker0 docker0 0.0.0.0/0 172.17.0.3 tcp dpt:80 0 0 ACCEPT tcp -- !docker0 docker0 0.0.0.0/0 172.17.0.4 tcp dpt:3306 0 0 ACCEPT tcp -- !docker0 docker0 0.0.0.0/0 172.17.0.6 tcp dpt:9443 0 0 ACCEPT tcp -- !docker0 docker0 0.0.0.0/0 172.17.0.6 tcp dpt:22 0 0 ACCEPT tcp -- !docker0 docker0 0.0.0.0/0 172.17.0.6 tcp dpt:9080 0 0 ACCEPT tcp -- !docker0 docker0 0.0.0.0/0 172.17.0.7 tcp dpt:25575 0 0 ACCEPT tcp -- !docker0 docker0 0.0.0.0/0 172.17.0.7 tcp dpt:25574 0 0 ACCEPT tcp -- !docker0 docker0 0.0.0.0/0 172.17.0.7 tcp dpt:25573 0 0 ACCEPT tcp -- !docker0 docker0 0.0.0.0/0 172.17.0.7 tcp dpt:25572 0 0 ACCEPT tcp -- !docker0 docker0 0.0.0.0/0 172.17.0.7 tcp dpt:25571 0 0 ACCEPT tcp -- !docker0 docker0 0.0.0.0/0 172.17.0.7 tcp dpt:25570 0 0 ACCEPT tcp -- !docker0 docker0 0.0.0.0/0 172.17.0.7 tcp dpt:25569 0 0 ACCEPT tcp -- !docker0 docker0 0.0.0.0/0 172.17.0.7 tcp dpt:25568 0 0 ACCEPT tcp -- !docker0 docker0 0.0.0.0/0 172.17.0.7 tcp dpt:25567 0 0 ACCEPT tcp -- !docker0 docker0 0.0.0.0/0 172.17.0.7 tcp dpt:25566 0 0 ACCEPT tcp -- !docker0 docker0 0.0.0.0/0 172.17.0.7 tcp dpt:25565 0 0 ACCEPT udp -- !docker0 docker0 0.0.0.0/0 172.17.0.7 udp dpt:25565 0 0 ACCEPT tcp -- !docker0 docker0 0.0.0.0/0 172.17.0.7 tcp dpt:8443 0 0 ACCEPT tcp -- !docker0 docker0 0.0.0.0/0 172.17.0.7 tcp dpt:8126 0 0 ACCEPT tcp -- !docker0 docker0 0.0.0.0/0 172.17.0.7 tcp dpt:8125 0 0 ACCEPT tcp -- !docker0 docker0 0.0.0.0/0 172.17.0.7 tcp dpt:8124 0 0 ACCEPT tcp -- !docker0 docker0 0.0.0.0/0 172.17.0.7 tcp dpt:8123 0 0 ACCEPT tcp -- !docker0 docker0 0.0.0.0/0 172.17.0.7 tcp dpt:8122 0 0 ACCEPT tcp -- !docker0 docker0 0.0.0.0/0 172.17.0.7 tcp dpt:8121 0 0 ACCEPT tcp -- !docker0 docker0 0.0.0.0/0 172.17.0.7 tcp dpt:8120 1141 60854 ACCEPT tcp -- !docker0 docker0 0.0.0.0/0 172.17.0.8 tcp dpt:51413 0 0 ACCEPT tcp -- !docker0 docker0 0.0.0.0/0 172.17.0.8 tcp dpt:6881 8 416 ACCEPT tcp -- !docker0 docker0 0.0.0.0/0 172.17.0.8 tcp dpt:80 0 0 ACCEPT tcp -- !docker0 docker0 0.0.0.0/0 172.17.0.9 tcp dpt:8181 0 0 ACCEPT tcp -- !docker0 docker0 0.0.0.0/0 172.17.0.9 tcp dpt:8080 1 40 ACCEPT tcp -- !docker0 docker0 0.0.0.0/0 172.17.0.9 tcp dpt:4443 Chain DOCKER-ISOLATION-STAGE-1 (1 references) pkts bytes target prot opt in out source destination 2804K 5034M DOCKER-ISOLATION-STAGE-2 all -- docker0 !docker0 0.0.0.0/0 0.0.0.0/0 0 0 DOCKER-ISOLATION-STAGE-2 all -- br-0bee9d2a6b71 !br-0bee9d2a6b71 0.0.0.0/0 0.0.0.0/0 0 0 DOCKER-ISOLATION-STAGE-2 all -- br-e5c922ad1d14 !br-e5c922ad1d14 0.0.0.0/0 0.0.0.0/0 0 0 DOCKER-ISOLATION-STAGE-2 all -- pterodactyl0 !pterodactyl0 0.0.0.0/0 0.0.0.0/0 6239K 6624M RETURN all -- * * 0.0.0.0/0 0.0.0.0/0 Chain DOCKER-ISOLATION-STAGE-2 (4 references) pkts bytes target prot opt in out source destination 0 0 DROP all -- * docker0 0.0.0.0/0 0.0.0.0/0 0 0 DROP all -- * br-0bee9d2a6b71 0.0.0.0/0 0.0.0.0/0 0 0 DROP all -- * br-e5c922ad1d14 0.0.0.0/0 0.0.0.0/0 0 0 DROP all -- * pterodactyl0 0.0.0.0/0 0.0.0.0/0 2804K 5034M RETURN all -- * * 0.0.0.0/0 0.0.0.0/0 Chain DOCKER-USER (1 references) pkts bytes target prot opt in out source destination 6239K 6624M RETURN all -- * * 0.0.0.0/0 0.0.0.0/0 Chain LIBVIRT_FWI (1 references) pkts bytes target prot opt in out source destination Chain LIBVIRT_FWO (1 references) pkts bytes target prot opt in out source destination Chain LIBVIRT_FWX (1 references) pkts bytes target prot opt in out source destination Chain LIBVIRT_INP (1 references) pkts bytes target prot opt in out source destination Chain LIBVIRT_OUT (1 references) pkts bytes target prot opt in out source destination Chain WIREGUARD_DROP_WG0 (0 references) pkts bytes target prot opt in out source destination Should I just delete the chain WIREGUARD_DROP_WG0?