






SimonF
Community Developer
-
Joined
-
Last visited
Everything posted by SimonF
-
16g is what we suggest.
-
I have release the update today, thanks for the PR.
-
Flash and flash2 will be the drives in an internal mirrored boot pool.
-
I was testing 6.12, 7.1 and 7.2 for backwards compatibilty but 7.2 did not show for me. I will try again today. It is working on 7.3 must be the package I created was not ok. I wil test for backwards compatibilty then look to release.
-
Here is an updated files for freq and text, space between Lanes and Fan (RPM) Intel.php gpustatusmovablemulti.page
-
You need to enable boot for the nvmes m2-keym1 and m3 https://youtu.be/yh8Ao5ryOeE?si=3bYHcHgiK-B9w3xy
-
Which version of 7.2 did you test on?
-
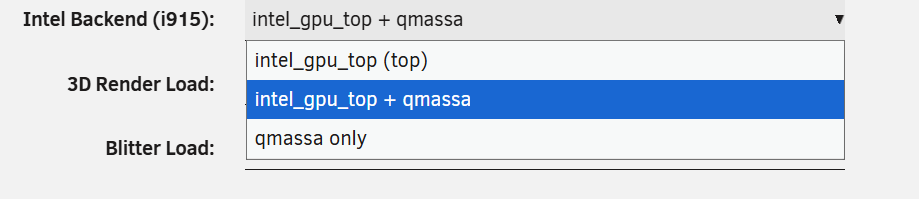
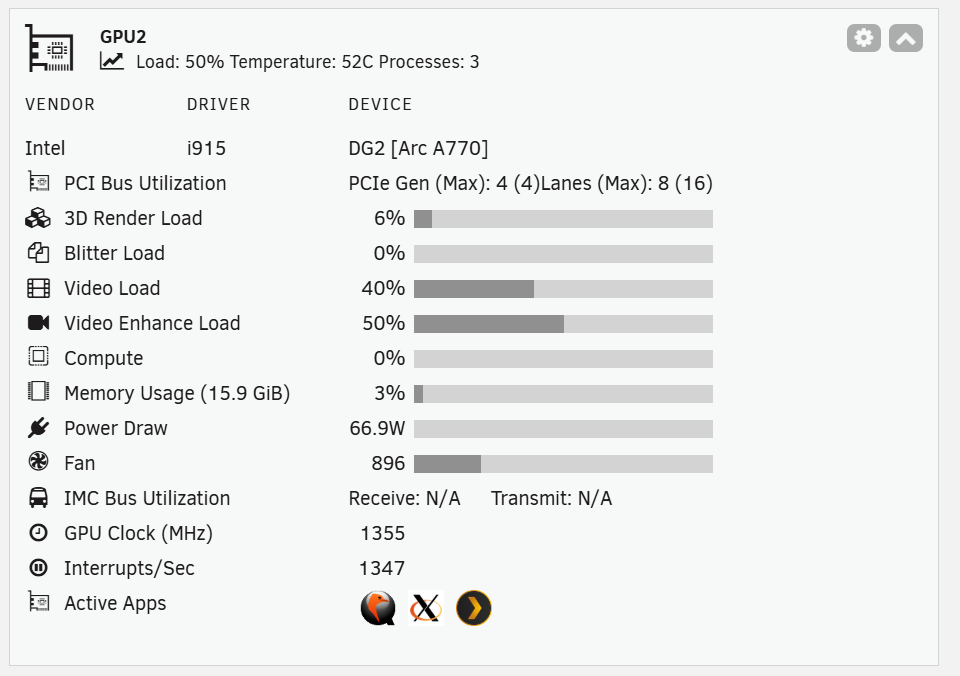
Release 2026.05.10 With this release you can now select the backend processing for i915. The default option is just to use intel_gpu_top. Changing to top + qmassa will show fans, power draw memory usage for ARC cards. qmassa can be set on its own, but you will loose utilisation. For XE drivers just qmassa is used as it support these metrics also. PCI reporting has been updated to look at upstream speeds to remove the x1 reporting.
-
If this one looks ok now for the fan, I will release a version tonight. Intel.php
-
@Niklas Thanks for testing. Attached an updated file to show zero fan and not show qmassa in apps. Also I noticed the PCI gen is 4 but max is 3. So this should be fixed with an updated main.php which goes in the lib directory. Intel.php Main.php
-
I have not release this as yet. but if you put this files into /usr/local/emhttp/plugins/gpustat for the page file and /usr/local/emhttp/plugins/gpustat/lib for the .php On the settings there is now an option for Intel backend for i915. This is is how my A770 looks with top + qmassa. Plex is tanscoding and VM is using virtio3d and running glxgears. Please give it a go an let me know any feedback when you can. GPUStatSettings.page Intel.php
-
i915 is using intel_gpu_top. Will look about using qmassa from that also.
-
If you run qmassa on the cmdline does it show fan speed? But will look into it.
-
It will not show the boot partition unless you have booted from it it will just show as a data pool. If you have created a boot pool try setting the nvme as the boot device in the bios and see if it boots. Or find the key to go into the boot menu, F11 for MSI motherboards brings up a list of devices but will be different for you machine
-
You may need to go into the bios and change the boot order to use the nvmes as it is still booting from the flash still.
-
Yes the model is still the same Unraid still runs from ram and the internal boot drive is similar to a flash drive storing configs and the bzfiles used at boot.
-
The 1 means it does not spin down and will not be tried again.
-
Do cntr + F5 to reload the page if not already. You might get more info if you switch to the XE driver.
-
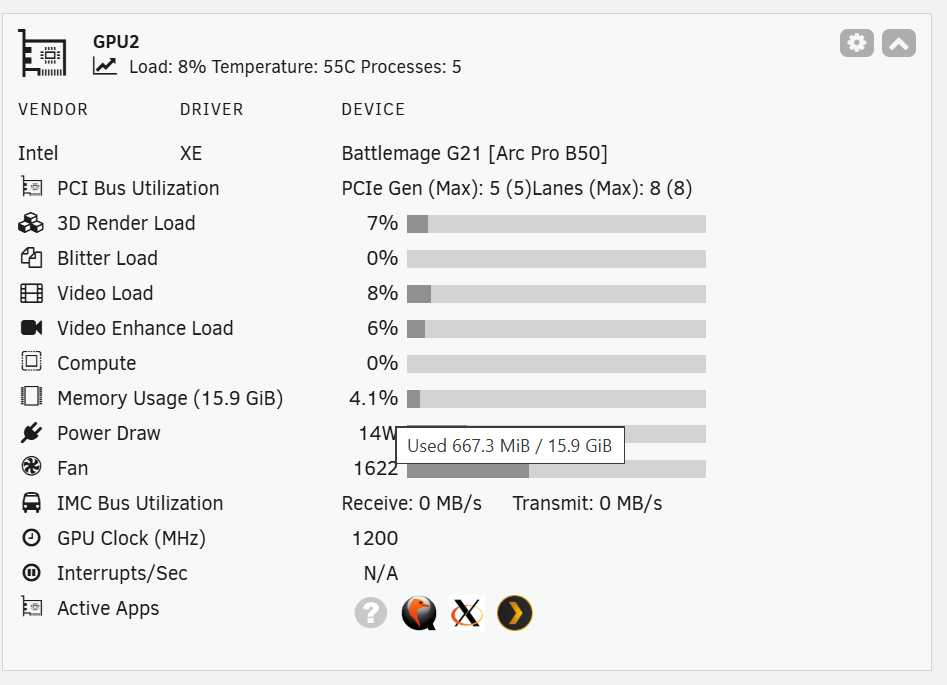
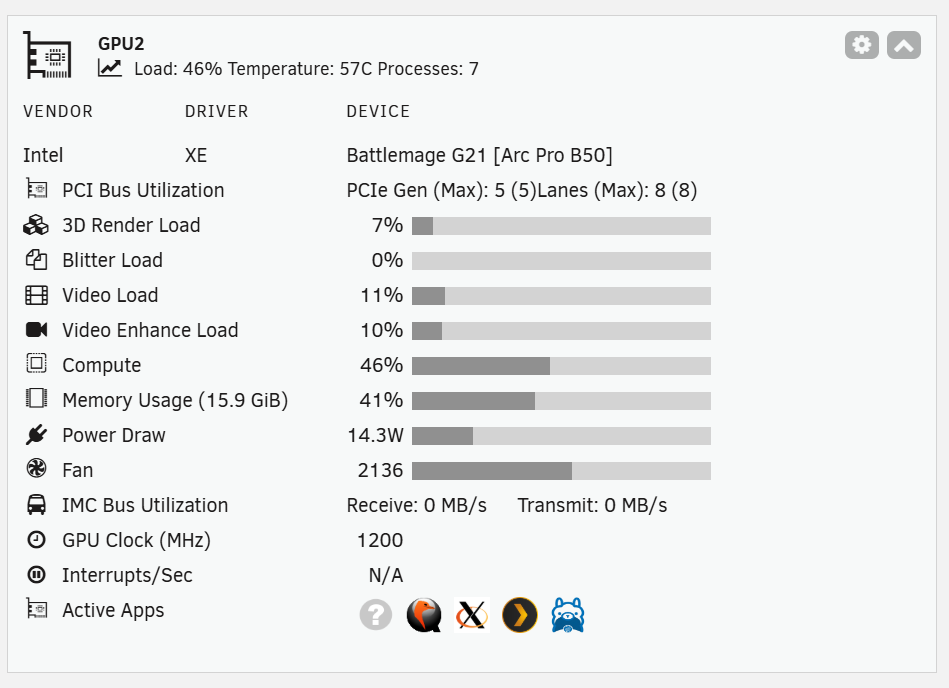
Give release 2026.05.08 a try for XE additional stats. This is the initial release and may need tweaks going forward. Question mark is nvtop. Spaceinvaderone was installing and running Ollama which is most of the mem usage. I was running plex with transcode and virtio3d running glxgears After loading the plugin I recommend do CTLR + F5 to reload the dashboard.
-
Give release 2026.05.08 a try for XE additional stats. This is the initial release and may need tweaks going forward.
-
Yes USBIP allows connecting a USB device from another, i.e. a Raspberry PI could be the USBIP server and the Unraid server uses it over the network. You need to install an add on plugin for the usbip binaries. Note USBIP is not a very secure comms session. Hub processing will connect all of the devices on a specific hub as you cannot passthru hubs. It will go through each of the devices and attachment to a vm. Here is a post showing usbip.
-
Thanks I have fixed this in https://github.com/unraid/webgui/pull/2632
-
No they should not be and dont show on my system. Could you raise a bug on product.unraid.net in the prerelease section and include diagnostics? I have found the error it is related the the file system of btrfs and zfs. I missed a check to see if it was a pool or array device.
-
WIP So far for XE - Question mark is NVTOP. Working on Bus sizes and bar usage. Hoping to have an initial release this weekend. With Ollama running SpaceInvaderOne Testing
-
Thanks for the PR I will try and review over the weekend.



