


jbartlett
Community Developer
-
Joined
-
Last visited
Everything posted by jbartlett
-
It's not that there are no partitions, it's that no partitions are mounted in a way the app can see them. Did you set up a mapping in the DiskSpeed settings? More information is in the FAQ link shown.
-
Since nobody's fussed yet, I went ahead and promoted it to the latest branch.
-
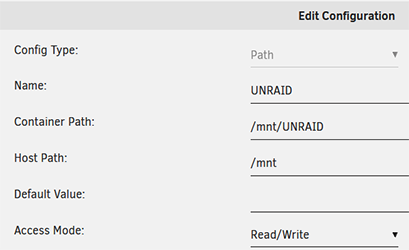
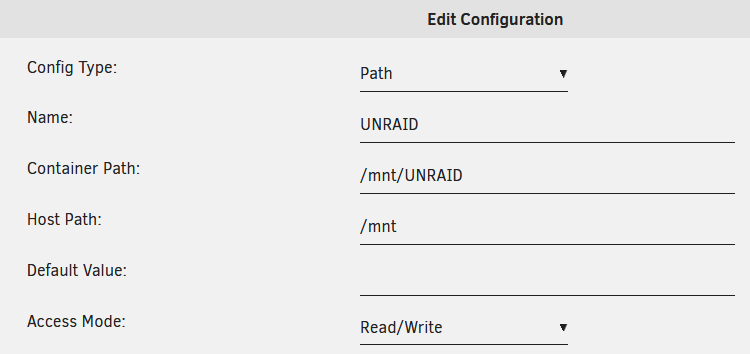
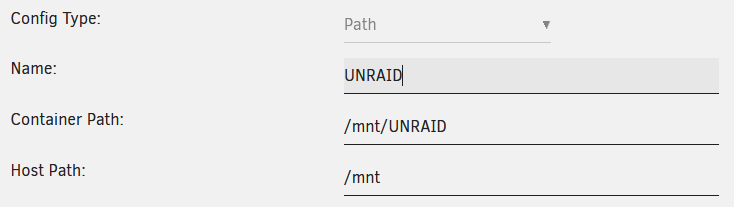
I overhauled the SSD benchmarking for the 2nd time. If you've been having issues benchmarking, please try this version before I push it to the "latest" tag. Edit your DiskSpeed repository to: jbartlett777/diskspeed:2.10.3 Keep in mind that you will need to add the UNRAID mount path to the DiskSpeed settings as a path variable. Values Config Type: Path Name: UNRAID Container Path: /mnt/UNRAID Host Path: /mnt Access Mode: Read/Write For other Docker installations, an example is -v '/mnt':'/mnt/Host':'rw' if you have all your SSD's mounted under /mnt. You may need more than one volume parameter if they are mounted in different areas. @jsmontague@Nargousias@endystrike@RealActorRob@dopeytree
-
This is how it looks when the Highcharts graph encountered an error launching. Viewing the browser Console might give hints. In Firefox/Chrome, right-click on a blank area and select "Inspect", then click in the Console tab.
-
Regarding benchmarking solid state drives, I ditched the "dd" command in favor of the "fio" utility. I hope to have the current bugs fixed soon along with switching to using fio. I will still utilize dd for spinners. The dd command simply had too much overhead in pulling from /dev/random. While not as much overhead, there still was some utilizing /dev/zero. Using the fio utility, I was able to utilize the full bandwidth.
-
I checked the code and I bet this is a 6TB drive but doesn't have an exact 6.00TB capacity. I found a flaw in that scenario that wasn't honoring the MaxGap selection and it was probably reading the very tail end of the drive so I added the MaxGap logic at an initial 90MB gap limit.

-
Sorry for the late replies, been a busy couple of weeks for me. I found out the problem with the Maiwo KT015 PCIe card with NVMe & SATA ports is a bug on the card itself. Issuing multiple "nvme show-regs" commands in a row will cause the system to hang without any mentions of issues in the syslog. Signs of the buggy card is the all F's in the pmrmsc field /usr/sbin/nvme show-regs /dev/nvme1n1 cap : 100030f00103ff version : 10300 cc : 460001 csts : 1 nssr : 0 intms : 0 intmc : 0 aqa : 1f001f asq : 105977000 acq : 105978000 cmbloc : 0 cmbsz : 0 bpinfo : 0 bprsel : 0 bpmbl : 0 cmbmsc : 0 cmbsts : 0 pmrcap : 0 pmrctl : 0 pmrsts : 0 pmrebs : 0 pmrswtp : 0 pmrmsc : ffffffffffffffff Repeat it a few times and every value returns all f's. Then if done again, system locks up. Looking into another way to get the data from that list. In other news, I suspect I know what's causing the slow write benchmarks on SSD/nvme drives but haven't tested that theory yet. I haven't yet looked into why it's trying to trim a spinner. That's just silly. I hope to get to it this weekend. @ToastinJam - You can select a 1% test range from the "Benchmark Drives" button on the main page. Clicking the banner will take you there. @GrahamTWatson - The benchmark graph on the main page only displays drives you've done benchmarks on. If you've purged the settings, it erases past benchmarks too though you can recover them if you uploaded your benchmark data. To do so, click on any drive and click the Maintain Benchmark button - though you have to have at least one benchmark already stored for it to display.
-
It's the "nothing" you click on. - in this orange area just to the right of the period. Your mouse pointer should still be in the text highlight pointer and not a mouse pointer (on Windows) <= Click in orange area

-
One thing to keep in mind is that when you're copying files, it takes advantage of both system and device cache and DiskSpeed specifically requests that "dd" to not utilize any system caches - though that doesn't mean the device has to honor the request. The 970 Pro is supposed to get 2.700 MB/S on write so something's strange going on. View the drive and click the Benchmark button. While it's benchmarking, look at the "Click on a drive label to hide or show it." line under the graph and click just to the right of the period at the end - this will toggle the visibility of the hidden iframes doing the actual work. When it's writing the files, take note of lines like this and reply with what you got. dd if=/dev/urandom of=/mnt/UNRAID/cache/DiskSpeedTestFile01.junk bs=131072 count=16384 oflag=direct conv=noerror status=progress 231 MB/Sec (9260 ms) @jsmontague - please use the same step to show the hidden iframe in your case, it will display an error message. Please copy that into a reply (don't need the long java stack trace at the end).
-
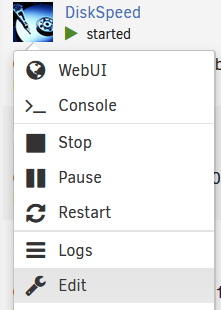
Click on the icon as if you were going to launch the app but instead click "Edit" At the bottom of the page, click on Set to the following: Note on Access Mode: Since the docker app runs in Privileged mode, it doesn't matter if it's Read Only or Read/Write, but might as well select Read/Write as future enhancements to allow the app to run outside of Privileged mode will require this. Save the new setting, then click on the "Apply" button for the Docker (not the Save button). Then launch DiskSpeed as per normal.

-
Please add it and see if you can benchmark your nvme drives.
-
Question - can you check your DiskSpeed docker settings for this path?
-
Yup, I'll have to utilize an additional way to identify free space on the drives or add an out-of-space detection to the benchmark and just allow it to run.
-
I repushed 2.10.2 (will display as 2.10.2.1 in the app) with additional error trapping during the hardware scan. I refrained from adding that in the past because I wanted people to send me the error message. However, with the additional logging I've added, that's not needed. If you were still getting an error on scan, I hope this version allows it to continue. For those who are getting the Unable to benchmark, please open a command shell into the docker via the Docker icon for DiskSpeed or entering "docker exec -it DiskSpeed bash", then enter the following command. df -B 1K On my system, I see the following: root@86294dbd858a:/usr/local/tomcat# df -B 1K Filesystem 1K-blocks Used Available Use% Mounted on /dev/loop2 20971520 2051948 16950884 11% / tmpfs 65536 0 65536 0% /dev tmpfs 16403820 0 16403820 0% /sys/fs/cgroup shm 65536 0 65536 0% /dev/shm shfs 250058072 182053732 66697420 74% /tmp/DiskSpeed rootfs 16321016 1005828 15315188 7% /mnt/UNRAID tmpfs 1024 0 1024 0% /mnt/UNRAID/disks tmpfs 1024 0 1024 0% /mnt/UNRAID/remotes tmpfs 1024 0 1024 0% /mnt/UNRAID/rootshare /dev/md1 9766436812 3872 9764322240 1% /mnt/UNRAID/disk1 /dev/md2 7814026532 4864992872 2948204344 63% /mnt/UNRAID/disk2 /dev/md3 7814026532 3530133468 4284356260 46% /mnt/UNRAID/disk3 /dev/nvme0n1p1 250058072 182053732 66697420 74% /mnt/UNRAID/cache shfs 25394489876 8395130212 16996882844 34% /mnt/UNRAID/user0 /dev/loop2 20971520 2051948 16950884 11% /etc/hosts root@86294dbd858a:/usr/local/tomcat# My nvmeon1p1 partition for my cache drive is listed showing the mount point to be "/mnt/UNRAID/cache" (note that inside the docker, your expected mount points will include "UNRAID"). I'm betting that if you can't benchmark your nvme drive, you're not seeing it listed in this list. One of the checks is for amount of free space and it gets that from this df command. If it can't find an entry, it assume it's not mounted even though it found it's mount point. This also means I need to find an alternate method.
-
I forgot to ask, are you running DiskSpeed or Unraid inside a VM?
-
@d3m3zs - the debug file you sent didn't include the hardware info on the MAIWO KT015 adapter so I went ahead and ordered one and a couple very cheap drives to go with it (SSD+NVMe). This one has me a little perplexed, it looks like it has a nvme port and a separate sata port - to date, the only nvme devices I've seen have their own built in controller. I'm wondering if the card provides a SATA port for one drive and a passthrough for the nvme.... It's interesting enough I want one for my collection and the price is good too.
-
@d3m3zs@jsmontague@Zonediver@emb531@youngfish@deepinder27@mayberts Please update DiskSpeed to 2.10.2. I found an issue with detecting partitions on nvme drives and added additional error trapping with logging during the scan process. If you continue to have any issues, please create a new Debug File from inside the app or by using: http://[IP]:18888/isolated/CreateDebugInfo.cfm The new debug file will also contain a html file of the hardware scan so I'll be able to see exactly what you saw if there was an issue during the scan process. Keep in mind that SSD's and NVME drives can't be benchmarked if they are not operating as solitary drives - that means no RAID, multi-pool BTRFS setups, etc. If you want to benchmark such drives, it has to be done prior to adding them to a multi-drive setup.
-
No worries. If you have a problem with the card, then others will have problems with cards that function the same. And it's cheap so it's all good.
-
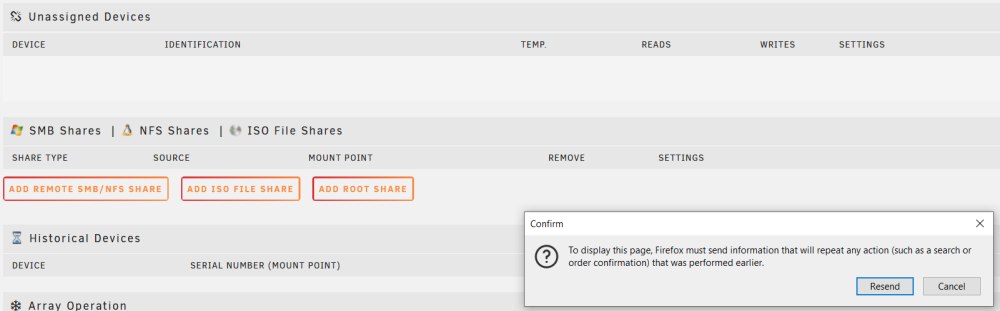
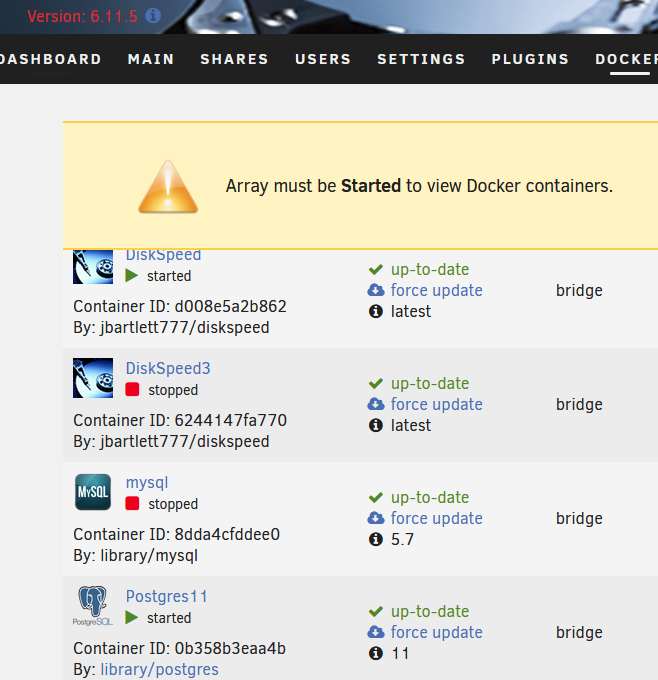
During array startup on unraid 6.11.5 on UD 2022.12.19, I get a Firefox browser prompt asking if I want to resubmit or not when the UD section tries to refresh. If I decline, everything seems fine. If I grant it, the UD block displays and then the entire page refreshes with the drive assignment available like the array is offline. The Docker screen reflects the "Array must be started" block AND displays the Docker apps with some running. Shares are available. Main tab has no stop/start buttons, just reboot. Rebooted in safe mode, no issue starting the array. Upon start up of array: nasbackup-diagnostics-20221226-1521.zip
-
It likely has additional PCI levels/nesting going on, I'll take a look. The link isn't working but I found it on Newegg for $13. The biggest issue I have with adding support to devices is not having the devices and them being prohibitively expensive for me to pick up just to add support for it - but this one is in my price range if I can't figure it out from your debug file. I've got a stack of cards that support multiple types of setups that I acquired just to add support for but none like this layout.
-
Can you give a link to the PCI-e adapter you added? Also, please update this URL to reflect your NAS's IP address to create a debug file using the Middle button to include controller information: http://[ip]:18888/isolated/CreateDebugInfo.cfm then email the file to [email protected]
-
If you clicked the Upload button before you purged, then you can restore the first benchmark by clicking on the individual drives as instructed in my previous post. If you hadn't uploaded, then they are gone and can't be recovered. If you don't suspect anything wrong with a drive, then you're probably fine with the latest run. As a general rule, you typically don't want to purge and start from scratch. It'll automatically rescan if it detects a change with your drives (or between DiskSpeed versions) but if it doesn't, then you can click the manual scan (left most button). Having a slow drive in your cache doesn't affect your array speeds.
-
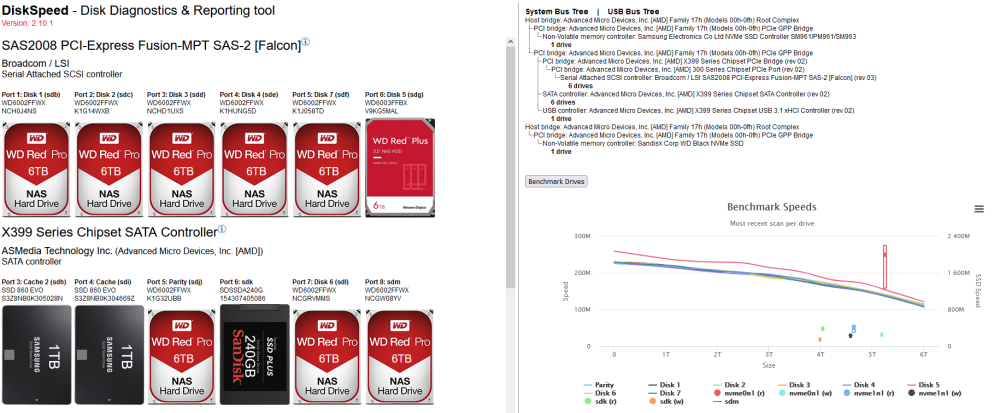
The main page displays all the benchmarks, clicking the page header on any page will take you there. The benchmark final result as shown isn't available once you leave it but you can click on the 3 line button on the top-right corner to download an image version of it. Here's how it looks on my system
-
Okay, everything looks almost ok. Are you saying that you clicked the "Bookmark Drives" button and it finished and displayed the graphs but now it does not? It should be displayed right under that button. Likewise, if you click on any of the drives, it's benchmark will be displayed on it's information page. Here, it doesn't seem that any benchmarks happened. There's a couple things that could cause this. If you clicked "Purge Everything and start over", that erases your past benchmarks from your system. If the benchmark is somehow invalid such as the abort button was pressed or a benchmark did not complete, it is removed. If the "Abort Benchmark" button updated to "Continue", the benchmark process fully ran successfully. It's safe to click "Benchmark Drives" or click on one drive and run the benchmark on it for a faster result. If the benchmarks still don't display, run another single drive benchmark and click just to the right of the period at the end of the "Click on a drive label to hide or show it." to toggle the visibility of the hidden iframes that are doing the actual work. If there was an error, it would be displayed there. If you accidentally erased your benchmarks, you can recover your past benchmarks if you had uploaded them to the hddb by clicking the "Upload Drive & Benchmarks" button. View a drive and click on the "Manage Benchmarks" button. The next page will display every benchmark on your system and what had been uploaded. Click on the drive label in the legend to hide or show individual benchmarks. Any that are visible when you click "Update Benchmarks" are saved locally, the rest are removed locally. Ideal if you have a ton of benchmarks but only want to see your oldest and newest for example. On a side note, many of your drives don't have images when they exist in the HDDB. When clicking the "Rescan Controllers" button, does it indicate any issues fetching the images?
-
Version 2.10.1 has error trapping added around calling the Spinup function. It's probably still happening, but it ignores the spinup issue and keeps moving forward. I'm looking into the debug files that were sent.


