





eribob
Members
-
Joined
-
Last visited
Everything posted by eribob
-
Thank you for the advice. I would like to try this. How can I implement iSCSI on unraid? Will this allow for me to share the same game data between several gaming VM:s? Can the VM:s be on at the same time?
-
Hi! I have 2 gaming VM:s with two GPU:s passed through to them (one for each). I would like to store all games on a single virtual disk and clone the disk for the other VM, so that I do not have to install all games twice, and could thus save space. Preferably, one disk would be the "master disk" and when games are added or updated on that one, it would be nice if these updates could be easily propagated to the other VM. - However I am not sure how this would work with game saves etc. Both VM:s already have an OS drive (virtual), that I am thinking I should keep, and where save data etc could be saved, but I am not sure if game saves can be easily separated from the game files (I am using steam and blizzard games at the moment). Before, I used btrfs and the "cp reflink" function, but the disks go corrupted after a while. Maybe btrfs is not stable enough to do this? So I thought that zfs could perhaps be used instead? However, I have never used zfs before so I would like some advice on how to set it up. I have a 1 TB SATA SSD that I am planning to use for this. And I have installed the zfs plugin for unraid. Thank you in advance!
-
Hi! just curious - what are you using this for? /Erik
-
-
+1! However, I have a feeling that this feature is not possible for the unraid devs to implement
-
I would love this feature
-
No ideas? How do you all create your VM:s? I am looking for expert tips...
-
VM creation takes a lot of time... 1. Using the GUI to set the number of cores, RAM, create vdisks etc 2. Running through the OS installation 3. Install necessary drivers, programs etc and adjust settings This is a hassle when you want to create a VM just to test something new... Is there a way to speed this up? Lately I have started using reflinks since my VM disks are on btrfs pools (cp --reflink /path/to/old/VM/vdisk1.img /path/to/new/VM/vdisk1.img). This saves HDD space and gets rid of the need for step 2 and 3, but I instead need to have base images that I can clone from. Is there a better or more accepted way to quickly create VM:s? Are there pre-installed vdisks available for common OSes like ubuntu/centos/windows10? Cloud providers let you create VMs by clicking a button in the web GUI and wait a minute or two but I guess unraid was not designed for this... Happy to get any suggestions!
-
Awsome work!! Got it to work with Radeon Rx580 passthrough as well. Nice to be able to explore the new win11 however I can not say that I am very impressed with the new features so far. It looks mostly like a pretty skin on windows 10 and microsoft trying to steal more of my privacy.
-
You saved the iso in /mmt/user/isos/ but you look for it in /mnt/user/ISO…
-
I agree this is a cool idea to try out. Both proxmox and unraid uses kvm so it should be possible?
-
Same error for me today. Could not even download diagnostics until I restarted nginx. monsterservern-diagnostics-20210707-1012.zip
-
Wow this is awsome! Great work crenn! I had lost all hope of solving this problem… I have upgraded my system and sold the huananzhi board already but I will save this post in case I decide to build a second system in the future. /Erik
-
Same problem here. System log is suddenly full of these messages: Nov 29 10:05:45 Monsterservern nginx: 2020/11/29 10:05:45 [alert] 7525#7525: worker process 21758 exited on signal 11 Nov 29 10:05:45 Monsterservern nginx: 2020/11/29 10:05:45 [crit] 21883#21883: ngx_slab_alloc() failed: no memory Nov 29 10:05:45 Monsterservern nginx: 2020/11/29 10:05:45 [error] 21883#21883: shpool alloc failed Nov 29 10:05:45 Monsterservern nginx: 2020/11/29 10:05:45 [error] 21883#21883: nchan: Out of shared memory while allocating channel /var. Increase nchan_max_reserved_memory. Nov 29 10:05:45 Monsterservern nginx: 2020/11/29 10:05:45 [alert] 21883#21883: *483824 header already sent while keepalive, client: 192.168.2.165, server: 0.0.0.0:80 Nov 29 10:05:45 Monsterservern kernel: nginx[21883]: segfault at 0 ip 0000000000000000 sp 00007fff9d8f5f58 error 14 in nginx[400000+22000] Nov 29 10:05:45 Monsterservern kernel: Code: Bad RIP value. Nov 29 10:05:45 Monsterservern nginx: 2020/11/29 10:05:45 [alert] 7525#7525: worker process 21883 exited on signal 11 Nov 29 10:05:45 Monsterservern nginx: 2020/11/29 10:05:45 [crit] 21884#21884: ngx_slab_alloc() failed: no memory Nov 29 10:05:45 Monsterservern nginx: 2020/11/29 10:05:45 [error] 21884#21884: shpool alloc failed Nov 29 10:05:45 Monsterservern nginx: 2020/11/29 10:05:45 [error] 21884#21884: nchan: Out of shared memory while allocating channel /disks. Increase nchan_max_reserved_memory. Nov 29 10:05:45 Monsterservern nginx: 2020/11/29 10:05:45 [error] 21884#21884: *483826 nchan: error publishing message (HTTP status code 507), client: unix:, server: , request: "POST /pub/disks?buffer_length=1 HTTP/1.1", host: "localhost" Nov 29 10:05:45 Monsterservern nginx: 2020/11/29 10:05:45 [crit] 21884#21884: ngx_slab_alloc() failed: no memory Nov 29 10:05:45 Monsterservern nginx: 2020/11/29 10:05:45 [error] 21884#21884: shpool alloc failed Nov 29 10:05:45 Monsterservern nginx: 2020/11/29 10:05:45 [error] 21884#21884: nchan: Out of shared memory while allocating channel /cpuload. Increase nchan_max_reserved_memory. Nov 29 10:05:45 Monsterservern nginx: 2020/11/29 10:05:45 [error] 21884#21884: *483827 nchan: error publishing message (HTTP status code 507), client: unix:, server: , request: "POST /pub/cpuload?buffer_length=1 HTTP/1.1", host: "localhost" Nov 29 10:05:45 Monsterservern nginx: 2020/11/29 10:05:45 [crit] 21884#21884: ngx_slab_alloc() failed: no memory Nov 29 10:05:45 Monsterservern nginx: 2020/11/29 10:05:45 [error] 21884#21884: shpool alloc failed Nov 29 10:05:45 Monsterservern nginx: 2020/11/29 10:05:45 [error] 21884#21884: nchan: Out of shared memory while allocating channel /dockerload. Increase nchan_max_reserved_memory. Nov 29 10:05:45 Monsterservern nginx: 2020/11/29 10:05:45 [alert] 21884#21884: *483828 header already sent while keepalive, client: 192.168.2.165, server: 0.0.0.0:80 Nov 29 10:05:45 Monsterservern kernel: nginx[21884]: segfault at 0 ip 0000000000000000 sp 00007fff9d8f5f58 error 14 in nginx[400000+22000] On the dashboard the memory for the log is 100% full. monsterservern-diagnostics-20201129-1235.zip
-
After many hours of trying to get my GTX 1070 ti to work, your guide finally made it possible. I almost gave up... Thank yo so much!
-
Thanks! I have seen the taichi guide and followed it. My bios is updated (a couple of months ago when I bought it) and I did the settings and xml he recommended. the other thread about the 5.8 kernel was very interesting though! I have also tried passing through onboard audio before and it resulted in the server hanging completely as well. I would like to try to upgrade but I saw that some people have troubles passing through hard drives via id (/dev/disk/by-id/XX) after upgrading so I would like to wait since I use that for my VM. Also I have a LSI 9211-8i SAS controller and some SAS-controllers stop working with beta 29 (not sure about mine though).
-
Thank you. Both the usb and wifi controllers are isolated and passed through to the VM. The mouse is connected to the passed through usb ports.
-
Does anyone have any suggestions? As I wrote I am able to pass through USB and the WIFI from the motherboard and they work, but as soon as I try to install any drivers (mouse drivers for a mouse connected to the USB or wifi/bluetooth drivers) I get a BSOD.
-
I have a windows 10 VM with a logitech mouse attached to it via usb pass-through. It works fine, but when I try to install the drivers the VM hangs with a blue screen. The same problem occured earlier when I tried to install drivers for wifi/bluetooth that is passed through from the motherboard. Attached diagnostics Here is my VM XML <?xml version='1.0' encoding='UTF-8'?> <domain type='kvm' id='5' xmlns:qemu='http://libvirt.org/schemas/domain/qemu/1.0'> <name>Windows</name> <uuid>8dcf9d3b-6010-947b-543a-6216bf778f0b</uuid> <description>Main computer</description> <metadata> <vmtemplate xmlns="unraid" name="Windows 10" icon="windows.png" os="windows10"/> </metadata> <memory unit='KiB'>33554432</memory> <currentMemory unit='KiB'>33554432</currentMemory> <memoryBacking> <nosharepages/> </memoryBacking> <vcpu placement='static'>16</vcpu> <cputune> <vcpupin vcpu='0' cpuset='8'/> <vcpupin vcpu='1' cpuset='24'/> <vcpupin vcpu='2' cpuset='9'/> <vcpupin vcpu='3' cpuset='25'/> <vcpupin vcpu='4' cpuset='10'/> <vcpupin vcpu='5' cpuset='26'/> <vcpupin vcpu='6' cpuset='11'/> <vcpupin vcpu='7' cpuset='27'/> <vcpupin vcpu='8' cpuset='12'/> <vcpupin vcpu='9' cpuset='28'/> <vcpupin vcpu='10' cpuset='13'/> <vcpupin vcpu='11' cpuset='29'/> <vcpupin vcpu='12' cpuset='14'/> <vcpupin vcpu='13' cpuset='30'/> <vcpupin vcpu='14' cpuset='15'/> <vcpupin vcpu='15' cpuset='31'/> </cputune> <resource> <partition>/machine</partition> </resource> <os> <type arch='x86_64' machine='pc-q35-5.0'>hvm</type> <loader readonly='yes' type='pflash'>/usr/share/qemu/ovmf-x64/OVMF_CODE-pure-efi.fd</loader> <nvram>/etc/libvirt/qemu/nvram/8dcf9d3b-6010-947b-543a-6216bf778f0b_VARS-pure-efi.fd</nvram> </os> <features> <acpi/> <apic/> <hyperv> <relaxed state='on'/> <vapic state='on'/> <spinlocks state='on' retries='8191'/> <vendor_id state='on' value='none'/> </hyperv> </features> <cpu mode='host-passthrough' check='none'> <topology sockets='1' dies='1' cores='8' threads='2'/> <cache mode='passthrough'/> <feature policy='require' name='topoext'/> </cpu> <clock offset='localtime'> <timer name='hypervclock' present='yes'/> <timer name='hpet' present='no'/> </clock> <on_poweroff>destroy</on_poweroff> <on_reboot>restart</on_reboot> <on_crash>restart</on_crash> <devices> <emulator>/usr/local/sbin/qemu</emulator> <disk type='file' device='disk'> <driver name='qemu' type='raw' cache='writeback'/> <source file='/mnt/user/VM_disks/Windows/windows_disk.img' index='5'/> <backingStore/> <target dev='hdc' bus='virtio'/> <boot order='1'/> <alias name='virtio-disk2'/> <address type='pci' domain='0x0000' bus='0x02' slot='0x00' function='0x0'/> </disk> <disk type='file' device='cdrom'> <driver name='qemu' type='raw'/> <source file='/mnt/user/isos/Win10_1809Oct_v2_Swedish_x64.iso' index='4'/> <backingStore/> <target dev='hda' bus='sata'/> <readonly/> <boot order='2'/> <alias name='sata0-0-0'/> <address type='drive' controller='0' bus='0' target='0' unit='0'/> </disk> <disk type='file' device='cdrom'> <driver name='qemu' type='raw'/> <source file='/mnt/user/isos/virtio-win-0.1.173-2.iso' index='3'/> <backingStore/> <target dev='hdb' bus='sata'/> <readonly/> <alias name='sata0-0-1'/> <address type='drive' controller='0' bus='0' target='0' unit='1'/> </disk> <disk type='block' device='disk'> <driver name='qemu' type='raw' cache='writeback'/> <source dev='/dev/disk/by-id/ata-Samsung_SSD_840_EVO_250GB_S1DBNSBF464063N' index='2'/> <backingStore/> <target dev='hdd' bus='sata'/> <alias name='sata0-0-3'/> <address type='drive' controller='0' bus='0' target='0' unit='3'/> </disk> <disk type='block' device='disk'> <driver name='qemu' type='raw' cache='writeback'/> <source dev='/dev/disk/by-id/ata-INTEL_SSDSC2CT180A3_CVMP2224015B180CGN' index='1'/> <backingStore/> <target dev='hde' bus='sata'/> <alias name='sata0-0-4'/> <address type='drive' controller='0' bus='0' target='0' unit='4'/> </disk> <controller type='usb' index='0' model='qemu-xhci' ports='15'> <alias name='usb'/> <address type='pci' domain='0x0000' bus='0x00' slot='0x07' function='0x0'/> </controller> <controller type='pci' index='0' model='pcie-root'> <alias name='pcie.0'/> </controller> <controller type='pci' index='1' model='pcie-root-port'> <model name='pcie-root-port'/> <target chassis='1' port='0x8'/> <alias name='pci.1'/> <address type='pci' domain='0x0000' bus='0x00' slot='0x01' function='0x0' multifunction='on'/> </controller> <controller type='pci' index='2' model='pcie-root-port'> <model name='pcie-root-port'/> <target chassis='2' port='0x9'/> <alias name='pci.2'/> <address type='pci' domain='0x0000' bus='0x00' slot='0x01' function='0x1'/> </controller> <controller type='pci' index='3' model='pcie-root-port'> <model name='pcie-root-port'/> <target chassis='3' port='0xa'/> <alias name='pci.3'/> <address type='pci' domain='0x0000' bus='0x00' slot='0x01' function='0x2'/> </controller> <controller type='pci' index='4' model='pcie-to-pci-bridge'> <model name='pcie-pci-bridge'/> <alias name='pci.4'/> <address type='pci' domain='0x0000' bus='0x01' slot='0x00' function='0x0'/> </controller> <controller type='pci' index='5' model='pci-bridge'> <model name='pci-bridge'/> <target chassisNr='5'/> <alias name='pci.5'/> <address type='pci' domain='0x0000' bus='0x04' slot='0x01' function='0x0'/> </controller> <controller type='pci' index='6' model='pci-bridge'> <model name='pci-bridge'/> <target chassisNr='6'/> <alias name='pci.6'/> <address type='pci' domain='0x0000' bus='0x04' slot='0x02' function='0x0'/> </controller> <controller type='pci' index='7' model='pci-bridge'> <model name='pci-bridge'/> <target chassisNr='7'/> <alias name='pci.7'/> <address type='pci' domain='0x0000' bus='0x04' slot='0x03' function='0x0'/> </controller> <controller type='pci' index='8' model='pci-bridge'> <model name='pci-bridge'/> <target chassisNr='8'/> <alias name='pci.8'/> <address type='pci' domain='0x0000' bus='0x04' slot='0x04' function='0x0'/> </controller> <controller type='pci' index='9' model='pci-bridge'> <model name='pci-bridge'/> <target chassisNr='9'/> <alias name='pci.9'/> <address type='pci' domain='0x0000' bus='0x04' slot='0x05' function='0x0'/> </controller> <controller type='pci' index='10' model='pcie-root-port'> <model name='pcie-root-port'/> <target chassis='10' port='0xb'/> <alias name='pci.10'/> <address type='pci' domain='0x0000' bus='0x00' slot='0x01' function='0x3'/> </controller> <controller type='pci' index='11' model='pcie-root-port'> <model name='pcie-root-port'/> <target chassis='11' port='0xc'/> <alias name='pci.11'/> <address type='pci' domain='0x0000' bus='0x00' slot='0x01' function='0x4'/> </controller> <controller type='pci' index='12' model='pcie-root-port'> <model name='pcie-root-port'/> <target chassis='12' port='0xd'/> <alias name='pci.12'/> <address type='pci' domain='0x0000' bus='0x00' slot='0x01' function='0x5'/> </controller> <controller type='pci' index='13' model='pcie-root-port'> <model name='pcie-root-port'/> <target chassis='13' port='0xe'/> <alias name='pci.13'/> <address type='pci' domain='0x0000' bus='0x00' slot='0x01' function='0x6'/> </controller> <controller type='pci' index='14' model='pcie-root-port'> <model name='pcie-root-port'/> <target chassis='14' port='0xf'/> <alias name='pci.14'/> <address type='pci' domain='0x0000' bus='0x00' slot='0x01' function='0x7'/> </controller> <controller type='virtio-serial' index='0'> <alias name='virtio-serial0'/> <address type='pci' domain='0x0000' bus='0x0a' slot='0x00' function='0x0'/> </controller> <controller type='sata' index='0'> <alias name='ide'/> <address type='pci' domain='0x0000' bus='0x00' slot='0x1f' function='0x2'/> </controller> <interface type='bridge'> <mac address='52:54:00:99:fc:d9'/> <source bridge='br0'/> <target dev='vnet4'/> <model type='virtio-net'/> <alias name='net0'/> <address type='pci' domain='0x0000' bus='0x04' slot='0x07' function='0x0'/> </interface> <serial type='pty'> <source path='/dev/pts/4'/> <target type='isa-serial' port='0'> <model name='isa-serial'/> </target> <alias name='serial0'/> </serial> <console type='pty' tty='/dev/pts/4'> <source path='/dev/pts/4'/> <target type='serial' port='0'/> <alias name='serial0'/> </console> <channel type='unix'> <source mode='bind' path='/var/lib/libvirt/qemu/channel/target/domain-5-Windows/org.qemu.guest_agent.0'/> <target type='virtio' name='org.qemu.guest_agent.0' state='connected'/> <alias name='channel0'/> <address type='virtio-serial' controller='0' bus='0' port='1'/> </channel> <input type='tablet' bus='usb'> <alias name='input0'/> <address type='usb' bus='0' port='1'/> </input> <input type='mouse' bus='ps2'> <alias name='input1'/> </input> <input type='keyboard' bus='ps2'> <alias name='input2'/> </input> <hostdev mode='subsystem' type='pci' managed='yes'> <driver name='vfio'/> <source> <address domain='0x0000' bus='0x0f' slot='0x00' function='0x0'/> </source> <alias name='hostdev0'/> <rom file='/mnt/user/isos/RX580.rom'/> <address type='pci' domain='0x0000' bus='0x0b' slot='0x00' function='0x0' multifunction='on'/> </hostdev> <hostdev mode='subsystem' type='pci' managed='yes'> <driver name='vfio'/> <source> <address domain='0x0000' bus='0x0f' slot='0x00' function='0x1'/> </source> <alias name='hostdev1'/> <address type='pci' domain='0x0000' bus='0x0b' slot='0x00' function='0x1'/> </hostdev> <hostdev mode='subsystem' type='pci' managed='yes'> <driver name='vfio'/> <source> <address domain='0x0000' bus='0x08' slot='0x00' function='0x0'/> </source> <alias name='hostdev2'/> <address type='pci' domain='0x0000' bus='0x03' slot='0x00' function='0x0'/> </hostdev> <hostdev mode='subsystem' type='pci' managed='yes'> <driver name='vfio'/> <source> <address domain='0x0000' bus='0x0c' slot='0x00' function='0x0'/> </source> <alias name='hostdev3'/> <rom file='/mnt/user/isos/RX580.rom'/> <address type='pci' domain='0x0000' bus='0x0c' slot='0x00' function='0x0' multifunction='on'/> </hostdev> <hostdev mode='subsystem' type='pci' managed='yes'> <driver name='vfio'/> <source> <address domain='0x0000' bus='0x0c' slot='0x00' function='0x1'/> </source> <alias name='hostdev4'/> <address type='pci' domain='0x0000' bus='0x0c' slot='0x00' function='0x1'/> </hostdev> <hostdev mode='subsystem' type='pci' managed='yes'> <driver name='vfio'/> <source> <address domain='0x0000' bus='0x0c' slot='0x00' function='0x3'/> </source> <alias name='hostdev5'/> <address type='pci' domain='0x0000' bus='0x0c' slot='0x00' function='0x2'/> </hostdev> <memballoon model='none'/> </devices> <seclabel type='dynamic' model='dac' relabel='yes'> <label>+0:+100</label> <imagelabel>+0:+100</imagelabel> </seclabel> <qemu:commandline> <qemu:arg value='-cpu'/> <qemu:arg value='host,topoext=on,invtsc=on,hv-time,hv-relaxed,hv-vapic,hv-spinlocks=0x1fff,hv-vpindex,hv-synic,hv-stimer,hv-reset,hv-frequencies,host-cache-info=on,l3-cache=off,-amd-stibp'/> </qemu:commandline> </domain> monsterservern-diagnostics-20201001-1725-hanged-USB-driver-install.zip
-
Hi! I rebooted normally (just like someone else in this thread) and the start button is back. Just wanted to post my diagnostics in case someone was interested in investigating this bug. I am also impressed by the speed with which you people reply in this forum! Thanks.
-
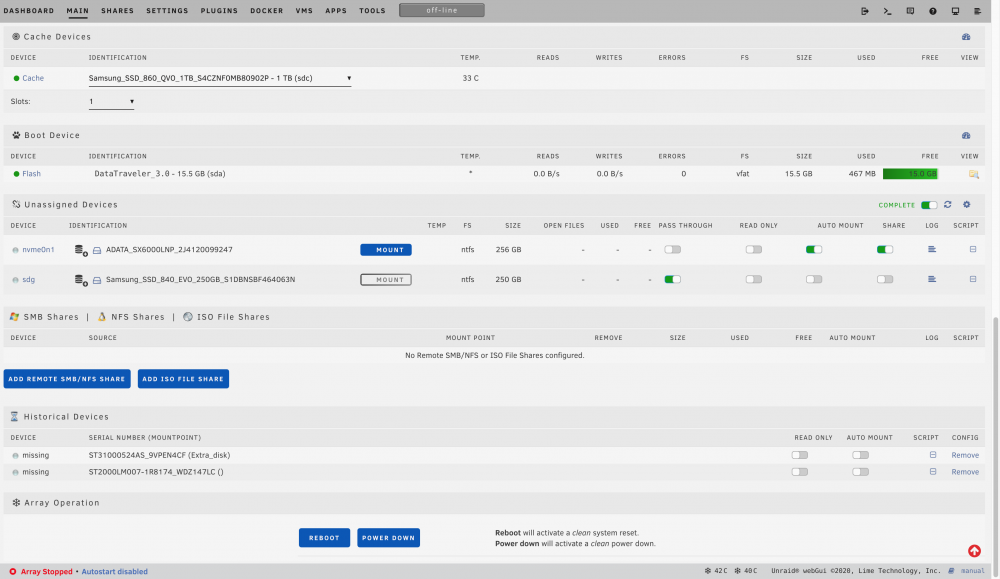
Hi! Same error here. I switched out an unassigned HDD for an SSD and in that process I acidentally unplugged my parity drive. Started up the server and realised. Shut it down, plugged the parity drive back in and restarted. The parity drive is now back but the array start button is missing. See screenshot and diagnostics. monsterservern-diagnostics-20200321-1351.zip
-
Hi! I have done some more digging. The problem seems to be with dmidecode, the command that the unraid GUI uses to fetch system information. When I run dmidecode manually I get some output and in the end the following error: Invalid entry length (0). DMI table is broken! Stop Is there a way to fix the DMI table? Only through BIOS update? Thank you! /Erik
-
OK, thank you. It seems like it would be easy to fix, related to how Unraid processes the system information?
-
Hi! I have posted about this before, but I did not get an answer and I have found some more information. I have a Huananzhi x79 8D motherboard with 8x8GB of DDR3 ECC memory and 2 x Xeon E5 2670 CPU:s. The unraid dashboard lists my RAM to be 32GB (instead of 64GB). The system information as well: Model: Custom M/B: HUANANZHI X79-8D Version VAA31 - s/n: MB-201903272019 BIOS: American Megatrends Inc. Version 4.6.5. Dated: 03/28/2019 CPU: Intel® Xeon® CPU E5-2670 0 @ 2.60GHz HVM: Enabled IOMMU: Enabled Cache: 512 KiB, 2048 KiB, 20480 KiB, 512 KiB, 2048 KiB, 20480 KiB Memory: 32 GiB DDR3 Multi-bit ECC (max. installable capacity 192 GiB) Network: bond0: fault-tolerance (active-backup), mtu 1500 eth0: 1000 Mbps, full duplex, mtu 1500 eth1: interface down Kernel: Linux 4.19.88-Unraid x86_64 OpenSSL: 1.1.1d Uptime: The "free" command gives me 64GB of RAM: total used free shared buff/cache available Mem: 65966588 19896080 4611780 696308 41458728 44772192 Swap: 0 0 0 lshw -short Also shows 8 sticks of 8GB RAM: /W path Device Class Description ===================================================== system To be filled by O.E.M. (To be filled by O.E.M.) /0 bus X79-8D /0/0 memory 64KiB BIOS /0/1 processor Intel(R) Xeon(R) CPU E5-2670 0 @ 2.60GHz /0/1/5 memory 512KiB L1 cache /0/1/6 memory 2MiB L2 cache /0/1/7 memory 20MiB L3 cache /0/2 processor Intel(R) Xeon(R) CPU E5-2670 0 @ 2.60GHz /0/2/9 memory 512KiB L1 cache /0/2/a memory 2MiB L2 cache /0/2/b memory 20MiB L3 cache /0/2c memory System Memory /0/2c/0 memory DIMM Synchronous [empty] /0/2c/1 memory DIMM Synchronous [empty] /0/2c/2 memory DIMM Synchronous [empty] /0/2c/3 memory DIMM Synchronous [empty] /0/2c/4 memory 8GiB DIMM DDR3 1600 MHz (0.6 ns) /0/2c/5 memory 8GiB DIMM DDR3 1600 MHz (0.6 ns) /0/2c/6 memory 8GiB DIMM DDR3 1600 MHz (0.6 ns) /0/2c/7 memory 8GiB DIMM DDR3 1600 MHz (0.6 ns) /0/3e memory System Memory /0/3e/0 memory 8GiB DIMM DDR3 1600 MHz (0.6 ns) /0/3e/1 memory 8GiB DIMM DDR3 1600 MHz (0.6 ns) /0/3e/2 memory 8GiB DIMM DDR3 1600 MHz (0.6 ns) /0/3e/3 memory 8GiB DIMM DDR3 1600 MHz (0.6 ns) /0/3e/4 memory DIMM Synchronous [empty] /0/3e/5 memory DIMM Synchronous [empty] /0/3e/6 memory DIMM Synchronous [empty] /0/3e/7 memory DIMM Synchronous [empty] /0/4 memory 1023KiB BIOS /0/6 memory 1023KiB BIOS /0/7 memory 1023KiB BIOS /0/9 memory 1023KiB BIOS /0/a memory 1023KiB BIOS /0/b memory 1023KiB BIOS /0/c memory 1023KiB BIOS /0/d memory 1023KiB BIOS /0/237e memory 1MiB BIOS /0/e memory /0/f memory Attaching diagnostics and complete lshw output as a text file. Thank you for any assistance! monsterservern-diagnostics-20200114-2239.zip lshw-output.txt
-
Thank you. Yes I can assign more than 32 GB of RAM to my VMs.


