





Tolete
Members
-
Joined
-
Last visited
Everything posted by Tolete
-
Short answer is no whith that image as-is. tigerblue77/dell_idrac_fan_controller accepts a single FAN_SPEED value and only flips back to the Dell/BIOS fan profile when the CPU passes CPU_TEMPERATURE_THRESHOLD. It doesn’t have a “ramp by +10%/-10% each interval” algorithm built in. you could test running a small script (container or host cron) that: -Reads temperature every CHECK_INTERVAL (e.g., 60s) -If temp ≥ threshold for the current interval, raise fan speed by +10 (capped) -If temp < threshold for N consecutive intervals (e.g., 2), lower by −10 (floored) -Uses ipmitool raw commands to keep iDRAC in manual and set duty cycle Here’s a drop-in bash script you can run in an Alpine container (or on the Unraid host) that steps fans up/down. It talks to iDRAC over LAN adjust as needed: #!/bin/sh set -eu # ---- CONFIG ---- IDRAC_HOST="${IDRAC_HOST:-192.0.2.10}" # or "local" IDRAC_USER="${IDRAC_USERNAME:-root}" IDRAC_PASS="${IDRAC_PASSWORD:-calvin}" THRESHOLD="${CPU_TEMPERATURE_THRESHOLD:-50}" # °C INTERVAL="${CHECK_INTERVAL:-60}" # seconds STEP="${STEP:-10}" # % per step MIN_SPEED="${MIN_SPEED:-20}" # % MAX_SPEED="${MAX_SPEED:-80}" # % START_SPEED="${START_SPEED:-20}" # % DOWN_STABLE_CYCLES="${DOWN_STABLE_CYCLES:-2}" # stay below threshold this many intervals before stepping down # ---- helpers ---- ipmi() { if [ "$IDRAC_HOST" = "local" ]; then ipmitool -I open "$@" else ipmitool -I lanplus -H "$IDRAC_HOST" -U "$IDRAC_USER" -P "$IDRAC_PASS" "$@" fi } set_manual() { ipmi raw 0x30 0x30 0x01 0x00 >/dev/null 2>&1 || true; } set_auto() { ipmi raw 0x30 0x30 0x01 0x01 >/dev/null 2>&1 || true; } pct_to_hex() { # 0-100 -> 0x00-0x64 v="$1"; [ "$v" -lt 0 ] && v=0; [ "$v" -gt 100 ] && v=100 printf "0x%02x" "$v" } set_speed_pct() { p="$1" hex=$(pct_to_hex "$p") ipmi raw 0x30 0x30 0x02 0xff "$hex" >/dev/null } read_temp() { # Try CPU core avg via 'sensors' (if container/host has it), # else fall back to iDRAC SDR (Inlet Temp). if command -v sensors >/dev/null 2>&1; then t=$(sensors 2>/dev/null | awk '/Core [0-9]+:|Tdie|Package id/ {gsub("[+°C]","",$3); sum+=$3; n++} END{if(n>0) printf "%.0f", sum/n}') [ -n "$t" ] && { echo "$t"; return; } fi ipmi sdr type Temperature | awk '/Inlet.*degrees/ {print int($10); found=1; exit} END{if(!found) print ""}' } # ---- main loop ---- current="$START_SPEED" stable_below=0 echo "Starting stepper: cur=${current}% threshold=${THRESHOLD}°C interval=${INTERVAL}s" set_manual set_speed_pct "$current" trap 'set_auto; echo "Exiting, returned to AUTO."' INT TERM while :; do t=$(read_temp || true) [ -z "$t" ] && { echo "WARN: could not read temp; keeping ${current}%"; sleep "$INTERVAL"; continue; } if [ "$t" -ge "$THRESHOLD" ]; then stable_below=0 next=$(( current + STEP )) [ "$next" -gt "$MAX_SPEED" ] && next="$MAX_SPEED" if [ "$next" -ne "$current" ]; then current="$next" set_manual; set_speed_pct "$current" echo "Temp ${t}°C ≥ ${THRESHOLD}°C -> step UP to ${current}%" else echo "Temp ${t}°C ≥ ${THRESHOLD}°C -> at MAX ${current}%" fi else stable_below=$(( stable_below + 1 )) if [ "$stable_below" -ge "$DOWN_STABLE_CYCLES" ]; then next=$(( current - STEP )) [ "$next" -lt "$MIN_SPEED" ] && next="$MIN_SPEED" if [ "$next" -ne "$current" ]; then current="$next" set_manual; set_speed_pct "$current" echo "Temp ${t}°C < ${THRESHOLD}°C for ${stable_below} cycles -> step DOWN to ${current}%" fi stable_below=0 else echo "Temp ${t}°C < ${THRESHOLD}°C (stability ${stable_below}/${DOWN_STABLE_CYCLES})" fi fi sleep "$INTERVAL" done Run it on Unraid (LAN iDRAC example): docker run -d --name idrac-stepper --restart=unless-stopped \ -e IDRAC_HOST=40.40.10.3 \ -e IDRAC_USERNAME=root -e IDRAC_PASSWORD=calvin \ -e CPU_TEMPERATURE_THRESHOLD=50 \ -e CHECK_INTERVAL=60 \ -e START_SPEED=20 -e STEP=10 -e MIN_SPEED=20 -e MAX_SPEED=80 \ alpine:3.20 sh -c \ "apk add --no-cache ipmitool lm-sensors bash; \ wget -qO /usr/local/bin/stepper.sh https://pastebin.example/idrac-stepper.sh; \ chmod +x /usr/local/bin/stepper.sh; /usr/local/bin/stepper.sh"
-
No problem. No boost in performance or issues noted after update, drive were just happy :) Upgrade can be done on the fly, i did not move my date out of the drives. You could move all data out of drives if you wanted to be extra cautious, once the update is complete you can move the data back. I didn't have any issues and ran everything in place.
-
This means that the oc_filecache table has duplicate row for the same storage and that hash. I would delete it. -check for duplicates SELECT * FROM oc_filecache WHERE storage = 1 AND path_hash = '1bcb3b48154a5423ee962e961cdf6af9'; -decide which you want to keep, and delete the others. Usually I keep the row with the most recent mtime Or the one with larger size. fileid storage path path_hash size mtime 1001 1 files/testfile.txt 1bcb3b48154a5423ee962e961cdf6af9 0 1680000000 1002 1 files/testfile.txt 1bcb3b48154a5423ee962e961cdf6af9 128 1685000000 -delete duplicate I this case in this example it would be 1001 DELETE FROM oc_filecache WHERE fileid = 1001; -that should take care of the error. I would occ files:scan --all from terminal. good luck!
-
what's in there by default?
-
By any chance are you using pfsense? if so, make sure you add to pfsense (Services > DNS Resolver > General Settings > Custom Options) private-domain: "myunraid.net" did you try ssh into the server and remove the ssl yet? 1 ssh root@SERVERIP 2 use_ssl no
-
did we clear the cache?
-
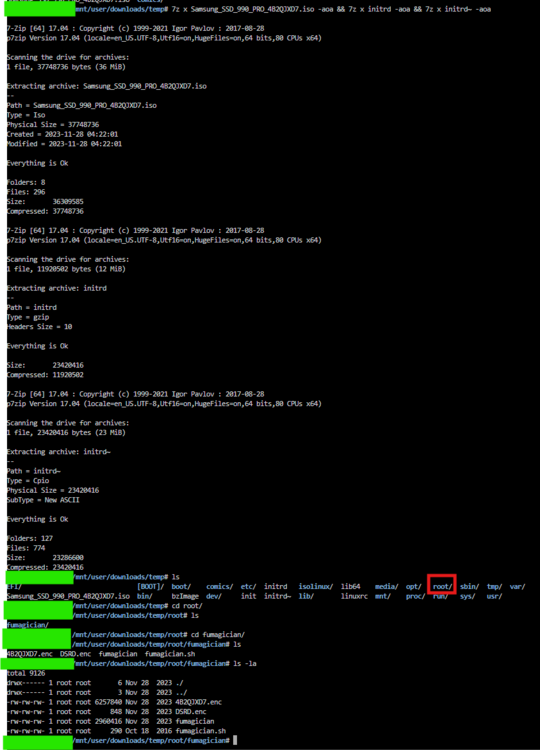
did you use 7z to properly extract the files per the guide? i just did same version for you to test no issues. follow the guide to the the T should work.
-
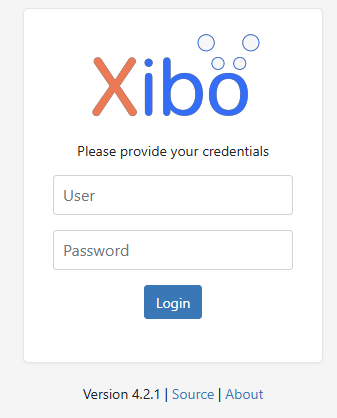
For those looking to get Xibo 4.2.1 (latest) running. -you will need to remove any current cms or xmr containers/images you currently have running. From the app store install the 'Docker Compose Manager' Create a directory for Xibo CMS mkdir -p /mnt/user/appdata/xibo4/xibo-docker-4.2.1 cd /mnt/user/appdata/xibo4/xibo-docker-4.2.1 Download Xibo CMS Docker Files wget https://github.com/xibosignage/xibo-cms/releases/download/4.2.1/xibo-docker.zip unzip xibo-docker.zip rm xibo-docker.zip Ensure all required directories exist: mkdir -p /mnt/user/appdata/xibo4/{custom,backup,web/theme/custom,library,web/userscripts,ca-certs} Configure the Environment Variables Copy the environment configuration file: cp config.env.template config.env Edit the config.env file: nano config.env Modify the following settings: ## Database Configuration (External MariaDB) MYSQL_HOST=your-mariadb-ip MYSQL_PORT=3306 MYSQL_DATABASE=xibo4 MYSQL_USER=xibo4 MYSQL_PASSWORD=your-secure-password ## XMR Configuration XMR_HOST=tcp://your-mariadb-ip:9505 ## SMTP (Email) Configuration CMS_SMTP_SERVER=smtp.gmail.com:587 [email protected] CMS_SMTP_PASSWORD=your-email-password CMS_SMTP_USE_TLS=YES CMS_SMTP_USE_STARTTLS=YES ## Web Server Configuration CMS_SERVER_NAME=xibo.yourdomain.com ## File Upload Limits (Optional) CMS_PHP_POST_MAX_SIZE=2G CMS_PHP_UPLOAD_MAX_FILESIZE=2G CMS_PHP_MAX_EXECUTION_TIME=300 Configure Docker Compose in Unraid cd /mnt/user/appdata/xibo4/xibo-docker-4.2.1 && nano docker-compose.yml Paste the following docker-compose.yml into the editor: version: "3.8" services: cms-xmr: image: ghcr.io/xibosignage/xibo-xmr:1.0 container_name: xibo-xmr networks: - proxynet ports: - "9505:9505" restart: always mem_limit: 256m env_file: config.env cms-web: image: ghcr.io/xibosignage/xibo-cms:release-4.2.1 container_name: xibo-cms networks: - proxynet depends_on: - cms-xmr volumes: - "/mnt/user/appdata/xibo4/custom:/var/www/cms/custom:Z" - "/mnt/user/appdata/xibo4/backup:/var/www/backup:Z" - "/mnt/user/appdata/xibo4/web/theme/custom:/var/www/cms/web/theme/custom:Z" - "/mnt/user/appdata/xibo4/library:/var/www/cms/library:Z" - "/mnt/user/appdata/xibo4/web/userscripts:/var/www/cms/web/userscripts:Z" - "/mnt/user/appdata/xibo4/ca-certs:/var/www/cms/ca-certs:Z" restart: always environment: - MYSQL_HOST=your-mariadb-ip - MYSQL_PORT=3306 - MYSQL_DATABASE=xibo4 - MYSQL_USER=xibo4 - MYSQL_PASSWORD=your-secure-password - XMR_HOST=tcp://your-mariadb-ip:9505 - CMS_USE_MEMCACHED=true - MEMCACHED_HOST=cms-memcached - CMS_SMTP_SERVER=smtp.gmail.com:587 - [email protected] - CMS_SMTP_PASSWORD=your-email-password - CMS_SMTP_USE_TLS=YES - CMS_SMTP_USE_STARTTLS=YES env_file: config.env ports: - "8976:80" mem_limit: 1g cms-memcached: image: memcached:alpine container_name: xibo-memcached networks: - proxynet command: memcached -m 15 restart: always mem_limit: 100M cms-quickchart: image: ianw/quickchart container_name: xibo-quickchart networks: - proxynet restart: always networks: proxynet: external: true Save and exit (CTRL+X, then Enter). Now, run: cd /mnt/user/appdata/xibo4/xibo-docker-4.2.1 docker compose up -d Once running, open your browser and visit: http://your-unraid-ip:8976 Default Login: Username: xibo_admin Password: password Change the password after logging in.
-
You're seeing ERROR 1193 (HY000): Unknown system variable for innodb_large_prefix and innodb_file_format because these settings have been deprecated and removed in MariaDB 10.3+.
-
did you click the rescan link?
-
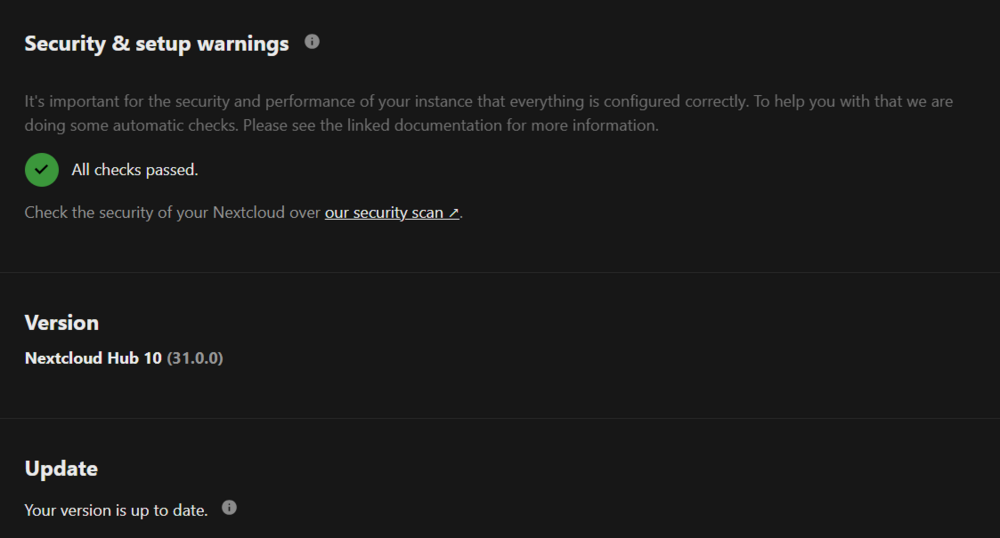
Hello, for anyone having ROW_FORMAT db errors on nextcloud, here is the fix for you. Nextcloud error Incorrect row format found in your database. ROW_FORMAT=Dynamic offers the best database performances for Nextcloud. Please update row format on the following list: oc_accounts, oc_accounts_data, oc_activity, oc_activity_mq, oc_addressbookchanges, oc_addressbooks, oc_appconfig, oc_authorized_groups, oc_authtoken, oc_bruteforce_attempts, oc_calendar_appt_bookings, oc_calendar_appt_configs, oc_calendar_invitations, oc_calendar_reminders, ..... Open a terminal on your Unraid server and run: docker exec -it mariadb mysql -u root -p Enter your MariaDB root password when prompted. Select the Nextcloud Database: USE nextcloud; (Replace nextcloud with your actual Nextcloud database name if different.) Update the ROW_FORMAT for All Affected Tables: Run the following command: SET GLOBAL innodb_large_prefix = 1; SET GLOBAL innodb_file_format = BARRACUDA; SET GLOBAL innodb_file_per_table = 1; Update All Affected Tables to ROW_FORMAT=DYNAMIC Run this command to generate the required ALTER statements: SELECT CONCAT('ALTER TABLE ', table_name, ' ROW_FORMAT=DYNAMIC;') FROM information_schema.tables WHERE table_schema = 'nextcloud'; (Replace nextcloud with your actual Nextcloud database name if different.) This will generate ALTER TABLE statements. Copy the output and execute each ALTER TABLE ... command manually. (your list will vary) ALTER TABLE oc_onlyoffice_filekey ROW_FORMAT=DYNAMIC; ALTER TABLE oc_preferences ROW_FORMAT=DYNAMIC; ALTER TABLE oc_privacy_admins ROW_FORMAT=DYNAMIC; ALTER TABLE oc_profile_config ROW_FORMAT=DYNAMIC; ALTER TABLE oc_properties ROW_FORMAT=DYNAMIC; ALTER TABLE oc_ratelimit_entries ROW_FORMAT=DYNAMIC; ALTER TABLE oc_recent_contact ROW_FORMAT=DYNAMIC; ALTER TABLE oc_richdocuments_assets ROW_FORMAT=DYNAMIC; ALTER TABLE oc_richdocuments_direct ROW_FORMAT=DYNAMIC; ALTER TABLE oc_richdocuments_template ROW_FORMAT=DYNAMIC; ALTER TABLE oc_richdocuments_wopi ROW_FORMAT=DYNAMIC; ALTER TABLE oc_rocket_file_chats ROW_FORMAT=DYNAMIC; ALTER TABLE oc_rocket_users ROW_FORMAT=DYNAMIC; ALTER TABLE oc_schedulingobjects ROW_FORMAT=DYNAMIC; ALTER TABLE oc_share ROW_FORMAT=DYNAMIC; ALTER TABLE oc_share_external ROW_FORMAT=DYNAMIC; ALTER TABLE oc_storages ROW_FORMAT=DYNAMIC; Then restart Mariadb and Nextcloud docker restart mariadb docker restart nextcloud -This is the way.
-
Restart is not required but If the UI does not reflect the upgrade a restart should do it.
-
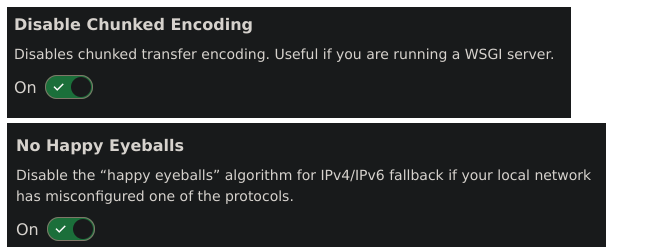
anyone getting a 'blank white page' on Docmost when trying to tunnel out with CF? enable these two Done.
-
Would Cloudflare Tunnel work to avoid opening ports. http://SERVERIPADDRESS:21115 > rustdesk.mydomain.com Then connecting RustDesk clients, use rustdesk.mydomain.com as the server address, so traffic is routed through the Cloudflare Tunnel?
-
Thank you for that clarification. "Additionally TCP ports 21118 and 21119 can be opened if you want to use the RustDesk Web Client." is there a webgui?
-
Checking out RustDesk, Thank you for the container @ich777 please advise. So, the key settings in Unraid for both HBBS_PARAMS and HBBR_PARAMS would be: --key YOUR_ACTUAL_PUBLIC_KEY_HERE You do not need the underscore ( _ ). You should replace ( _ ) with the actual contents of your id_ed#####.pub file?
-
yup, image stuck on 3.3.3 manual install works, until image maintainer updates or new image become available.
-
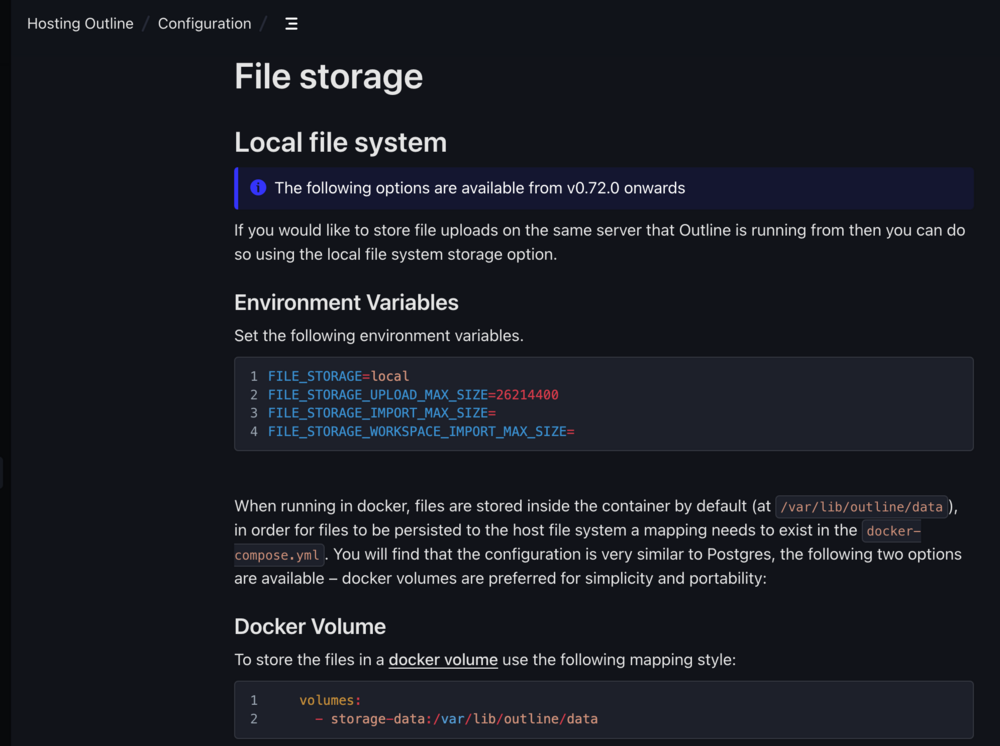
Outlinewiki--- local file storage, trying to map where uploaded files go on host. duplicate mount point error when trying to specify an upload file location. Is it not possible to separate the appdata file location from the uploaded file locations? UPDATE: edit the 'appdata' map to 'upload' share location of choice. chown 1001 /upload_share/location for it to work!


-
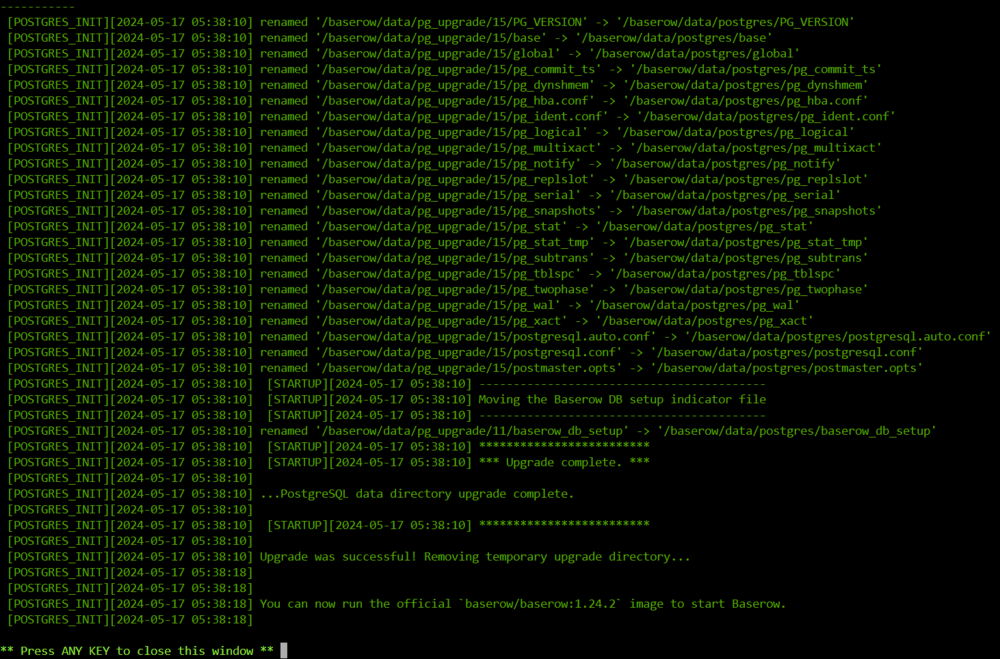
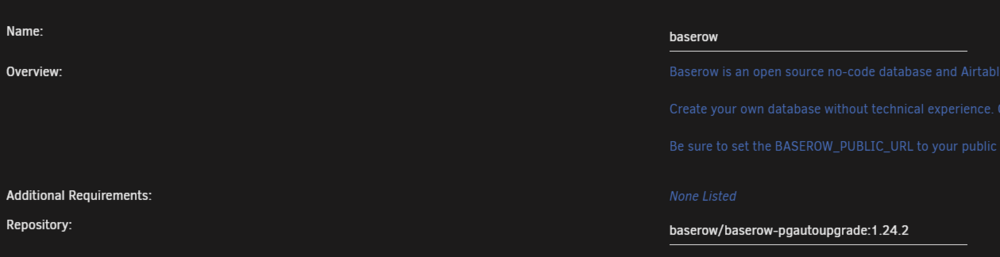
Need to Upgrade Baserow PostgreSQL to ver 15? Find your Baserow container and stop it. Edit the repository name to baserow/baserow-pgautoupgrade:1.24.2 Save it and Start the container. Check logs wait for it to Finish the upgrade process. Once Done, The container will stop automatically. Edit the repository name again to or Tag you wish to stay on. baserow/baserow Save it. Start Baserow, Welcome to Baserow with PostgreSQL 15. Done. This is the way.
-
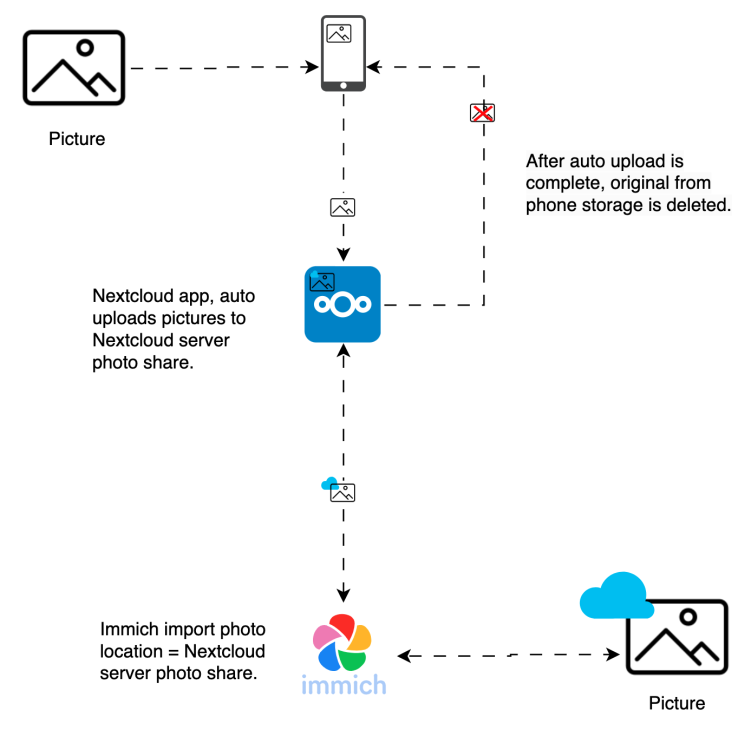
Working on ditching google photos, and use Immich as my 'front end' main Photos/Video app. I'm running into a few issues in this quest as I suspect many others are due to 'Immich' root design of being a Photo/Video backup solution. -end result/expectations: Using mobile phone (Pixel 8 Pro) > Capture Photo/Video > Immich app, backups Photo/Video > Auto deletes Photo/Video from source after backup is completed. -This is the way - Diagram Using mobile phone (Pixel 8 Pro) > Capture Photo/Video > Nextcloud app, Auto uploads to Nextcloud server > After auto upload is complete, original Photo/Video from phone storage is deleted by Nextcloud > Immich import photo/video location = Nextcloud server photo share. Is anyone else using this solution any suggestions are welcome.
-
if you follow the guide, it will work. looks like the files did not extract properly for you. I just did it using the firmware file for the 990 and it worked, there is a root directory. so re-try the extract command from the guide.
-
In the terminal, enter the following command to navigate to the Docker templates directory: cd /boot/config/plugins/dockerMan/templates-user Use the nano text editor to create a new XML file for the Docker container configuration: nano my-Dell-iDRAC-Fan-Controller.xml Now, copy and paste the XML configuration Paste this into the nano editor. To paste in the terminal, you can usually right-click and select "Paste" or use Ctrl + Shift + V. <?xml version="1.0"?> <Container version="2"> <Name>Dell-iDRAC-Fan-Controller</Name> <Repository>tigerblue77/dell_idrac_fan_controller</Repository> <Registry>https://hub.docker.com/r/tigerblue77/dell_idrac_fan_controller/</Registry> <Network>bridge</Network> <MyIP/> <Shell>sh</Shell> <Privileged>false</Privileged> <Support/> <Project/> <Overview>https://github.com/tigerblue77/Dell_iDRAC_fan_controller_Docker
 
 https://hub.docker.com/r/tigerblue77/dell_idrac_fan_controller/
 
 All parameters are optional as they have default values (including default iDRAC username and password).
 
 IDRAC_HOST parameter can be set to "local" or to your distant iDRAC's IP address. Default value is "local".
 IDRAC_USERNAME parameter is only necessary if you're adressing a distant iDRAC. Default value is "root".
 IDRAC_PASSWORD parameter is only necessary if you're adressing a distant iDRAC. Default value is "calvin".
 FAN_SPEED parameter can be set as a decimal (from 0 to 100%) or hexadecimal value (from 0x00 to 0x64) you want to set the fans to. Default value is 5(%).
 CPU_TEMPERATURE_THRESHOLD parameter is the T°junction (junction temperature) threshold beyond which the Dell fan profile defined in your BIOS will become active again (to protect the server hardware against overheat). Default value is 50(°C).
 CHECK_INTERVAL parameter is the time (in seconds) between each temperature check and potential profile change. Default value is 60(s).
 DISABLE_THIRD_PARTY_PCIE_CARD_DELL_DEFAULT_COOLING_RESPONSE parameter is a boolean that allows to disable third-party PCIe card Dell default cooling response. Default value is false.
 ipmi tool installation help: https://forums.unraid.net/topic/129200-plug-in-nerdtools/ for installation and check this link for missing ipmi
 ipmi tool can't find /dev/ipmi0?: https://serverfault.com/questions/480371/ipmitool-cant-find-dev-ipmi0-or-dev-ipmidev-0</Overview> <Category>Other:</Category> <WebUI/> <TemplateURL>https://raw.githubusercontent.com/selfhosters/unRAID-CA-templates/master/templates/idrac-fan-controller.xml</TemplateURL> <Icon>https://raw.githubusercontent.com/selfhosters/unRAID-CA-templates/master/templates/img/idrac6.png</Icon> <ExtraParams/> <PostArgs/> <CPUset/> <DateInstalled>1707442417</DateInstalled> <DonateText/> <DonateLink/> <Requires/> <Config Name="IDRAC_HOST" Target="IDRAC_HOST" Default="local" Mode="" Description="IDRAC_HOST parameter can be set to local or to your distant iDRAC's IP address. Default value is local" Type="Variable" Display="always" Required="false" Mask="false">IDRAC IPADDRESS</Config> <Config Name="FAN_SPEED" Target="FAN_SPEED" Default="5" Mode="" Description="FAN_SPEED parameter can be set as a decimal (from 0 to 100%) or hexadecimaladecimal value (from 0x00 to 0x64) you want to set the fans to. Default value is 5(%)." Type="Variable" Display="always" Required="false" Mask="false">30</Config> <Config Name="CPU_TEMPERATURE_THRESHOLD" Target="CPU_TEMPERATURE_THRESHOLD" Default="50" Mode="" Description="CPU_TEMPERATURE_THRESHOLD parameter is the T°junction (junction temperature) threshold beyond which the Dell fan profile defined in your BIOS will become active again (to protect the server hardware against overheat). Default value is 50(°C)." Type="Variable" Display="always" Required="false" Mask="false">50</Config> <Config Name="CHECK_INTERVAL" Target="CHECK_INTERVAL" Default="60" Mode="" Description="CHECK_INTERVAL parameter is the time (in seconds) between each temperature check and potential profile change. Default value is 60(s). " Type="Variable" Display="always" Required="false" Mask="false">60</Config> <Config Name="IDRAC_USERNAME" Target="IDRAC_USERNAME" Default="root" Mode="" Description="" Type="Variable" Display="always" Required="false" Mask="false">IDRAC USERNAME</Config> <Config Name="IDRAC_PASSWORD" Target="IDRAC_PASSWORD" Default="calvin" Mode="" Description="" Type="Variable" Display="always" Required="false" Mask="false">IDRAC PASSWORD</Config> <Config Name="DISABLE_THIRD_PARTY_PCIE_CARD_DELL_DEFAULT_COOLING_RESPONSE" Target="DISABLE_THIRD_PARTY_PCIE_CARD_DELL_DEFAULT_COOLING_RESPONSE" Default="false" Mode="" Description="parameter is a boolean that allows to disable third-party PCIe card Dell default cooling response. Default value is false." Type="Variable" Display="always" Required="false" Mask="false">false</Config> </Container> Once you've finished pasting the XML configuration into nano, save the changes by pressing Ctrl + O (to write out the changes), then press Enter (to confirm the file name), and finally, Ctrl + X to exit the editor. Go back to the Unraid web interface. Navigate to the Docker tab by selecting "Docker" from the top menu. Scroll down to the bottom of the page, and you'll see an "Add Container" button. Click it. In the "Template" dropdown menu, you should now see your newly created template 'Dell-iDRAC-Fan-Controller'. Select it. Review the settings and make any adjustments if needed. Click on "Apply" to create the Docker container.
-
the firmware file you downloaded/extracted, does not have a 'root' directory in them. -what drive are you trying to upgrade?
-
cd /mnt/user/downloads/temp/root/fumagician/ && chmod +x fumagician && ./fumagician "chmod +x fumagician" is changing the permissions of the file named "fumagician" to make it executable. The command "chmod +x" means "change mode to executable." Once the permissions are changed, the "./fumagician" command is run, which executes the "fumagician" program. you lost me 'how to actually ensure the drive boots from the extracted ISO files.' you don't boot the iso into the drive, these steps basically tell the OS, run this app, then the app does the rest.
-
yes, a reboot will refresh the version on the drives. You can also run the SMART info and you should see the latest firmware.








