


Tolete
Members
-
Joined
-
Last visited
Everything posted by Tolete
-
i just added the template manually. cd /boot/config/plugins/dockerMan/templates-user nano my-cal.com.xml -Paste XML <?xml version="1.0"?> <Container version="2"> <Name>cal.com</Name> <Repository>calcom/cal.com:latest</Repository> <Registry>https://hub.docker.com/r/calcom/cal.com</Registry> <Network>bridge</Network> <MyIP/> <Shell>sh</Shell> <Privileged>false</Privileged> <Support/> <Project/> <Overview>The open source Calendly alternative. You are in charge of your own data, workflow and appearance.
 </Overview> <Category>Productivity: Tools:</Category> <WebUI>http://[IP]:[PORT:3000]</WebUI> <TemplateURL/> <Icon>https://i.imgur.com/mwmNzNQ.png</Icon> <ExtraParams/> <PostArgs/> <CPUset/> <DateInstalled>1681261202</DateInstalled> <DonateText/> <DonateLink/> <Requires/> <Config Name="WebUI" Target="3000" Default="" Mode="tcp" Description="" Type="Port" Display="always" Required="false" Mask="false">3000</Config> <Config Name="Config" Target="/cal" Default="" Mode="rw" Description="" Type="Path" Display="always" Required="false" Mask="false">/mnt/user/appdata/cal.com/</Config> <Config Name="NEXT_PUBLIC_WEBAPP_URL" Target="NEXT_PUBLIC_WEBAPP_URL" Default="" Mode="" Description="http://serverIP:PORT" Type="Variable" Display="always" Required="true" Mask="false"/> <Config Name="CALCOM_TELEMETRY_DISABLED" Target="CALCOM_TELEMETRY_DISABLED" Default="" Mode="" Description="" Type="Variable" Display="always" Required="true" Mask="false">1</Config> <Config Name="NEXTAUTH_SECRET" Target="NEXTAUTH_SECRET" Default="" Mode="" Description="" Type="Variable" Display="always" Required="true" Mask="false"/> <Config Name="CALENDSO_ENCRYPTION_KEY" Target="CALENDSO_ENCRYPTION_KEY" Default="" Mode="" Description="" Type="Variable" Display="always" Required="true" Mask="false"/> <Config Name="DATABASE_URL" Target="DATABASE_URL" Default="" Mode="" Description="postgresql://${POSTGRES_USER}:${POSTGRES_PASSWORD}@${DATABASE_HOST}/${POSTGRES_DB}" Type="Variable" Display="always" Required="true" Mask="false"/> <Config Name="NEXTAUTH_URL" Target="NEXTAUTH_URL" Default="" Mode="" Description="http://serverIP:PORT/api/auth" Type="Variable" Display="always" Required="true" Mask="false"/> <Config Name="EMAIL_FROM" Target="EMAIL_FROM" Default="" Mode="" Description="" Type="Variable" Display="always" Required="false" Mask="false"/> <Config Name="EMAIL_SERVER_HOST" Target="EMAIL_SERVER_HOST" Default="" Mode="" Description="" Type="Variable" Display="always" Required="false" Mask="false"/> <Config Name="EMAIL_SERVER_PORT" Target="EMAIL_SERVER_PORT" Default="" Mode="" Description="" Type="Variable" Display="always" Required="false" Mask="false"/> <Config Name="EMAIL_SERVER_USER" Target="EMAIL_SERVER_USER" Default="" Mode="" Description="" Type="Variable" Display="always" Required="false" Mask="false"/> <Config Name="EMAIL_SERVER_PASSWORD" Target="EMAIL_SERVER_PASSWORD" Default="" Mode="" Description="" Type="Variable" Display="always" Required="false" Mask="true"/> </Container> Save - Ctrl + O and Ctrl + X -Than, just install from 'templates' -Go to Docker > Add Container > and search for cal.com on the list.
-
did app get removed? not seen it in the app store
-
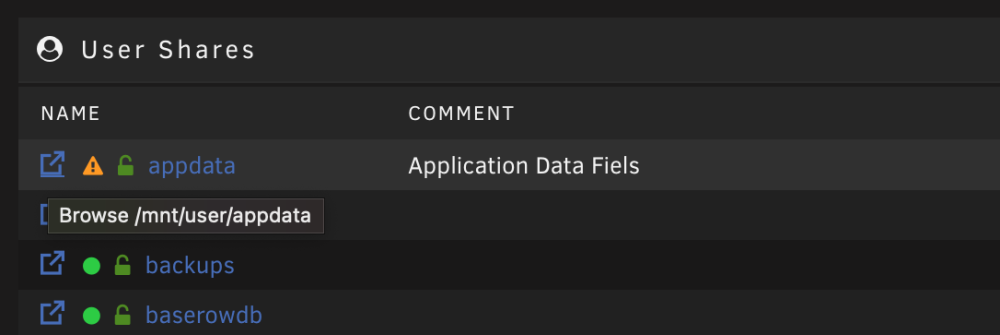
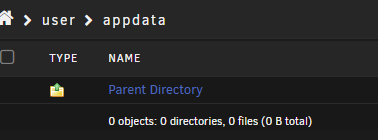
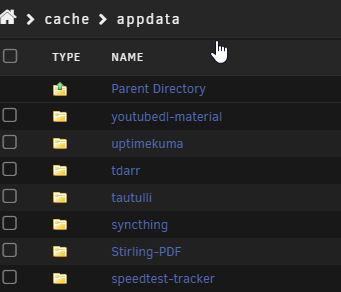
not sure how, but i might have solve my issue of not been able to 'browse' my appdata share from the gui -now when i click on the browse icon next to appdata share i can see the folder is not empty.
-
that command just list all my shares under user my first screen shot was using the gui to browse to the appdata...which takes me to empty folder. Shares> browse share icon

-
Sure, here we go diagnostics-20240127-2126.zip
-
Share > appdata Pool Device > Cache 'mnt/cache' all apps running no issues other than the appdata share is empty. So some how i manage to empty out my appdata share. zfs gods send help
-
cant get docs to load on NC + OnlyOfficeDocumentServer + Cloudflare trying to edit docs result in docserver.mydomain.com refused to connect /healthcheck = true anyone currently running NC/ODS send help!

-
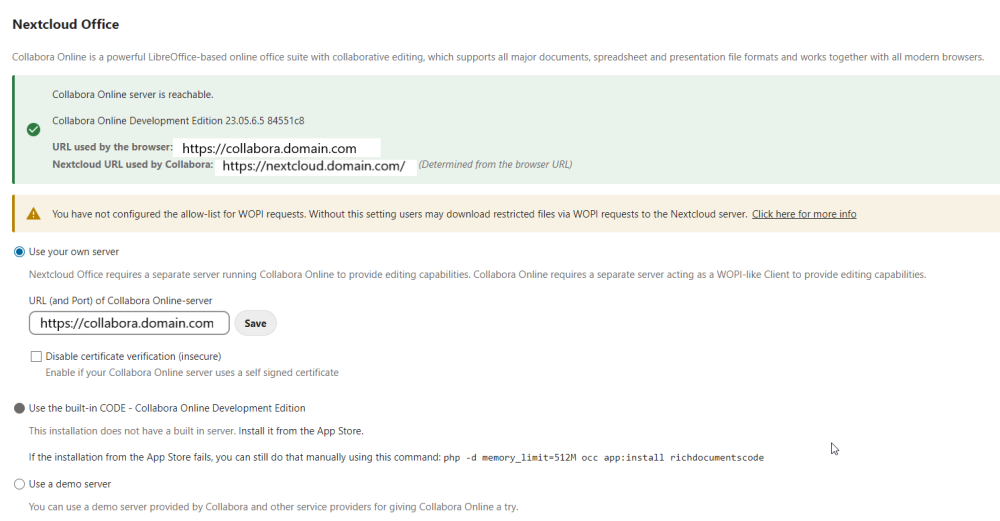
fresh install of Collabora-CODE with no aliasgroup ev added.
-
none other than default -i previously had had/added the 'aliasgroup' ev on there but this is a fresh install of NC and Collabora. All its got is the defaults. -not sure if the 'aliasgroup' ev is required. but currently not running it.
-
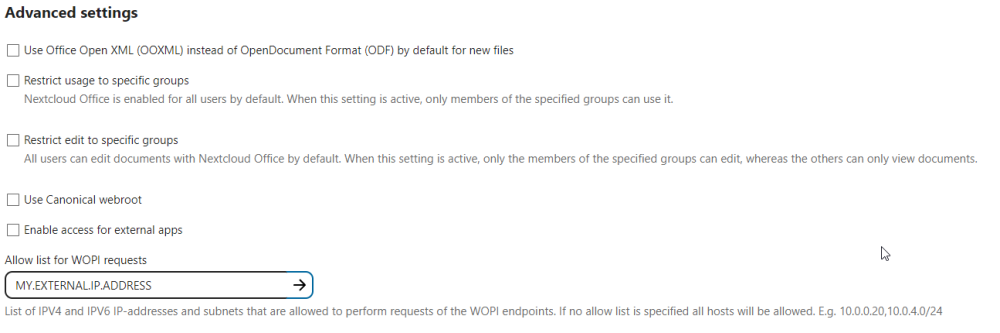
I have left it blank and no matter what i get the same logs wsd-00001-00031 2024-01-07 12:03:47.114051 -0500 [ websrv_poll ] WRN convert-to: Requesting address is denied: MY.EXTERNAL.IP| wsd/COOLWSD.cpp:4108
-
Yes, I have added 'https://collabora.mydomain.com'. Results are the same Collabora log wsd-00001-00031 2024-01-07 12:03:47.114051 -0500 [ websrv_poll ] WRN convert-to: Requesting address is denied: MY.EXTERNAL.IP| wsd/COOLWSD.cpp:4108
-
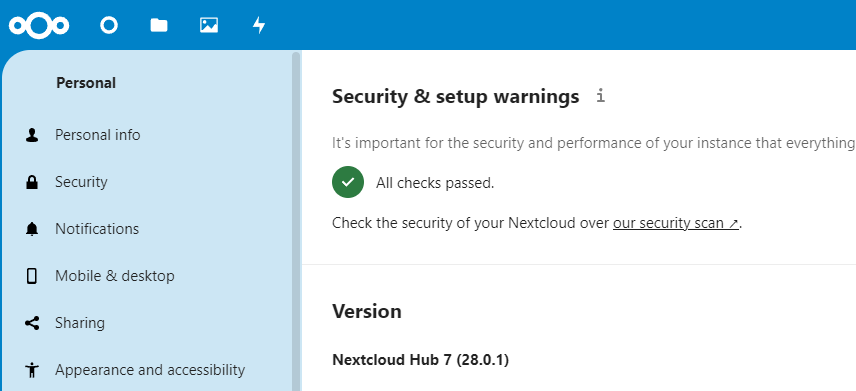
Been fighting with Nextcloud and Collabora for a while, wondering if anyone is got the two working? -Running Nextcloud latest 28.0.1 with NPM -Installed Nextcloud Office 8.3.0 -Collabora-CODE -Collabora-Code logs -Back to NC advance settings to add external ip Collabora-CODE logs As a result NC documents fail to load. If any one got the two running, send help


-
I have both variable set on the container. OPENPROJECT_HTTPS=true SERVER_PROTOCOL_FORCE_HTTPS=true still no joy, shows the 'HTTPS mode setup mismatch' error after logging in.
-
trying to resolve the 'HTTPS mode setup mismatch' error adding the environment variable does not does not solve the mismatch. OPENPROJECT_HTTPS=true Anyone get this to work with cloudflare tunnel?
-
You're welcome.
-
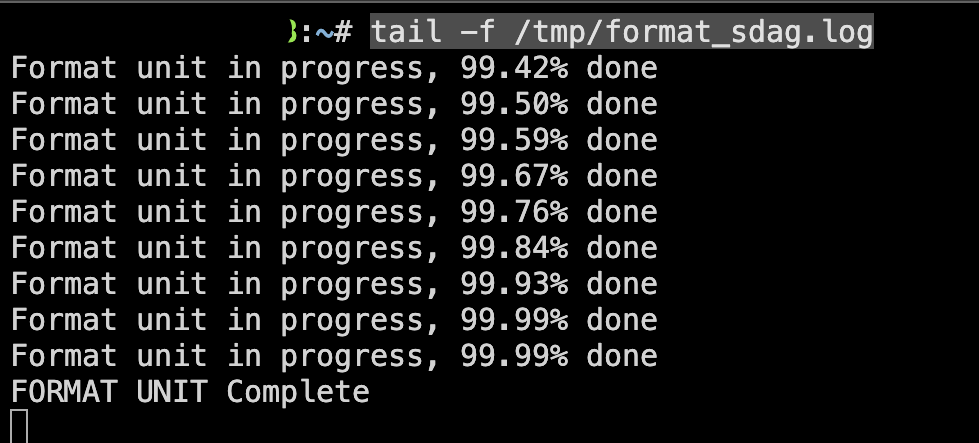
Hello, -All you have to do is to run the following command -MAKE SURE 'sdk sdm sdn' are the 3 16TB drives you are missing. for disk in sdk sdm sdn; do nohup sg_format -v -F /dev/$disk > /tmp/format_$disk.log 2>&1 & done -This command will start the formatting process for each disk listed (sdk sdm sdn) in the background, with the output and any errors being logged to separate files in the /tmp directory for each disk. -Remember, this is a disk formatting operation, so it will ERASE ALL DATA on the specified disks. -BE PATIENT the process for 16TB will take a while 24hr+- -You can check the progress by ruining following command for each drive. tail -f /tmp/format_sdk.log tail -f /tmp/format_sdm.log tail -f /tmp/format_sdn.log -The output should be something like this after the command has been running for some time (not right away) you will start seen the progress in the logs. BE PATIENT let it do is thing, come back and check the logs you will start seen it in the logs. -Cntrl + C to quit and check a different drive. -Once the process is complete drives will appear and be available for the array or under Unassigned devices,
-
Hello, you can got to Tools > System Devices and note your drive model and mapped location. Then just download the latest firmware. utility will tell you if drive needs upgrade or not.

-
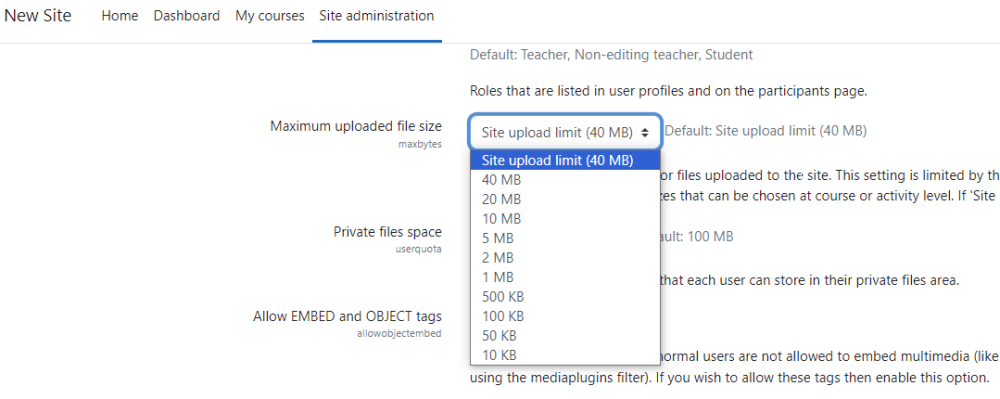
I have added the variable according to the PHP Configuration to @A75G Template, but the Maximum uploaded file size remains the same. PHP_UPLOAD_MAX_FILESIZE Has anyone been able to change/increase the 'Maximum uploaded file size' on Moodle?
-
Currently running Snipe-IT on Unraid, and it's been working well. Looking to set up SAML. following the documentation to setup SAML I get a **Success:** Settings updated successfully. But when trying to sign in using SAML, I get an error. **Error** There was a problem while trying to log you in, please try again. Wondering if I'm missing environment variables specific for SAML to work properly. ## System Information **Snipe-IT version:** v6.2.1 build 11625 (gc45ede2d1) **Software License:** [AGPL3](https://www.gnu.org/licenses/agpl-3.0.en.html) **PHP Version:** 8.1.22 **Laravel Version:** 8.83.22 **Timezone:** America/Los_Angeles **Database Driver:** mysql **Mail From Address:** Snipe-IT`<[email protected]>` **Mail Reply-To Address:** Snipe-IT `<[email protected]>` **Table Storage:** cookieStorage
-
Glad it was helpful.
-
this be great, anyone got a guide on installation yet?
-
your welcome.
-
after update, can't get to web-gui?

-
Thank you.
-
Anyone 'cloudflared-tunnel' randomly stop/crashed (not sure which). I have noticed it couple times now, container has stopped/crashed on its own. start the container starts without any problems after the crash/stop. anyone running it with a restart policy '--restart unless-stopped' ?


