





de-sascha
Members
-
Joined
-
Last visited
Everything posted by de-sascha
-
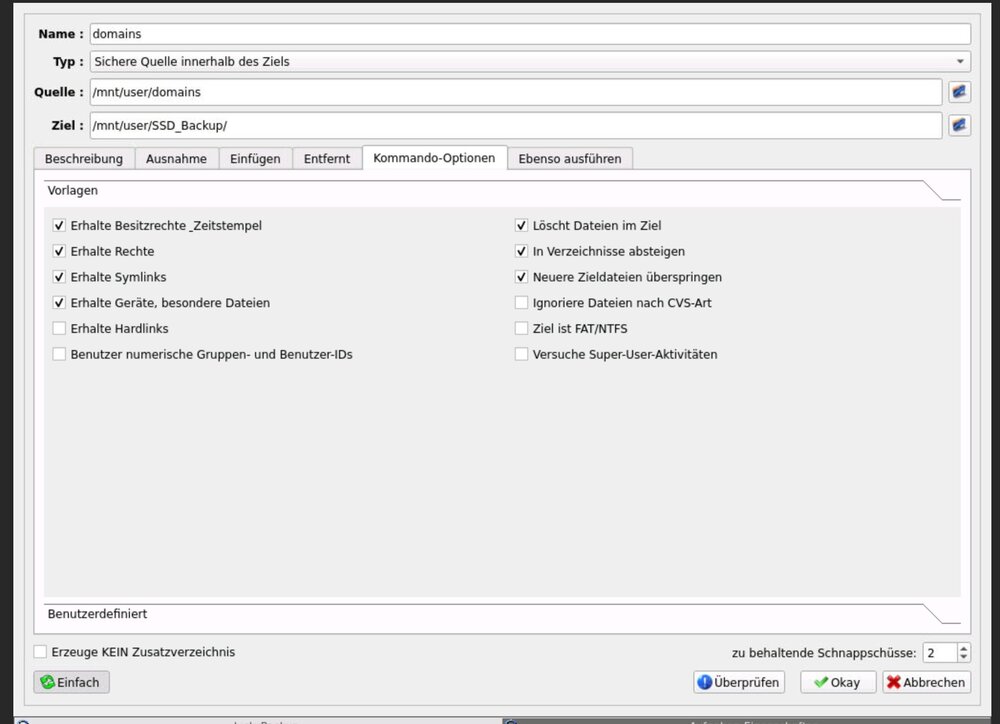
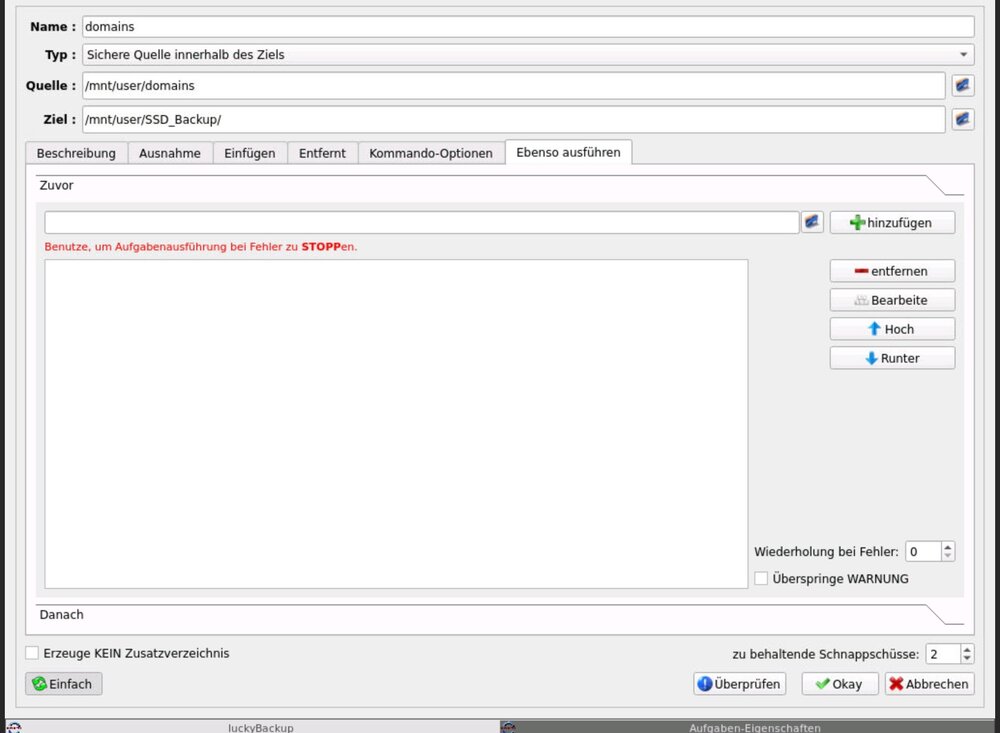
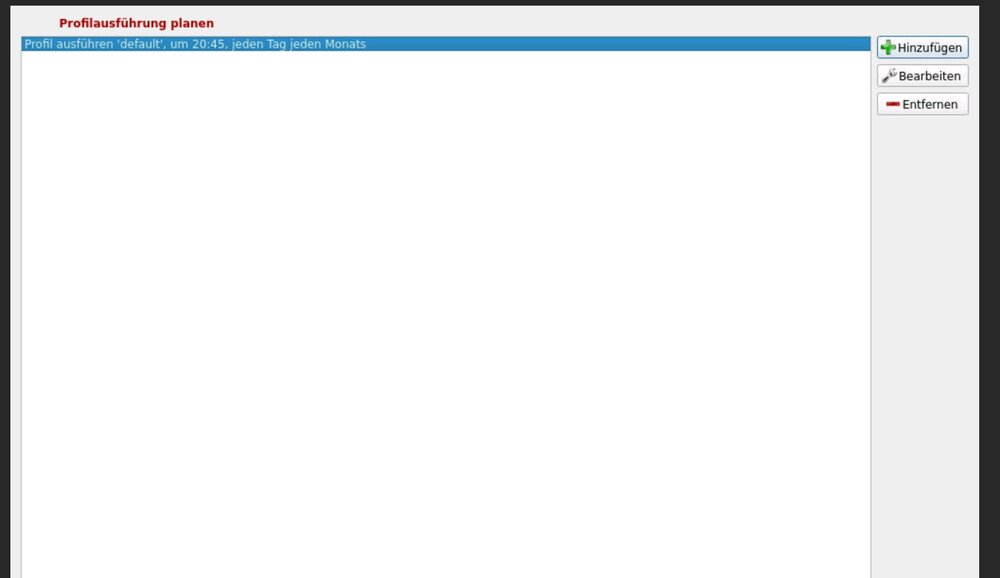
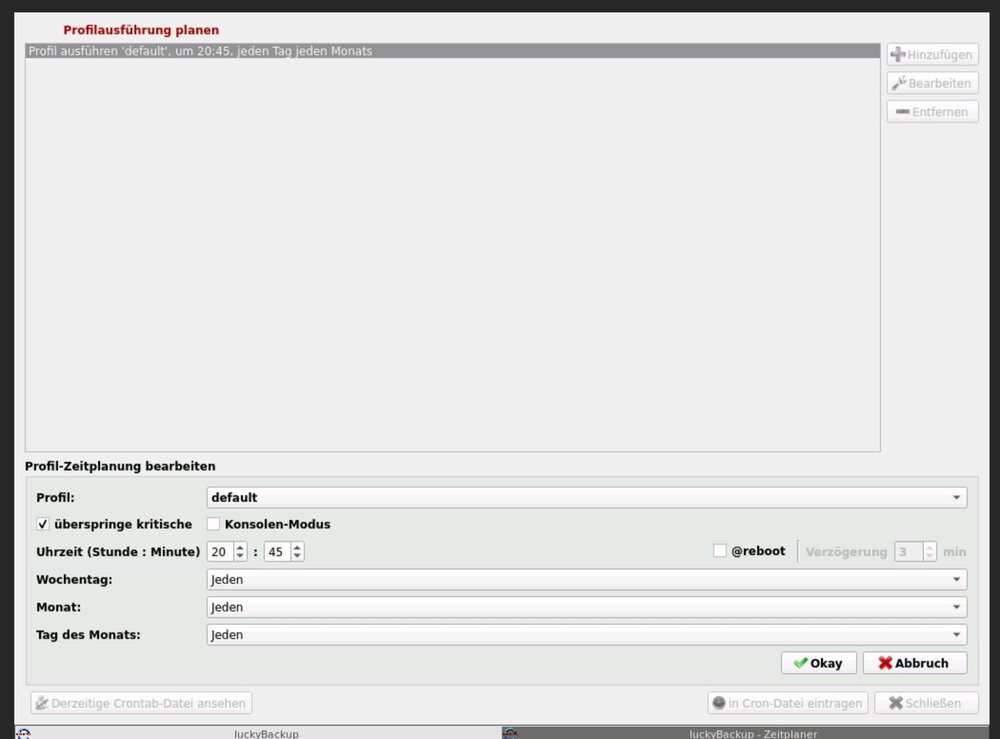
Hi Danke. Gerne doch. Hier im Beispiel der Screenshoots versuche ich den 'Domains' Ordner welcher auf einer SSD Liegt in den Ordner 'SSD_Backup' welcher auf dem Array liegt zu sichern. Starte ich den Job manuell von der GUI geht alles und die Daten werden kopiert. Danke euch.
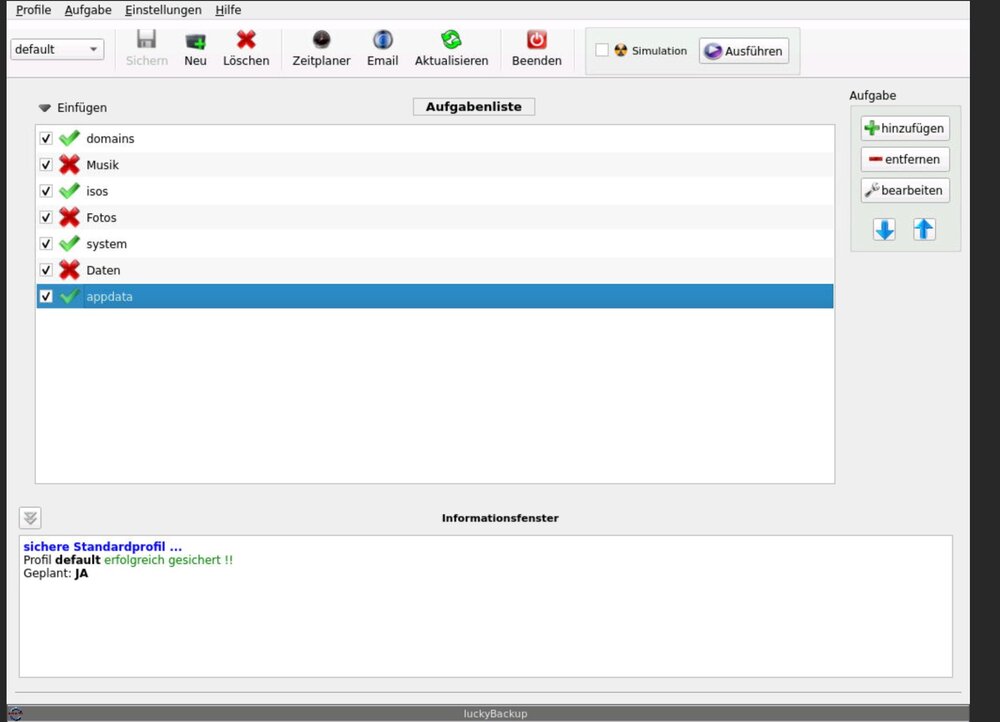
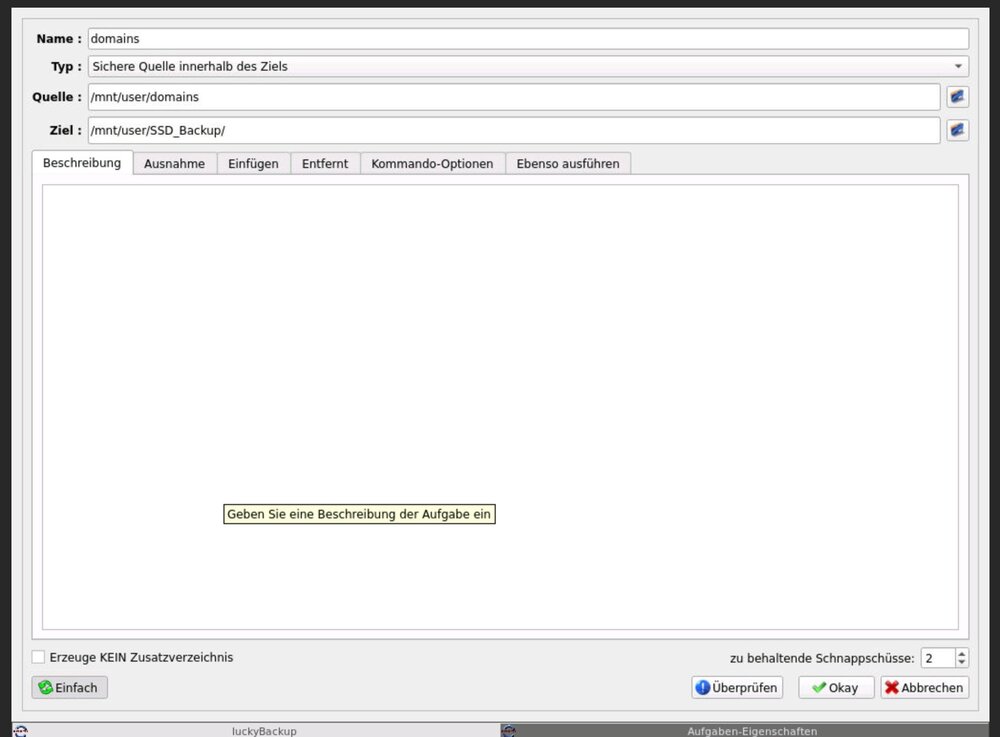
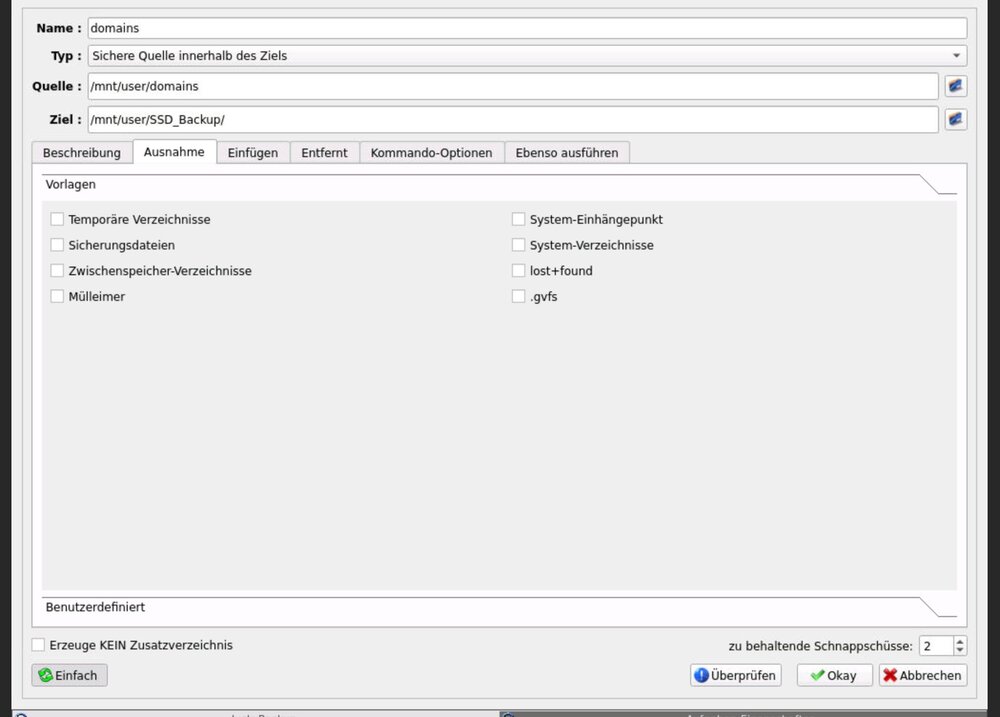
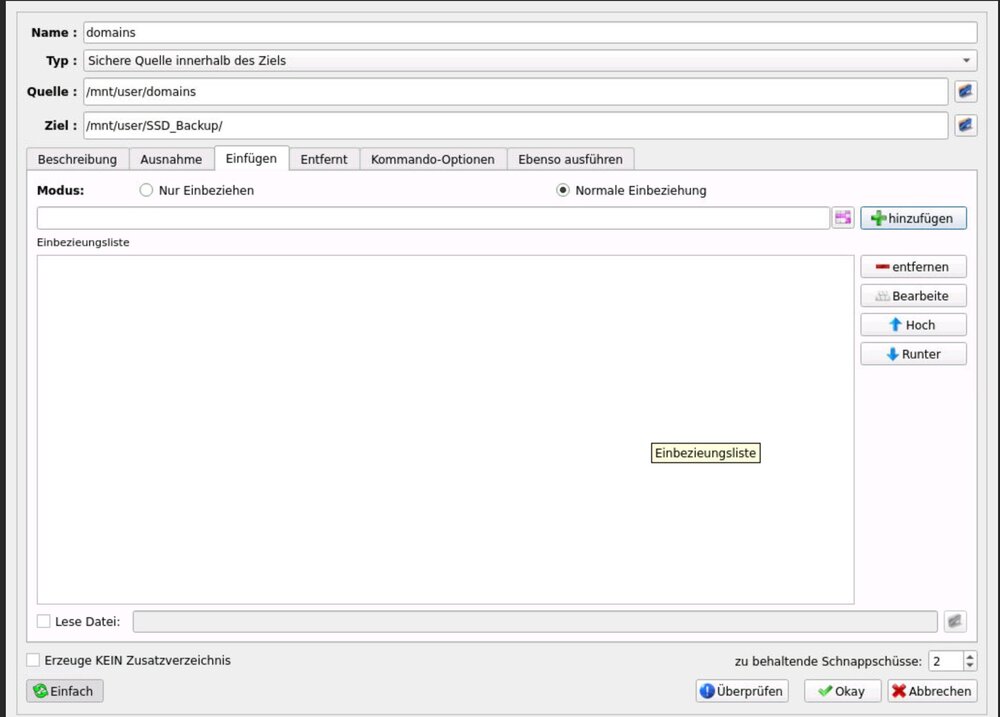
-
Hallo zusammen, bin neu im Thema LuckyBackup. Aber irgendwie startet das backup nicht vom Cron Job aus. Manuell funktioniert das Backup. Zum testen habe ich den kompletten Inhalt des SSD_Backup Odners gelöscht, so das das Backup eigentlich von neuen geschrieben wird. Was wird aber nicht ausgeführt via cron. Habt ihr eine Idee? Danke Uhrzeit stimmt auch im docker container. root@13c92e0c308c:/# date Fri 05 Jul 2024 03:47:04 PM CEST root@13c92e0c308c:/# #Initial Cron # ~~~~~~~~~~~~~~~~~~~~~~~~~~~~~~~~~~~~~~ luckybackup entries ~~~~~~~~~~~~~~~~~~~~~~~~~~~~~~~~~~~~~~ 45 20 * * * env DISPLAY=:0 /usr/bin/luckybackup --silent --skip-critical /luckybackup/.luckyBackup/profiles/default.profile > /luckybackup/.luckyBackup/logs/default-LastCronLog.log 2>&1 # ~~~~~~~~~~~~~~~~~~~~~~~~~~~~~~~~~~~ end of luckybackup entries ~~~~~~~~~~~~~~~~~~~~~~~~~~~~~~~~~~~ QStandardPaths: XDG_RUNTIME_DIR not set, defaulting to '/tmp/runtime-luckybackup' ============================================================================================ Loading profile /luckybackup/.luckyBackup/profiles/default.profile ~~~~~~~~~~~~~~~~~~~~~~~~~~~~~~~~~~~~~~~~~~~~~~~~~~~~~~~~~~~~~~~~~~~~~~~~~~~~~~~~~~~~~~~~~~~~ * task name : domains * source : /mnt/user/domains * destination : /mnt/user/SSD_Backup/ * This task is included * task name : Musik * source : /mnt/user/Musik * destination : /mnt/user/SSD_Backup/ * This task is NOT included * task name : isos * source : /mnt/user/isos * destination : /mnt/user/SSD_Backup/ * This task is included * task name : Fotos * source : /mnt/user/Fotos * destination : /mnt/user/SSD_Backup/ * This task is NOT included * task name : system * source : /mnt/user/system * destination : /mnt/user/SSD_Backup/ * This task is NOT included * task name : Daten * source : /mnt/user/Dateien * destination : /mnt/user/SSD_Backup/ * This task is NOT included * task name : appdata * source : /mnt/user/appdata * destination : /mnt/user/SSD_Backup/ * This task is NOT included ** Profile loaded successfully ... ** ============================================================================================ Task list check ~~~~~~~~~~~~~~~~~~~~~~~~~~~~~~~~~~~~~~~~~~~~~~~~~~~~~~~~~~~~~~~~~~~~~~~~~~~~~~~~~~~~~~~~~~~~ * Checking if the task list is empty... done * Checking if 2 connected tasks have been selected for execution... done * Checking if no task is included... done * Checking if 2 or more identical destination directories are declared & 'Backup dir contents' is checked... done ** Task list looks ok... ** ============================================================================================ Directories check ~~~~~~~~~~~~~~~~~~~~~~~~~~~~~~~~~~~~~~~~~~~~~~~~~~~~~~~~~~~~~~~~~~~~~~~~~~~~~~~~~~~~~~~~~~~~ ~~~~~~~~~~~~~~~~~~~~~~~~~~~~~~~~~~~~~~~~~~~~~~~~~~~~~~~~~~~~~~~~~~~~~~~~~~~~~~~~~~~~~~~~~~~~~ Source & destination data check results ~~~~~~~~~~~~~~~~~~~~~~~~~~~~~~~~~~~~~~~~~~~~~~~~~~~~~~~~~~~~~~~~~~~~~~~~~~~~~~~~~~~~~~~~~~~~~ Errors have been found Please have a good look at the following messages WARNING means that the task is NOT going to be performed CRITICAL means that the task is going to be performed normally If a directory is empty or does not exist, there is a possibility that you 've forgotten to mount a partition/drive or have just mistyped a path !! BEWARE if a destination is empty or non-existent and it is not the first time you perform the specific task(s) Also have in mind that checks are not performed for remote data ~~~~~~~~~~~~~~~~~~~~~~~~~~~~~~~~~~~~~~~~~~~~~~~~~~~~~~~~~~~~~~~~~~~~~~~~~~~~~~~~~~~~~~~~~~~~~ [CRITICAL] -> domains Last execution time : Thursday, 4 July 2024 20:38:28 CEST (no errors) Source directory : /mnt/user/domains Destination directory : /mnt/user/SSD_Backup/ is empty or does not exist. This task will NOT be skipped (unless '--skip-critical' is given as argument) The Destination Directory will be created if it doesn't exist and filled with new backup data. _____________________________________________________________________________________________ [CRITICAL] -> isos Last execution time : Thursday, 4 July 2024 20:38:28 CEST (no errors) Source directory : /mnt/user/isos Destination directory : /mnt/user/SSD_Backup/ is empty or does not exist. This task will NOT be skipped (unless '--skip-critical' is given as argument) The Destination Directory will be created if it doesn't exist and filled with new backup data. _____________________________________________________________________________________________ ** ..nothing to do !! **
-
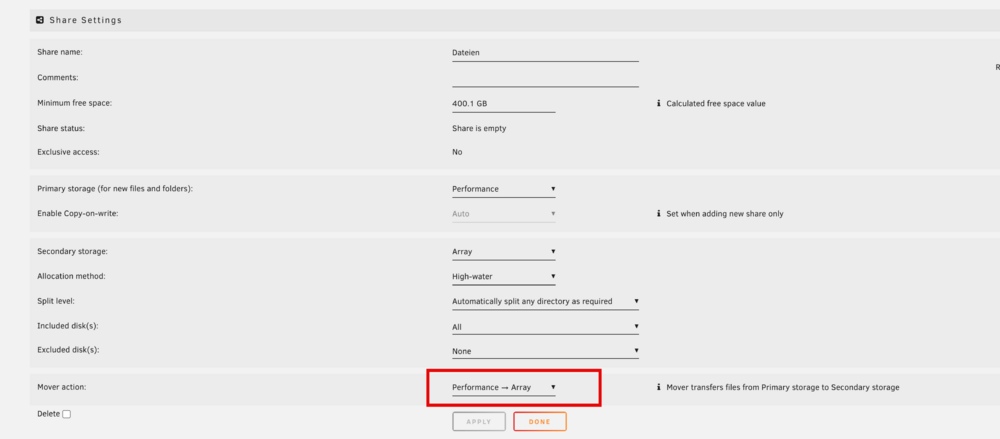
Danke dir. Klingt interessant das Tool. Werde ich mir anschauen. Ist die option mit dem Mover action nicht scho gegeben? Hier habe ich gesehen, dass ich Performance (was meine 2x Raid 0 SSDs sind) auf das Array "Moven". Wie gesagt noch nicht näher beschäftigt.
-
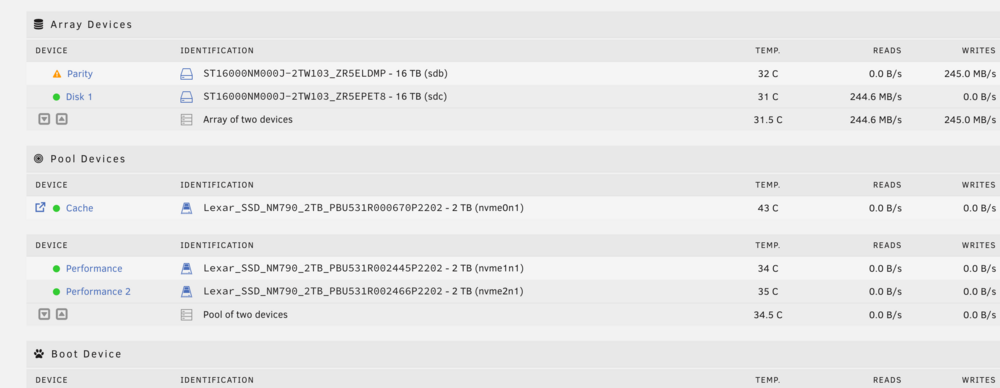
Danke dir. Ich habe es mal so eingerichtet. Wenn ich dich richtig verstanden habe, dann muss ich aber die Daten der Single-NVME auf das Array der 16TB Platte Sichern um die zu sichern. Richtig?
-
Hi habe leider kein discord. Ich komme aus Deutschland, Gruß in die Schweiz. Ich habe 3x gleiche 2TB SSDs und 2x gleiche seagate 16TB HDDs. VMs gerne aber die werden wohl nicht immer laufen. Es soll Nextcloud drauf laufen und eine paar andere Docker Container. Datensicherung, ja. Es soll so aufgebaut werden, falls moeglich, dass eine SSD ausfallen kann und eine HDD. Komme noch aus Raid Zeiten und verstehe noch nicht so ganz das Unraid Setup.
-
Hi. Ich habe Zeit gefunden und mich weiter mit meinem Unraid Projekt beschäftigt und Platten gekauft. Ich habe 2x HDDs 16TB und 3x NVME SSDs Nun weiss ich nicht so richtig wie ich das setup bauen kann. Ich hatte vor aus den mechanischen Platten Daten und Backups zu halten, die nicht viel benötigt werden und die Platten sollen auch in den Standby gehen um Strom zu sparen. Auf den SSDs sollen die Dockers oder VMs liegen und Daten, die oft benötigt werden. Wie muss ich denn das Setup aufsetzen? Danke für eure Hilfe. Sascha
-
Hi Anyone successfully tested a NVME SATA extension Card like ASM1166 or other regarding APSM. In my Case I have a ASM1166 which did a great Job on a Fujitsu Q957 but on this Mainboard I fall back from C10 to C2 if I in stall this card. This is a great Mainboard but very limited regarding of SATA Ports.
-
Okay Perfekt, dann muss ich noch eine kleine SSD verbauen. Danke dir. Das erklärt das Verhalten.
-
Ich habe eine Verständnisfrage. Ich habe zum ersten mal einen Docker App (Timemachine) installiert. Dabei ist mir im Nachgang aufgefallen, dass the Parity und Disk1 (Auf ihr liegen die Shares) nicht mehr in den spin down gehen. Auch wenn ich das Array manuel schlafen lege, ist Parity und Disk 1 nach kurzer Zeit wieder wach. Ist generell etwas zu beachten? Danke
-
Genau so ist es. Der Anlaufstrom hat bei 3x zeitgleich startende 3,5" HDDs schon Peak bei mir 75Watt, gemessen Fritz Dect 200. Bei 4x HDDs war das wohl overkill beim 65 Watt Netzteil. Wenn der Rechner anläuft und die 4 Platte nachtäglich angeschlossen wird, oder ein normaler Reboot, kein Problem. Nur der Kaltstart. Das Mainboard hat einen 12V und einen 5V Anschluss. Mit dem Umgebauten Kabel ging es. Danach einfach mit Y-Kabel weiter machen. Ich Poste mal meine Config: chenyang CY M.2 NVME NGFF M-Key SSD Stecker auf Buchse Verlängerungskabel 40cm mit SFF-8654 Steckeradapter für Mainboard SSD ASM 1166 M2 NVME SATA Adapter Firmware hab ich mir die neuste besorgt
-
@MPC561 Genau mich wundert es auch im BIOS geht nur C7 bzw. C7s (Was auch immer C7s ist) So hatte ich es auch eingestellt und Powertop bis bis C7. Ich habe dann auf automatisch gestellt und dabei kam C8 raus. Ich habe den I5 6500T verbaut. Irgendwo hatte ich eine Beitrag gelesen, das mit einen BIOS irgendwann der M2 Slot abgeschaltet wird und was man beachten muss. Von daher habe ich bisher noch kein BIOS update gemacht. Ist einer von euch schon einmal über die Seite gestolpert?
-
Neueste Erkenntnisse. Eine ASM 1166 NVME mit aktueller Firmware wird super erkannt. Und das System geht in C8. Verbraucht mit der ASM 1166 ca. 4,5 Watt im Idle. 3x 3,5" HDDs funktionieren im Spin Up, bei 4x langt der Peek Strom nicht mehr und der Rechner rebootet. Das liegt aber am 65W internen Netzteil. Summa Summarum habe ich etwas gemischte Gefühle. Der CPU Lüfter dreht nach einen shutdown wie wild und hört nicht mehr auf. Bisher habe ich noch aber noch kein itx mainboard gefunden, was so effizient ist und out-of the Box ASPM funktioniert, vor allem bei der NIC, und min. 4x SATA verbaut hat. Aber erstmal ein guter Anfang. Die ASM 1166 scheint ein Glücksspiel zu sein ob die vom Powermanagement richtig erkannt wird von den Mainboards. Zumindest ist das die Erfahrung, welche ich mit Intel B660 und H610I Chipsätzen gemacht habe.
-
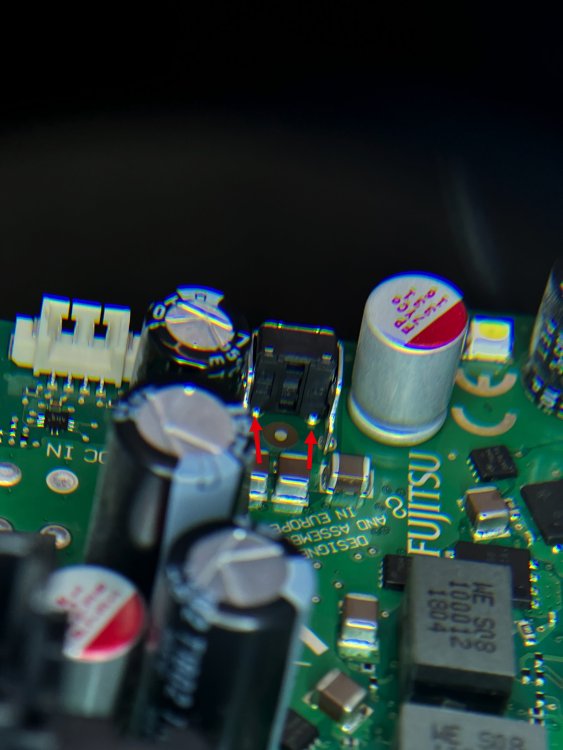
🥰 YES! Unter dem Paster sind 2x Lötpunkte, siehe Bilder. Habes es gerade ausprobiert. Funktioniert. Die 2x Drähte miteinan verbunden schaltet das MB ein und aus. Selbes Prinzip wie der Taster.
-
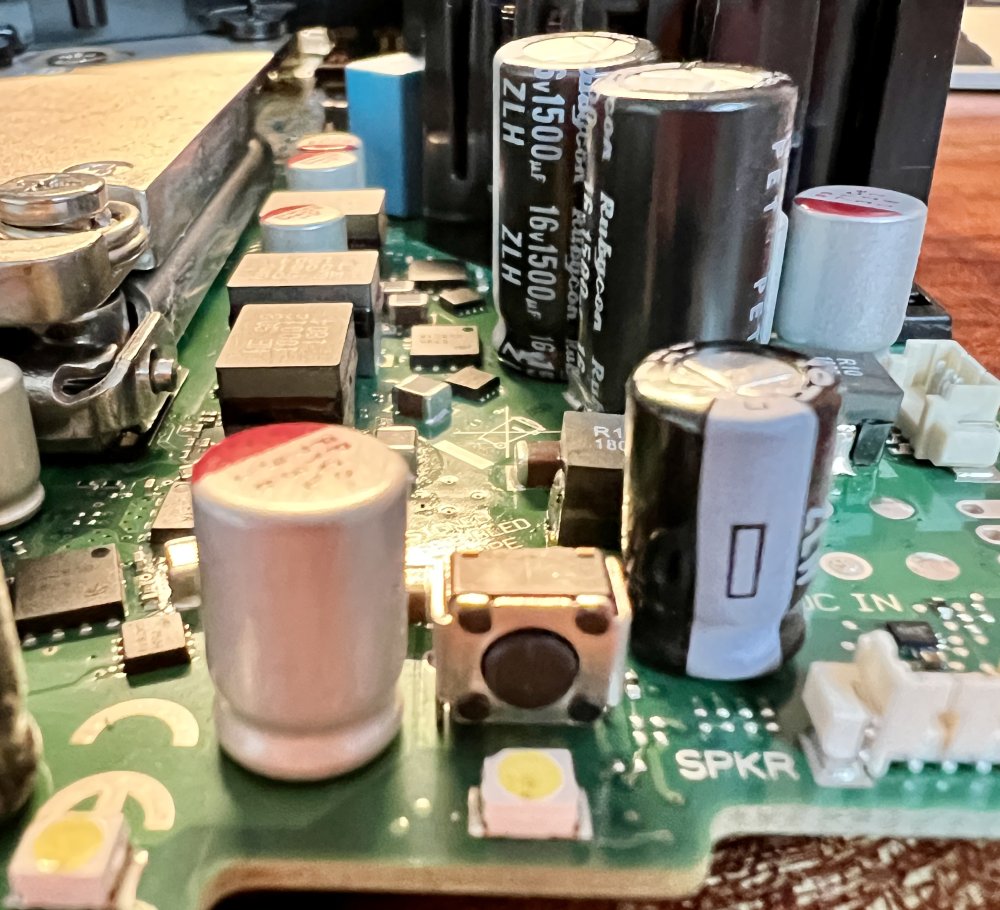
Hab euch mal die Platine und den besagten Knopf abfotografiert. Eigentlich dachte ich es sollte langen die 2x Pins auf der Rückseite, siehe Bilder rot umrahmt, zu verbinden. Irgendwo muss der Knopf ja das Push-Signal hin senden. Was meint ihr dazu?
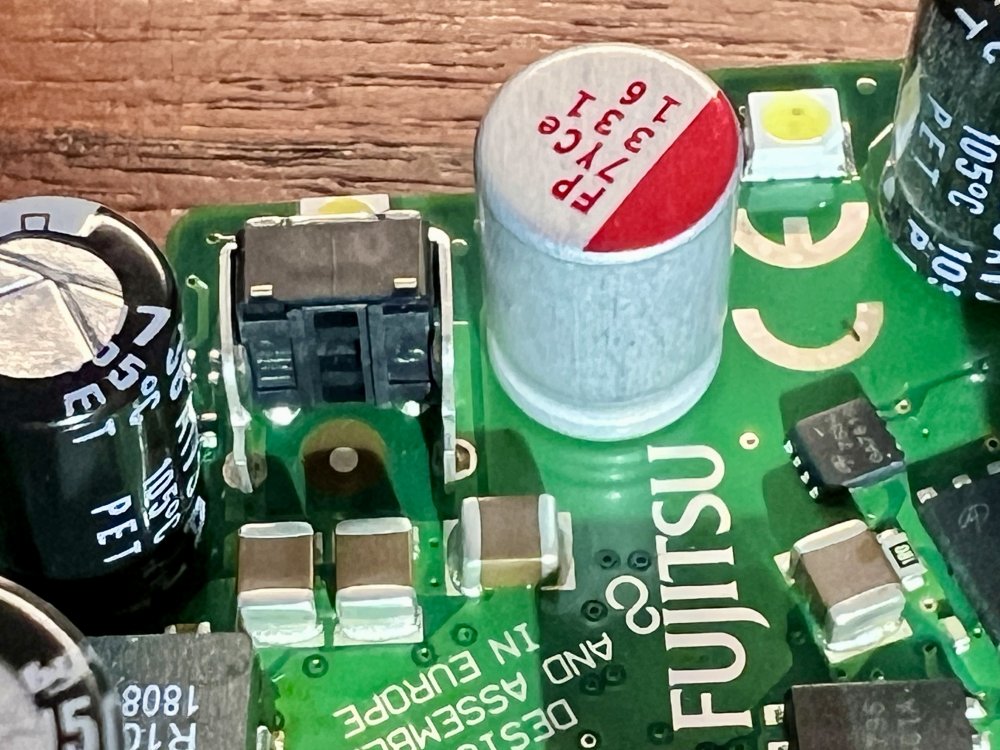
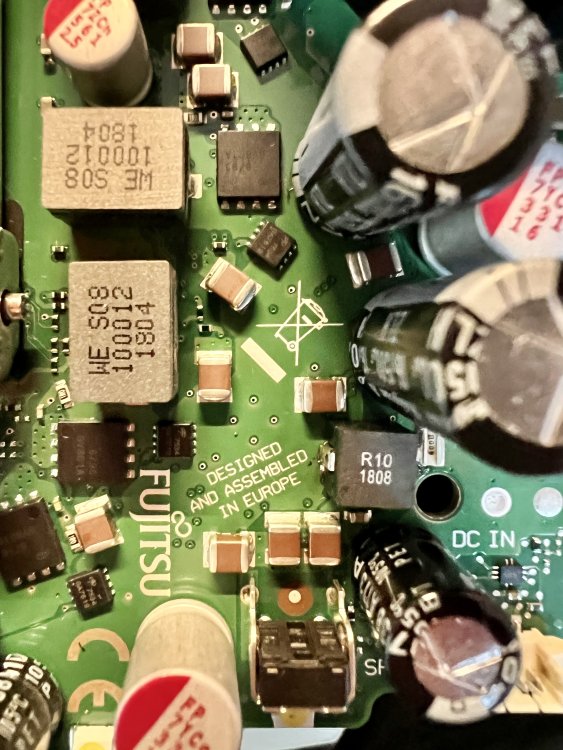
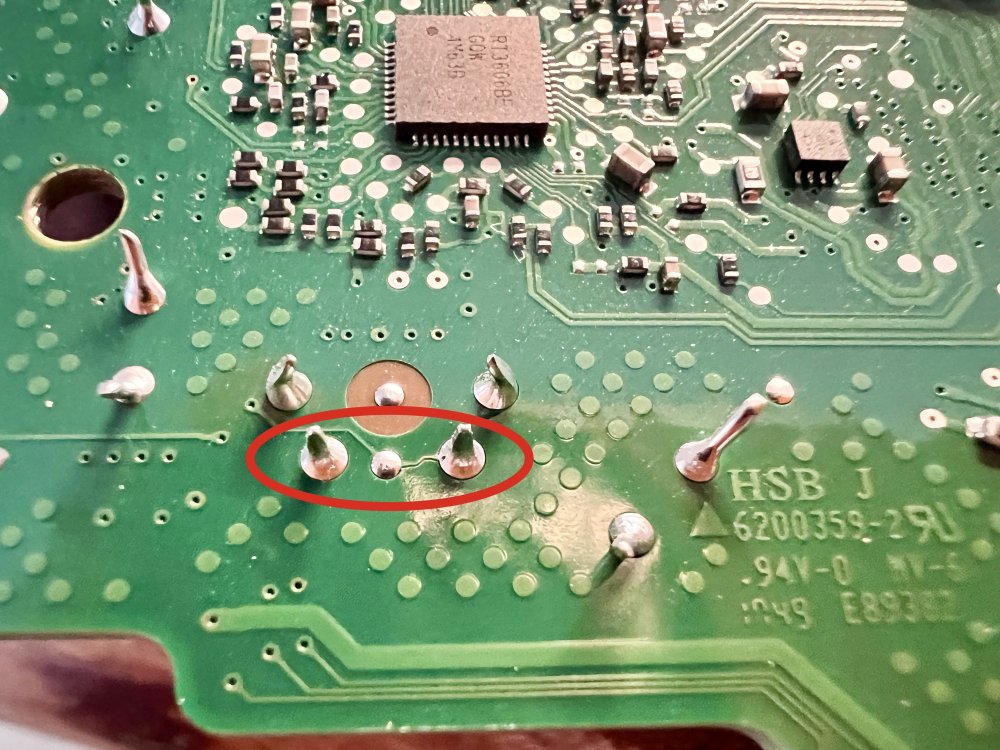
-
Moin Danke. Ich habe heute Morgen testweise probiert. Mit die Lötpunkte auf der Unterseite des Schalters zu Überbrücken. Funktioniert leidern nicht. Ich dache ich kann einfach 2x Kabel anlöten und wenn ich den die Kabel mit einander verbinde, schliesse ich den Kreislauf und der PC startet.
-
Frage in die Runde. Ich spiele mit dem Gedanken das Board des Q957 auszubauen und in eine mini ITX Gehäuse einzubauen. Stelle mir aber die Frage wie ich dann den Powerbutton drücke. Kann man den irgendwie vom Board abgreifen und an einen Powerbutton eines Gehäuses anlöten?
-
Hi all. I have ASUS Pro H610T D4-CSM which reach C10 State and Patched ASM1166 M2 from Ali'sExpress. But with this card I fall back to C2. Hence I decided start with the 2x onboard sata onboard, focus on the ASM1166 later on. In case of the Energie State of powertop, is there anything to know for the 2x 3,5" HDDs? Or just buy the one which have the best price value per GB? Best, Sascha
-
Hi. I am looking for the option only run a script @reboot. To set specific values. How does this work?
-
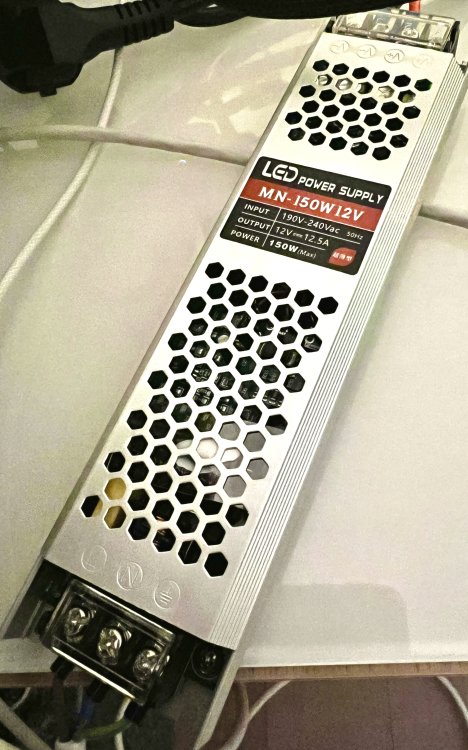
I did some short Tests based on Fritz Dect 200: Based on ASUS Pro H610T D4-CSM 1 USB Stick Unraid 6.12.6, Powertop --auto-tune , System in C3 State! Mean Well LSP-160-12T: Not really sure why such a PSU is on the market! PSU without Mainboard connected = ~ 2,9 Watt PSU Mainboard connected = ~ 3,5 Watt PSU Powertop --auto-tune , System in C3 State! = ~ 13 Watt LEICKE ULL Netzteil 19V 6,32A/6,3A 120W PSU without Mainboard connected = ~ 0,14 Watt PSU Mainboard connected = ~ 0,28 Watt PSU Powertop --auto-tune , System in C3 State! = ~ 10,6 Watt Ultra Dünne LED Netzteil DC 12V 24V Beleuchtung Transformator 60W 100W 150W 200W 300W 400W Led-treiber Netzteil für LED Streifen "Aliexpress PSU GW Green Wisdom" PSU without Mainboard connected = ~ 0,64 Watt PSU Mainboard connected = ~ 0,78 Watt PSU Powertop --auto-tune , System in C3 State! = ~ 10,5 Watt For me a cool PSU in case of Price.
-
Hi long pause between. But today I tried on my ASUS Pro H610T D4-CSM echo 1 | sudo tee /sys/bus/pci/drivers/r8169/0000\:02\:00.0/link/l1_aspm To activate L1 ASPM on the Realtek RTL8111H But I don't know why I don't have permissions to. See: root@nasnas:~# lspci -vv | awk '/ASPM/{print $0}' RS= | grep --color -P '(^[a-z0-9:.]+|ASPM )' 00:1c.0 PCI bridge: Intel Corporation Alder Lake-S PCH PCI Express Root Port #1 (rev 11) (prog-if 00 [Normal decode]) LnkCap: Port #1, Speed 8GT/s, Width x1, ASPM L0s L1, Exit Latency L0s <1us, L1 <4us LnkCtl: ASPM L0s L1 Enabled; RCB 64 bytes, Disabled- CommClk- 00:1c.2 PCI bridge: Intel Corporation Device 7aba (rev 11) (prog-if 00 [Normal decode]) LnkCap: Port #3, Speed 8GT/s, Width x1, ASPM L1, Exit Latency L1 <64us LnkCtl: ASPM L1 Enabled; RCB 64 bytes, Disabled- CommClk+ 02:00.0 Ethernet controller: Realtek Semiconductor Co., Ltd. RTL8111/8168/8411 PCI Express Gigabit Ethernet Controller (rev 15) LnkCap: Port #0, Speed 2.5GT/s, Width x1, ASPM L0s L1, Exit Latency L0s unlimited, L1 <64us LnkCtl: ASPM L1 Enabled; RCB 64 bytes, Disabled- CommClk+ root@nasnas:~# echo 1 | sudo tee /sys/bus/pci/drivers/r8169/0000\:02\:00.0/link/l1_aspm tee: '/sys/bus/pci/drivers/r8169/0000:02:00.0/link/l1_aspm': Permission denied 1 UPDATE! ENABLE native ASPM support in BIOS fixed the permission issue Mean ENABLE = OS ASPM support not BIOS support which is disable state. UPDATE2: C10 Working now! Without HDDs connected around 5 Watt idle load I need to enable ASPM on the Realtek NIC manuel: You can simple use this Shell script. But may you need edit the Endpoint like here: 02:00.0 #!/bin/bash # Execute lspci -vv and filter lines containing ASPM # Then grep for lines containing Ethernet controller # Finally, print all lines beginning from the Ethernet controller line to the end output=$(lspci -vv | awk '/ASPM/{print $0}' RS= | grep --color -P '(^[a-z0-9:.]+|ASPM )' | awk '/Ethernet controller/{found=1} found') # Check if "ASPM Disabled" appears after finding the Ethernet controller if echo "$output" | grep -q "ASPM Disabled"; then echo "ASPM Disabled for Ethernet controller" sleep 2 # Run the command to enable ASPM echo "Enabling L1 ASPM for Ethernet controller" echo set -x echo 1 | sudo tee /sys/bus/pci/drivers/r8169/0000:02:00.0/link/l1_aspm >/dev/null set +x # Sleep for 3 seconds sleep 3 # Check again if ASPM is now enabled new_output=$(lspci -vv | awk '/ASPM/{print $0}' RS= | grep --color -P '(^[a-z0-9:.]+|ASPM )' | awk '/Ethernet controller/{found=1} found') if echo "$new_output" | grep -q "ASPM Disabled"; then echo echo "ASPM still Disabled after attempting to enable" else echo echo "ASPM Enabled for Ethernet controller" echo "$new_output" echo echo "Use powertop and check the C-States" fi else echo echo "ASPM Enabled for Ethernet controller" echo "$new_output" echo echo "Use powertop and check the C-States" fi
-
Does anyone know if r8169 driver in unraid 6.12.6 have issues with ASPM ? Because I’m troubleshooting since days and found out that r8169 Nic of my Asus Pro H610T D4. Unraid 6.12.6 can only reach C10 Powersave level once i disable the NIC in the BIOS. Otherwise only C3 possible. With the same BIOS settings my test Ubuntu have no issues. Does some of you have ideas? root@Tower:~# ethtool -i eth0 driver: r8169 version: 6.1.64-Unraid firmware-version: rtl8168h-2_0.0.2 02/26/15 expansion-rom-version: bus-info: 0000:02:00.0 supports-statistics: yes supports-test: no supports-eeprom-access: no supports-register-dump: yes supports-priv-flags: no root@Tower:~# ubuntu@ubuntu:~$ sudo ethtool -i enp2s0 driver: r8169 version: 6.2.0-26-generic firmware-version: rtl8168h-2_0.0.2 02/26/15 expansion-rom-version: bus-info: 0000:02:00.0 supports-statistics: yes supports-test: no supports-eeprom-access: no supports-register-dump: yes supports-priv-flags: no ubuntu@ubuntu:~$
-
Wake on LAN is disabled. MTU is 1500. Other setting bring no changes of the C State. I think this parameter are not need to reboot the OS and are no persistent commands, right? MTU Disable NIC Flow Control Disable NIC Offload Ethernet NIC Rx Buffer Ethernet NIC Tx Buffer
-
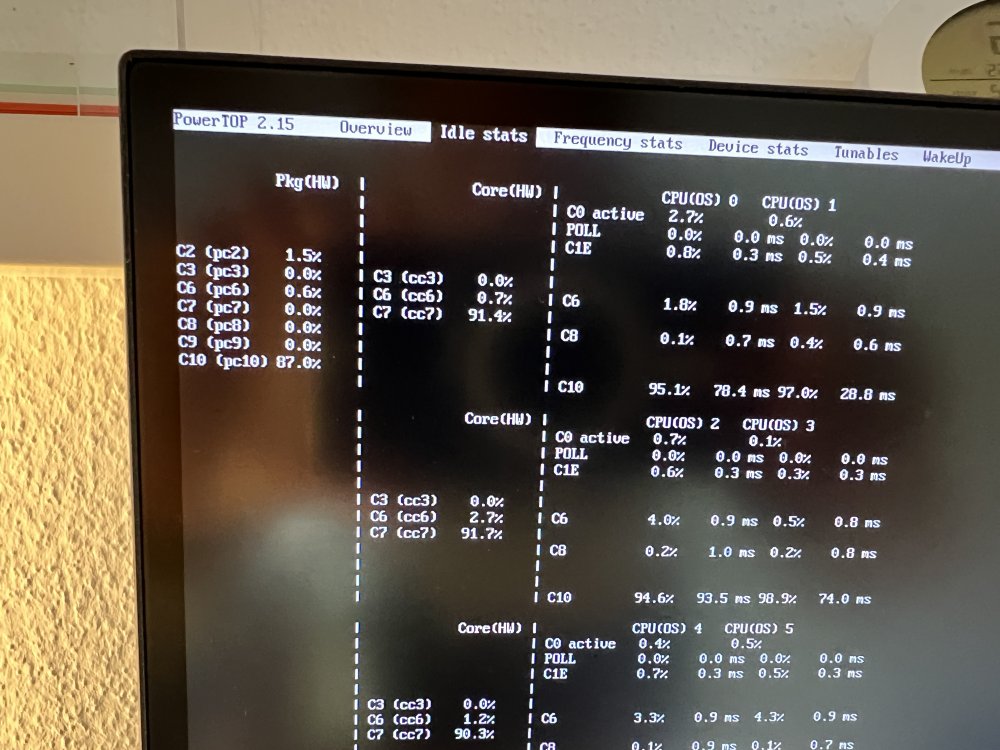
Okay I tried to isolate the issue. I'm thinking this come from the Realtek NIC from the Pro H610T D4 Board. I disabled the NIC in the BIOS and after powertop --auto-tune i reach C8. After disconnecting HDMI and wait some time --> C10 But I have no Idea how to Fix. Does some of you have ideas? I tried to find the difference in driver and firmware so I compare ubuntu live stick with unraid via ethtool. But I don´t see a difference only the Kernel version. root@Tower:~# ethtool -i eth0 driver: r8169 version: 6.1.64-Unraid firmware-version: rtl8168h-2_0.0.2 02/26/15 expansion-rom-version: bus-info: 0000:02:00.0 supports-statistics: yes supports-test: no supports-eeprom-access: no supports-register-dump: yes supports-priv-flags: no root@Tower:~# ubuntu@ubuntu:~$ sudo ethtool -i enp2s0 driver: r8169 version: 6.2.0-26-generic firmware-version: rtl8168h-2_0.0.2 02/26/15 expansion-rom-version: bus-info: 0000:02:00.0 supports-statistics: yes supports-test: no supports-eeprom-access: no supports-register-dump: yes supports-priv-flags: no ubuntu@ubuntu:~$ Thanks
-
Hi good point with the BIOS but i am current running the news one. But I also try to downgrade the picture is the same. It make no difference if I enable or disable native APSM in BIOS. System stock on C3 even all devices disconnected like HDMI and Keyboard and Mouse. Pro H610T D4 BIOS 3010 BIOS Native ASPM = enabled (controlled by OS) Befor execute aspm.py root@Tower:~# dmesg | grep ASPM [ 0.348880] acpi PNP0A08:00: _OSC: OS supports [ExtendedConfig ASPM ClockPM Segments MSI HPX-Type3] root@Tower:~# root@Tower:~# lspci -vvPPDq | awk '/ASPM/{print $0}' RS= | grep --color -P '(^[a-z0-9:./]+|:\sASPM (\w+)? ?((En|Dis)abled)?)'; 0000:00:1c.0 PCI bridge: Intel Corporation Alder Lake-S PCH PCI Express Root Port #1 (rev 11) (prog-if 00 [Normal decode]) LnkCtl: ASPM L0s L1 Enabled; RCB 64 bytes, Disabled- CommClk- 0000:00:1c.2 PCI bridge: Intel Corporation Device 7aba (rev 11) (prog-if 00 [Normal decode]) LnkCtl: ASPM Disabled; RCB 64 bytes, Disabled- CommClk+ 0000:00:1c.2/02:00.0 Ethernet controller: Realtek Semiconductor Co., Ltd. RTL8111/8168/8411 PCI Express Gigabit Ethernet Controller (rev 15) LnkCtl: ASPM Disabled; RCB 64 bytes, Disabled- CommClk+ After execute aspm.py root@Tower:~# dmesg | grep ASPM [ 0.348880] acpi PNP0A08:00: _OSC: OS supports [ExtendedConfig ASPM ClockPM Segments MSI HPX-Type3] root@Tower:~# lspci -vvPPDq | awk '/ASPM/{print $0}' RS= | grep --color -P '(^[a-z0-9:./]+|:\sASPM (\w+)? ?((En|Dis)abled)?)'; 0000:00:1c.0 PCI bridge: Intel Corporation Alder Lake-S PCH PCI Express Root Port #1 (rev 11) (prog-if 00 [Normal decode]) LnkCtl: ASPM L0s L1 Enabled; RCB 64 bytes, Disabled- CommClk- 0000:00:1c.2 PCI bridge: Intel Corporation Device 7aba (rev 11) (prog-if 00 [Normal decode]) LnkCtl: ASPM L0s L1 Enabled; RCB 64 bytes, Disabled- CommClk+ 0000:00:1c.2/02:00.0 Ethernet controller: Realtek Semiconductor Co., Ltd. RTL8111/8168/8411 PCI Express Gigabit Ethernet Controller (rev 15) LnkCtl: ASPM L0s L1 Enabled; RCB 64 bytes, Disabled- CommClk+
-
Thanks @dopeytree I changed it with the python script. But for me nothing changed still no ASPM enabled in dmesg. Strange 🤔 Is this something in Unraid themselve that this is not supported? root_complex = "00:1c.2" endpoint = "02:00.0" root@Tower:~# dmesg | grep ASPM [ 0.186221] ACPI FADT declares the system doesn't support PCIe ASPM, so disable it [ 0.348829] acpi PNP0A08:00: _OSC: OS supports [ExtendedConfig ASPM ClockPM Segments MSI HPX-Type3] [ 0.350546] acpi PNP0A08:00: FADT indicates ASPM is unsupported, using BIOS configuration [ 7.100918] r8169 0000:02:00.0: can't disable ASPM; OS doesn't have ASPM control root@Tower:~# python3 aspm.py 00:1c.2 PCI bridge: Intel Corporation Device 7aba (rev 11) 0x34 points to 0x40 Value at 0x40 is 0x10 Found the byte at: 0x40 Adding 0x10 to the register... Final register reads: 0x42 Byte to patch: 0x50 Byte is set to 0x42 -> ASPM_L1_ONLY Value doesn't match the one we want, setting it! Byte is set to 0x43 -> ASPM_L1_AND_L0s 02:00.0 Ethernet controller: Realtek Semiconductor Co., Ltd. RTL8111/8168/8411 PCI Express Gigabit Ethernet Controller (rev 15) 0x34 points to 0x40 Value at 0x40 is 0x1 Value is not 0x10! Reading the next byte... 0x41 points to 0x50 Value at 0x50 is 0x5 Value is not 0x10! Reading the next byte... 0x51 points to 0x70 Value at 0x70 is 0x10 Found the byte at: 0x70 Adding 0x10 to the register... Final register reads: 0x42 Byte to patch: 0x80 Byte is set to 0x42 -> ASPM_L1_ONLY Value doesn't match the one we want, setting it! Byte is set to 0x43 -> ASPM_L1_AND_L0s root@Tower:~# dmesg | grep ASPM [ 0.186221] ACPI FADT declares the system doesn't support PCIe ASPM, so disable it [ 0.348829] acpi PNP0A08:00: _OSC: OS supports [ExtendedConfig ASPM ClockPM Segments MSI HPX-Type3] [ 0.350546] acpi PNP0A08:00: FADT indicates ASPM is unsupported, using BIOS configuration [ 7.100918] r8169 0000:02:00.0: can't disable ASPM; OS doesn't have ASPM control







