mmwilson0

Members
  • Posts

    34
  • Joined

  • Last visited

Everything posted by mmwilson0

  1. Can we enable MFA for our servers as well?
  2. Is your install wizard completeing after you launch the container and choose which apps you want to install? When i choose more than a couple apps, mine is hanging and not finishing. I tested with just doing one or two apps and watched the progress in the container, and one of the last steps is provisioning the user accounts. So if the install wizard is not completing, the admin and user accounts will not get provisioned. I am looking for how to troubleshoot why my installation wizard is not finishing, and i came across your post so it thought I'd chime in
  3. @dlandon @JorgeB in case you folks are interested in this new piece to the puzzle -- i enabled Mover Logging, and the issue returned (after the next reboot). Disabled it, and the issue went away again (after i rebooted). So, there is something going on more than just what the enhanced logging plugin was doing, but is curiously still related to logging.
  4. Hey @bajsakakka Did you resolve this? I'm getting the same issue. Accessing my cryptpad container over the web so i'm using the URL and Nginx Proxy Manager. it works fine if i access the container locally on my networking using ip:3000
  5. I had tried re-installing enhanced logs, to see if a clean install of it would help, and the problem returned. It's uninstalled now, I'll live without
  6. Hey @dlandon, Diagnostics attached. launchctl-diagnostics-20221102-1157.zip
  7. Update: Finally got to doing this. It appears that it was Enhanced Log Viewing that was causing my issues. Uninstalled it, and all is well now. Thanks for putting me on the right path @JorgeB
  8. Thanks! i'll give it a shot after work tonight. I imagine this will require a reboot when I rename/restore a plugin?
  9. When i boot in safe mode, everything seems to be working ok. But when i launch back in to normal mode, the behavior returns again
  10. @JorgeB I tried Firefox and Chrome, as well as private windows (to disable extensions), and it's the same behavior all around.
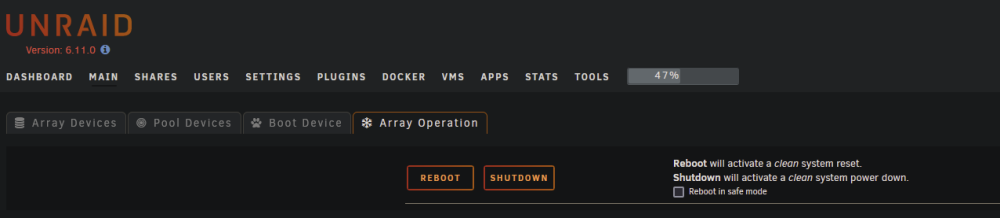
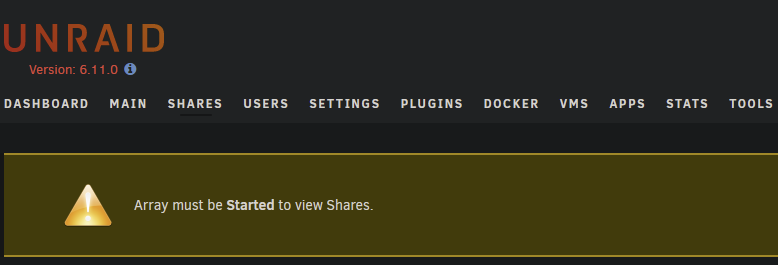
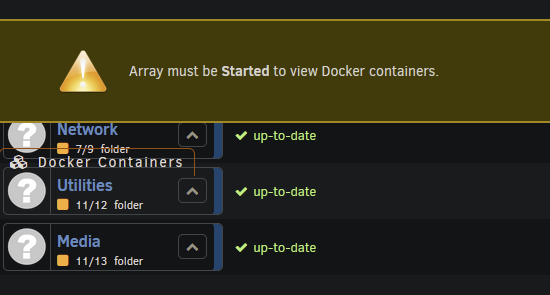
  11. Hi Forum, I recently updated from 6.11.0 to 6.11.1. I applied the update initiated a reboot once I was prompted. The reboot hung for more than an hour, soI ended up holdlng the power button to complete a hard reboot. Once i finally got the unraid back up and running again, it was upgraded, but behaving oddly. After i enter my encryption key and start the array, the array operations menu is missing a lot of the options that are normally visible there. Additionaly, i get the "array must be started" message whenever i try and visit certain menus. In the bottom left it does say "Array Stopped. Stale Configuration". Docker containers appear to be running though, and i can stream to Plex. I have downgraded and upgraded the Unraid version twice now, hoping that would help resolve this, but it had no affect. Attaching the diag bundle generated before i most recently downgraded OS versions. launchctl-diagnostics-20221010-2243.zip
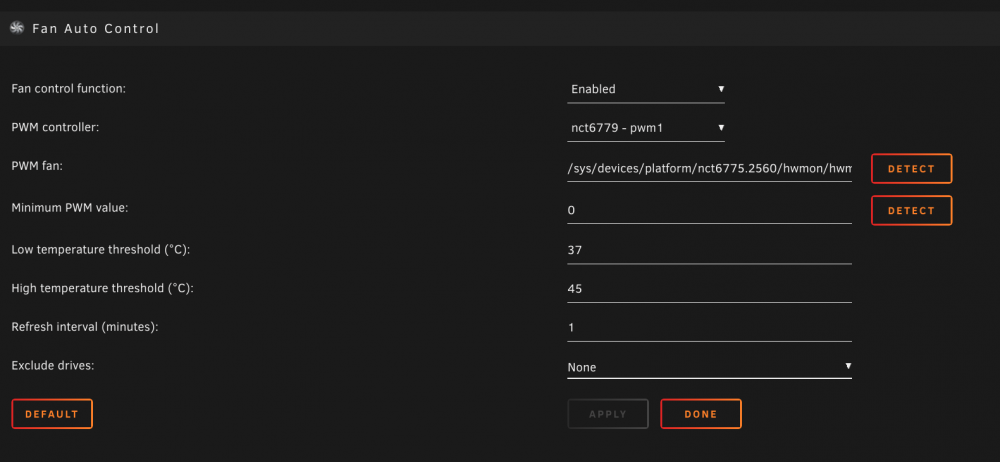
  12. Thanks for the suggestion @comet424, i tried uninstalling and reinstalling System Temps and Fan Auto Control, and went through the detect on all PWM's... but the fans still dont seem to be being controlled by the plugins at all. Any other thoughts? They sound like they're running at a steady 75%, which they didn't always used to do. If i was downloading and extracting heavily then the fans used to scale up and down appropriately, but currently my home is just one loud "blowing" noise from the fans
  13. Hello, is there anyway i can troubleshoot Dynamix Fan Auto Control? In the last few months my fan's have been running extra loud compared to what they used to. I have the array powered off, processor and mainboard are showing 31 & 33 degrees, respectively. All the hard drives are under 34 degrees, but the fans are still spinning at medium-high speed. Settings are screenshotted in the attachment, let me know if there is any other information i can include for diagnostics.
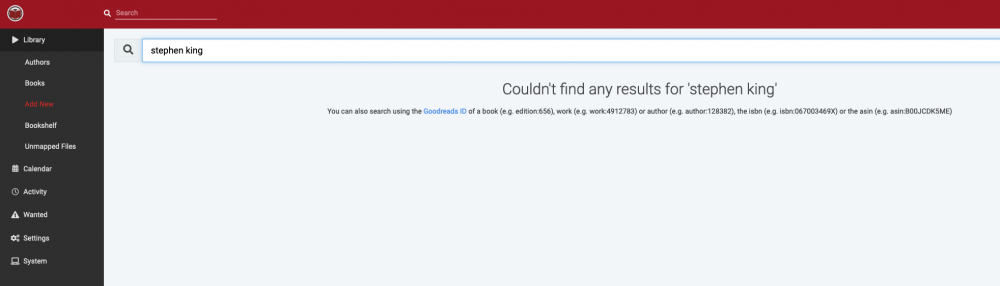
  14. Hello, I'm having trouble searching for any title or author in Readarr. No matter what i search for, i get "Couldn't find any results for...". Any thoughts on why this may be?
  15. I'm having trouble getting this to work. I'm running binhex-plexpass on my host network. When i run the python script in the container, i see: |========================================================================================================================================================================================================| | | | ____ _ __ __ _ __ __ | | | _ \| | _____ __ | \/ | ___| |_ __ _ | \/ | __ _ _ __ __ _ __ _ ___ _ __ | | | |_) | |/ _ \ \/ / | |\/| |/ _ \ __/ _` | | |\/| |/ _` | '_ \ / _` |/ _` |/ _ \ '__| | | | __/| | __/> < | | | | __/ || (_| | | | | | (_| | | | | (_| | (_| | __/ | | | |_| |_|\___/_/\_\ |_| |_|\___|\__\__,_| |_| |_|\__,_|_| |_|\__,_|\__, |\___|_| | | |___/ | | Version: 1.15.1 | |========================================================================================================================================================================================================| | Starting Run | |========================================================================================================================================================================================================| | Locating config... | | Using //config/config.yml as config | |========================================================================================================================================================================================================| | Initializing cache database at //config/config.cache | |========================================================================================================================================================================================================| | notifiarr attribute not found | |========================================================================================================================================================================================================| | Connecting to TMDb... | | TMDb Connection Successful | |========================================================================================================================================================================================================| | omdb attribute not found | |========================================================================================================================================================================================================| | Connecting to Trakt... | | Config Error: trakt sub-attribute client_id is blank | | Trakt Connection Failed | |========================================================================================================================================================================================================| | mal attribute not found | |========================================================================================================================================================================================================| | playlist_files attribute not found | |========================================================================================================================================================================================================| | Connecting to Plex Libraries... | |========================================================================================================================================================================================================| | Movies Configuration | |========================================================================================================================================================================================================| | | | Connecting to Movies Library... | | | | Loading Metadata File: config/Movies.yml | | YAML Error: File Error: File does not exist /config/Movies.yml | | | | Loading Metadata Git: meisnate12/MovieCharts | | Metadata File Loaded Successfully | | | | Loading Metadata Git: meisnate12/Studios | | Metadata File Loaded Successfully | | | | Loading Metadata Git: meisnate12/IMDBGenres | | Metadata File Loaded Successfully | | | | Loading Metadata Git: meisnate12/People | | Metadata File Loaded Successfully | | | | Using Asset Directory: //config/assets | | | | Plex Error: Plex url is invalid | | | | Movies Library Connection Failed | |========================================================================================================================================================================================================| | TV Configuration | |========================================================================================================================================================================================================| | | | Connecting to TV Library... | | | | Loading Metadata File: config/TV.yml | | YAML Error: File Error: File does not exist /config/TV.yml | | | | Loading Metadata Git: meisnate12/ShowCharts | | Metadata File Loaded Successfully | | | | Loading Metadata Git: meisnate12/Networks | | Metadata File Loaded Successfully | | | | Using Asset Directory: //config/assets | | | | Plex Error: Plex url is invalid | | | | TV Library Connection Failed | |========================================================================================================================================================================================================| | Plex Error: No Plex libraries were connected to | | | |========================================================================================================================================================================================================| | Finished Run | | Finished: 22:39:53 2022-02-09 Run Time: 0:00:00 | |========================================================================================================================================================================================================| # I verified that the Plex URL is correct -- i visited it in the browser and i was able to connect. And i validated i had the correct token in there as well. Any thoughts? Edit: I'm not thrilled about it, but i figured it out. I had to switch "Secure Connection: Required" to "Secure Connection: Preferred" in Plex Network settings, and i had to use HTTP in the config.yml. It's possible this is because there is no valid certificate configured on my Plex app.
  16. Thanks for the response @Frank1940, sounds simple enough (famous last words). Should I disable both parity drives from my array and then just rebuild with a single drive? Or replace parity one, let it build, then remove parity two?
  17. Hi Forum, In my Unraid I am using two 4TB parity drives, and four 4TB data drives. I just bought three new 14TB drives. I think that i want to go to a single 14TB Parity drive, and replace two of the 4TB data drives with the two other 14TB drives. I feel like since I'm swapping both parity and data drives, that there are a lot of moving pieces. I was hoping someone could give me a simple breakdown of what steps i should be doing, and in what order. To simplify what I'm trying to do: Current State Parity: 2x4TB Storage: 4x4TB Desired State Parity: 1x14TB Storage: 2x4TB 2x14TB Thanks!
  18. Hi Forum, The past two day's i've tried to connect to plex and it cant, so i login to my Unraid GUI and see that my array is stopped. This leads me to believe that my system is rebooting. I checked Fix Common Problems and got Machine Check Events detected on your server. Your server has detected hardware errors. You should install mcelog via the NerdPack plugin, post your diagnostics and ask for assistance on the unRaid forums. The output of mcelog (if installed) has been logged Per the advice of the error, i'm posting my diagnostic bundle here. Thanks! unraid-diagnostics-20210817-1610.zip
  19. Nope ☹️ Ive just powered off the freeipa VM for now. Need to revisit it and try again
  20. Can we please please please get the ability to create user accounts, disable root logon, and enable mfa.
  21. Did you resolve this? I am having the same issue. I switched from password to LDAP with FreeIPA. i followed the ibracorp LDAP video and copied over the LDAP configs from the git repo, and commented out the password file configurations. In freeIPA i have basically set it up, created an admin user and a non-admin user (ipausers group), the latter i would like to use to log in to authelia. Do i have to do any configurations in FreeIPA so that this will work?
  22. Hi Forum, Not sure if this is the right place for this, and i did some quick searching to see if a topic like this existed but i didn't see one. Since there are some Docker containers that backup your data to AWS S3, i thought it would be important for members of the community that are inexperienced with AWS to have some pointers on securing their account, and s3 buckets. I put together a walkthrough that covers the following topics. Create an admin user, to avoid using the root account Enable a password policy and MFA Create an s3 bucket, disabling global access and enabling encryption, and versioning Create an IAM user/policy/group that provides least privelege to the s3 bucket as is required by s3sync Create a bucket policy for the S3 Bucket that restricts the actions and users allowed. I posted this on @Jacob Bolooni's support thread, since that is the container that i use specifically. I thought that @joch might benefit from it on their page as well, but i don't want to keep spamming this across the forum. I'll leave it to others to decide. If this is not the right place for this, please let me know where i should post this and i can relocate. Any feedback or recommendations are welcome too! Thanks! Malcolm Some notes before we get started: As a best practice, you should never do anything using your root account. That is the account/email that you used to create your AWS account. This is your “break glass” account, and has unrestricted rights to everything in your AWS account. If it is compromised, you could potentially lose access to your account. If you have set up a new AWS account to use for offsite backups, by default you will only have the “root” user. In an effort to secure your account, use a password manager to generate a long, strong password for this account, and enable MFA, and never use it unless you have a compelling reason to. It is also good to set a strong password policy in the IAM > Account Settings. For example: Minimum password length is 20 characters Require at least one uppercase letter from Latin alphabet (A-Z) Require at least one lowercase letter from Latin alphabet (a-z) Require at least one number Require at least one non-alphanumeric character (! @ # $ % ^ & * ( ) _ + - = [ ] { } | ') Password expires in 90 day(s) Allow users to change their own password Remember last 24 password(s) and prevent reuse 3. Now, lets create an admin user for you to use. After the root account has been secured, navigate to IAM > “Users” > “Add User”. Pick a username that you would like to use Check “AWS Management Console Access” to create username/password to log in to the AWS Administrative Console (Web interface) with. Make a strong password, and after it is created enable MFA for this account as well Check “Programmatic Access” if you would like to interface with your account using the command line interface. This is optional. Later in this guide we will create one more user who will ONLY have programmatic access, specifically to leverage the s3sync docker container. Click next to go to permissions We’ll skip permission for now, click next to go to tags Add tags if you desire Click Next to create user Store your AWS username, password, and access keys somewhere secure, and click close. 4. Let’s give this new user some permissions Navigate to IAM > User Groups > Create Group We are going to create a new group that has Admin Rights, as well as access to the billing console so you can track your spend. So give it a fitting name “Admin_And_Billing”, for example. “Add Users To the Group” – Check the box next to the user that you just created in step 3 “Attach Permissions” – There are 3 user groups that we want to add here, you can use the search bar to find them. -- AdministratorAccess – Gives you full admin rights to your AWS Account -- Billing – Gives you access to the billing reports and settings -- IAMUserChangePassword – Allows this user account to change its own password Click "Create Group" Now, log out and log back in using the new account you created. Navigate back to the IAM settings, and look around the different pages there. Make sure you don’t see any permissions or access denied errors. 5. If everything looks ok: In the top right of your browser window, click the dropdown where it says your username @ your account # > My Security Credentials. Enable MFA for your new account. 6. Perfect. Now that we have secured your root account and have a separate admin account with a strong password and MFA, let’s get started prepping your environment for s3sync. First, let us create the s3 bucket Click the dropdown for “Services” in the top left, and navigate to S3 Click “Create Bucket” Give the bucket a name. This name has to be unique across all AWS customers. So something simple like “bob” is probably taken. But “bobs.unraid.s3sync.backup.bucket” is probably available. Region – Choose a region closest to you for increased performance and reduced latency. Avoid US-East-1 if possible (friends don’t let friends us-east-1!) ****Block Public Access – check the box next to BLOCK ALL PUBLIC ACCESS. This will help prevent any joe shmo from accessing your backed up files.**** Bucket Versioning – This will keep previous versions of your files. Say you are backing up a text document. You make changes to the document and sync it to s3 again. S3 will store the previous version, and the new version with the changes. Also, if you delete the text document from s3, it will not be instantly deleted. It will create a marker that says this file is marked for deletion. This helps prevent accidental loss/deletion of files. I recommend enabling this, but it is up to you. I won’t cover it in this guide, but after your bucket is created you can create “Lifecycle policies” to automatically delete previous versions, and files marked for deletion from your bucket after an amount of days that you specify. Default Encryption **Enable** Amazon S3 key (SSE-S3) – AWS S3 manages the encryption keys, it’s simple and keeps your files secure! Create Bucket 7. Easy Enough! Now you have your very own cloud storage! Before we go, after creating the bucket you should now be back at the AWS S3 dashboard. If not, navigate back there using the services tab in the top left, and click s3. Click on the name of the bucket that you just created. Navigate to the “properties” tab and copy down the “Amazon Resource Name (ARN)” for your bucket. Store it in notepad or somewhere similar, we’ll need it coming up. Mine is arn:aws:s3:::mmwilson0.s3sync.demo 8. The next step is to create a new user and give them permission to use s3sync so that they can backup your files to this bucket. Click “Services” in the top left, and click “IAM” “users” > Add User Username – name it something that lets you know this is the account that is doing the backups for you. Mine will be “mmwilson0_s3sync_demo” Check the box for “programmatic access”. You will never need to login with this account, it will only be used by the docker container. There is no need to create a password for AWS Management Console access. Click Next, skipping through permissions, apply tags if you wish, and just get to the end and press Create User. It will present you with your access key and secret access key. Copy these both down in to your notepad 9. Create a new policy. IAM > Policies > Create Policy Switch the tab from “Visual Editor” to JSON, and paste the below text in. Under “resource” you will need to update the s3 ARN so that it has your s3 bucket’s ARN. Additionally, if you want s3sync to DELETE objects from your s3 bucket after they have been deleted from your home device, then you will also need to add "s3:DeleteObject" under the Actions. Make sure to match the formatting by including quotation marks, and commas. { "Version": "2012-10-17", "Statement": [ { "Resource": [ "arn:aws:s3:::yourbucketname", "arn:aws:s3:::yourbucketname/*" ], "Sid": "Allows3sync", "Effect": "Allow", "Action": [ "s3:GetBucketLocation", "s3:ListBucket", "s3:PutObject" ] } ] } Optionally, if you have a static IP at home, know what range your home ip will be in, or are willing to sign in and update this policy periodically as your home ip changes, then you can add a conditional statement to restrict access to your home IP address. This means that if someone has your access keys they will not be able to access the files in your s3 bucket unless their requests are originating from your home IP. Pretty cool huh!? Here is an example below. For demonstration purposed, I’ll include the "s3:DeleteObject" action as well { "Version": "2012-10-17", "Statement": [ { "Resource": [ "arn:aws:s3:::yourbucketname", "arn:aws:s3:::yourbucketname/*" ], "Sid": "Allows3sync", "Effect": "Allow", "Action": [ "s3:GetBucketLocation", "s3:ListBucket", "s3:PutObject", "s3:DeleteObject" ], "Condition": { "IpAddress": { "aws:SourceIp": "65.5.217.0/24" } } } ] } Click “next” Add Tags if you wish. Click “next” Give your policy a name and Description, and click “Create Policy”. 10. Now to bring it all together. Create a new User Group IAM > User Groups > Create Give the user group a relevant name Check the box next to the user you just created Check the box next to the policy you just created Click “Create Group” 11. At this point you now have a new user and a policy that restricts access to only allow that user to read/write in the s3 bucket that you created for your backups. I also recommend adding a policy to your bucket that will restrict who is allowed to access that bucket. First we will need to get the ARN associated with the user that we just created, the one that is allowed to write to the s3 bucket. Navigate to IAM > Users > Click on the username that you just created. At the top of the page, copy the User ARN. The format is similar to: arn:aws:iam::1234567890:user/mmwilson0_s3sync_demo Navigate to S3 > Click on the bucket name that you created earlier in this walk-through. Click on the Permissions tab, scroll down to Bucket Policy, and paste in the following policy. You will need to update: --the resources so that they match the ARN for your s3 bucket --the principal so it matches the ARN for your user that you just created. --If you did not add the “deleteobject” permission in your policy above, then you can remove it from the below statement as well. --If you do not wish to restrict access to a specific ip address, remove the 5 lines, starting with "Condition", ending at }, (delete this line as well) { "Id": "Policy1620696812001", "Version": "2012-10-17", "Statement": [ { "Sid": "Stmt1620696697710", "Action": [ "s3:DeleteObject", "s3:GetBucketLocation", "s3:ListBucket", "s3:PutObject" ], "Effect": "Allow", "Resource": ["arn:aws:s3:::mmwilson0.s3sync.demo", "arn:aws:s3:::mmwilson0.s3sync.demo/*"], "Condition": { "IpAddress": { "aws:SourceIp": "65.5.217.0/24" } }, "Principal": { "AWS": [ "arn:aws:iam::1234567890:user/mmwilson0_s3sync_demo" ] } } ] } Click “Save Changes”, and you are done!
  23. Hey @Jacob Bolooni, I put together this how-to that walks users through setting up an s3 bucket, and creating a separate IAM user and Policy specifically for backups. I had security in mind when i wrote this so I include things such as blocking public access to the bucket, enabling encryption, and restricting access to IP addresses. Let me know if this post is ok for here, otherwise i can certainly remove it. Thanks, Malcolm Some notes before we get started: As a best practice, you should never do anything using your root account. That is the account/email that you used to create your AWS account. This is your “break glass” account, and has unrestricted rights to everything in your AWS account. If it is compromised, you could potentially lose access to your account. If you have set up a new AWS account to use for offsite backups, by default you will only have the “root” user. In an effort to secure your account, use a password manager to generate a long, strong password for this account, and enable MFA, and never use it unless you have a compelling reason to. It is also good to set a strong password policy in the IAM > Account Settings. For example: Minimum password length is 20 characters Require at least one uppercase letter from Latin alphabet (A-Z) Require at least one lowercase letter from Latin alphabet (a-z) Require at least one number Require at least one non-alphanumeric character (! @ # $ % ^ & * ( ) _ + - = [ ] { } | ') Password expires in 90 day(s) Allow users to change their own password Remember last 24 password(s) and prevent reuse 3. Now, lets create an admin user for you to use. After the root account has been secured, navigate to IAM > “Users” > “Add User”. Pick a username that you would like to use Check “AWS Management Console Access” to create username/password to log in to the AWS Administrative Console (Web interface) with. Make a strong password, and after it is created enable MFA for this account as well Check “Programmatic Access” if you would like to interface with your account using the command line interface. This is optional. Later in this guide we will create one more user who will ONLY have programmatic access, specifically to leverage the s3sync docker container. Click next to go to permissions We’ll skip permission for now, click next to go to tags Add tags if you desire Click Next to create user Store your AWS username, password, and access keys somewhere secure, and click close. 4. Now, let’s give this new user some permissions Navigate to IAM > User Groups > Create Group We are going to create a new group that has Admin Rights, as well as access to the billing console so you can track your spend. So give it a fitting name “Admin_And_Billing”, for example. “Add Users To the Group” – Check the box next to the user that you just created in step 3 “Attach Permissions” – There are 3 user groups that we want to add here, you can use the search bar to find them. -- AdministratorAccess – Gives you full admin rights to your AWS Account -- Billing – Gives you access to the billing reports and settings -- IAMUserChangePassword – Allows this user account to change its own password Click "Create Group" Now, log out and log back in using the new account you created. Navigate back to the IAM settings, and look around the different pages there. Make sure you don’t see any permissions or access denied errors. 5. If everything looks ok: In the top right of your browser window, click the dropdown where it says your username @ your account # > My Security Credentials. Enable MFA for your new account. 6. Perfect. Now that we have secured your root account and have a separate admin account with a strong password and MFA, let’s get started prepping your environment for s3sync. First, let us create the s3 bucket Click the dropdown for “Services” in the top left, and navigate to S3 Click “Create Bucket” Give the bucket a name. This name has to be unique across all AWS customers. So something simple like “bob” is probably taken. But “bobs.unraid.s3sync.backup.bucket” is probably available. Region – Choose a region closest to you for increased performance and reduced latency. Avoid US-East-1 if possible (friends don’t let friends us-east-1!) ****Block Public Access – check the box next to BLOCK ALL PUBLIC ACCESS. This will help prevent any joe shmo from accessing your backed up files.**** Bucket Versioning – This will keep previous versions of your files. Say you are backing up a text document. You make changes to the document and sync it to s3 again. S3 will store the previous version, and the new version with the changes. Also, if you delete the text document from s3, it will not be instantly deleted. It will create a marker that says this file is marked for deletion. This helps prevent accidental loss/deletion of files. I recommend enabling this, but it is up to you. I won’t cover it in this guide, but after your bucket is created you can create “Lifecycle policies” to automatically delete previous versions, and files marked for deletion from your bucket after an amount of days that you specify. Default Encryption **Enable** Amazon S3 key (SSE-S3) – AWS S3 manages the encryption keys, it’s simple and keeps your files secure! Create Bucket 7. Easy Enough! Now you have your very own cloud storage! Before we go, after creating the bucket you should now be back at the AWS S3 dashboard. If not, navigate back there using the services tab in the top left, and click s3. Click on the name of the bucket that you just created. Navigate to the “properties” tab and copy down the “Amazon Resource Name (ARN)” for your bucket. Store it in notepad or somewhere similar, we’ll need it coming up. Mine is arn:aws:s3:::mmwilson0.s3sync.demo 8. The next step is to create a new user and give them permission to use s3sync so that they can backup your files to this bucket. Click “Services” in the top left, and click “IAM” “users” > Add User Username – name it something that lets you know this is the account that is doing the backups for you. Mine will be “mmwilson0_s3sync_demo” Check the box for “programmatic access”. You will never need to login with this account, it will only be used by the docker container. There is no need to create a password for AWS Management Console access. Click Next, skipping through permissions, apply tags if you wish, and just get to the end and press Create User. It will present you with your access key and secret access key. Copy these both down in to your notepad 9. Create a new policy. IAM > Policies > Create Policy Switch the tab from “Visual Editor” to JSON, and paste the below text in. Under “resource” you will need to update the s3 ARN so that it has your s3 bucket’s ARN. Additionally, if you want s3sync to DELETE objects from your s3 bucket after they have been deleted from your home device, then you will also need to add "s3:DeleteObject" under the Actions. Make sure to match the formatting by including quotation marks, and commas. { "Version": "2012-10-17", "Statement": [ { "Resource": [ "arn:aws:s3:::yourbucketname", "arn:aws:s3:::yourbucketname/*" ], "Sid": "Allows3sync", "Effect": "Allow", "Action": [ "s3:GetBucketLocation", "s3:ListBucket", "s3:PutObject" ] } ] } Optionally, if you have a static IP at home, know what range your home ip will be in, or are willing to sign in and update this policy periodically as your home ip changes, then you can add a conditional statement to restrict access to your home IP address. This means that if someone has your access keys they will not be able to access the files in your s3 bucket unless their requests are originating from your home IP. Pretty cool huh!? Here is an example below. For demonstration purposed, I’ll include the "s3:DeleteObject" action as well { "Version": "2012-10-17", "Statement": [ { "Resource": [ "arn:aws:s3:::yourbucketname", "arn:aws:s3:::yourbucketname/*" ], "Sid": "Allows3sync", "Effect": "Allow", "Action": [ "s3:GetBucketLocation", "s3:ListBucket", "s3:PutObject", "s3:DeleteObject" ], "Condition": { "IpAddress": { "aws:SourceIp": "65.5.217.0/24" } } } ] } Click “next” Add Tags if you wish. Click “next” Give your policy a name and Description, and click “Create Policy”. 10. Now to bring it all together. Create a new User Group IAM > User Groups > Create Give the user group a relevant name Check the box next to the user you just created Check the box next to the policy you just created Click “Create Group” 11. At this point you now have a new user and a policy that restricts access to only allow that user to read/write in the s3 bucket that you created for your backups. I also recommend adding a policy to your bucket that will restrict who is allowed to access that bucket. First we will need to get the ARN associated with the user that we just created, the one that is allowed to write to the s3 bucket. Navigate to IAM > Users > Click on the username that you just created. At the top of the page, copy the User ARN. The format is similar to: arn:aws:iam::1234567890:user/mmwilson0_s3sync_demo Navigate to S3 > Click on the bucket name that you created earlier in this walk-through. Click on the Permissions tab, scroll down to Bucket Policy, and paste in the following policy. You will need to update: --the resources so that they match the ARN for your s3 bucket --the principal so it matches the ARN for your user that you just created. --If you did not add the “deleteobject” permission in your policy above, then you can remove it from the below statement as well. --If you do not wish to restrict access to a specific ip address, remove the 5 lines, starting with "Condition", ending at }, (delete this line as well) { "Id": "Policy1620696812001", "Version": "2012-10-17", "Statement": [ { "Sid": "Stmt1620696697710", "Action": [ "s3:DeleteObject", "s3:GetBucketLocation", "s3:ListBucket", "s3:PutObject" ], "Effect": "Allow", "Resource": ["arn:aws:s3:::mmwilson0.s3sync.demo", "arn:aws:s3:::mmwilson0.s3sync.demo/*"], "Condition": { "IpAddress": { "aws:SourceIp": "65.5.217.0/24" } }, "Principal": { "AWS": [ "arn:aws:iam::1234567890:user/mmwilson0_s3sync_demo" ] } } ] } Click “Save Changes”, and you are done!
  24. There is also Glacier Deep Archive. It is slower to retrieve the data if you do actually need to access it, the thawing time is 12-48 hours depending on what you want to pay. It is a fraction of the price to standard Glacier though. ^^ Do this please. @joch do you have a write-up for users to help them create the IAM user and policy, disable public access, enable encryption etc? Some general ways that the users can harden their buckets?