Mainfrezzer
Members
-
Joined
-
Last visited
Everything posted by Mainfrezzer
-
Change your docker settings to macvlan. Settings -> Docker -> Advanced View (top right) then you can give docker container custom macs with "--mac-address 02:42:C0:B8:C5:07" for example in the "Extra Parameters" line within the docker edit page

-
Das wird an den ASM1166 liegen die mit powertop auf auto gestellt wurden. Hab deshalb extra "echo on | tee /sys/bus/pci/devices/0000:01:00.0/power/control" (Wobei die 1:00.0 halt angepasst werden muss, mit dem auf dem eigenen System passend) in die Go-Datei gesetzt, damit das Ding anbleibt.
-
Seems like your docker image file has an issue Dec 29 17:31:16 STower24 kernel: BTRFS error (device loop2): parent transid verify failed on logical 7820394496 mirror 1 wanted 645367 found 645369 Dec 29 17:31:16 STower24 kernel: BTRFS error (device loop2): parent transid verify failed on logical 7820394496 mirror 2 wanted 645367 found 645369 Dec 29 17:31:16 STower24 kernel: BTRFS error (device loop2): failed to read block groups: -5 Dec 29 17:31:16 STower24 root: mount: /var/lib/docker: can't read superblock on /dev/loop2. took a bit to find https://docs.unraid.net/unraid-os/manual/docker-management/#re-create-the-docker-image-file
-
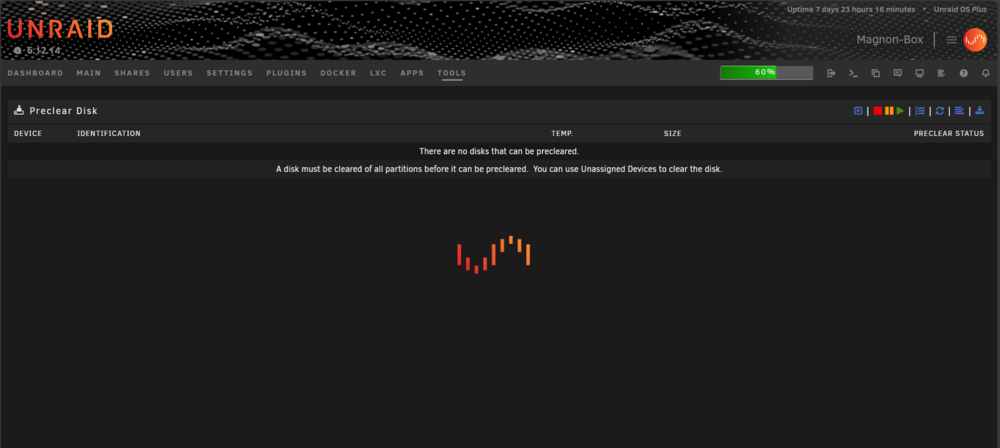
That issue, also exists on 6.12.14 BUT, in 6.12.14 you can actually hover over the buttons and get the button info and press the buttons on the top right, which doesnt work on 7-RC2. All you have is a spinning curser. Locks up everything basically because the Dashboard and Main links stop working too Edit: The issue starts appearing with version 2024.12.05 for 6.12.14 @dlandon
-
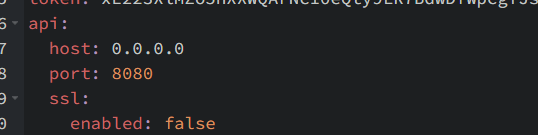
yeah, the 502 is odd. I would suspect theres an issue with either the port mappings from the container or the forwarding over tailscale cause the response you should get from the wing, if its running is Is your Wing config looking similar to this? Also, just as a late response from my earlier reply, a example from my setup


-
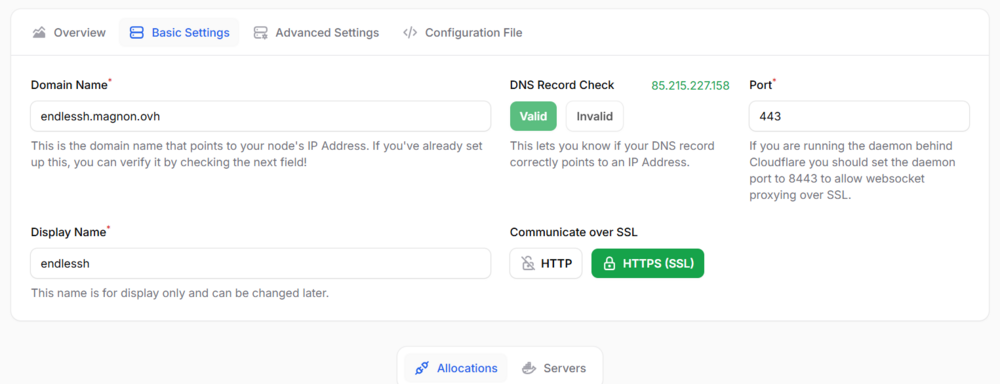
You need to keep the Https(SSL) in the Panel itself active, if you want the Panel to access a https website. The comment for disabling the ssl is just needed within the config.yml inside the wing container itself cause, well you outsource the encryption part^^
-
Do you get a response from curl inside the panel container for the wing domain? based on your screenshot, i assume youre using ssl, but for some reason you picked http communication instead of https?
-
where exactly do you get the message and when you do what? Are you trying to copy something to the share that starts with M? That one is wildly misconfigured. As its only using a non existent disk 3 Also the obligatory, usb isnt recommended to use for drives.
-
Ive updated the adguard-unbound container and template to include the following option By default, its set to no, and you have to go through the usual setup-steps of adguard. If you pick yes and theres no AdGuardHome.yaml present at the config directory, it will copy the following file to that location and use it https://raw.githubusercontent.com/Mainfrezzer/adguardhome-unbound/refs/heads/main/additions/etc/AdGuard/AdGuardHome.yaml

-
Did you use the link https://raw.githubusercontent.com/pelican-eggs/games-steamcmd/refs/heads/main/palworld/egg-palworld-proton.json or https://github.com/pelican-eggs/games-steamcmd/blob/main/palworld/egg-palworld-proton.json ? The first one should work
-
If the Wing is behind a reverse proxy, you need to rewrite the config the panel hands out to "ssl: enabled: false"
-
Thats good. Since that config used "network_mode: bridge" the wing is using the existing network, given that it seems to have created the pelican_net network, you could edit it to "network_mode: pelican_net" so the gameservers are back to their isolated network. Alternatively, you could also specify a wgX interface, if you run a Tunnel for Docker container. Although, that can have issues if youre not on unraid 7 rc2
-
Then lets try giving this config.yml a shot, change the "CHANGEME" parts debug: false uuid: CHANGEME token_id: CHANGEME token: CHANGEME api: host: 0.0.0.0 port: 8443 ssl: enabled: false cert: /etc/letsencrypt/live/192.168.1.18/fullchain.pem key: /etc/letsencrypt/live/192.168.1.18/privkey.pem disable_remote_download: false upload_limit: 256 trusted_proxies: [] system: root_directory: /var/lib/pelican log_directory: /var/log/pelican data: /mnt/user/appdata/pelican-wing/data archive_directory: /mnt/user/appdata/pelican-wing/data/archives backup_directory: /mnt/user/appdata/pelican-wing/data/backups tmp_directory: /tmp/pelican username: nobody user: rootless: enabled: false container_uid: 0 container_gid: 0 uid: 99 gid: 100 mount_passwd: true passwd_file: /etc/passwd disk_check_interval: 150 activity_send_interval: 60 activity_send_count: 100 check_permissions_on_boot: true enable_log_rotate: true websocket_log_count: 150 sftp: bind_address: 0.0.0.0 bind_port: 2022 read_only: false crash_detection: enabled: true detect_clean_exit_as_crash: true timeout: 60 backups: write_limit: 0 compression_level: best_speed remove_backups_on_server_delete: true transfers: download_limit: 0 openat_mode: auto docker: network: interface: 10.16.5.1 dns: - 1.1.1.1 - 1.0.0.1 name: pelican_net ispn: false IPv6: true driver: bridge network_mode: bridge is_internal: false enable_icc: true network_mtu: 1500 interfaces: v4: subnet: 10.16.5.0/24 gateway: 10.16.5.1 v6: subnet: fd00:10:16:5::/64 gateway: fd00:10:16:5::1011 domainname: "" registries: {} tmpfs_size: 100 container_pid_limit: 512 installer_limits: memory: 1024 cpu: 100 overhead: override: false default_multiplier: 1.05 multipliers: {} use_performant_inspect: true userns_mode: "" log_config: type: local config: compress: "false" max-file: "1" max-size: 5m mode: non-blocking throttles: enabled: true lines: 2000 line_reset_interval: 100 remote: https://CHANGEME remote_query: timeout: 30 boot_servers_per_page: 50 allowed_mounts: [] Search: blacklisted_dirs: - node_modules - .wine - appcache - depotcache - vendor max_recursion_depth: 8 BlockBaseDirMount: true allowed_origins: [] allow_cors_private_network: false ignore_panel_config_updates: false
-
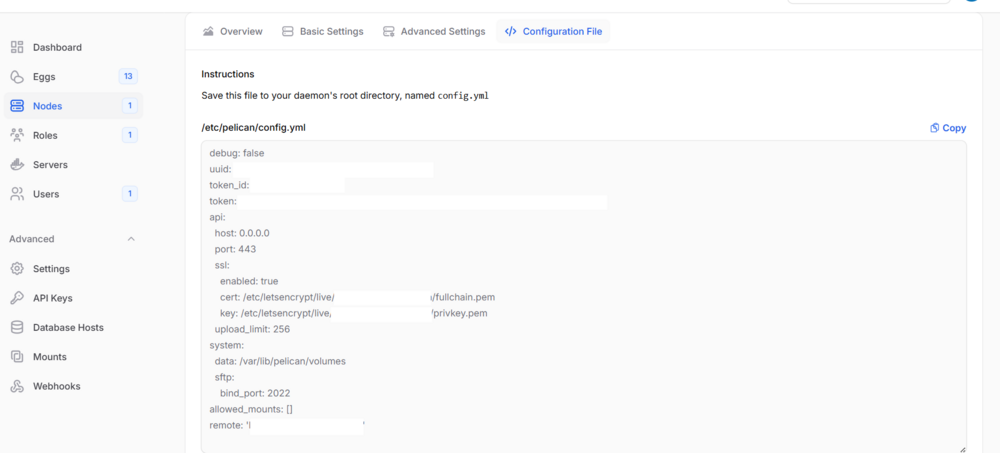
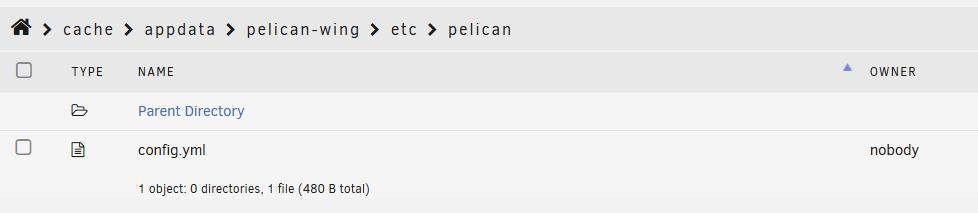
The Webui gives you the config.yml for the first time. You need to check/edit the config.yml you created yourself at "/mnt/user/appdata/pelican-wing/etc/pelican/"(if its still the default). The Wing container uses the "barebones" config from the WebUI and builds ontop of it.
-
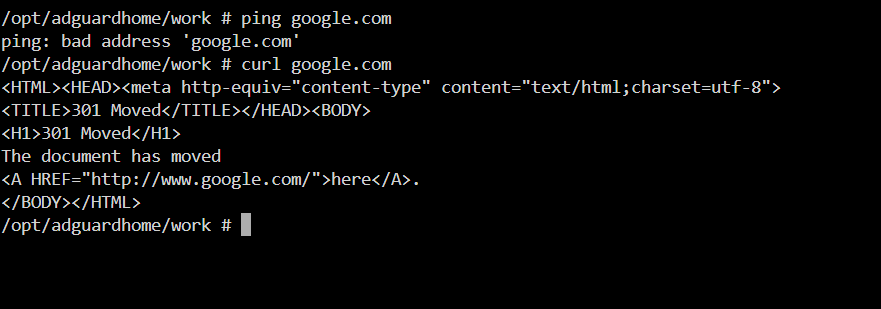
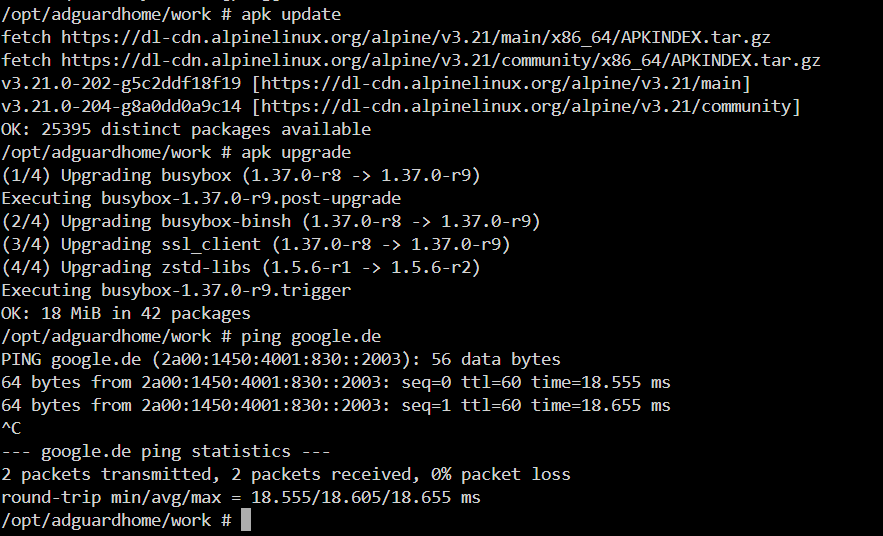
seems to be an issue with ping on alpine. i was able to recreate it, but curl does work fine. after running apk update and apk upgrade, ping works again. Ill update the container in a bit
-
I would highly suspect that it does work with cloudflare tunnels, at least the https communication part. The different subnet is normal, I changed it earlier to the 10.16.5.0/24 to make absolutely sure it won't interfere with any docker networks that could possibly exist.
-
Whats your list of networks when you type "docker network ls" in the console? to get things running asap, you can edit the config.yml and change the "network_mode:" from "pelican_nw" or "pelican_net" to "bridge", that would use the already existing default bridge network to run the container
-
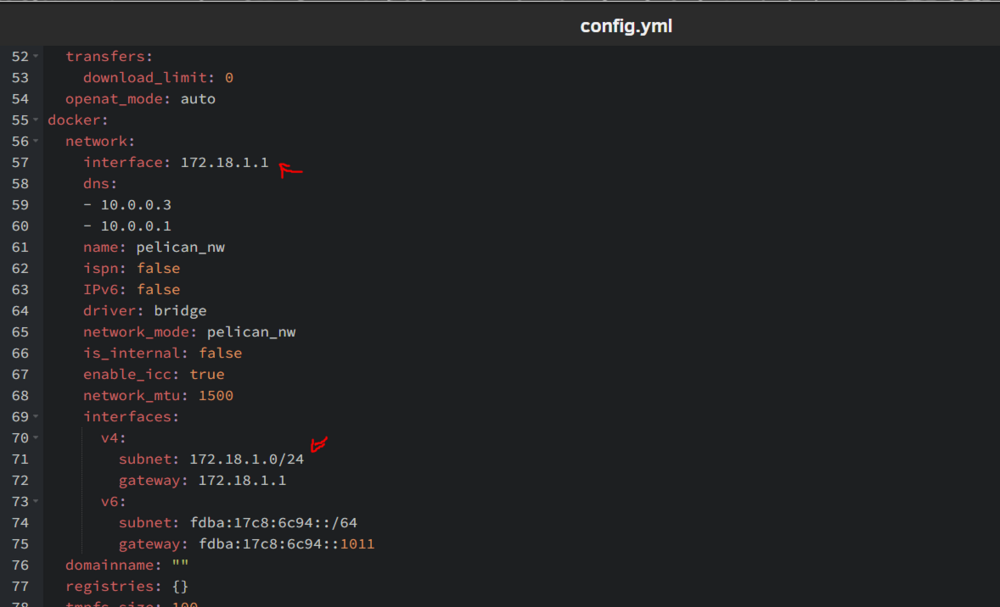
i pushed an update, i did goof. Should have been 172.19 not 172.18 🫣 Edit: you might have to check your config.yaml and change the ips in the list, in case it got populated already
-
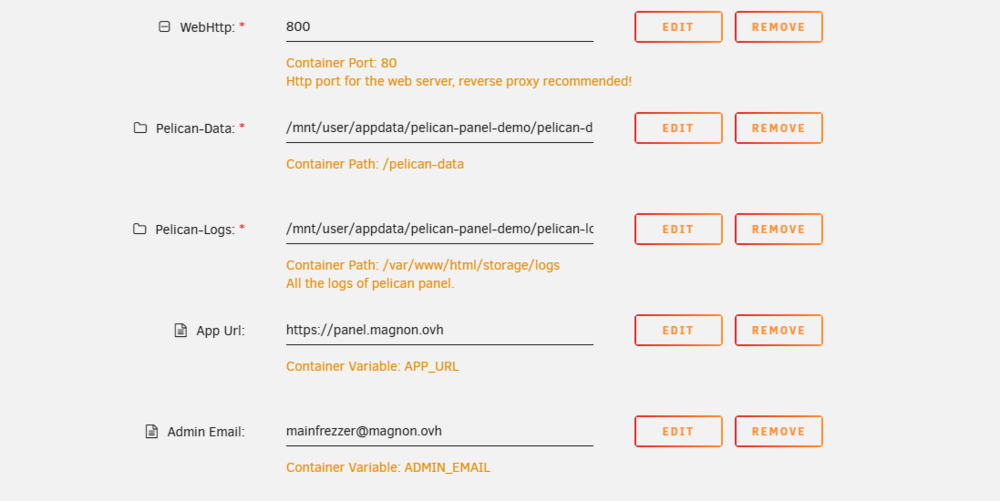
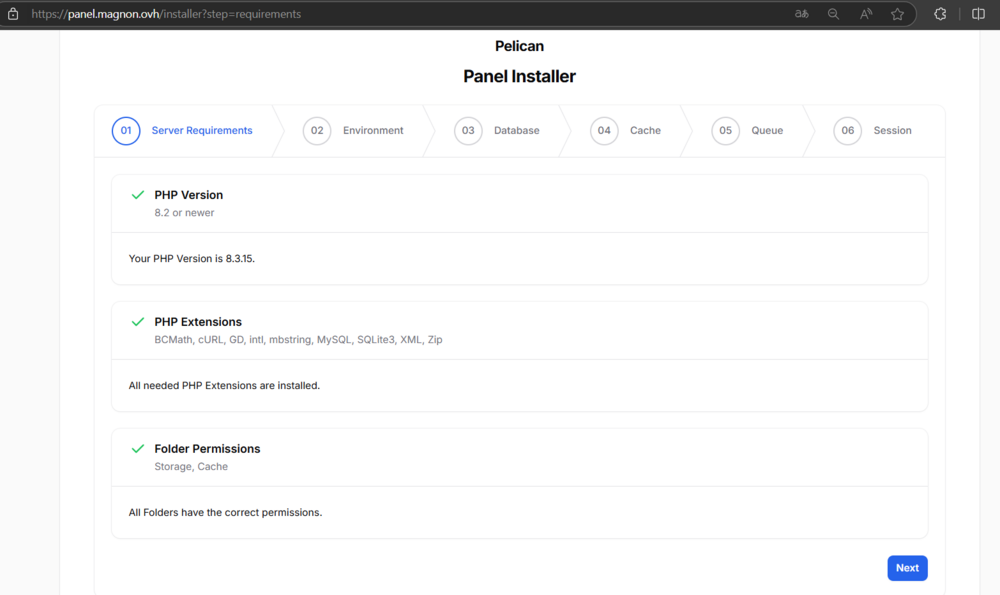
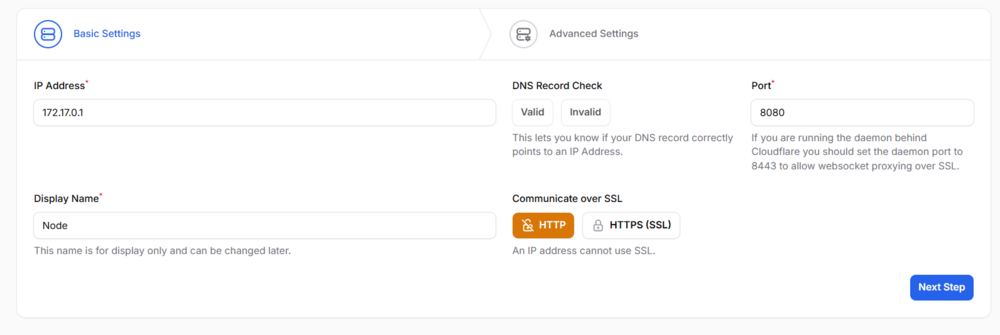
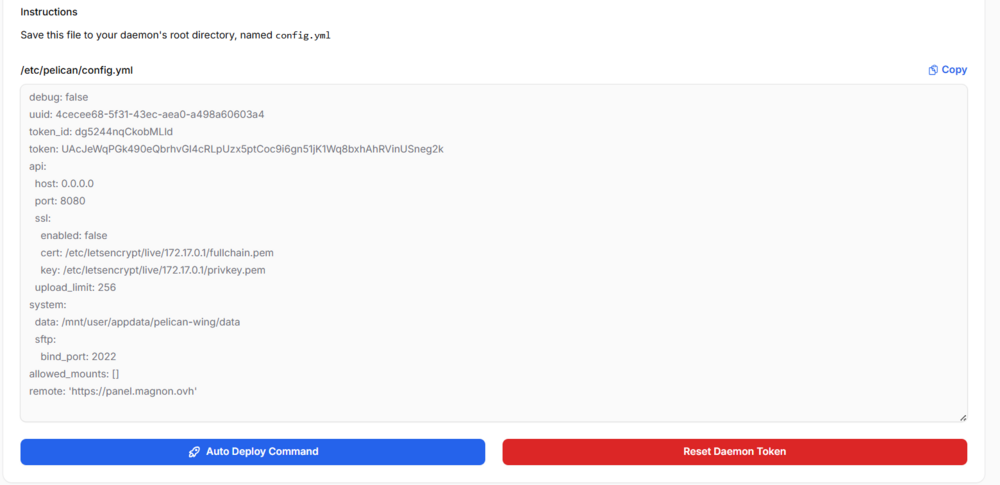
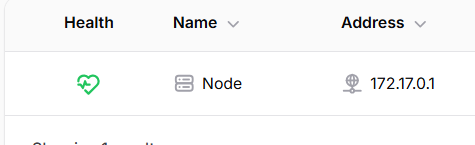
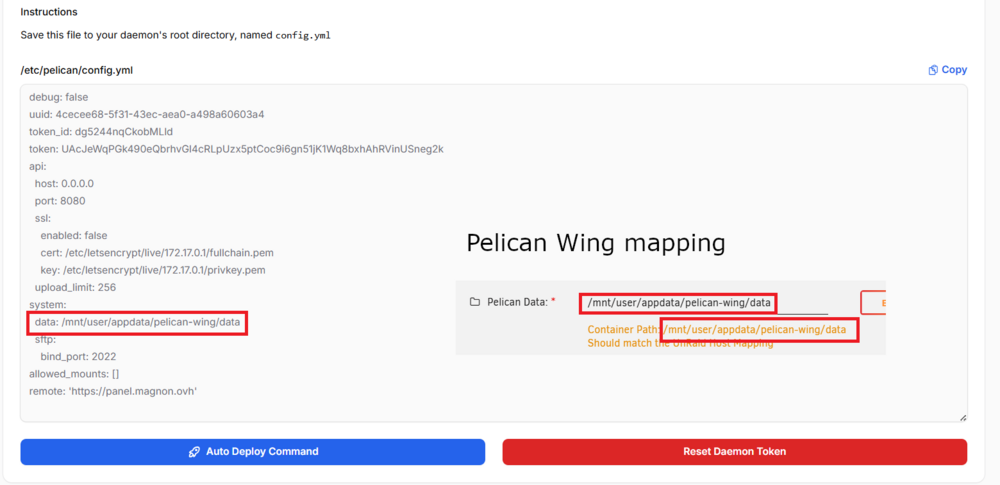
Ive created a modified container and added template to CA, should be there at some point soon™️ It should be a lot more straight forward and require a lot less manual tinkering with the files. The Panel container includes the modified Caddyfile by default, so reverse proxy is heavily recommended! All you need to set on the panel template is the usual. Then you access the panel, in my case https://panel.magnon.ovh/installer, if you want to install it locally first, change the address in the template to http://LANIP after you finished installing, you have to add a node, which is the wing container. The important thing apart from deciding if the Node is accessible via https or http is the port. The port tells the panel on what port it should check for the connection. If you put the wing behind a reverse proxy, always pick 443. After you added the node, the panel will hand out a config.yml, which looks similar to this. Here its important to have a look at the port. If you picked 443 for the reverse proxied node earlier, you would have to change the number back to 8080 or whichever mapping you picked on the Pelican-Wing container. Also, if you use a reverse proxy for the node, dont forget to set "SSL: enabled:" to false The Data: point is set to fit the default template layout of the Mainfrezzer-Pelican-Wing template. You only need to change that if you chose to change the location i.e. you rather want it on a share instead of appdata. They all have to match Now is a good time to start the Pelican-Wing up once. The Pelican-Wing container should complain that its missing the config file and you have to create a config.yml in the "/etc/pelican" location of the Pelican-Wing container, which is by default mapped to "/mnt/user/appdata/pelican-wing/etc/pelican" Take note that you probably have to change the owner to nobody if you created that file via the cmd line, it would be owned by root. After that, start the wing and you should see the following in the Webinterface of the Pelican-Panel Edit: A few things ive changed compared to the official container. 1. The default localtion its handing out, all to fit the mainfrezzer-pelican-**** templates and the UnRaid default. 2. Dockernetwork - The IP Ranges, it shouldnt collide with Pterodactyl created networks. Networkname is pelican_net with "172.19.99.0/24" and "fdba:17d8:6c94::/64"
-
thats usually all you get from that panel in terms of logs. If you kept the reverse proxy work around mapping (this one), youre missing the Caddyfile that you need to create yourself as mentioned. Edit: Currently the default caddyfile that gets created takes in the value from this, the issue with that arrises if you designate a https address, it causes a redirect loop behind a reverse proxy. Edit Edit: Im planning on creating the containers myself in a bit and that should remove a lot of the manual hassel you have to go through to get this all running


-
Odd. Does it work now without issue?
-
How are you running that container? Ipv6 only on br0 or something else? I did include a test to check if the container is able to download the roothints and should only shutdown when it fails to ping "www.internic.net" but theres some odd things going on. I updated the container to remove that check for the moment
-
my-IPTVBoss.xml you can place it in and you can install it via the community apps - previous apps. Edit it as you need it.
-
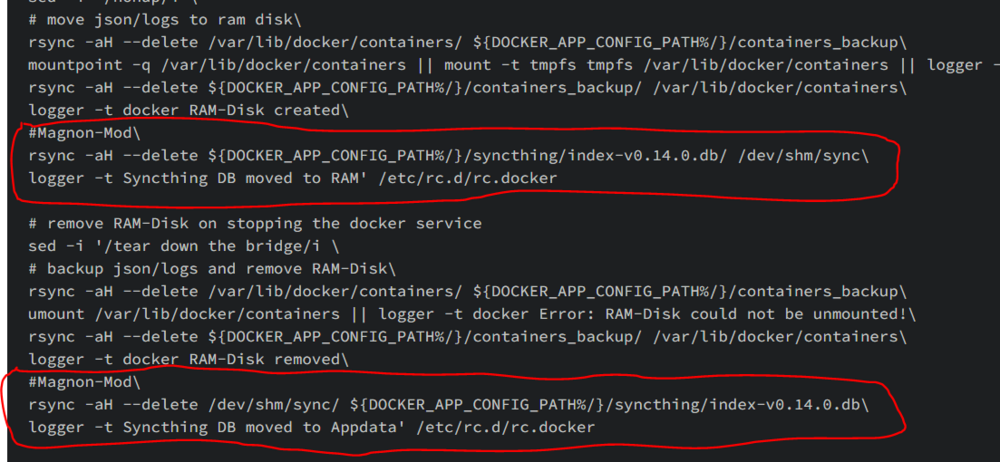
if the logs arent *that* important, you can just map them to /tmp or /dev/shm or use the docker method with --mount type=tmpfs,destination=/WHERE-THE/LOGS-ARE-INSIDE-THE-CONTAINER/logs/,tmpfs-mode=777,tmpfs-size=128000000 Edit: And if youre as crazy as i am, and decided to run a database in ram, you can manually edit the script similar to my that syncs on start and stop of the array
-
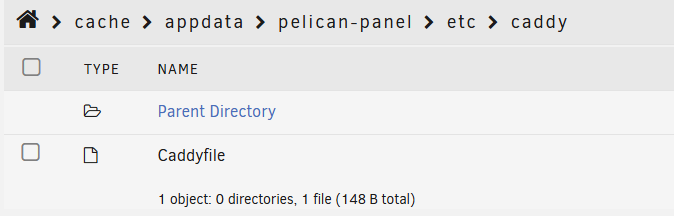
if you kept the mapping for the reverse proxy in the template. You need to manually add the Caddyfile into your location you chose { admin off email {$ADMIN_EMAIL} } :80 { root * /var/www/html/public encode gzip php_fastcgi 127.0.0.1:9000 file_server } The Config.yml isnt created as a file, its displayed in the webui once you added the node. you manually have to create that one for the wing with the contents of it.