






SimonF
Community Developer
-
Joined
-
Last visited
Everything posted by SimonF
-
GPU top does not provide power readings for dg2
-
Please start a new post and include diagnostics
-
What does this provide. root@computenode:~# lspci -ks 0000:03:00.0 03:00.0 VGA compatible controller: Intel Corporation DG2 [Arc A770] (rev 08) Subsystem: Intel Corporation Device 1020 Kernel driver in use: i915 Kernel modules: i915 root@computenode:~# if i915 is not shown do modprobe i915 and try again. You may have the driver blacklisted. Have a look in system drivers at the i915 driver.

-
Ok top is only seeing the AMD device. Suggest starting a new thread with your diagnostics as looks like the card does not have a driver attached if you say it is showing in lspci etc.
-
What is your unraid vers?
-
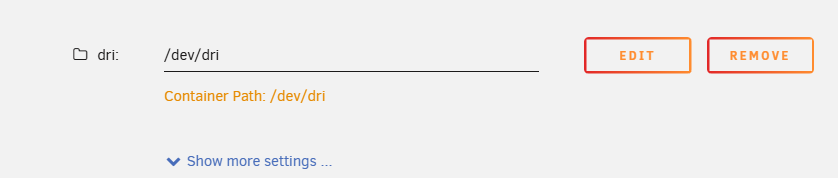
and I added this path to my plex docker.

-
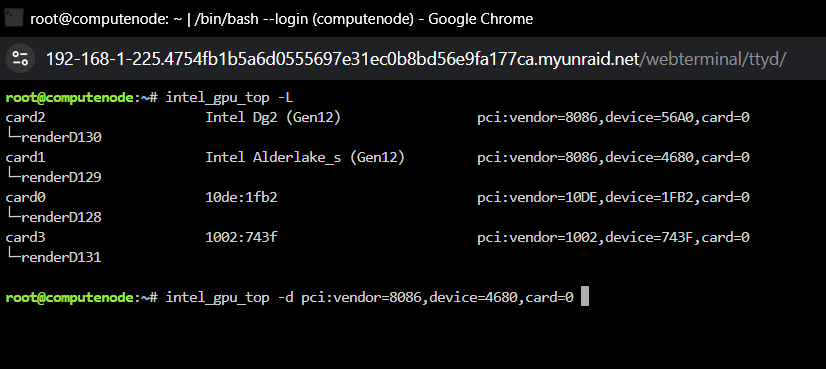
intel_gpu_top -L will list the gpus. I suspect it is trying the AMD. do -L and then use -d with the pci info
-
You need to install intel GPU top for GPU stat to get data. Have you enabled hardware transcode in Plex settings?
-
Scroll down to the intel section and put that value in the intel_gpu command timeout
-
Suggest you install zfs master plugin as it will allow you to remove the dataset.
-
Are you on 7 betas likely because they are zfs datasets? You need to remove the dataset you cannot rmdir
-
Added a donate link in CA Apps info panel.
-
Can you do nano /usr/local/emhttp/plugins/gpustat/lib/Nvidia.php Change 'Threadfin' => ['ffmpeg'], to 'threadfin' => ['ffmpeg' , 'Threadfin'], Update to 2024.10.27 includes tunarr
-
Threadfin was added. Do you have more info for dizque
-
Sounds like you have had a failure, have you retried the update/
-
Do you have it connected to a monitor or a dummy plug.
-
Ok that looks ok, so try refresh of 4000 and top of 2 2.5 in gui settings
-
There is } missing which is the problem. Try with -k 2 and 3, are you on the latest top version? Maybe an issue with a380s with that. It is getting late here so may not respond straight away.
-
Try ctlr + F5 If that does not work can you provide timeout -k 1 1.5 intel_gpu_top -J -s 1000 -d pci:slot="0000:c3:00.0"
-
Try .9 1.5 and see if that makes a difference
-
This was my XML, Installed start ok. <?xml version='1.0' encoding='UTF-8'?> <domain type='kvm' id='1'> <name>Ubuntu</name> <uuid>a789f74f-18c0-aa79-bb41-6d0e0640a29f</uuid> <metadata> <vmtemplate xmlns="unraid" name="Ubuntu" icon="ubuntu.png" os="ubuntu" webui="" storage="default"/> </metadata> <memory unit='KiB'>4194304</memory> <currentMemory unit='KiB'>4194304</currentMemory> <memoryBacking> <nosharepages/> </memoryBacking> <vcpu placement='static'>2</vcpu> <cputune> <vcpupin vcpu='0' cpuset='2'/> <vcpupin vcpu='1' cpuset='3'/> </cputune> <resource> <partition>/machine</partition> </resource> <os> <type arch='x86_64' machine='pc-i440fx-9.1'>hvm</type> <loader readonly='yes' type='pflash'>/usr/share/qemu/ovmf-x64/OVMF_CODE-pure-efi.fd</loader> <nvram>/etc/libvirt/qemu/nvram/a789f74f-18c0-aa79-bb41-6d0e0640a29f_VARS-pure-efi.fd</nvram> </os> <features> <acpi/> <apic/> </features> <cpu mode='host-passthrough' check='none' migratable='on'> <topology sockets='1' dies='1' clusters='1' cores='2' threads='1'/> <cache mode='passthrough'/> </cpu> <clock offset='utc'> <timer name='hpet' present='no'/> <timer name='hypervclock' present='no'/> <timer name='pit' tickpolicy='delay'/> <timer name='rtc' tickpolicy='catchup'/> </clock> <on_poweroff>destroy</on_poweroff> <on_reboot>restart</on_reboot> <on_crash>restart</on_crash> <devices> <emulator>/usr/local/sbin/qemu</emulator> <disk type='file' device='disk'> <driver name='qemu' type='raw' cache='writeback' discard='unmap'/> <source file='/mnt/user/domains/Ubuntu/vdisk1.img' index='2'/> <backingStore/> <target dev='hdc' bus='virtio'/> <serial>vdisk1</serial> <boot order='1'/> <alias name='virtio-disk2'/> <address type='pci' domain='0x0000' bus='0x00' slot='0x05' function='0x0'/> </disk> <disk type='file' device='cdrom'> <driver name='qemu' type='raw'/> <source file='/mnt/user/isos/ubuntu-24.10-desktop-amd64.iso' index='1'/> <backingStore/> <target dev='hda' bus='sata'/> <readonly/> <boot order='2'/> <alias name='sata0-0-0'/> <address type='drive' controller='0' bus='0' target='0' unit='0'/> </disk> <controller type='usb' index='0' model='ich9-ehci1'> <alias name='usb'/> <address type='pci' domain='0x0000' bus='0x00' slot='0x07' function='0x7'/> </controller> <controller type='usb' index='0' model='ich9-uhci1'> <alias name='usb'/> <master startport='0'/> <address type='pci' domain='0x0000' bus='0x00' slot='0x07' function='0x0' multifunction='on'/> </controller> <controller type='usb' index='0' model='ich9-uhci2'> <alias name='usb'/> <master startport='2'/> <address type='pci' domain='0x0000' bus='0x00' slot='0x07' function='0x1'/> </controller> <controller type='usb' index='0' model='ich9-uhci3'> <alias name='usb'/> <master startport='4'/> <address type='pci' domain='0x0000' bus='0x00' slot='0x07' function='0x2'/> </controller> <controller type='pci' index='0' model='pci-root'> <alias name='pci.0'/> </controller> <controller type='sata' index='0'> <alias name='sata0'/> <address type='pci' domain='0x0000' bus='0x00' slot='0x03' function='0x0'/> </controller> <controller type='virtio-serial' index='0'> <alias name='virtio-serial0'/> <address type='pci' domain='0x0000' bus='0x00' slot='0x04' function='0x0'/> </controller> <interface type='bridge'> <mac address='52:54:00:db:5a:ef'/> <source bridge='br0'/> <target dev='vnet0'/> <model type='virtio-net'/> <alias name='net0'/> <address type='pci' domain='0x0000' bus='0x00' slot='0x02' function='0x0'/> </interface> <serial type='pty'> <source path='/dev/pts/4'/> <target type='isa-serial' port='0'> <model name='isa-serial'/> </target> <alias name='serial0'/> </serial> <console type='pty' tty='/dev/pts/4'> <source path='/dev/pts/4'/> <target type='serial' port='0'/> <alias name='serial0'/> </console> <channel type='unix'> <source mode='bind' path='/run/libvirt/qemu/channel/1-Ubuntu/org.qemu.guest_agent.0'/> <target type='virtio' name='org.qemu.guest_agent.0' state='disconnected'/> <alias name='channel0'/> <address type='virtio-serial' controller='0' bus='0' port='1'/> </channel> <input type='tablet' bus='usb'> <alias name='input0'/> <address type='usb' bus='0' port='1'/> </input> <input type='mouse' bus='ps2'> <alias name='input1'/> </input> <input type='keyboard' bus='ps2'> <alias name='input2'/> </input> <graphics type='vnc' port='5900' autoport='yes' websocket='5700' listen='0.0.0.0' sharePolicy='ignore'> <listen type='address' address='0.0.0.0'/> </graphics> <audio id='1' type='none'/> <video> <model type='qxl' ram='65536' vram='65536' vgamem='16384' heads='1' primary='yes'/> <alias name='video0'/> <address type='pci' domain='0x0000' bus='0x00' slot='0x1e' function='0x0'/> </video> <memballoon model='virtio'> <alias name='balloon0'/> <address type='pci' domain='0x0000' bus='0x00' slot='0x06' function='0x0'/> </memballoon> </devices> <seclabel type='dynamic' model='dac' relabel='yes'> <label>+0:+100</label> <imagelabel>+0:+100</imagelabel> </seclabel> </domain>
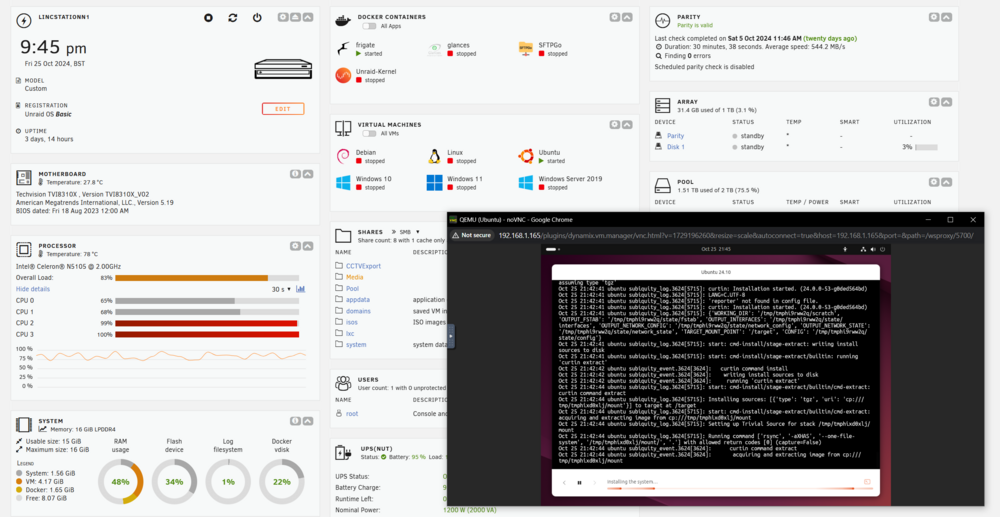 As Jorge states create a new VM image and point to the vdisk or maybe change to a newer model. I may be that the virtio drivers may be old in the VM where you running the latest?Cannot see anything in the logs, I have an N1 so will try to install Ubuntu VMs and see how it goes. I have run Debian and other test VMs before with no issue. But to confirm it is not going in to the UEFI boot page a CPU normally shows running at 100% at this stage.Try 2024.10.25a





