Leaderboard


Popular Content
Showing content with the highest reputation on 12/08/18 in all areas
-
Yeah, I've been busy, quite ironic though that the day before you came along I started working on it again..... I uploaded v6.6.6 last night. There are some caveats, can't get the OOT 10GB Intel drivers to compile. Need to talk to LT about that one.5 points
-
To upgrade: If you are running any 6.4 or later release, click 'Check for Updates' on the Tools/Update OS page. If you are running a pre-6.4 release, click 'Check for Updates' on the Plugins page. If the above doesn't work, navigate to Plugins/Install Plugin, select/copy/paste this plugin URL and click Install: https://s3.amazonaws.com/dnld.lime-technology.com/stable/unRAIDServer.plg Refer also to @ljm42 excellent 6.4 Update Notes which are helpful especially if you are upgrading from a pre-6.4 release. BIOS: Especially if using Virtual Machines, we highly recommend keeping your motherboard bios up-to-date. Bugs: If you discover a bug or other issue new to this release, please open a Stable Releases Bug Report. This will likely be the last of the Unraid 6.6 series since the linux kernel, 4.18.20 was recently marked EOL (no more updates). We had a devil of a time deciding whether to simply update to the 4.19 kernel now, but we're about to start Unraid 6.7 public -rc, which uses 4.19 kernel. If 6.7 stretches out too far we may need to produce a 6.6.7 for security updates of if something apocalyptic comes up. Version 6.6.6 2018-12-01 Base distro: openssl: version 1.1.1a (CVE-2018-0734 CVE-2018-5407) openssl-solibs: version 1.1.1a (CVE-2018-0734 CVE-2018-5407) samba: version 4.8.7 (CVE-2018-14629 CVE-2018-16841 CVE-2018-16851 CVE-2018-16853) Linux kernel: version 4.18.20 OOT Intel 10gbps network driver: ixgbe: version 5.5.2 Management: bug fix: error reported by 'btrfs filesystem show' prevented proper btrs cache pool analysis update smartmontools drivedb and hwdata/{pci.ids,usb.ids,oui.txt,manuf.txt} webgui: Black and White theme: make select arrow consistent for all browsers webgui: All themes: create consistent select arrow for all browsers using pure css webgui: Fixed: flash share warning is given when SMB is disabled webgui: Added customizable header background color webgui: All themes: css corrections webgui: Revert FAT32 filename collisions webgui: Dashboard: add disk utilization, cpu load & memory usage coloring webgui: Syslinux Configuration: rename Basic/Advanced view to Raw/Menu webgui: Fixed: parity schedule not taking zero values (e.g. Sunday=0) webgui: Prevent Adblocker from hiding share list webgui: Fixed missing font-awesome class in VM CPU popup window webgui: Improved PCIe ACS override help text webgui: Improved VFIO allow unsafe interrupts help text webgui: Apply syslinux changes to all menus except safe mode webgui: add per DIMM information toggle webgui: Fixed PHP warnings in Vars.page webgui: Docker: narrow CPU pinning list to fit lower resolutions webgui: Added confirmation checkbox when missing disk in array webgui: Disable cache slots selection when cache disks are re-arranged webgui: Added confirmation checkbox when missing cache disk webgui: Remove unused information in array view1 point
-
Now that the flash SMB share when its set to be exported publicly throws a warning, maybe its time to consolidate the SMB Security settings for the Flash under the Shares Tab, since it's not particularly obvious how to change it. (Main, Boot Device, Click on "Flash", SMB Security Settings -> isn't really intuitive, but Shares Tab, Click on Flash is)1 point
-
You can't. All you can do is a non-correcting check and see if parity is consistent. I understand what you are getting at, but if you think it through, it's not possible. The parity disk by itself has no way of recording which member of the parity set is the wrong bit, only that ONE of the several data disks is inconsistent. Theoretically you could examine each non matching address offset and flip a bit on each drive one by one and see which of the solutions made the most logical sense, but you would have to determine which file was effected for each drive and check for corruption with external validation, or if that address was in unused space, in which case you wouldn't be able to tell what was correct or incorrect. The best you can do is a non-correcting check, if there are errors you would have to do a byte level comparison with backups or checksum to verify which file if any were affected. tldr; Parity is a sum of all disks, so if the array consists of more than one data disk there is no way to tell which data disk is wrong.1 point
-
Just because something works by accident does not mean that its correct. Output of these two code snips are different #!/usr/bin/php <? $xmlstr = <<<XML <?xml version='1.0'?> <test> <PostArgs>--database /etc/database.db</PostArgs> </test> XML; $test = new SimpleXMLElement($xmlstr); echo $test->PostArgs[0]; ?> !/usr/bin/php <? $xmlstr = <<<XML <?xml version='1.0'?> <test> <PostArgs> --database /etc/database.db </PostArgs> </test> XML; $test = new SimpleXMLElement($xmlstr); echo $test->PostArgs[0]; ?> Difference between the two is that the first xml does not include newlines in the string, the second does (before and after) Now, assume that you did this on your templates <Network> bridge </Network> Instead of <Network>bridge</Network> The system decides that the network type is NONE on the first, but does correctly pick bridge on the second. What is between the opening and closing tags on XML is what the entry is. That includes newlines. And before you say that the system should automatically remove all newlines from all entries, and trim any opening / closing whitespace, how is it supposed to know that that is what you actually intend to have happen vs you intend to have the whitespace / newlines actually present in the entry (ie: Description) Your snip works by accident, along with your other xml's in the repositories (ExtraParams section). But they are not correct. All I'm stating is that you're expecting full documentation on a schema that for all intents and purposes is an internal data structure when if you use the system as I've asked, everything is correct in the first place without any problems. The template page is an xml editor effectively.1 point
-
This doesn't sound right. Did you alter the USB during the transition? It really feels to me like the new board is not properly mounting the USB drive during boot, which can happen if the USB subsystem on the new board isn't working well with unraid. Are you plugged in to a USB 2 or USB 3 port?1 point
-
Probably closer to the truth that you just like making more work for me. Reverted setting a maximum version1 point
-
You need to update the templates to reflect the change Sent via telekinesis1 point
-
Empty drives in the array are still part of parity protection, and can't be removed or downsized and still keep parity valid. An empty drive still contains lots of information, as the empty file system has the structures in place to organize and catalog data, all of which is part of parity. The only way to remove a drive without invalidating parity is force the write of all zeroes to the drive, which takes many many hours and results in an unmountable volume. Because of this, it's generally a good idea to only keep drives that you actually need for storage in the array. Keeping a bunch of empty or little used drives in the parity protected array wastes resources and raises the risk of data loss unnecessarily. I generally try to keep enough free space in the array total as big as my biggest single drive. When I get below that, I upgrade my smallest disk. Try to keep the number of disks as low as possible, and always keep at least 1 physical and logical space permanently unoccupied in case of an emergency backup or recovery or testing option.1 point
-
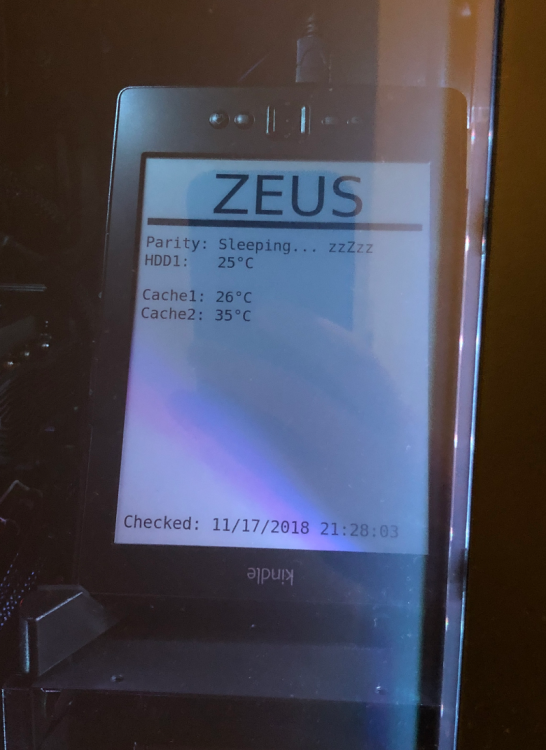
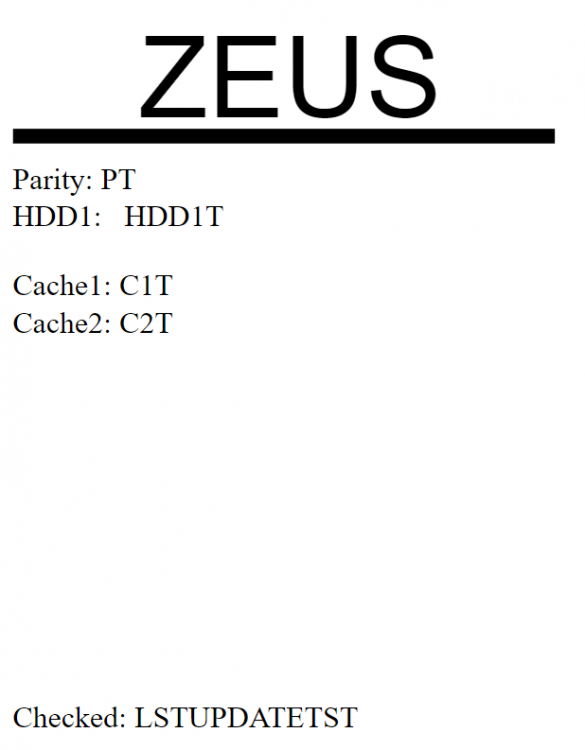
I, eh... well... *blushes* Thanks for your kind words! Both of you! Sure, a small writeup wouldn't be tooo hard, I guess... The Kindle Well, the Kindle being used is nothing too spectacular, but it was the part that consumed almost half of the time for the whole project. It's a 4th Gen Kindle, which, as you might already have guessed from the name, runs the Firmware 4.x (don't know the exact version number). For prepping the Kindle, I followed several online tutorials - most of it was taken out of this tutorial at galacticstudios. The author did a great work here. However, as outlined in the last paragraph, the writer also hit a roadblock when trying to register the cron job. I had the same issue, so at the end I had to head over to the mobileread thread, where I got everything to setup a USB-Network. Luckily, as you might remember, my thin client already runs on linux, so no problems here with crude Windows drivers. I could then ssh into the Kindle itself as root, and add the cronjob there. On the now-rooted Kindle, I installed Kite, an alternative launcher for the Kindle, which allows you to run basically everything that can run under Linux. What I also took from the first link, was the script, which fetches the image from the server: #!/bin/sh rm -f /mnt/us/weather.png read url </mnt/us/weatherurl if wget $url -O /mnt/us/weather.png 2>/mnt/us/documents/recentweatherlog.txt; then eips -c eips -c eips -g /mnt/us/weather.png else cat /mnt/us/recentweatherlog.txt >>/mnt/us/documents/weatherlog.txt eips -c eips -c eips -g /mnt/us/weather-image-error.png fi eips is the program on the kindle, which is used to display images (which are in a really special format) on the display. The script reads the url from a text-file, then tries to wget the image from a server, and stores it on the kindle. Also, logging is performed, and an error image has been provided, in case something fails. This basically rounds up the Kindle setup. The Server Yeah, well - it's a bit ugly. I wanted to make it a bit more cleaner, but sometimes life happens, and you don't have time to finish stuff the way you want it. But it's working for now, and I'm sure I'll get back to it some day. As you can see in the image from the first post, the Kindle only displays text. So, I thought it should be pretty straight forward: Design a template svg file, replace the placeholders with the actual content, convert it to a png, and push it to a webserver somewhere on the network. Well... no. First, I created a template SVG file in my favourite SVG editor, inkscape. It looks like this: Then, because I'm a C# coder all day, I wrote a .NET Core application, which can run under Windows and Linux alike (big bonus for developing in Visual Studio, and then deploying to a Linux Docker). It reads like this: using System; using Renci.SshNet; /* reference needed: Renci.SshNet.dll */ using System.IO; namespace Distat.Cli { class Program { static void Main(string[] args) { Console.WriteLine("Booting Launchpad..."); //smartctl -a /dev/sde | grep -m 1 -i Temperature_Celsius | awk '{print $10}' string[] drives = new string[]{ "sdf", "sdd", "sde", "sdc" }; string[] placeholders = new string[]{ "PT", "HDD1T", "C1T", "C2T" }; string svgContent = File.ReadAllText(@"./template/kindle-600-800.svg"); if (String.IsNullOrWhiteSpace(svgContent)) Console.WriteLine("Not loaded..."); ConnectionInfo ConnNfo = new ConnectionInfo("192.168.178.51",22,"root", new AuthenticationMethod[]{ // Pasword based Authentication new PasswordAuthenticationMethod("root","****************") } ); //svgContent = svgContent.Replace("PT", "31").Replace("LSTUPDATETST", DateTime.Now.ToString()); for(int i = 0; i < placeholders.Length; i++){ try{ using (var sshclient = new SshClient(ConnNfo)){ sshclient.Connect(); using(var cmd = sshclient.CreateCommand(String.Format("smartctl -a --nocheck standby -i /dev/{0} | grep -m 1 -i Temperature_Celsius | awk '{{print $10}}'", drives[i]))) { cmd.Execute(); string result = cmd.Result; if (String.IsNullOrWhiteSpace(result)) result = "Sleeping... zzZzz"; else result = result.Replace(System.Environment.NewLine, "") + "°C"; Console.WriteLine("Command>" + cmd.CommandText); Console.WriteLine("Return Value = {0}", result); svgContent = svgContent.Replace(placeholders[i], result); } sshclient.Disconnect(); } } catch { } } svgContent = svgContent.Replace("LSTUPDATETST", DateTime.Now.ToString()); Directory.CreateDirectory("./output/"); if (File.Exists("./output/kindle.png")) File.Delete("./output/kindle.png"); if (File.Exists("./output/kindle.svg")) File.Delete("./output/kindle.svg"); File.WriteAllText("./output/kindle.svg", svgContent); "rsvg-convert --width 600 --height 800 --background-color white -o ./output/kindle.png ./output/kindle.svg".Bash(); "convert ./output/kindle.png -rotate -180 ./output/kindle.png".Bash(); "pngcrush -c 0 -ow ./output/kindle.png".Bash(); using (var sshsftp = new SftpClient(ConnNfo)){ sshsftp.Connect(); sshsftp.UploadFile(new MemoryStream(File.ReadAllBytes("./output/kindle.png")), "/mnt/user/appdata/apache-www/imgs.png"); sshsftp.Disconnect(); } } } } So I guess I have to explain a few parts: Everything is hardcoded. Yes. I admit. I have another EPaper sitting in our house, which waits for being allowed to display some info. Maybe next year. Let's walk through the code: string[] drives = new string[]{ "sdf", "sdd", "sde", "sdc" }; string[] placeholders = new string[]{ "PT", "HDD1T", "C1T", "C2T" }; string svgContent = File.ReadAllText(@"./template/kindle-600-800.svg"); I defined an array with all the drives that are available in the server, and another array, which holds the placeholder. Out of pure lazyness, these share the same indices. ;) The next line reads all the content from the template svg into a simple string. for(int i = 0; i < placeholders.Length; i++){ try { using (var sshclient = new SshClient(ConnNfo)) { sshclient.Connect(); using(var cmd = sshclient.CreateCommand(String.Format("smartctl -a --nocheck standby -i /dev/{0} | grep -m 1 -i Temperature_Celsius | awk '{{print $10}}'", drives[i]))) { cmd.Execute(); string result = cmd.Result; if (String.IsNullOrWhiteSpace(result)) result = "Sleeping... zzZzz"; else result = result.Replace(System.Environment.NewLine, "") + "°C"; Console.WriteLine("Command>" + cmd.CommandText); Console.WriteLine("Return Value = {0}", result); svgContent = svgContent.Replace(placeholders[i], result); } sshclient.Disconnect(); } } catch { } } Here, most of the magic happens. Using the awesome ssh.net library, I connect to the unraid machine via SSH, and run several commands on it (Note: Don't do that.) Nice detail: The --nocheck standby flags doesn't wake up the drive. So it stays idle, although the cron job is updating the data every 7 minutes. I then simply replace the placeholders with the real data (Note: My daily production code doesn't look like this.^^). File.WriteAllText("./output/kindle.svg", svgContent); "rsvg-convert --width 600 --height 800 --background-color white -o ./output/kindle.png ./output/kindle.svg".Bash(); "convert ./output/kindle.png -rotate -180 ./output/kindle.png".Bash(); "pngcrush -c 0 -ow ./output/kindle.png".Bash(); using (var sshsftp = new SftpClient(ConnNfo)){ sshsftp.Connect(); sshsftp.UploadFile(new MemoryStream(File.ReadAllBytes("./output/kindle.png")), "/mnt/user/appdata/apache-www/imgs.png"); sshsftp.Disconnect(); } Afterwards, everything is written to a new file, called kindle.svg. The ssh library also provides a simple "Bash()" - Extension to strings, with which I can run commands on a local machine. I use rsvg-convert, convert and pngcrush: rsvg-convert: Does the heavy lifting from svg to png. Had some headache to get it running. convert: Rotates the output. As you can see in the picture, the Kindle is placed upside down. This is for the power cord. pngcrush: Does the conversion to a "Kindle"-friendly, grayscale png format. Took some time to find the right format for the png. Finally, the image gets uploaded to the Unraid server. On the Unraid server itself are two Docker containers running, that belong to this project: Apache-PHP: The easiest to use apache server I could find. Works like a charme, and provides the image to the Kindle Gogs: My go-to git repository. I use it to pull the source code to the server, and then build everything into a docker container. The aforementioned docker container is then run via cron every 10 minutes: #!/bin/bash while timeout -k 10 8 docker run --rm distat; [ $? = 124 ] do sleep 2 # Pause before retry done Yes, sometimes the "smartctl" - command doesn't return, and I haven't had the time to look into it. So I give the whole container a 10 second timeout. "Distat" is the name of the project - "Display Statistics". It should grow into sth. bigger, but I haven't had the time for it yet. I guess I missed some bits and pieces, but I'm also a little bit sick at the moment, so my mind might not work as expected.^^ One more thing... I almost forgot - there is one thing left: The power supply. One part of the hack is to change the Kindle to an "always on" kind of display. That's not how the kindle works out of the box. It normally goes to sleep, which also means that the wifi gets disconnected. So I had to turn this off. This means, the Kindle needs to be attached to a 5V PSU all the time. I did this by splicing up a Micro USB cable, soldering a Fan-Connector at the other end, and then put a 5V/12V - Fan - Molex splitter in between. Now, the Kindle never switches off, because the server runs 24/7. Conclusion That's pretty much all that is to say about the project. It was fun, and I'm really looking into making it more mature - like growing it into a "home-assistant" for information displays through out the household. Don't know if that's realistic, but... Well, that's what dreams are for. Thanks for reading. :)
 1 point
 -
Ok I found issue sound modules must be enabled in kernel config, that the one of the depends of that module which need TBS 6981 New build v2 on the way ---------------------------- UPDATE - done please test it https://www.sendspace.com/file/4642ak all others which don't work before also please check1 point
-
change it to "siwatinc/homebridge_gui_unraid" as I already deleted "homebridge_gui_x_unraid"1 point
-
Well the upstream code hasn't changed in six months, my additions are simply shell script code for the entrypoint. From what I can tell v3 protocol is still being developed, otherwise why blog about a whitepaper? If/when v3 becomes live I'll see if they change/update this container or just build a new one - if they update the container, things should update easy enough. If storj makes a new v3 container I'd look into making a template, and/or repo for Unraid support. Fundamentally my container is fork of https://github.com/zannen/docker-storjshare-cli. I don't think the container presently does support v3, but when the storj team (or 3rd-party) releases a v3-storj client or container I'd be happy to look into it. If people find it before I do, welcome track me down.1 point
-
Possibly an issue with the Realtek NIC driver on the newer kernel, that driver has been iffy and prone to issues before, best bet for the future would to replace the NIC with an Intel one.1 point
-
Sorry! Was I supposed to put that in a text file?1 point
-
Thank you for this! I've updated the dockerfile to include the h.265 codec. Sadly, InMethod hasn't updated the linux version of Air Video HD past 2.2.3.1 point
-
I was having the same problem, and figured out a solution. The codec needs to be updated inside the docker. Here are the steps I took to accomplish this: 1. ssh into your Unraid server (I am on Windows and use Putty) 2. Run the following command to be able to make changes inside the Air Video HD container: docker exec -it <container_name> bash (<container_name> should match what you see in the Unraid GUI, my was "AirVideoHD" so my command was "docker exec -it AirVideoHD bash" without the quotes) 3. You should now be making changes inside the container - the h.265 codec plugin is not available from the Ubuntu repositories, so you will need to add a repository: sudo apt-add-repository ppa:strukturag/libde265 4. Update the packages from the newly added repository: sudo apt-get update 5. Install the h.265 codec plugin for VLC: sudo apt-get install vlc-plugin-libde265 6. Type "exit" to return to the Unraid command line (No longer making changes to the Air Video HD container) 7. Restart AirVideoHD docker container from Unraid GUI (may not be necessary, but I wanted to make sure the changes stuck after the container was restarted) I was successfully able to stream and download videos using the h.265 codec and no longer received the "missing codec" error. (Air Video Converted the files to download to iOS) I am not sure if this container is still being maintained, as it has been over a year since the last update, but if it is, then hopefully this can be included in the next update. Hope this helps anyone having problems playing h.265 video files!1 point


