ALERT
Members
-
Joined
-
Last visited
Everything posted by ALERT
-
@ich777 Could you please provide a direct link to the latest Unraid Nvidia plugin for a forced upgrade? Thank you
-
same issue, same fix.
-
Thank you. You can close this topic.
-
Oh, there a GitHub request for this already https://github.com/unraid/api/issues/1597
-
Hello, I'm trying to set up Home Assistant monitoring for my Unraid server's temperatures, but both SNMP plugins and the Unraid API endpoints lack temperature data. I would appreciate the ability to monitor Unraid temperatures via the Unraid API. Thanks!
-
Alas, 4.10.0 still hangs on Starting the Unraid API
-
Hi. I finally got time to migrate from spaceinvaderone's script v1 to buddybackup. I have a few suggestions: It would be nice if Snapshot creation and pruning had a button "create snapshot now", similar to "Send backup now" in Backup and restore. It would be nice if Snapshot creation Recursive mode had a list of exclusions. I like keeping snapshots for all my docker volumes, but there are a few of them that don't need snapshots E.g. glances, mongodb, redis/valkey, etc. Thank you for your work!
-
Here is how I figured this out plugin install https://raw.githubusercontent.com/greycubesgav/unraid-templates/refs/heads/main/davfs2/davfs2.plg tailscale_mountpoint=/mnt/remotes/tailscale tailscale_remote=http://100.100.100.100:8080 davfs_secrets=/etc/davfs2/secrets grep -q "^$tailscale_remote" $davfs_secrets || echo "$tailscale_remote '' ''" | tee -a $davfs_secrets > /dev/null mkdir -p $tailscale_mountpoint mount -t davfs $tailscale_remote $tailscale_mountpoint the username and password are empty for Tailscale, so you will have to fill them within the single quotes
-
Вітаю. Запрошую до україномовного чату ентузіастів розумного дому та self hosting https://t.me/selfhostedua Обговорюється не лише Unraid. Раді новачкам! 1. Спілкуємось українською 2. Гуглимо перед тим як запитувати 3. Банимо за промоут російських продуктів (Аліса, Маруся, тощо) Адмін: @denysdovhan
-
Hello. Please help me out. I have two Unraid servers: Server Media and Server Mini. Server Mini is 12V and the UPS is connected via USB to it. Server Media is connected to the UPS power (but the USB cannot be connected, as it is too far). How do I set up NUT this scheme: - The power is down, Server Media understands it is on UPS power. - Server Media shuts itself down on a one-minute straight timer AND shuts the UPS afterward - Server Mini does not depend on the UPS, just hosts the NUT server. Thank you!
-
Silly me, I didn't manage to think about clicking Force Update myself. Thank you! It worked! Dummy change didn't work, btw.
-
Hello, could you please tell me how can I enable the version of a replicated Docker container? I have separated my Unraid into two Unraids, moving the essentials to a power-efficient node, and luckily I found out about this plugin that saved me at least 4 hours of replicating the containers from the main server to the mini server by hand. But now, as the replication succeeded, I wish to abandon my essentials on my main server and fully use them on my mini server, but the container versions are "not available". Thank you.
-
Just happened to me on Version: 6.12.6.
-
A story from a noob: I converted my drive to ZFS. I copied the data back to it (*1). I wanted to benefit from ZFS datasets and tried converting an existing path to a dataset via ZFS Master (*2). Pressed "create dataset" button, entered the existing path, pressed confirm, saw the success window (*3). Didn't read all the other options within the window. Left them on their default values. I was shocked to find out that the contents of the path was gone. After a nerve break, rationality kicked in, and I thought that this mountpoint could just overlap the existing path. I renamed the dataset via `zfs rename mountpoint/path mountpoint/new_path` and luckily the old path returned with all the data. Then I copied the `mountpoint/path/*` to `mountpoint/new_path/`, deleted the old empty path and renamed the dataset. *1. My fault that I didn't pre-create datasets for the root paths. Didn't read enough, thought that a magical plugin will do everything for me without much knowledge of ZFS. *2. My fault again, didn't read much on ZFS. Should have known that datasets can be mounted on top of the existing paths. *3. Feedback to ZFS Master plugin: This operation may have checked that the path exists? Warned about it? Offered to move the data inside the existing path to the newly created dataset for me? I understand that I am a ignorant noob, but I imagine someone doesn't think of renaming the newly created dataset and their surprise of that the data is gone, the free space is not reclaimed, whilst the path is now empty. Thank you for this plugin, @Iker
-
Yes, but we are all lazy individuals here and we want to press a button in Community Applications and deploy a Lemmy instance without docker-compose.
-
Ended up fixing the malfunctioning motherboard, then the malfunctioning USB dongle. Basically, my setup was all crap. So no. I did not manage to find a command line switch for VMs.
-
I did not do anything specific. I used my duckdns URL to connect to VNC. But now it seems that it just works normally with the local IP connection. You can always put a custom VNC port to the VM settings and connect using a VNC client using the Unraid IP and this port.
-
what's the end of the story?
-
same error for me. can you describe the difference between serve modes local and remote?
-
I might have found the cause! So my Unraid is with HTTPS turned OFF. But my Nginx Proxy Manager has a subdomain with letsncrypt dns challenge for my duckdns that redirects https://unraid.mydoimain.duckdns.org to the HTTP port of my Unraid. Aaaand... VNC doesn't work if I use the local non-secure Unraid URL, but it connects successfuly if I use the secure duckdns subdomain over NPM to the HTTP Unraid port. This doesn't work: http://192.168.1.3/plugins/dynamix.vm.manager/vnc.html?v=1640104829&autoconnect=true&host=192.168.1.3&port=&path=/wsproxy/5701/ This works: https://unraid.mydomain.duckdns.org/plugins/dynamix.vm.manager/vnc.html?v=1640104829&autoconnect=true&host=unraid.mydomain.duckdns.org&port=&path=/wsproxy/5701/ (the link is not real) I have deleted the OS image again and the Ubuntu is loading!
-
Once I force stop the vm and start it again — it starts successfuly, but the log is the same, no errors on UI, and nothing happens after the log. Tried waiting for an hour. All the paths exist. ISO exists, vdisk is present and was created by the VM. Tried deleting the VM and starting anew. Tried shutting down the server and starting it again. No results.
-
Yeah, it seems version switch jumped from Next to Test, and I just clicked update on the popped up top OS Update notification. My log has the same last two lines. I found this topic via google using the last line. VNC doesn't connect, nothing happens next. VM cannot be shut down, only forced to shut down. HOME=/var/lib/libvirt/qemu/domain-3-Ubuntu \ XDG_DATA_HOME=/var/lib/libvirt/qemu/domain-3-Ubuntu/.local/share \ XDG_CACHE_HOME=/var/lib/libvirt/qemu/domain-3-Ubuntu/.cache \ XDG_CONFIG_HOME=/var/lib/libvirt/qemu/domain-3-Ubuntu/.config \ /usr/local/sbin/qemu \ -name guest=Ubuntu,debug-threads=on \ -S \ -object '{"qom-type":"secret","id":"masterKey0","format":"raw","file":"/var/lib/libvirt/qemu/domain-3-Ubuntu/master-key.aes"}' \ -machine pc-q35-6.2,usb=off,dump-guest-core=off,mem-merge=off,memory-backend=pc.ram \ -accel kvm \ -cpu host,migratable=on,host-cache-info=on,l3-cache=off \ -m 8192 \ -object '{"qom-type":"memory-backend-ram","id":"pc.ram","size":8589934592}' \ -overcommit mem-lock=off \ -smp 10,sockets=1,dies=1,cores=5,threads=2 \ -uuid d6b4463d-9f37-edb9-3ef8-8d809654e776 \ -no-user-config \ -nodefaults \ -chardev socket,id=charmonitor,fd=38,server=on,wait=off \ -mon chardev=charmonitor,id=monitor,mode=control \ -rtc base=utc,driftfix=slew \ -global kvm-pit.lost_tick_policy=delay \ -no-hpet \ -no-shutdown \ -boot strict=on \ -device '{"driver":"pcie-root-port","port":16,"chassis":1,"id":"pci.1","bus":"pcie.0","multifunction":true,"addr":"0x2"}' \ -device '{"driver":"pcie-root-port","port":17,"chassis":2,"id":"pci.2","bus":"pcie.0","addr":"0x2.0x1"}' \ -device '{"driver":"pcie-root-port","port":18,"chassis":3,"id":"pci.3","bus":"pcie.0","addr":"0x2.0x2"}' \ -device '{"driver":"pcie-root-port","port":19,"chassis":4,"id":"pci.4","bus":"pcie.0","addr":"0x2.0x3"}' \ -device '{"driver":"pcie-root-port","port":20,"chassis":5,"id":"pci.5","bus":"pcie.0","addr":"0x2.0x4"}' \ -device '{"driver":"pcie-root-port","port":21,"chassis":6,"id":"pci.6","bus":"pcie.0","addr":"0x2.0x5"}' \ -device '{"driver":"ich9-usb-ehci1","id":"usb","bus":"pcie.0","addr":"0x7.0x7"}' \ -device '{"driver":"ich9-usb-uhci1","masterbus":"usb.0","firstport":0,"bus":"pcie.0","multifunction":true,"addr":"0x7"}' \ -device '{"driver":"ich9-usb-uhci2","masterbus":"usb.0","firstport":2,"bus":"pcie.0","addr":"0x7.0x1"}' \ -device '{"driver":"ich9-usb-uhci3","masterbus":"usb.0","firstport":4,"bus":"pcie.0","addr":"0x7.0x2"}' \ -device '{"driver":"virtio-serial-pci","id":"virtio-serial0","bus":"pci.3","addr":"0x0"}' \ -blockdev '{"driver":"file","filename":"/mnt/user/domains/Ubuntu/vdisk1.img","node-name":"libvirt-2-storage","cache":{"direct":false,"no-flush":false},"auto-read-only":true,"discard":"unmap"}' \ -blockdev '{"node-name":"libvirt-2-format","read-only":false,"cache":{"direct":false,"no-flush":false},"driver":"raw","file":"libvirt-2-storage"}' \ -device '{"driver":"virtio-blk-pci","bus":"pci.4","addr":"0x0","drive":"libvirt-2-format","id":"virtio-disk2","bootindex":1,"write-cache":"on"}' \ -blockdev '{"driver":"file","filename":"/mnt/user/isos/ubuntu-20.04.3-desktop-amd64.iso","node-name":"libvirt-1-storage","auto-read-only":true,"discard":"unmap"}' \ -blockdev '{"node-name":"libvirt-1-format","read-only":true,"driver":"raw","file":"libvirt-1-storage"}' \ -device '{"driver":"ide-cd","bus":"ide.0","drive":"libvirt-1-format","id":"sata0-0-0","bootindex":2}' \ -fsdev local,security_model=passthrough,id=fsdev-fs0,path=/mnt/user/ubuntu/ \ -device '{"driver":"virtio-9p-pci","id":"fs0","fsdev":"fsdev-fs0","mount_tag":"unraid","bus":"pci.1","addr":"0x0"}' \ -netdev tap,fd=40,id=hostnet0 \ -device '{"driver":"virtio-net","netdev":"hostnet0","id":"net0","mac":"52:54:00:4f:ed:9f","bus":"pci.2","addr":"0x0"}' \ -chardev pty,id=charserial0 \ -device '{"driver":"isa-serial","chardev":"charserial0","id":"serial0"}' \ -chardev socket,id=charchannel0,fd=41,server=on,wait=off \ -device '{"driver":"virtserialport","bus":"virtio-serial0.0","nr":1,"chardev":"charchannel0","id":"channel0","name":"org.qemu.guest_agent.0"}' \ -device '{"driver":"usb-tablet","id":"input0","bus":"usb.0","port":"1"}' \ -audiodev '{"id":"audio1","driver":"none"}' \ -vnc 0.0.0.0:1,websocket=5701,password=on,audiodev=audio1 \ -k en-us \ -device '{"driver":"qxl-vga","id":"video0","ram_size":67108864,"vram_size":67108864,"vram64_size_mb":0,"vgamem_mb":16,"max_outputs":1,"bus":"pcie.0","addr":"0x1"}' \ -device '{"driver":"virtio-balloon-pci","id":"balloon0","bus":"pci.5","addr":"0x0"}' \ -sandbox on,obsolete=deny,elevateprivileges=deny,spawn=deny,resourcecontrol=deny \ -msg timestamp=on char device redirected to /dev/pts/1 (label charserial0) qxl_send_events: spice-server bug: guest stopped, ignoring
-
i have the same issue trying to create Ubuntu Desktop LTS on Unraid 6.10.0-rc3i alert-server-diagnostics-20220123-1248.zip
-
oh. thank you.
-
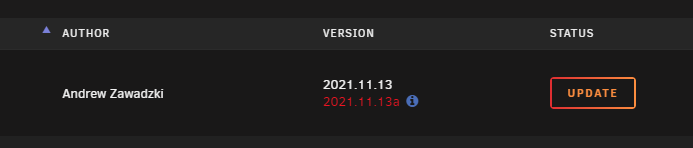
Hey. It seems suspicious to me that Community Applications plugin offers me an upgrade from Stable version to an Alpha version.