frakman1
Community Developer
-
Joined
-
Last visited
Everything posted by frakman1
-
I am using this docker jlesage/nginx-proxy-manager If you're talking about jc21/nginx-proxy-manager:latest Then its /etc/nginx/nginx.conf configuration has this line: access_log /data/logs/fallback_access.log proxy; Which mean you will need to map the /data/logs folder to a location that the goaccess container can also access. You will also need to change the goaccess configuration to look for that log file instead of the one currently configured
-
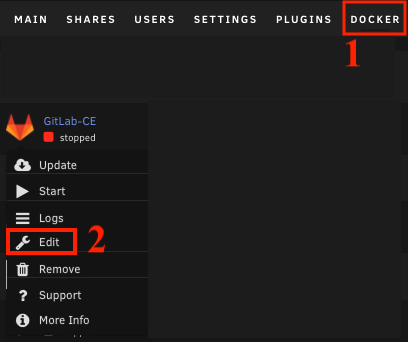
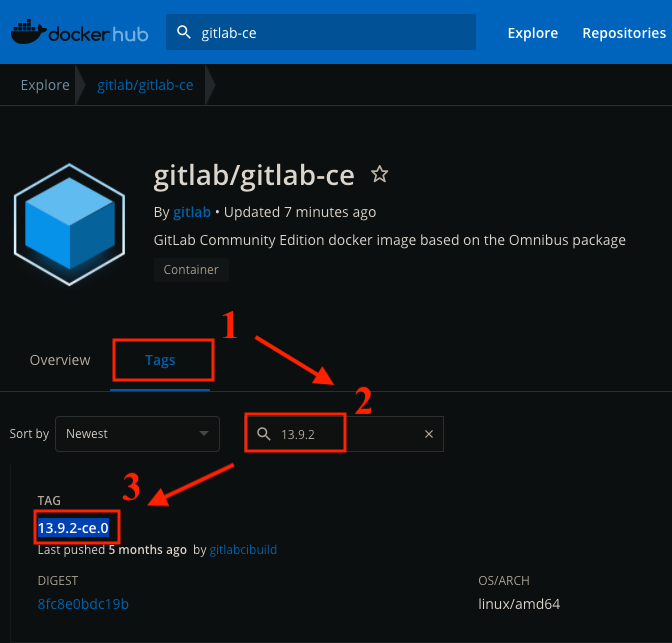
You do that by editing the docker template page. Goto the DOCKER tab, click on Gitlab-CE and select "Edit" Locate the field labeled Repository. It should be set to gitlab/gitlab-ce:latest This is what controls what version of Gitlab-CE you are using. A quick breakdown of the components of this string is: gitlab: user on dockerhub gitlab-ce: name of the repository latest: version To change it to something else, first find out what the official tags are from the dockerhub page for that project here. Click on the Tags tab and search for the version that you want. For example, 13.9.2, would correspond to 13.9.2-ce.0 Now enter that version instead of latest in the Repository field of the Gitlab-CE docker template: Repository: gitlab/gitlab-ce:13.9.2-ce.0 Hope that helps!

-
I address this point in Step One of my post. The idea is not to have to change anything in nginx.conf and map the folders appropriately.
-
You can do that by modifying the repository that the docker template is using. It looks like it is currently using the "master" tag: To change it, head out to where it is hosted on docker hub: https://hub.docker.com/r/mattermost/mattermost-team-edition/tags?page=1&ordering=last_updated and pick the tag that you want and replace it. Example: mattermost/mattermost-team-edition:5.33.4-rc1

-
I'm not 100% sure what the original state of the "Use SSL/TLS" setting was but I think it was originally No and that installing the Unraid.net plugin enabled it. If I'm wrong and it was set to Yes already, then removing the plugin should remove the new Unraid.net certificate so that it would continue using the self-signed hostname certificate.
-
Thank you. I tried that solution but that wasn't satisfactory either. It was still using the new Unraid certificate. Uninstalling the plugin should really remove everything that it added.
-
For those suffering from the recent error: Error: ER_WRONG_NAME_FOR_INDEX: Incorrect index name 'migrations_lock_lock_key_unique' I was able to recover by droping the two tables migrations and migrations_lock tables as mentioned in the ghost user forum I used the adminer docker that lets you do it easily via a web UI.
-
I decided to uninstall this plugin. However, now anytime I go to tower.local or the IP addres, it always redirects to the xxx.unraid.net URL which requires a functioning internet and DNS which isn't always true when I reboot the server. This seems like a bug. When I uninstall this plugin and reboot the server, I don't expect any remnants of the xxx.unraid.net to exist. How do I completely remove this redirection and go back to using my IP address directly? Update, well I looked at the /etc/nginx/conf.d/emhttp-servers.conf file and found the offending line here: server { # # Redirect http requests to https # listen *:80 default_server; listen [::]:80 default_server; return 302 https://xxxxx.unraid.net:443$request_uri; } However commenting it out just breaks the webUI and reverting the whole file to a backup and rebooting results in it being regenerated again. I can't find where to turn it off. I've already uninstalled the plugin so I can't go into any settings and turn things off. I even tried re-installing the plugin, turning off the remote access etc and then uninstalling but still have the same problem. Also, it is still using the WebUI SSL certificate that it installed for use with the unraid.net plugin. How do I remove that too? I just want it to go back to the way it was without any of the unraid.net stuff. I was able to locate the certificate here: /boot/config/ssl/certs/certificate_bundle.pem and the original one is in the same folder here: /boot/config/ssl/certs/Tower_unraid_bundle.pem but not sure what to do with them. _____________________________ Final Update -> Solved Under Settings -> Management Access -> Use SSL/TLS. When I hit the ? symbol, I saw this useful help page: The path is actually /boot/config/ssl/certs. In there I found the offending certificate, certificate_bundle.pem. I moved it somewhere else for safekeeping and rebooted the server and then it finally went back to normal. 🔍 Mystery solved.
-
The "drvload" command should be run within the "Command Prompt" box, so it is surprising to me that anything would hang since it's not a full-blown windows environment. I don't really know but if it's hanging after loading the virtio driver, then take a look at which iso you are using. I'm using this one: Maybe you could try different ones.

-
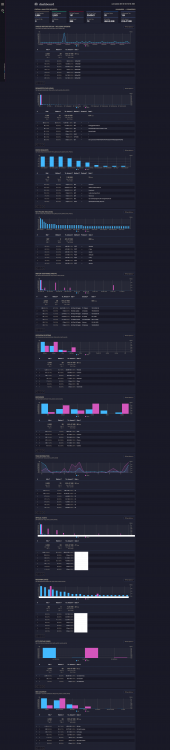
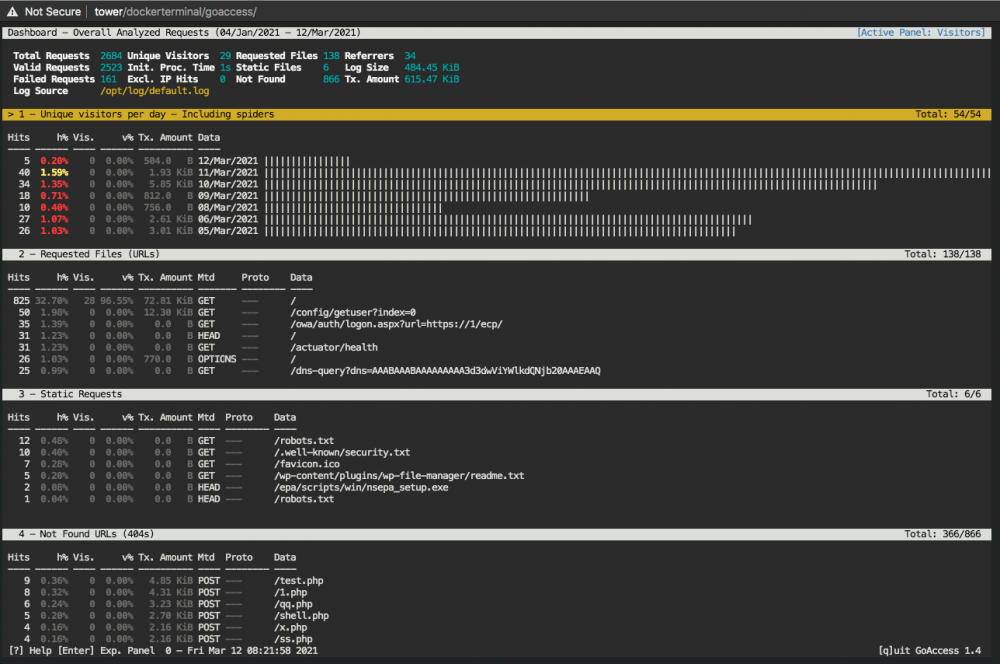
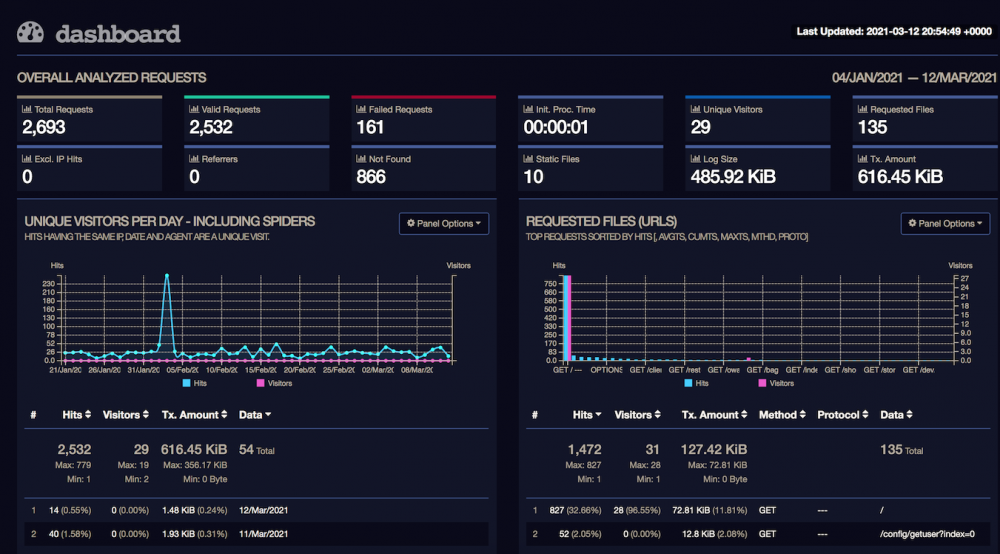
Pre-requisites - You have Nginx Proxy Manager already installed and working. I am using this one from the Community Applications: jlesage/nginx-proxy-manager: - You have installed goaccess from Community Applications but it's not working out-of-the-box. I am using this one from the Community Applications: gregyankovoy/goaccess There are three main steps 1- Have your log generator container (Nginx Proxy Manager) output its logs into a folder that goaccess can, well, access 2- Configure goaccess to look for the right log file 3- Configure goaccess to understand how to parse the log/date/time format Step One: Map Log File Folder I use Nginx Proxy Manager and by default, it puts its access logs in the file /config/log/default.log. This location is non-configurable. Well, actually it's configured in the file /etc/nginx/nginx.conf with the line: access_log /config/log/default.log proxy; ... but nginx.conf is not in a mapped folder so I just left it alone. I just ensured that it mapped its /config/log folder to a folder that both containers could access. In my case, I used /mnt/user/dmz/goaccess/log Step Two: Configure Log File The goaccess container looks for its access logs in the file /opt/log/access.log by default. Luckily, this is configurable in the goaccess.conf file that is mapped to the host's /mnt/user/appdata/goaccess/goaccess.conf file. In there, change the line: log-file /opt/log/access.log To: log-file /opt/log/default.log Step Three: Configure Log Format The other thing to do is to provide the log/date/time file format that Nginx Proxy Manager uses in a language that goaccess understands. The nginx format is defined in the same nginx.conf file mentioned above as: log_format standard '[$time_local] $status - $request_method $scheme $host "$request_uri" [Client $remote_addr] [Length $body_bytes_sent] [Gzip $gzip_ratio] "$http_user_agent" "$http_referer"'; There is a nifty script that does this mapping for you here. The short story is that it has to look like this for goaccess to understand it otherwise you get parsing errors. time-format %T date-format %d/%b/%Y log_format [%d:%t %^] %s - %m %^ %v "%U" [Client %h] [Length %b] [Gzip %^] "%u" "%R" Now, open the file goaccess.conf again and comment out the line: log-format COMBINED and paste the three lines describing the log/date/time format we want. That's it. You should now have a beautiful dashboard of your Nginx Proxy Manager access logs including which subdomains are getting used most (virtual hosts) and which URLs end up going to 404 (possible attacks) and a whole lot more besides! Sample Dashboard: Note that it should update in real time as long as the settings cog on the left has a green dot near it like this: That means that the websocket is connected. BONUS If you want to get all geeky and see the results in a terminal window, you can do that too. Just open the goaccess container's Console window and paste the three lines of log/date/time format into the file ~/.goaccessrc so it looks like this: # cat ~/.goaccessrc time-format %T date-format %d/%b/%Y log_format [%d:%t %^] %s - %m %^ %v "%U" [Client %h] [Length %b] [Gzip %^] "%u" "%R" and run: goaccess /opt/log/default.log And you will get the same information in a terminal window: (Navigate with TAB and SHIFT+TAB button to jump between sections and ENTER to expand selection. q to quit)


-
You would need to put your public key in: /root/.ssh/authorized_keys However, in order to survive a reboot, you'll have to put it in the USB flash drive too. That location is: /boot/config/ssh/authorized_keys Note that if you do this, you won't be able to use Virt Manager because that requires a username/password to login with.
-
Pardon the stupid question but isn't that everything that matters though? I thought those are the main Unraid folders that you'd want it to run on. What is it for if not that?
-
@jowi How do I get pip (for python 2.7.10) to work on Unraid? I have Nerd Pack and Dev Pack installed. I have version 2.7.10 of Python. When I run the above command, I get: # python -m ensurepip --default-pip ERROR:root:code for hash md5 was not found. Traceback (most recent call last): File "/usr/lib64/python2.7/hashlib.py", line 147, in <module> globals()[__func_name] = __get_hash(__func_name) File "/usr/lib64/python2.7/hashlib.py", line 97, in __get_builtin_constructor raise ValueError('unsupported hash type ' + name) ValueError: unsupported hash type md5 ERROR:root:code for hash sha1 was not found. Traceback (most recent call last): File "/usr/lib64/python2.7/hashlib.py", line 147, in <module> globals()[__func_name] = __get_hash(__func_name) File "/usr/lib64/python2.7/hashlib.py", line 97, in __get_builtin_constructor raise ValueError('unsupported hash type ' + name) ValueError: unsupported hash type sha1 ERROR:root:code for hash sha224 was not found. Traceback (most recent call last): File "/usr/lib64/python2.7/hashlib.py", line 147, in <module> globals()[__func_name] = __get_hash(__func_name) File "/usr/lib64/python2.7/hashlib.py", line 97, in __get_builtin_constructor raise ValueError('unsupported hash type ' + name) ValueError: unsupported hash type sha224 ERROR:root:code for hash sha256 was not found. Traceback (most recent call last): File "/usr/lib64/python2.7/hashlib.py", line 147, in <module> globals()[__func_name] = __get_hash(__func_name) File "/usr/lib64/python2.7/hashlib.py", line 97, in __get_builtin_constructor raise ValueError('unsupported hash type ' + name) ValueError: unsupported hash type sha256 ERROR:root:code for hash sha384 was not found. Traceback (most recent call last): File "/usr/lib64/python2.7/hashlib.py", line 147, in <module> globals()[__func_name] = __get_hash(__func_name) File "/usr/lib64/python2.7/hashlib.py", line 97, in __get_builtin_constructor raise ValueError('unsupported hash type ' + name) ValueError: unsupported hash type sha384 ERROR:root:code for hash sha512 was not found. Traceback (most recent call last): File "/usr/lib64/python2.7/hashlib.py", line 147, in <module> globals()[__func_name] = __get_hash(__func_name) File "/usr/lib64/python2.7/hashlib.py", line 97, in __get_builtin_constructor raise ValueError('unsupported hash type ' + name) ValueError: unsupported hash type sha512 Ignoring ensurepip failure: pip 6.1.1 requires SSL/TLS
-
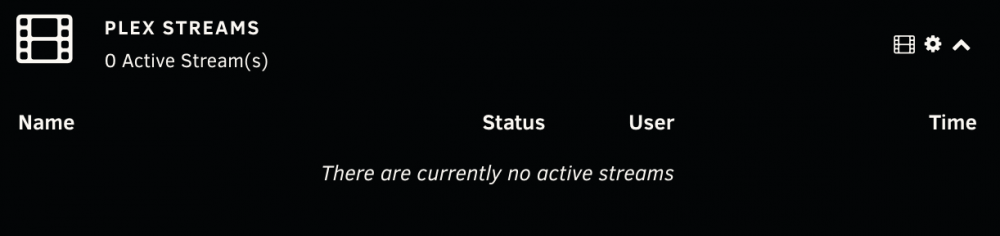
There are many plugins that add to the Dashboard. The Plex Streams plugin is just one example. It has it's own Tab as well as a Dashboard widget Are you saying that you can't add to the UD widget in the Dashboard or that you don't want to (which is fine if that's the case)?
-
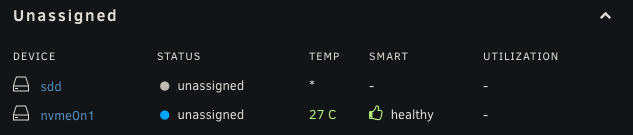
A reboot seems to heal things for now. I can see the Unassigned devices listed under Main now. Another question about the plugin: How come the Utilization bar is not populated in the Dashboard but is populated in the Main tab? Dashboard: Main:

-
My server is acting weird. Super high average load values even after stopping all VMs and docker. It may or not be related. There are a ton of hdparm calls in the D (uninterruptible sleep) state. I don't know if that's a plugin or OS thing I posted a thread about it here:
-
tower-diagnostics-20210227-1553.zip
-
The toggles are all on. Toggling them off and on didn't make a difference. Clicking on the reload button returned Success but nothing changed Clicking on the Gear icon tried to go to "/Settings/UnassignedDevicesSettings" but it hangs there and never loads. syslog shows a timeout. All other pages seem to load fine. Feb 27 15:28:00 Tower nginx: 2021/02/27 15:28:00 [error] 31631#31631: *265334 upstream timed out (110: Connection timed out) while reading response header from upstream, client: 192.168.86.22, server: , request: "POST /plugins/unassigned.devices/UnassignedDevices.php HTTP/1.1", upstream: "fastcgi://unix:/var/run/php5-fpm.sock", host: "tower", referrer: "http://tower/Main"
-
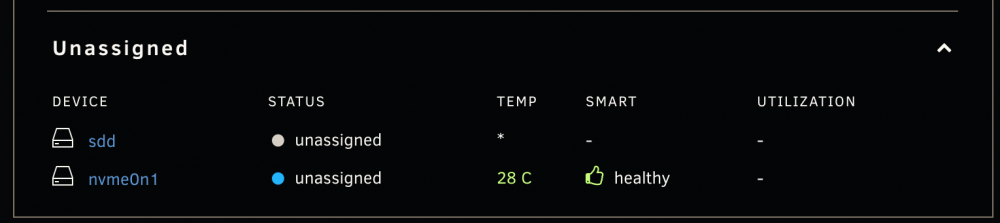
I recently updated this plugin and can no longer see my unassigned devices listed in the Main tab of the webUI. It shows up in the Dashboard though Dashboard: Main: I have both Unassigned Devices and Unassigned Devices Pro installed: Using UNRAID Version: 6.8.3


-
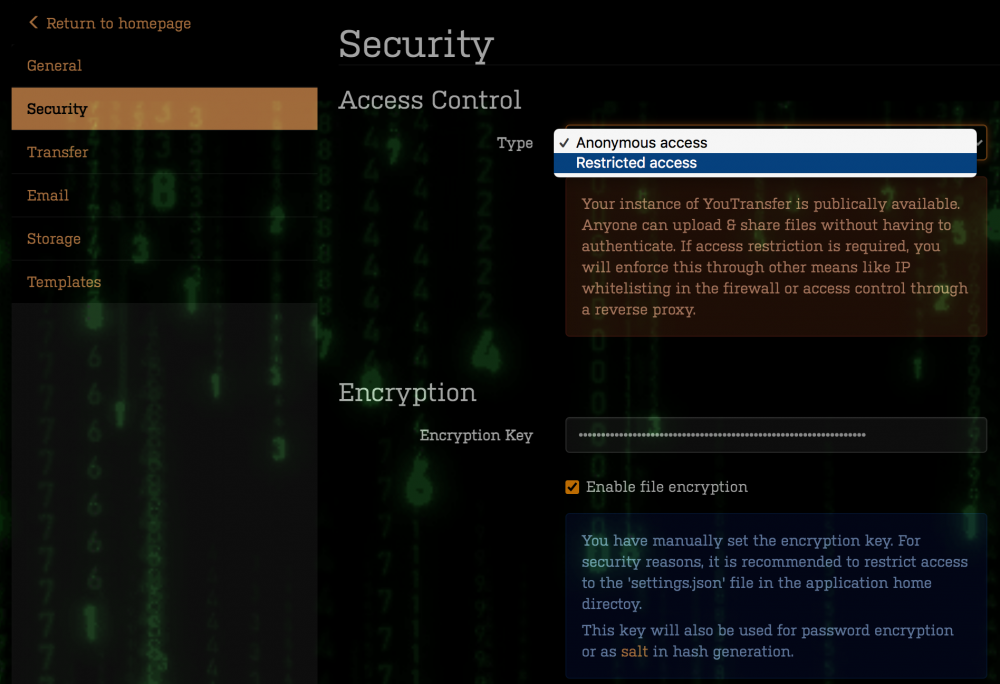
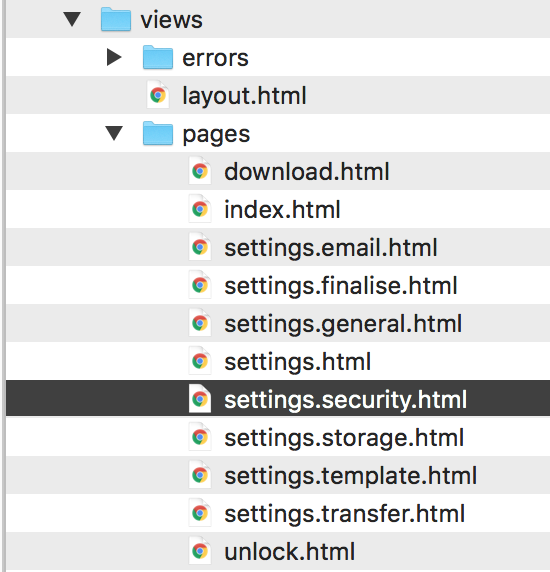
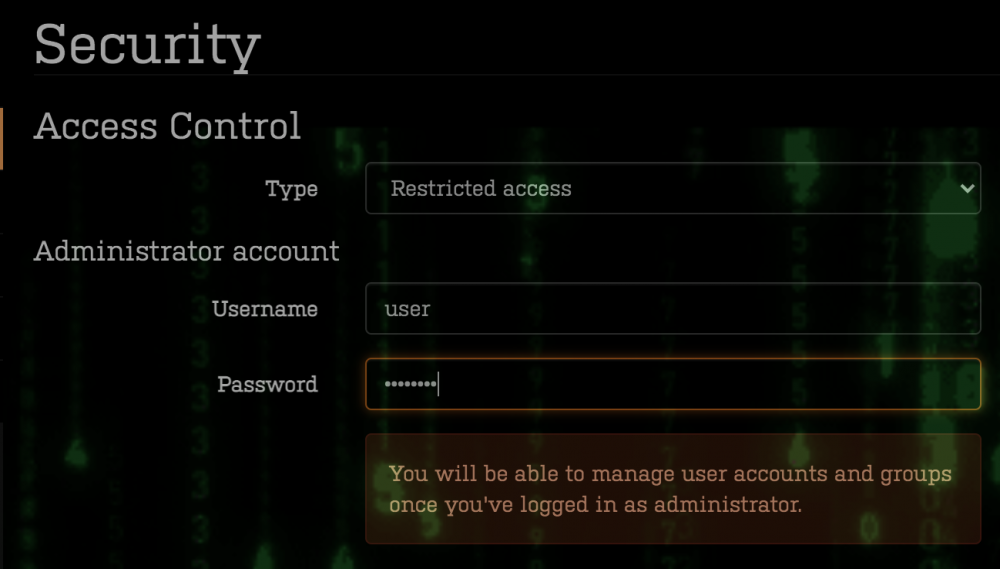
The docker image that this template uses is missing the security features that the latest one in GitHub contains even though the GitHub code is 5 years old. This one doesn't have this security settings page under http://<ip>/settings/security: nor the corresponding settings.security.html page available in the GitHub version: GitHub: UNRAID: root@dc87d0587a01:/opt/youtransfer/dist/views/pages# ls -lsth total 52K 4.0K -rw-r--r-- 1 root root 608 Feb 10 17:47 unlock.html 4.0K -rw-r--r-- 1 root root 2.8K Feb 10 17:47 settings.transfer.html 4.0K -rw-r--r-- 1 root root 3.7K Feb 10 17:47 settings.template.html 4.0K -rw-r--r-- 1 root root 1.7K Feb 10 17:47 settings.html 8.0K -rw-r--r-- 1 root root 6.1K Feb 10 17:47 settings.storage.html 4.0K -rw-r--r-- 1 root root 3.0K Feb 10 17:47 settings.general.html 4.0K -rw-r--r-- 1 root root 1.4K Feb 10 17:47 settings.finalise.html 12K -rw-r--r-- 1 root root 9.9K Feb 10 17:47 settings.email.html 4.0K -rw-r--r-- 1 root root 1006 Feb 10 17:47 index.html 4.0K -rw-r--r-- 1 root root 743 Feb 10 17:47 download.html
-
Support for JFrog Artifactory OSS docker container Application Name: JFrog Artifactory OSS Application Site: https://www.jfrog.com/ Docker Hub: JFrog Private Registry: docker.bintray.io/jfrog/artifactory-oss:6.23.7 Github Template: https://github.com/frakman1/docker-templates/blob/master/tynor88/artifactory-oss.xml Default credentials: admin/password

-
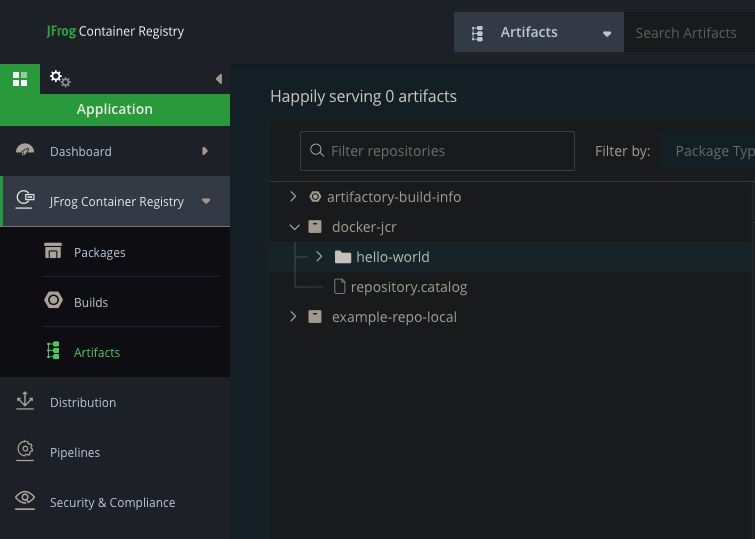
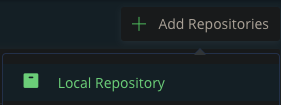
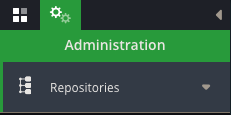
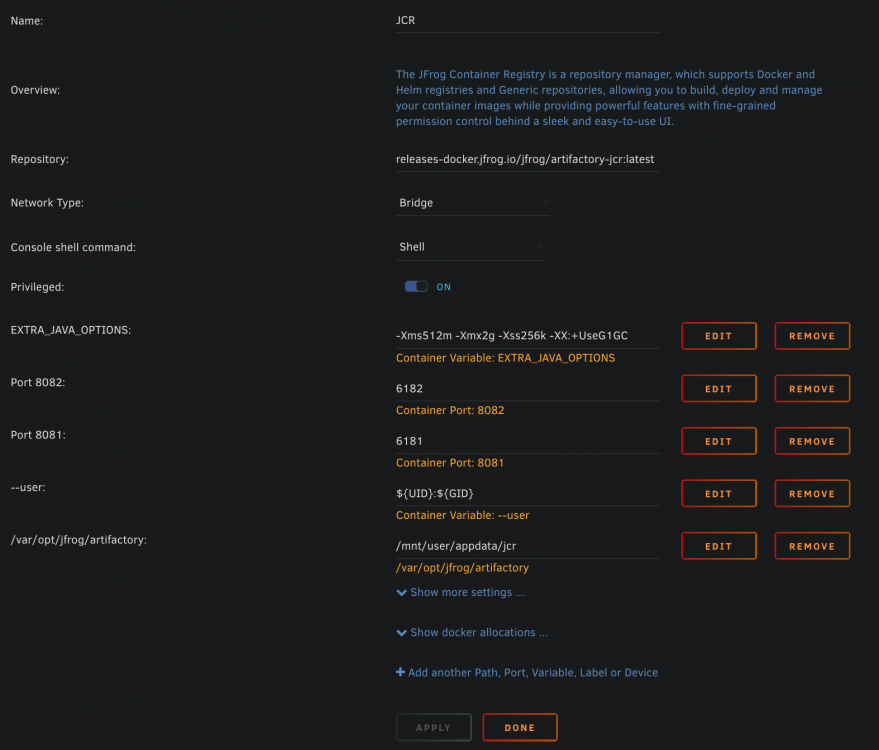
Support for JFrog Container Registry docker container Application Name: JFrog Container Registry (JCR) Application Site: https://www.jfrog.com/ Docker Hub: JFrog Private Registry: releases-docker.jfrog.io/jfrog/artifactory-jcr:latest Github: N/A (JFrog does not provide one) Github Template: https://github.com/frakman1/docker-templates/blob/master/tynor88/jcr.xml Default credentials: admin/password My template looks like this: Example of usage Login to the WebUI with default credentials (admin/password) and create a Local Docker Repo. Click on Administration -> Repositories in top left: Then Add Repositories -> Local Repository by clicking on the top right button: I called it docker-jcr and left the default settings as is. You'll need to add the JCR server to the list of insecure-registries supported by your local docker installation. On Linux, that is in /etc/docker/daemon.json. On Mac, it is in /Users/username/.docker/daemon.json On Windows, it is in C:\ProgramData\docker\config\daemon.json Add this if it isn't there: { ... "insecure-registries": [ "UNRAID-IP:6182" ], ... } Then from a terminal, I pulled a hello-world repo, tagged it to the new JCR repo and then pushed it to my JCR instance. e.g. $docker login http://UNRAID-IP:6182 Username: admin Password: Login Succeeded $docker pull hello-world Using default tag: latest latest: Pulling from library/hello-world Digest: sha256:31b9c7d48790f0d8c50ab433d9c3b7e17666d6993084c002c2ff1ca09b96391d Status: Image is up to date for hello-world:latest docker.io/library/hello-world:latest $docker images REPOSITORY TAG IMAGE ID CREATED SIZE hello-world latest bf756fb1ae65 13 months ago 13.3kB hello-world linux bf756fb1ae65 13 months ago 13.3kB $docker tag bf756fb1ae65 UNRAID-IP:6182/docker-jcr/hello-world:latest $docker push UNRAID-IP:6182/docker-jcr/hello-world:latest The push refers to repository [UNRAID-IP:1182/docker-jcr/hello-world] 9c27e219663c: Pushed latest: digest: sha256:90659bf80b44ce6be8234e6ff90a1ac34acbeb826903b02cfa0da11c82cbc042 size: 525 After docker push:

-
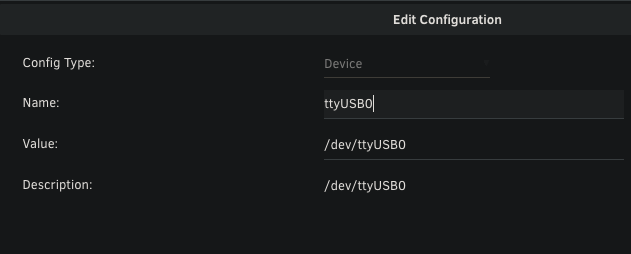
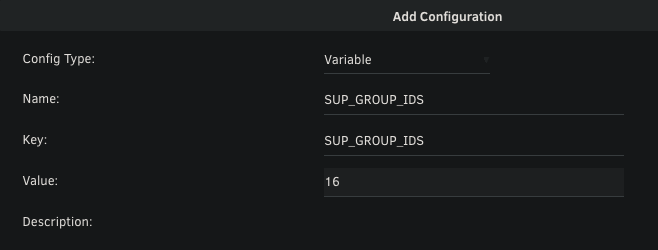
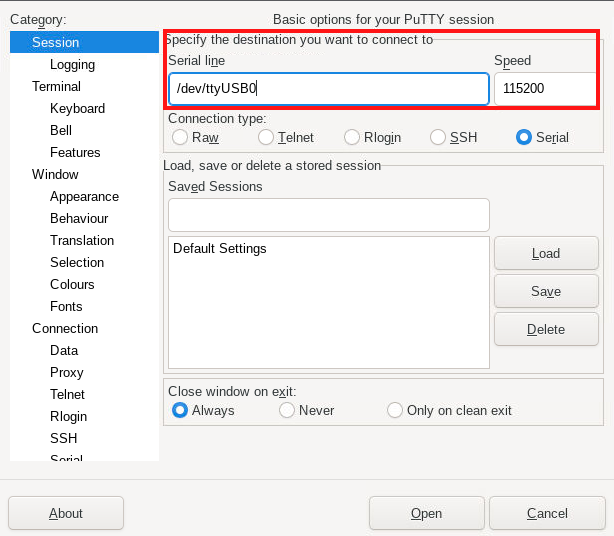
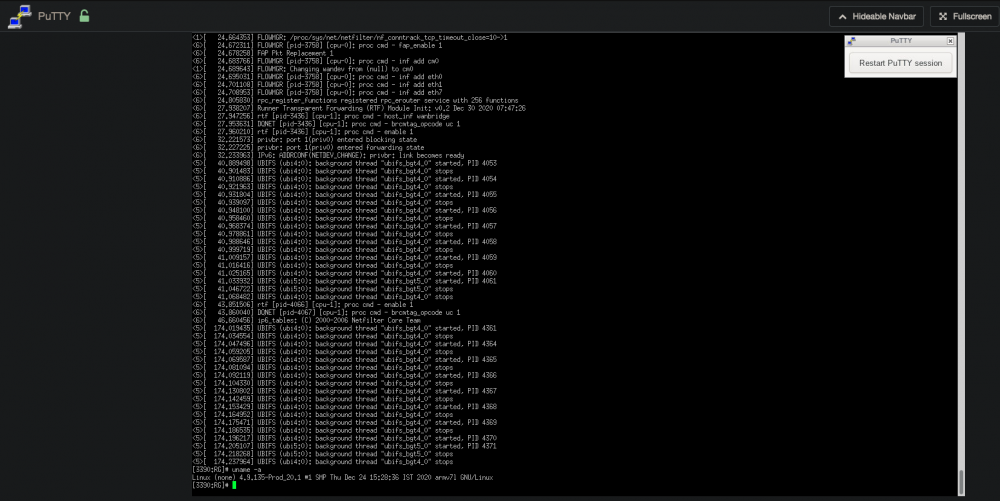
This is SUPER helpful. Thank you! Can you please add notes to that effect in the template overview? I would never have known this if I didn't come across this forum. I have initially just added the --device paramter but that wasn't enough. This is what I did to make it work for my serial USB cable /dev/ttyUSB0 Run this on UNRAID terminal: # stat -c '%g' /dev/ttyUSB0 16 Add these paramters to the Docker template Then use that device using the Serial option: Interactive serial console now working:
-
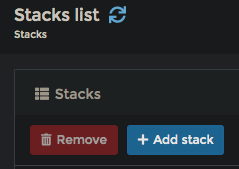
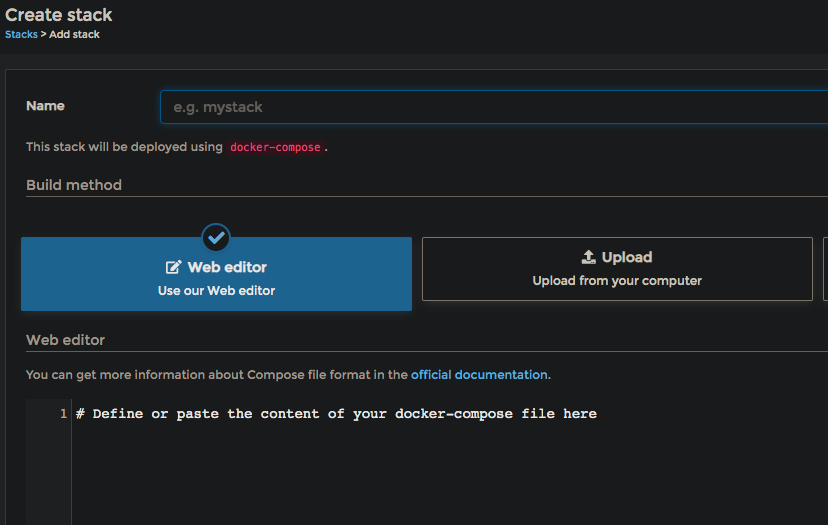
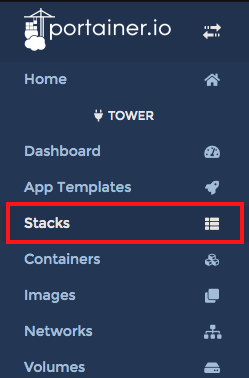
Click on Stacks in left frame. Then click on Add Stack Give it a name and use the default Web Editor to paste your docker-compose.yml file
-
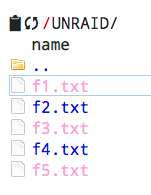
Thank you for telling me about this. I just wanted something that lets me upload and download files as well as do basic file functions and this works nicely. The only problem is that the bottom panel buttons don't work when accessing remotely behind a reverse proxy (e.g. files.mydomain.com). They work when accessing the IP:PORT directly within the LAN. You can select an item by clicking on it. Not sure what you mean by "mark". You can select multiple items by holding Cmd (on Mac) and clicking on multiple items at the same time. The pink files are the ones I selected: Right clicking and selecting (Un)Select All actually inverses the selection which is really cool. I haven't tried a touch screen. Weird, it took no time at all to boot up for me. The full feature set is documented here for reference: http://cloudcmd.io/