Leaderboard


Popular Content
Showing content with the highest reputation on 09/05/19 in all areas
-
Sorry but I disagree. LT has always been so often too nice and bowed down to pressure from the minority that happens to scream really loudly about niche issues. e.g. new GUI too big / small and certain people refused to use their browsers' native zoom functionality and demanded very loudly that LT changed everything back to the way they were familiar with - and guess what, LT spent time and resource responding to these GUI supremacists while ignoring the fact that Gigabyte X399 users (e.g. me) have severe lags that to-date still have not been resolved. So it's rather refreshing to hear LT dev(s) get the balls to respond to loudmouth screamers in a different way. Donald Trump and Boris Johnson come to power because people are too nice to scream back at them.2 points
-
Sure. 2,000 blu-rays backed up at 50GB / disk. When you have well over $20,000 worth of blu ray disks, surely you would want a backup of your data, right? 🤣2 points
-
It appears that the docker images --digests --no-trunc command is showing, for whatever reason, the digest of the manifest list rather than the manifest itself for containers pushed as part of a manifest list (https://docs.docker.com/engine/reference/commandline/manifest/#create-and-push-a-manifest-list). I'm not sure if that's always been the case, or is the result of some recent change on the Docker hub API. Also not sure if it's intentional or a bug. This causes an issue since in DockerClient.php (/usr/local/emhttp/plugins/dynamix.docker.manager/include), the request made to get the comparison digest is /** * Step 4: Get Docker-Content-Digest header from manifest file */ $ch = getCurlHandle($manifestURL, 'HEAD'); curl_setopt( $ch, CURLOPT_HTTPHEADER, [ 'Accept: application/vnd.docker.distribution.manifest.v2+json', 'Authorization: Bearer ' . $token ]); which retrieves information about the manifest itself, not the manifest list. So it ends up comparing the list digest as reported by the local docker commands to the individual manifest digests as retrieved from docker hub, which of course do not match. Changing the Accept header to the list mime type: 'application/vnd.docker.distribution.manifest.list.v2+json' causes it to no longer consistently report updates available for these containers. Doing this however reports updates for all containers that do not use manifest lists, since the call now falls back to a v1 manifest if the list is not available and the digest for the v1 manifest doesn't match the digest for the v2 manifest. If the Accept header is instead changed to 'application/vnd.docker.distribution.manifest.list.v2+json,application/vnd.docker.distribution.manifest.v2+json' docker hub will fallback correctly to the v2 manifest, and the digests now match the local output for both containers using straight manifests and those using manifest lists. Until docker hub inevitably makes another change. /** * Step 4: Get Docker-Content-Digest header from manifest file */ $ch = getCurlHandle($manifestURL, 'HEAD'); curl_setopt( $ch, CURLOPT_HTTPHEADER, [ 'Accept: application/vnd.docker.distribution.manifest.list.v2+json,application/vnd.docker.distribution.manifest.v2+json', 'Authorization: Bearer ' . $token ]);2 points
-
It's in the GUI. You might want to watch SpaceInvaderOne basic setup vid.1 point
-
Check the known issues with Ryzen and Linux, usually related to C-states.1 point
-
You should never paste random code from the Internet into your computer without understanding what it does... but that aside, if you open up a terminal and paste in the following line: wget https://gist.githubusercontent.com/ljm42/74800562e59639f0fe1b8d9c317e07ab/raw/387caba4ddd08b78868ba5b0542068202057ee90/fix_docker_client -O /tmp/dockfix.sh; sh /tmp/dockfix.sh Then the fix should be applied until you reboot.1 point
-
@coblck You have to edit the DockerClient.php (/usr/local/emhttp/plugins/dynamix.docker.manager/include) change it like it's shown on the post I've linked you nano /usr/local/emhttp/plugins/dynamix.docker.manager/include/DockerClient.php Scroll down until you see "DOCKERUPDATE CLASS". Below it you should find "Step 4: Get Docker-Content-Digest header from manifest file" Change the following from 'Accept: application/vnd.docker.distribution.manifest.v2+json', to 'Accept: application/vnd.docker.distribution.manifest.list.v2+json,application/vnd.docker.distribution.manifest.v2+json', done. With a server restart that file will be reset. If you don't feel confident with editing a file, wait for the next Unraid update and ignore the docker update hints. If there is a real update for a docker container and you run the update, it will install.1 point
-
They don't show up exactly as 970. You need to look for something like this: Non-Volatile memory controller: Samsung Electronics Co Ltd NVMe SSD Controller SM981/PM981 For vfio stubbing purpose, I suspect your ID is 144d:a808 (cuz that's what my 970 and PM983 show up as)1 point
-
I tried all of those options and I even used a cable that was working for the same model SSD in my gaming rig, and in my UNRAID rig I get the errors. Finally replaced the cache drive Samsung SSD with a Western Digital and for 30 days so far I haven't had one error.1 point
-
Yes it means something. The 1TB and the 840 have not been formatted. I remember there's a box somewhere to format unmountable drives but can't remember - have not had to format anything for quite some time now (since I use the Preclear plugin). You might want to post a question in the General Support forum (alternatively, watch SpaceInvaderOne's video - I'm pretty sure it's in the basic set up guide). Btw, if you have any data that you still want to recover from the 1TB and 840, now is the time.1 point
-
you can install bind in NerdPack1 point
-
Ah so I see now, I ran ls /mnt on my unraid terminal, docker did create /mnt/diskX I have changed the XML now and users will have to manually add their disks if they would like them to be monitored. In addition I have also added a guide to the support thread to show users how to add a disk for monitoring. Edit: This thread can be closed! Support Thread:1 point
-
It's a change with the docker API causing this. The temporary fix is detailed in the bug report. But, it is a minor thing. Any container that does actually have an update available for it will download and install.1 point
-
Take your server out of the router's DMZ or don't forward the SSH ports to it Aug 31 04:41:19 Hardi-unRAID nginx: 2019/08/31 04:41:19 [error] 4886#4886: *5009935 user "lbsb" was not found in "/etc/nginx/htpasswd", client: 213.136.90.36, server: , request: "GET /level/15/exec/-/show/configuration/CR HTTP/1.1", host: "76.167.231.67", referrer: "http://76.167.231.67/" Aug 31 04:41:20 Hardi-unRAID nginx: 2019/08/31 04:41:20 [error] 4886#4886: *5009938 user "aeon3" was not found in "/etc/nginx/htpasswd", client: 213.136.90.36, server: , request: "GET /Main HTTP/1.1", host: "76.167.231.67", referrer: "http://76.167.231.67/" Aug 31 04:41:20 Hardi-unRAID nginx: 2019/08/31 04:41:20 [error] 4886#4886: *5009932 user "admin" was not found in "/etc/nginx/htpasswd", client: 5.189.166.164, server: , request: "GET /level/15/exec/-/show/configuration/CR HTTP/1.1", host: "76.167.231.67", referrer: "http://76.167.231.67/" Aug 31 04:41:20 Hardi-unRAID nginx: 2019/08/31 04:41:20 [error] 4886#4886: *5009935 user "lbsb" was not found in "/etc/nginx/htpasswd", client: 213.136.90.36, server: , request: "GET /level/15/exec/-/show/configuration/CR HTTP/1.1", host: "76.167.231.67", referrer: "http://76.167.231.67/" Aug 31 04:41:21 Hardi-unRAID nginx: 2019/08/31 04:41:21 [error] 4886#4886: *5009941 user "adm" was not found in "/etc/nginx/htpasswd", client: 5.189.166.164, server: , request: "GET /level/15/exec/-/show/configuration/CR HTTP/1.1", host: "76.167.231.67", referrer: "http://76.167.231.67/" Aug 31 04:41:21 Hardi-unRAID nginx: 2019/08/31 04:41:21 [error] 4886#4886: *5009943 user "admin" was not found in "/etc/nginx/htpasswd", client: 213.136.90.36, server: , request: "GET /level/15/exec/-/show/configuration/CR HTTP/1.1", host: "76.167.231.67", referrer: "http://76.167.231.67/" Aug 31 04:41:22 Hardi-unRAID nginx: 2019/08/31 04:41:22 [error] 4886#4886: *5009941 user "adm" was not found in "/etc/nginx/htpasswd", client: 5.189.166.164, server: , request: "GET /level/15/exec/-/show/configuration/CR HTTP/1.1", host: "76.167.231.67", referrer: "http://76.167.231.67/" Aug 31 04:41:22 Hardi-unRAID nginx: 2019/08/31 04:41:22 [error] 4886#4886: *5009938 user "aeon3" was not found in "/etc/nginx/htpasswd", client: 213.136.90.36, server: , request: "GET /Main HTTP/1.1", host: "76.167.231.67", referrer: "http://76.167.231.67/" Aug 31 04:41:24 Hardi-unRAID nginx: 2019/08/31 04:41:24 [error] 4886#4886: *5009943 user "admin" was not found in "/etc/nginx/htpasswd", client: 213.136.90.36, server: , request: "GET /level/15/exec/-/show/configuration/CR HTTP/1.1", host: "76.167.231.67", referrer: "http://76.167.231.67/" Aug 31 04:41:25 Hardi-unRAID nginx: 2019/08/31 04:41:25 [error] 4886#4886: *5009951 user "admin" was not found in "/etc/nginx/htpasswd", client: 213.136.90.36, server: , request: "GET /level/15/exec/-/show/configuration/CR HTTP/1.1", host: "76.167.231.67", referrer: "http://76.167.231.67/" Aug 31 04:41:26 Hardi-unRAID nginx: 2019/08/31 04:41:26 [error] 4886#4886: *5009951 user "admin" was not found in "/etc/nginx/htpasswd", client: 213.136.90.36, server: , request: "GET /level/15/exec/-/show/configuration/CR HTTP/1.1", host: "76.167.231.67", referrer: "http://76.167.231.67/" Aug 31 04:41:27 Hardi-unRAID nginx: 2019/08/31 04:41:27 [error] 4886#4886: *5009956 user "admin" was not found in "/etc/nginx/htpasswd", client: 213.136.90.36, server: , request: "GET /level/15/exec/-/show/configuration/CR HTTP/1.1", host: "76.167.231.67", referrer: "http://76.167.231.67/" Aug 31 04:41:28 Hardi-unRAID nginx: 2019/08/31 04:41:28 [error] 4886#4886: *5009956 user "admin" was not found in "/etc/nginx/htpasswd", client: 213.136.90.36, server: , request: "GET /level/15/exec/-/show/configuration/CR HTTP/1.1", host: "76.167.231.67", referrer: "http://76.167.231.67/" Aug 31 04:41:28 Hardi-unRAID nginx: 2019/08/31 04:41:28 [error] 4886#4886: *5009963 user "adm" was not found in "/etc/nginx/htpasswd", client: 5.189.166.164, server: , request: "GET /level/15/exec/-/show/configuration/CR HTTP/1.1", host: "76.167.231.67", referrer: "http://76.167.231.67/" and on and on and on from various IPs around the world1 point
-
With Windows, you do have to set things up so that you can see and access other computers. MS has been tightening security over the years so that you are not automatically exposed. You will probably have to config the other computers as well.1 point
-
Answers: I understand that I will need to add the Sata & HDD to the system. Does the Sata plug that each connect to matter? Meaning, does the Sata SSD need to be on plug one... ect? Does not matter. One of NVME drives has my current Win10 64 Pro build on it. The other has my wifes VM machine (runs on Vmware Workstation 15 Pro but the FPS in game is just aweful) Will I need to just format both drives and reinstall through UNRAID via the server host software? No need to format. You can pass through the NVMe to the VM as a PCIe device (i.e. just like a GPU - you will need to vfio-stub it - instructions are in SpaceInvaderOne videos) and it should just boot (in which case you don't need a VM vdisk and certainly don't need to format it). (Note: your VM should boot in OVMF mode and not SeaBIOS) Even if it doesn't boot and you need a vdisk, you also don't need to format the NVMe disk if passed through. It should just appear to Windows the exact same way. You can even convert the vmdk vdisk of your wife's VM into qcow2 / raw format to use for Unraid VM (still have to set up your VM template - can't convert that). I vaguely remember vmdk being supported directly, just need to edit the xml tag = vmdk but I have never used it. While talking about format - your HDD in the array and the SSD in the cache pool will be formatted by Unraid so make sure you backup your data. Probably best way is to just copy stuff from the 850 and 1TB to the 2TB and keep the 2TB safe and outside of the case so there is zero chance of accidental format. Also, I have 3 physical computers at my house but they're not networked to mine, though they all connect to the same wireless cable router/modem. What would I have to do to access the server once its running? If they are connected to the same router then shouldn't they be on the same network? What do you mean by "not networked to mine"? The others can speak about the USB stick since I have not had any problem - and I can't possibly do any worse since I use a micro stick AND USB 3.0, all sort of "not recommended" stuff. 😅1 point
-
Could be the case, but sometimes, the Creator just does not work well with some USB sticks. If you have the same problem with the new USB, try the manual method. 1. Download the latest unRAID zip file from the unraid.net 2. Extract the contents 3. Copy over all files to the USB drive 4. Run make_bootable.bat to make the USB drive bootable.1 point
-
Should work fine. It is made by a recognized manufacturer of memory devices. Try to avoid getting one of the 'micro' USB drives as there are some indications that they are more prone to failure. (Some suspect heat issues.)1 point
-
I get it... My first Norco case (24 Bays) was around $2500 without drives 5 years back. It lasted me a long time until I outgrew it and heat became an issue as platter sizes increased. I look at it as a long term investment. We also run a media production company, so it is a business expense. That's the great thing about UNRAID. It is insanely customization, scalable, and can literally run on anything from potato to a Lamborghini. 😂1 point
-
The executable and configuration files are in the USB stick which it will boot from. Then things get copied into RAM and run out of RAM. The USB stick only provide the functionalities, the "whole system" isn't on it e.g. the storage array / cache pool, VM disks, docker image etc. are not on the USB stick. In Windows terms, it's like booting into Windows on a USB stick - everything else, including apps, will have to be stored somewhere else. See below for longer answer See below for longer answer So what you need to do, I'll break it into stages for you. Stage 1 - buy stuff Get USB stick (with unique GUID - so don't buy cheap), preferably USB 2.0 stick but USB 3.0 is fine. You don't state you have something for storage other than the 2 NVMe drives so get a HDD to be used for the array. You need at least 1 drive in the array, even if you are using your server purely for VM i.e. no NAS storage requirement. Ideally you want 1 HDD in the array and 1 SSD (256GB SATA would be the minimum in my opinion) in the cache pool. 1 more dedicated GPU - you only listed 1 dedicated GPU and you would want 2 for your 2 VMs. While it is possible in some cases to pass through the iGPU to a VM, the process is more complicated so my general recommendation is avoid it if possible. You MAY need 1 more USB PCIe card - depending on what your IOMMU device layout is. Stage 2 - feasibility assessment i.e. should things work for your use case in theory? Make sure all the necessary devices are plugged in - sounds redundant but I once spent an hour figuring out why my 970 isn't showing up when it was on the shelf behind me. Create the USB drive using UNRAID USB Flash Device creator. Don't enable UEFI boot - see below Go into BIOS, enable everything that is necessary (e.g. VT-x, VT-d, IOMMU etc.) Make sure to set your BIOS to boot in Legacy Mode (i.e. not UEFI). This will save you a lot of troubles in Stage 3 with Nvidia driver Error 43. Make sure to set your BIOS to use the iGPU as the primary GPU (and connect your (boot) monitor to the motherboard port to be absolutely sure Unraid is using the iGPU to boot. Boot into the USB stick, watch for the boot selection screen and select GUI mode (i.e. no need a 2nd PC in the network to configure stuff!). The default timer will boot into non-GUI mode. Preferably, use the USB 2.0 port on your motherboard if available. Go to Tools -> System Devices and review the PCI Devices and IOMMU Groups section to see if devices are in their own IOMMU groups. If you are not sure what to look for, you can copy-paste the section here - we usually can help have a look to see if things are more or less ok Please use the "Code" functionality on the forum (the </> button) when copy-pasting stuff from the GUI / code. It makes it a lot easier on the eyes to look for things. Stage 3 - doing it - assuming it looks like things should work in theory Watch SpaceInvaderOne videos on Youtube. They are incredibly useful and you won't need to spend more than an hour. For your use case, pay attention to his basic configuration + VM set up + PCIe pass-through + NVMe boot videos. I have never had any luck booting VM directly from NVMe drives but others have reported success so it should be possible. I still recommend creating a vdisk (100GB is more than sufficient) for the VM to boot from and use the NVMe for apps and games. (Hence, I said ideally you want an SSD in the cache pool to store the vdisk image). It just saves you unnecessary issues. Boot into GUI mode and do the configuration, following the Youtube instructions as closely as possible. If you have problems, post on the forum and ask for help.1 point
-
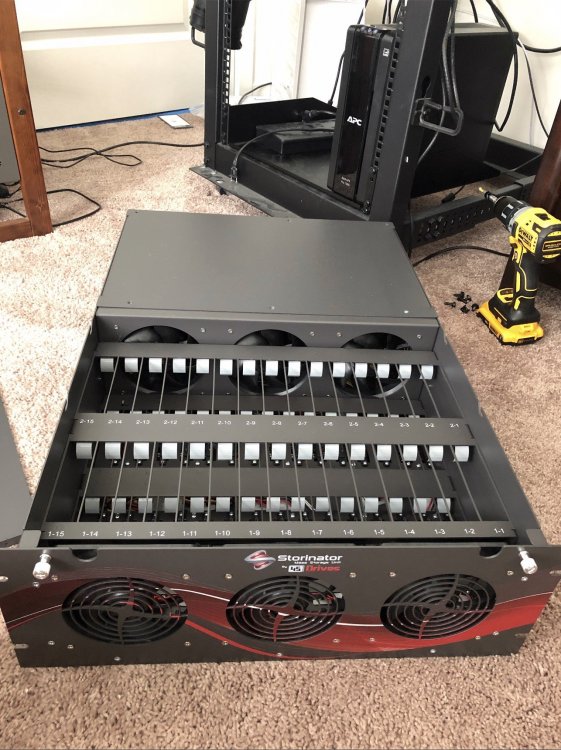
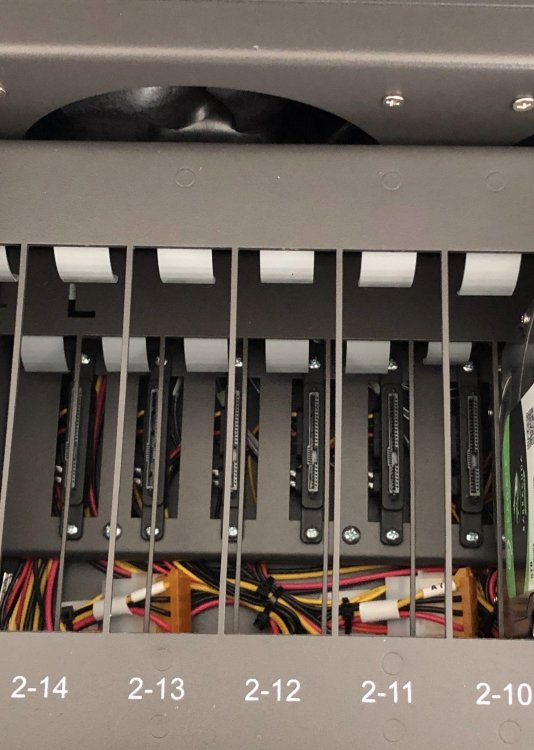
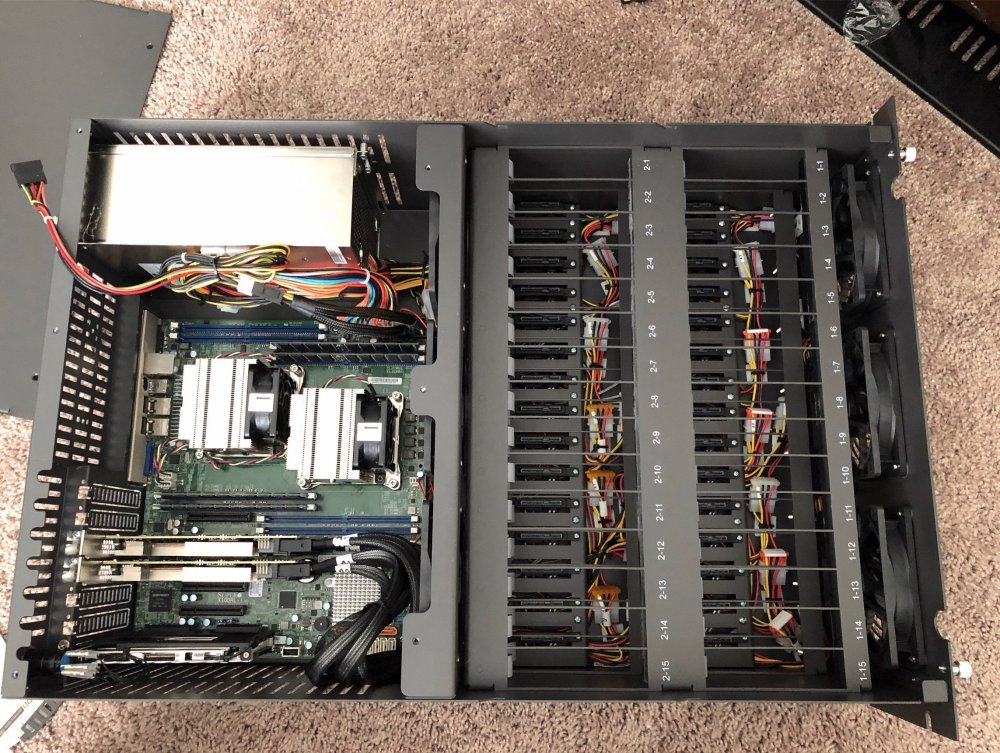
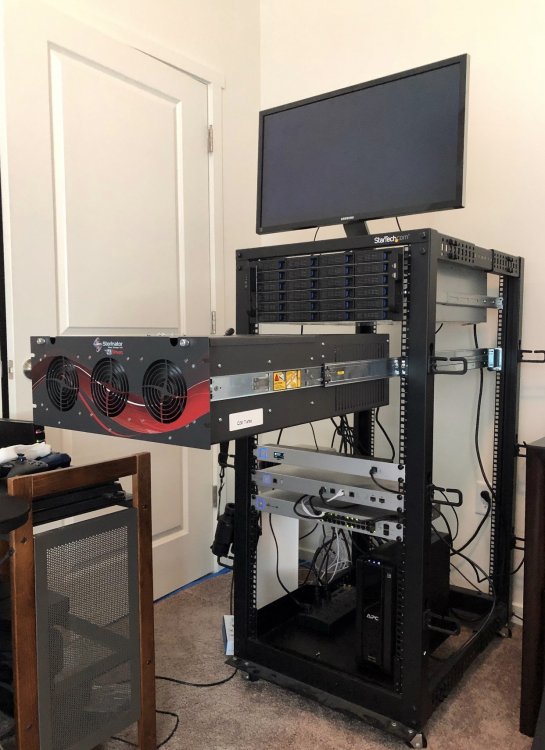
Alright here you go! This currently shows 186TB usable as I have my last 14TB disk pre-clearing in another UNRAID server but you get the idea. Once I install that into SLOT 28, I will be at the 200TB described. That leaves me with another 28TBs to expand with the last 2 empty slots at 14TB each for a total of 228TB usable, unless I step up to 16TB. However, I'll probably wait until the industry hits 20TB per disk to increase because I'm on dual parity so I'd have to purchase X3 drives to expand the size of any disk past parity. In the build below I added the 10GIG NIC and 2 PCI SSD trays for my Cache pool. Other than that, I added the drives to the array and the rest came from the factory (45 Drives). By the way, the friction mounts in this thing are friggen awesome. No. More. Screws/Trays! To fire this thing up I literally just swapped my drives and FLASH USB from my old server and plugged them into this one. And Bam. UNRAID started up without a single issue whatsoever. It just said, sweet, more of everything, and went about its business. I was a little worried about how it would handle the Dual 8-Core CPUs (16 Cores Total/32 with Hyper-threading), but it had no issues and that SWEET CPU dashboard is awesome to look at in action. This build maxes out UNRAID's current limit of 30 drives (2 Parity & 28 Data) with a Cache Pool. This is why I decided to get the Storinator Q30 instead of the Q45, or even Q60. Also, the Q45 and Q60 have longer chassis, so the Q30 matched the standard length in a 4U rack-mount. Also, holy cow this thing runs Sooooooo cool. Before, my drives temps would peak at 50C+ (danger zone) during parity/rebuilds in that old Norco 24 bay case. Now they don't break 32C during a parity check. The fan setup in this thing is crazy efficient and the motherboard steps up speeds as temps rise automatically (no fan plugin required). Finally, it is very quite, and lives up to the "Q" in its name. The Q30 is the ultimate sweet spot in my opinion, and pushes UNRAID to its current limits. Note: Serial numbers have been redacted from the pics. Let me know if you have any questions. Enjoy!


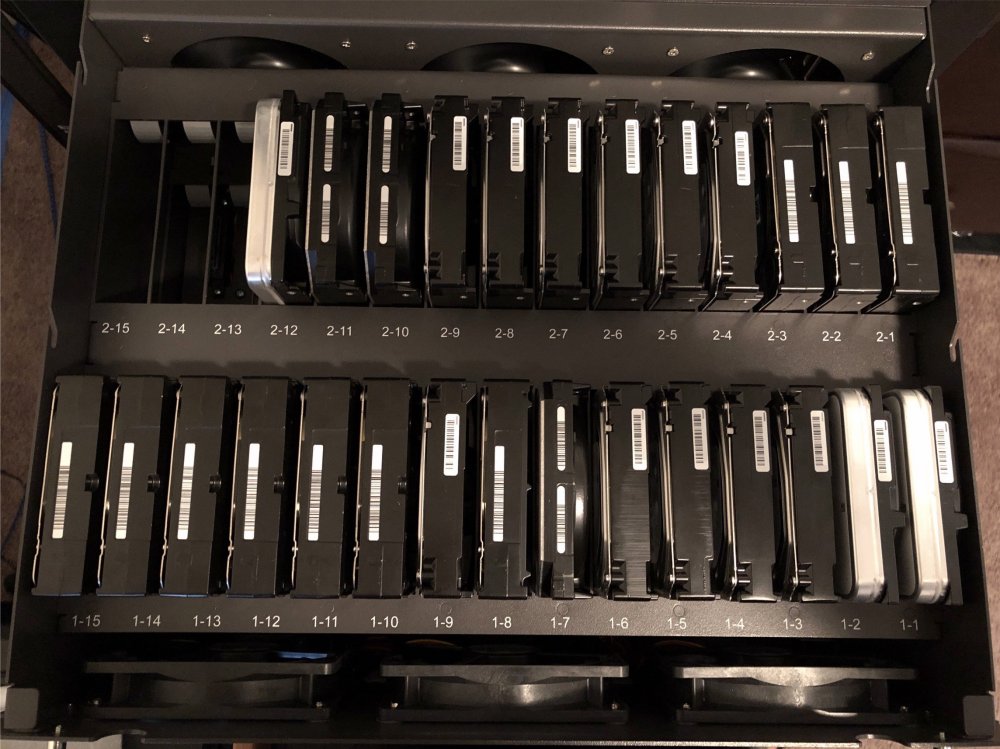
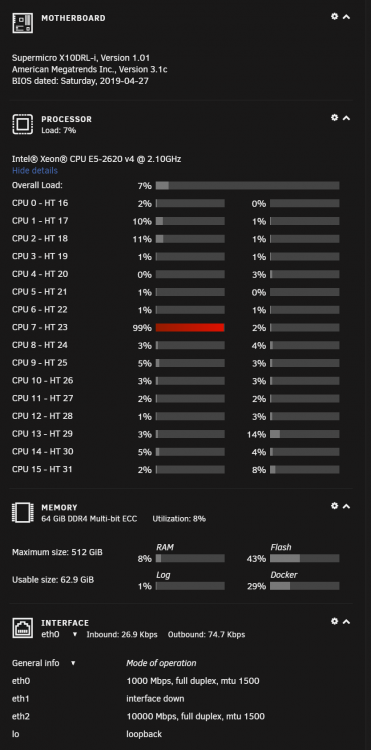
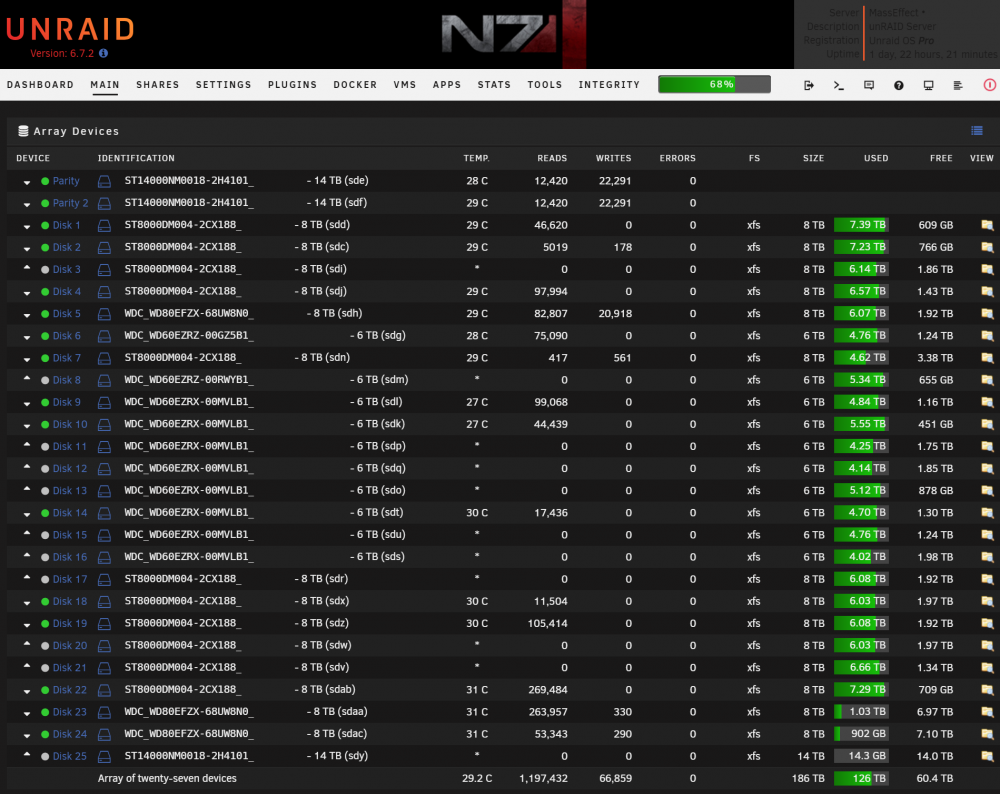 1 point
 -
Thanks for the fix @bluemonster ! Here is a bash file that will automatically implement the fix in 6.7.2 (and probably earlier, although I'm not sure how much earlier): https://gist.github.com/ljm42/74800562e59639f0fe1b8d9c317e07ab It is meant to be run using the User Scripts plugin, although that isn't required. Note that you need to re-run the script after every reboot. Remember to uninstall the script after you upgrade to Unraid 6.8 More details in the script comments.1 point
-
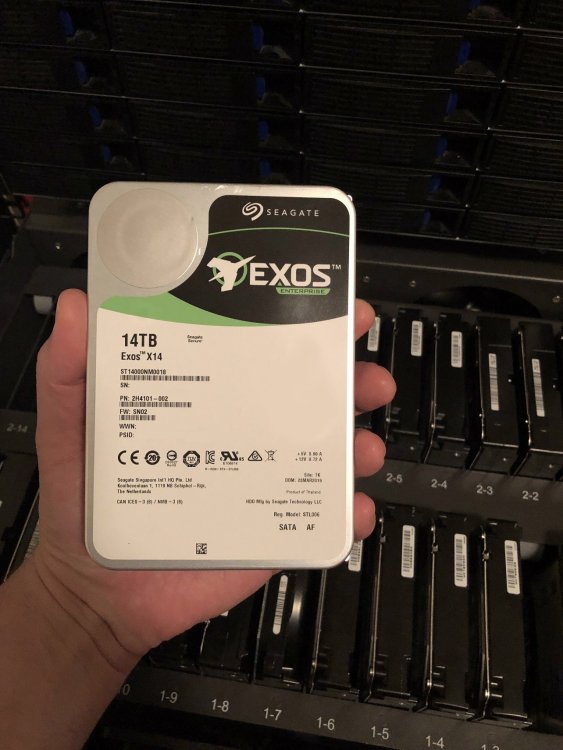
@SpencerJ I just setup my Storinator Q30 Turbo with 30 drive bays, and thanks to 14TB drives (the current sweet spot on price per GB) I am now up to 200TB usable, even with Dual 14TB parity drives. 45 Drives makes excellent products and I am very happy with my new Unraid server. My old Norco 24 bay server is going to be used for backups now. I've been an avid UNRAID customer since 2014.1 point
-
The next release has wireguard included. The GUI component to manage wireguard will be available as a plugin.1 point
-
Pfsense, once you move into that realm of firewall/router it's impossible to go back...... OPNsense would be an alternative.1 point