Leaderboard


Popular Content
Showing content with the highest reputation on 11/26/22 in all areas
-
I have the X13SAE-F paired with an i9-13900K. All 8P/16E cores are detected and fully operational. If you plan on buying this combo, just be aware that you need a 12th gen CPU on-hand to be able to flash the BIOS to version 2.0 before the board can work with 13th gen CPUs like the i9-13900K. You can also RMA the board right after receiving it and have Supermicro themselves do the flashing, but then you're working on their timeline which could be a while depending on where you're RMAing from and how busy they are. I don't use unraid but stumbled upon this thread while researching something else and wanted to give you a datapoint.2 points
-
[6.10 rc3 - 6.10.3] Realtek RTL8156 USB 2.5Gb NIC not working (since 6.10 rc3) Unraid found the device and list it in the System Devices page Bus 004 Device 002 Port 4-2 ID 0bda:8156 Realtek Semiconductor Corp. USB 10/100/1G/2.5G LAN But the NIC is not found in Network Setting page itmu-diagnostics-20220520-0705.zip1 point
-
As always, prior to updating, create a backup of your USB flash device: "Main/Flash/Flash Device Settings" - click "Flash Backup". Bugs: If you discover a bug or other issue in this release, please open a Stable Releases Bug Report. Version 6.11.5 2022-11-20 This release reverts a change which modified the wrong file. This resulted in not being able to select 'macvlan' custom docker network type. New installations only will now have 'ipvlan' selected by default. Docker fix: Set IPVLAN as default only for new installations.1 point
-
I wrote a little bash script to interface with a MicroPython program on a Pi Pico with a 1602 LCD to display information, such as: Unraid Version, Hostname/IP, UPS Status, Disk Space. Video if interested (a link to my code is in the video description): I was wondering if there was a way to check for updates to Unraid via the CLI, so that I could incorporate a daily check into my script.1 point
-
The existing instance will continue to run and another instance will also be created. No checks are done on the scheduled runs. To avoid this, you would have to put in appropriate controls into the script to check for this situation.1 point
-
Ok, Thanks for your help1 point
-
Yep -- sorry, I should have mentioned I clocked that in my research and it's part of why I will upgrade before going further.1 point
-
Next attempt this morning and everything went as expected. 256GB available on the cache and all the containers started. Only thing I can figure is that the first attempt didn't like that linux was already on the new SSD and the first format was wonky. Regardless, it appears to be good to go now. I'll respond here if that changes. Thanks!1 point
-
Hi, super! Vielen Dank! Das war es gewesen!!!! Ich hatte die Einträge tatsächlich mal gemacht, konnte mich aber nicht mehr daran erinnern! Auf jeden Fall hab ich wieder die lokale Konsole. Die Mitigations hatte ich auch mal deaktiviert, wegen der "performance". Was aber natürlich totaler Quatsch für mich ist, da ich ja den Server in keiner Weise ans Limit fahre, wo ich eventuell noch die 1% mehr Leistung gebrauchen könnte. Habs schon wieder aktiviert. Kommen sich NerdTools und un-get so in die Quere? Ich denke wenn ja, dann müssen wohl die NerdTools gehen, da un-get mehr bietet. Und ja, ich kopiere die bash_profile, da ich hier Aliase wiederherstelle. Ich geh mal auf die Suche, eventuell kann ich das ja mit den User Scripts lösen. Und noch mal: Vielen Dank Euch beiden!!! (auch für die extra Tipps!) Gruß Bernd1 point
-
Nur mal ruhig blut, du postest den thread hier ja zu... Zu aller erst solltest du mal das hier aus deinem go file entfernen, sprich deine modifikationen für die VM: #fix video for VM echo 0 > /sys/class/vtconsole/vtcon0/bind echo 0 > /sys/class/vtconsole/vtcon1/bind echo efi-framebuffer.0 > /sys/bus/platform/drivers/efi-framebuffer/unbind cp /boot/extra/.bash_profile /root/ (wobei ich nicht weiß warum oder wieso du .bash_profile nach root kopierst, willst du irgendwas damit wiederherstellen? wenn ja dann lass die letzte Zeile drin) Ich vermute mal das dies das problem ist. Warum bootest du mit dem flag: mitigations=off Auf einem server würde ich das wohl wirklich nicht empfehlen... Bitte entscheide dich zwischen un-get oder NerdTools, beides würde ich nicht auf dem Server laufen lassen, bin auch keinem böse wenn jemand un-get nicht verwendet...1 point
-
Thanks, kind of had the same issue, I've updated to 6.11.5 and the problem persists, then tried your idea and tried to remove all spaces in the "WEBPAGE_TITLE", and it works!1 point
-
pg_dumpall tries to dump the whole database instance (all databases) and needs root/superuser permissions. If you want to dump a single database, use pg_dump.1 point
-
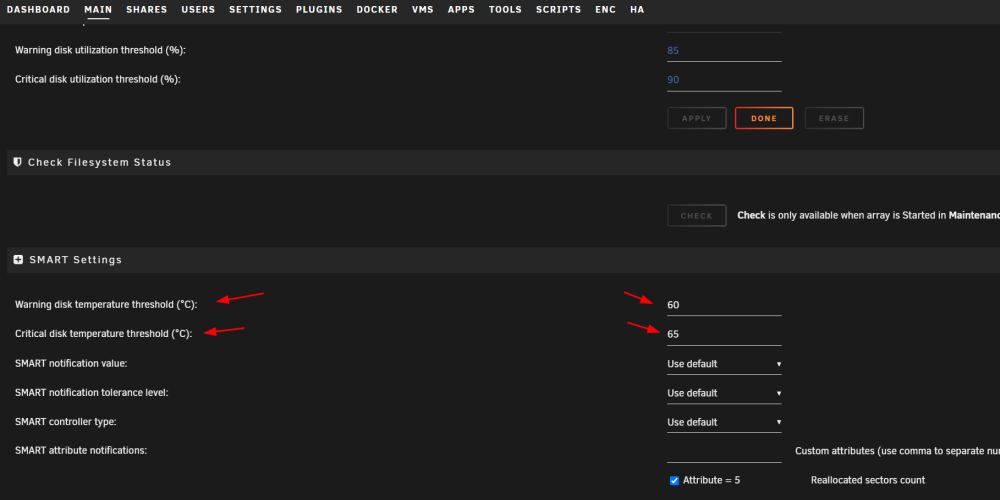
geh in main, dann auf die entsprechende nvme dort kannst du dann das temp limit individuell einstellen, sprich, hier dann hoch ...

 1 point
 -
I finally got it! Everything worked justfine. I will post some screenshots Install locally is working, sharing my e.g for helping others. Here is my diagnostics. stannas-diagnostics-20221126-1533.zip

 1 point
 -
THANK YOU!! have downgraded all my torrent dockers, will wait and see1 point
-
i think it's working again.1 point
-
I have now also tested with vdisk using cache='none' again. This time without any errors. Yay! I think I can finally conclude that my problems were all hardware related and that new RAM modules have fixed the problem - at least for now. It is still quite strange to me that all of my four RAM modules apparently failed. That suggests an external cause. But I have no clue what that cause might be. I guess I just have to wait and see if it happens again.1 point
-
I am having this issue as well (including the "fatal server error: Unrecognized option: -" I tried changing the "WEBPAGE_TITLE" variable, as mine had a " - " in the title. Removing the whitespace on either side of the "-" solved the issue for me. I don't know what is happening in the underbelly there that is causing that to parse weirdly. Anyway, check your WEBPAGE_TITLE variable.. maybe especially if your log is showing that same error?1 point
-
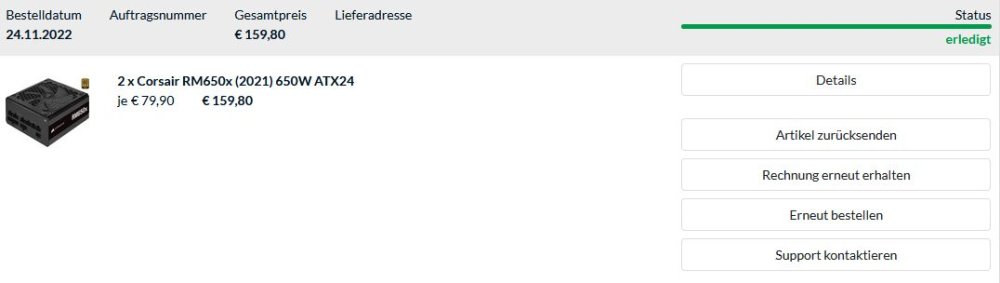
ist das 2021er, inzwischen auch angekommen, hatte bei notebooksbilliger storniert und bei alternate bestellen, weil es bei notebooksbilliger seit 6 Tagen auf "vorbestellt" stand..
 1 point
 -
I put 9KW of solar on the roof and export more than I use here in sunny north Queensland (Australia), in any given 24 hour period. I no longer care how much power I use Sure, we use about 7kwh overnight including the aircons and stuff, but once I evaluate the best battery solution I won't have that problem either. The unRAID machine I have idles at about 200W and during some hefty workloads gets up to about 450W.1 point
-
Hi, i don´t know how it would work with adminer, should just export from the old one and import to the new. But this is how i migrated: I´ve used the same port for the new database, so i switch with powering on and off between them. Just don´t wanted to change the nextcloud config. -shut down nextcloud & postgres and do a backup of your appdata folders -install target postgres docker IMPORTANT: You need to create a user with the same credentials used by nextcloud after starting the docker (you can find it in the nextcloud config) or add it to the postgres docker template (easiest way) -start target postgres docker (if you did not entered the user credentials for nextcloud to the template, you have to create the user now) -shut down target postgres docker -start source postgres docker -backup Database run in source docker: pg_dumpall -U YOUR-NEXTCLOUD-DB-USER -s > /var/lib/postgresql/data/bak.sql -in unraid, move it to your target appdata folder (e.g. from /mnt/user/appdata/postgres13 to /mnt/user/appdata/postgres15) -stop source docker -import Database run in target docker: psql -U YOUR-NEXTCLOUD-DB-USER -d nextclouddb < /var/lib/postgresql/data/bak.sql Database should be imported, you can now start nextcloud again and test it1 point
-
https://github.com/limetech/webgui/pull/1208/files1 point
-
1 point
-
I have added setting Title to be the VM name. or I could also include the host name. i.e. VMName on 192.168.x.x

 1 point
 -
Maybe it`s not the right topic for my critics, but I could not find another better place. With all my respect to this hole project which I really like: Could somebody explain why these "beta" releases are pushed that much to public for everyone? Newsletter and UnraidServer itself pushes me all the time to update. I´m a bit disappointed getting part of this without being clearly informed that I will be a beta tester and risk my working system every one or two weeks again. Imho there is missing a clear statement to tell the user what`s the last stable release and where beginns beta. Naturally I do understand that there needs to be testers and I appriciate that unraid gets developped further, but maybe there is a other way to get the volunteer testers in charge. Hope you understand that I dont wanna blaim someone for this, but thats how I see the situation at the moment.1 point
-
Looks like this isse:1 point
-
Wherever you have appdata going. For example mine is at /mnt/cache/appdata/plex/Library/Application Support/Plex Media Server/Plug-in Support/Databases1 point
-
Copy this into the GAME_ID variable: 896660 -beta public-test -betapassword yesimadebackups and set validate to true. After the container pulled the update (open the logs and wait that the contianer fully started) please stop it again and disable valdiation in the template again.1 point
-
Da verstehst du was falsch. Nextcloud stellt bereits WebDAV zur Verfügung. Einbinden geht ohne extra Software: https://docs.nextcloud.com/server/19/benutzerhandbuch/files/access_webdav.html#dateizugriff-unter-microsoft-windows1 point
-
I switched over to frigate NVR because its better integration with Home Assistant. I can set up automation based on objects and zones. I also use Home Assistant app as my way of accessing the camera feeds from outside the house, which answer your question on not using the reolink app. I have been toying with compreface facial recognition (which also integrate nicely with frigate) lately, and this is when I found out reolink's camera image quality is a bit sub-par. I read some discussion on Home Assistant subreddit suggesting dahua, hikvision, or amcrest instead. The storage space used really depends on how you setup the NVR. For example, I set it to only record when "human" object is detected in my drive way, and the recordings are only kept for 14 days. I have about 350GB of recording data right now for your reference.1 point
-
Just a heads up here, you are not forgotten. I've been moving jobs and have had a crazy couple of weeks. Things will hopefully settle down soon(TM)1 point
-
There's already a template in CA that loads the official image and works just fine. EDIT: Seems it's disappeared? Still working great here... Will add one on my repo EDIT2: Done1 point
-
I find the guides pretty confusing. I want to replace my parity drive with a larger one on the same SATA port. Then add the old parity drive as a data drive on a different SATA port. This is because I have bought a MZHOU PCIe SATA Card 6 Port to add extra drives, and I feel like it's safer to have the parity drive on a mainboard SATA port (or is that nonsense..?). I wanted to do it like this: 1. Stop array and power down system 2. Remove old parity drive 3. Install new drive on the same SATA port as the old parity drive 4. Boot system 5. Assign new drive as parity 6. Start array and let it rebuild parity 7. Stop the array 8. Power down system 9. Add old parity drive to a MZHOU SATA port 10. Boot system and assign old parity drive as a data drive 11. Start array 12. DONE! That should work right? This seems like the simplest way to me, or am I missing something? Thanks in advance. Edit: also, if anyone knows, that MZHOU card has no drive size limit, does it? I want to use 14TB+ drives with it. Edit2: this edit comes very late, but just in case other people come across this post: that MZHOU card did not work in my system. I am not sure if it was a faulty card or if it simply doesn't work with Unraid. I sent it back for a refund.1 point
-
Best bet for now is to use this driver:1 point
-
See earlier post!1 point
-
1 point
-
Finally managed to get the temperature to show up in the plugin. Turns out the "detect" button is broken and does not scan available drivers properly. Following this comment: I had to create a `drivers.conf` file in `/boot/config/plugins/dynamix.system.temp` and add the following two lines: it87 k10temp Then once I went back to the temperature plugin settings I was able to select the CPU/MB temperature from the dropdown. One thing to note – already mentioned in the linked comment but just to make sure – don't click on "Detect" or else it will wipe out your changes and you'll have to start over. The commenter in the link had to do the `modprobe force_id` thing, but I didn't have to thanks to this plugin. You probably shouldn't need it if you have this it87 plugin installed.1 point
-
1 point
-
Back from the dead! A lot has happened since I was last active, including personal stuff I wont go into here. Anyways, I will try to work my way through all the requests, and it might take a while, so please bear with me1 point
-
UP Sorry to hijack your thread but i'm have the same problem. I moved from a 'homeassistant-core' docker to a VM and i cannot get remote access through HTTPS working. HASS config: http: use_x_forwarded_for: true trusted_proxies: - 172.17.0.3 I cannot figure out if i have to look in homeassistant or NPM or maybe a unraid setting that's wrong. Port forwarding in pfSense is setup correctly. [SOLVED] Ok, so i stumbled upon a topic in the Home Assistant Forums with some very usefull info. The home assistant logs tell you where the request is comming from. Look for this line located in the home assistant config folder, named like 'home-assistant.log.1'. I opened it with notepad++. ERROR (MainThread) [homeassistant.components.http.forwarded] Received X-Forwarded-For header from an untrusted proxy 192.168.8.189 Note the IP adress at the end of the line and copy that in the home assistant configuration.yaml file. http: use_x_forwarded_for: true trusted_proxies: - 192.168.8.189 It all makes sense to me now Note: i use home assistant as a VM so my ip is in range of 192.168.#.### . If you use the docker version the IP may be more like 172.17.0.3 .
 1 point
 -
With a lot of help from an unraid user on reddit I was able to figure this out and am posting here for anyone else tryin to do this. Prerequisites- Router and network switches must support VLANs. You will need to research the configuration of these for your particular brand. Docker service and VM Manager must both be disabled in settings (set enabled to "No"). In Settings>Network Settings set Enable VLANs to "Yes" for your desired ethernet port (eth1 in the pic) and click "Apply". This will add several new settings. Enter your desired VLAN number, set Network protocol (optional) and set address assignment(s) (optional). Click "Apply" once again. In Settings>Docker enable Advanced View. Check the box next to the new network you have just added (eth1 in the pic) and enter the proper subnet and CIDR. Gateway will be the address of your router. Once you have finished, set Docker Enable to "Yes" and click "Apply" Finally, in the configuration settings for your docker container set Network Type to your newly added custom network (Custom:eth1 in the pic) and click "Apply". Note: I am not an expert on networking by a long shot. It took me quite a lot of digging through various forums to piece this together. Some of it may be wrong. If anyone sees any errors please let me know and I'll make the appropriate edits.


 1 point
 -
...gib mal ein: cd /mnt/user/appdata chmod a+rwX grafana ...dann probiere es mit dem Docker nochmal, mit dem Verzeichnis /mnt/user/appdata/grafana im template1 point
-
LSI SAS3 models like the 9300-8i support trim as long as the SSDs support deterministic read zeros after trim. e.g, 860 EVO, WD Blue 3D, etc1 point
-
Not going to comment on the Parity Swap Procedure, as I've never done it and it's just a "shortcut" for the standard way Stop the array Assign the 12TB as parity drive Start the Array and let it build the parity drive After that's done, stop the array and add the original 8TB as a data drive 5. Unraid will clear it in the background and when that's done (hours), then the storage space is available. The standard way does give you a fall back, as the original parity drive is available for you to reinstall if something terrible goes wrong.1 point
-
How do I replace/upgrade my single cache device? (unRAID v6.2 and above only) This procedure assumes that there are at least some dockers and/or VMs related files on the cache disk, some of these steps are unnecessary if there aren't. Stop all running Dockers/VMs Settings -> VM Manager: disable VMs and click apply Settings -> Docker: disable Docker and click apply For v6.11.5 or older: Click on Shares and change to "Yes" all cache shares with "Use cache disk:" set to "Only" or "Prefer" For v6.12.0 or newer: Click on all shares that are using the pool you want to empty and change them to have the pool as primary storage, array as secondary storage and mover action set to move from pool to array Check that there's enough free space on the array and invoke the mover by clicking "Move Now" on the Main page When the mover finishes check that your cache is empty (any files on the cache root will not be moved as they are not part of any share) Stop array, replace cache device, assign it, start array and format new cache device (if needed), check that it's using the filesystem you want For v6.11.5 or older: Click on Shares and change to "Prefer" all shares that you want moved back to cache For v6.12.0 or newer: Click on Shares and change the mover action to move from array to pool for all shares that you want moved back to cache On the Main page click "Move Now" When the mover finishes re-enable Docker and VMs1 point