Leaderboard


Popular Content
Showing content with the highest reputation on 02/11/19 in all areas
-
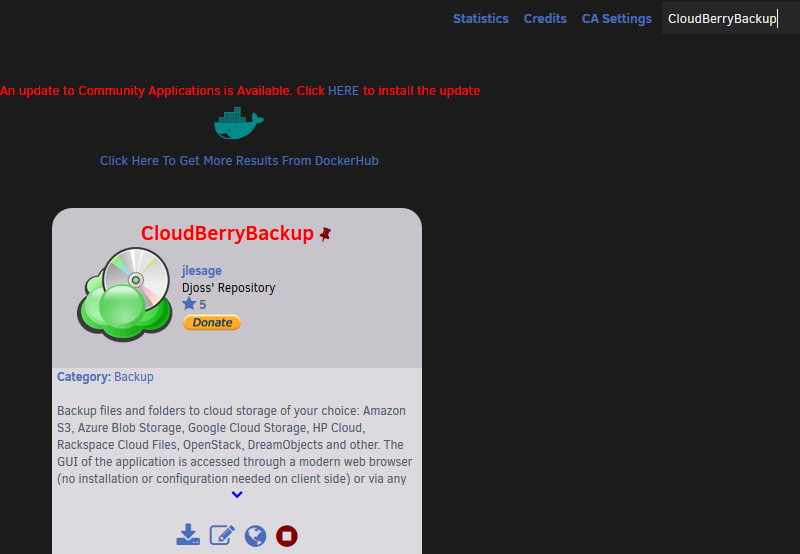
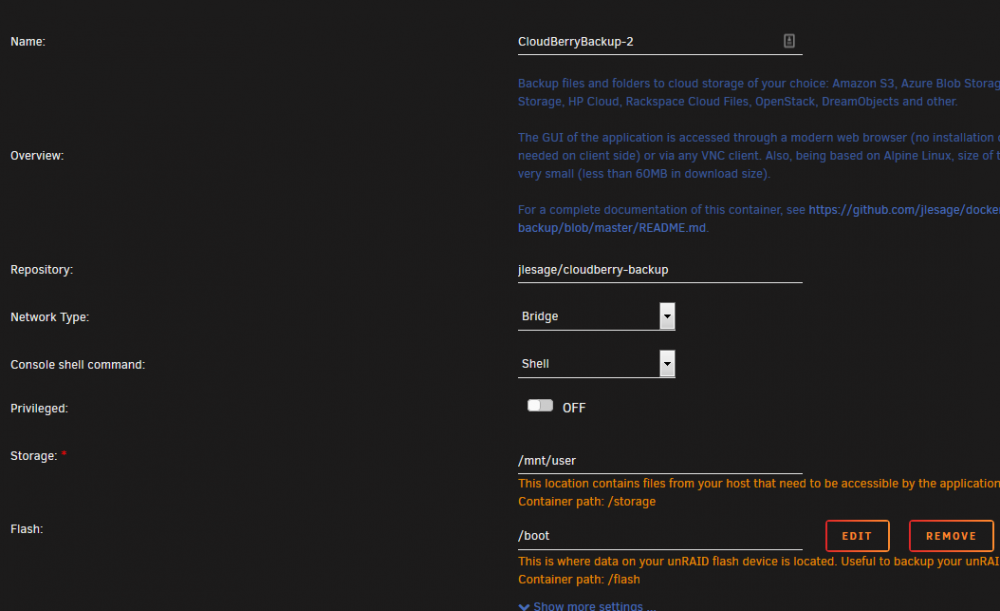
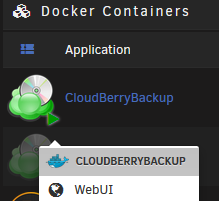
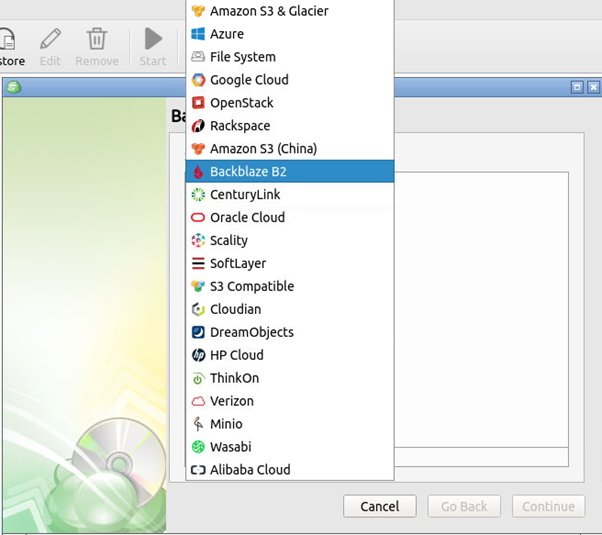
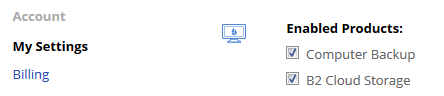
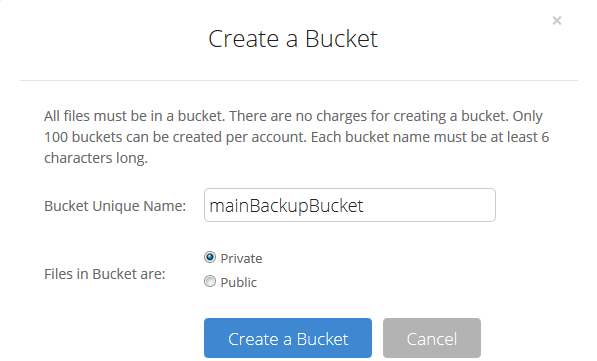
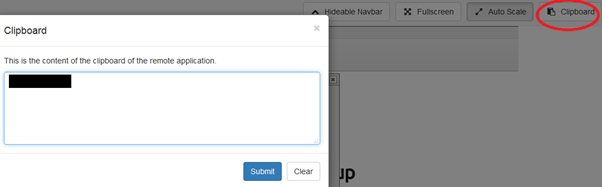
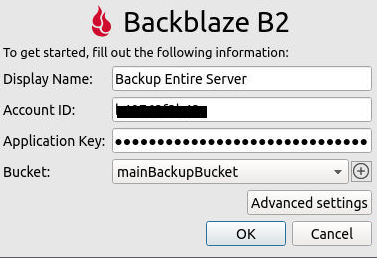
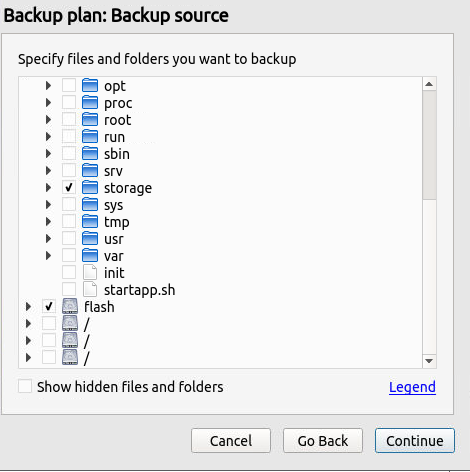
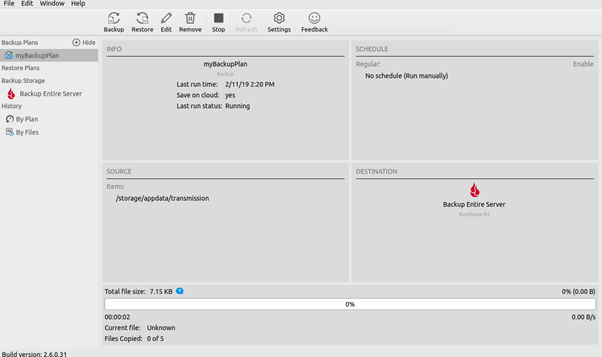
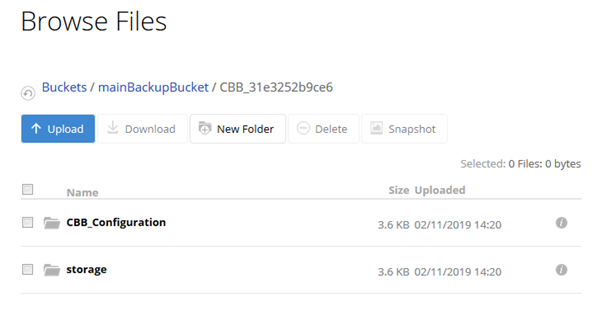
This tutorial is for a simple Backup solution for your entire unRAID box, flash drive and all. Please note, it will involve paying money for things. I'm aware this can be accomplished with tools like rclone and @SpaceInvaderOne has done a brilliant tutorial on how to do that. However, my requirements were as follows: I just wanted a GUI solution that will offer the same fine grained control with minimum setup. I wanted something reliable as my data in invaluable. I didn't want to risk losing anything because I cheaped out on something. Both the application I chose and the storage provider offer trial / free tier options so you can try this tutorial out. If it's not for you, no harm no foul. Some of you will also be averse to "Handing your data over to the corporations". I respect that, but I can't risk losing a lifetime of family photos so i'm willing to pay for a little piece of mind. The Cost 1. CloudBerry Backup This is the application that will be used to initiate, schedule, monitor, and track the backup. It's a $29.99 one off cost and in my mind was well worth it. They are reputable and have a great suite of products. If you don't want to use BackBlaze as I have, you can also connect CloudBerry to a host of other storage providers. It also caters for encryption and in the event of a disaster it has restore functionality as well. CloudBerry offer a 15 Day trail so you can test out the functionality and see if it fits your use case. EDIT: After some great sleuth work by @charlescc1000 , looks like the personal edition of CloudBerry is limited to 5TB worth of data. so this guide will work well if you're under that limit. Looks like if you're above that limit you will need to buy the Linux Ultimate Version which is $149.99. Please bear this in mind. Might be extortionate for some, but personally I think it's okay as a one off cost. You're able to upgrade and pay the difference once you hit the limit as well. 2. BackBlaze Another reputable company in the backup business, BackBlaze was my provider of choice. It will cost you $0.005/GB/month so $5/TB/month. It is much faster compared to offerings from CrashPlan and is cheaper than S3 (non-glacier), Azure, and Google Cloud. There is no fee for getting your data into BackBlaze but there is a 0.01/GB cost for download. They also integrate with many other vendors such so if you decide to switch to another NAS solution you can get your data onto there as well. It's pay for what you use so I won't be capped / paying for anything I'm not using. BackBlaze give you the first 10GB Free for you to test. The Solution 1. Buy CloudBerry The variant you need to buy is CloudBerry Desktop Backup for Linux. After you've purchased it they will email you an activation code. We'll keep this handy for the next step. 2. Install CloudBerry container. Head over to the APPS tab in unRAID. If you can't see it you need to install the Community Applications plugin. Search for CloudBerry and click the install button under it. You can keep all the default values and click apply. Head to the Docker tab in unRAID, click the play icon on CloudBerryBackup followed by WebUI. Choose Activate (If you've purchased) or Trial Enter your details and click finish. Congratulations you've installed CloudBerry! Click the Backup / Backup Files Button which will open the Cloud Storage window. Click on the little plus icon followed by BackBlaze B2. We can leave this window as is and come back to it after we've setup BackBlaze. 3. Create BackBlaze account You can sign up to BackBlaze free of charge and You can use a google account to sign in if that makes it easier. In your account click on Settings on the left and scroll down to Enabled Products. Next to B2 Cloud Storage, Click on the Link to Verify your Mobile Number. Once your number is verified enable B2 Cloud Storage. 4. Create a Bucket and Get the Keys A bucket is just a container for keeping files or like a top level folder. Why would you want more than 1 bucket? In the case that you wanted a different set of rules for backup schedules and wanted to keep your data separate this is how you'd do it. Also if you wanted to backup more than one device to it's own bucket you could create multiple buckets to do so. For me I just wanted all my data stored in a single bucket (your folder structure will remain in the bucket so not to worry). Click on create Bucket. Chose a unique name (this will need to be globally unique, meaning no one else in the world can have this bucket name) Click Create. Now that we've created the bucket that will hold all the data we need the keys to it. For this we click on Show Account ID and Application Key. Here again you have quite fine grained control over your bucket via multiple Application Keys. So if you had one of your friends backup up to your bucket. you'd create an application key for them and not give them the master one. In the event you'd like to revoke access / change certain permissions without affecting other keys you could do that. For me, I've just got a single device backing up so I'm going to use the Master Application Key. Please note that Master Keys are only displayed once. So once you click Create New Master Application Key keep the window open we're going to use it immediately. Copy your application ID to your clipboard for bonus efficiency points. 5. Create The Backup Schedule Head back to our CloudBerry Container WebUI and choose a display name for this Backup plan. You can create multiple backup Plans if you wish but we're just creating a single one for now to backup the entire server. The thing to note here is that we're VNCd into the containers WebUI so your computers clipboard isn't shared with it. The way we use the containers clipboard is with the clipboard button on the top right in the Navbar. Click on the Clipboard button, paste your application ID into the box and click submit. You can now paste your Application ID into the CloudBerry dialog box. Now Do the same for the Master Application Key. Click the drop down box next to Bucket. After 1 or 2 seconds you will see the Bucket name that we created in the previous step. Hoorah! Under Advanced Settings you can choose a prefix that this backup plan will use in the bucket. This is useful if you have more than one backup plan. So in the BackBlaze you will see the structure: Bucket > Prefix name > Folders-that-are-backed-up Select Okay and click on the Plan we've just created and click Continue. Choose a Backup Plan Name and click Continue. The next window shows a few drives. The one's you're interested in are the first two. The first one of which will just show up as "/". If you'd like to backup the contents of your flash drive click the tick box next to it. Expand the first drive and scroll down to the folder labeled "storage" This should immediately look familiar to you. Yes! They are your shares. Select the folders you want to backup or choose "storage" if you want to backup everything followed by Continue. Now the next settings namely: Advanced Filters Encryption Retention Policies Schedule Notifications Are best answered by you alone. I personally Backup all the files in the storage folder, with encryption on, retain all the files, and backup daily at midnight. The backup is an incremental backup so only files that have been added or changed will make their way up to BackBlaze. That being said your options may vary. To manually start your backup click on your backup plan in CloudBerry (myBackupPlan) and click Start. Your backup should immediately begin. To see the fruits of your work head back to BackBlaze, Under B2 Cloud Storage click on Browse Files. You should see your bucket there and all your files under it. Don't forget to set your container to AutoStart and you should be golden


 5 points
 -
I have to say since rolling back to the 6.6.6 I really do like having more colorful icons. Makes navigating the WebUI much easier. Not a deal breaker for me for sure but would be nice to to offer the new/old icons as themes so users have a choice.2 points
-
This thread is reserved for Frequently Asked Questions, concerning all things Docker, their setup, operation, management, and troubleshooting. Please do not ask for support here, such requests and anything off-topic will be deleted or moved, probably to the Docker FAQ feedback topic. If you wish to comment on the current FAQ posts, or have suggestions or requests for the Docker FAQ, please put them in the Docker FAQ feedback topic. Thank you! Note: I am the author of many of these posts. But I am not the author of all of them. Due to circumstances beyond our control, the original postings have been lost, but I took it upon myself to salvage them, with the unfortunate net result that I had to take "ownership" of the posts. ANY user can reply to this thread with any new Q/A. I will add such posts to this table of contents. I need help with an application? What information should I supply? Getting Started How do I get started using Docker Containers? What are the host volume paths and the container paths Dockers, theres so much to learn! Are there any guides? How do I know if I've set up my paths, ports, etc correctly? With 6.2, do I need to move my appdata and/or docker image into unRaid's recommended shares? How should I set up my appdata share? General Questions Why doesnt the "Check for Updates" button bring my Docker to the newest version of the application? How do I update to the newest version of the application? How do I move or recreate docker.img? What do I fill out when a blank template appears? How can I run other docker applications that are not listed within the App tab? I've told {App-X} to look / move / copy files via SMB to my server. Why doesn't it work? If I need to delete my docker.img file, will I lose my application's settings, etc? How do I get a command prompt within a docker application? How do I increase the size of my docker.img file? Why does the "EDIT" not appear on the dashboard / docker tab when I click on an icon? What do I do when I see 'layers from manifest don't match image configuration' during a docker app installation? How Do I Create My Own Docker Templates? I've recreated my docker.img file. How do I re-add all my old apps? I want to run a container from docker hub, how do I interpret the instructions. I want to change the port my docker container is running on or I have two containers that want to use the same port, how do I do that? Why it's important to understand how folder mappings work... and an example of why it goes wrong. How do I Stop/Start/Restart Docker via Command Line How Do I Pass Through A device To A Container? Can I switch Docker containers, same app, from one author to another? How do I do it? For a given application, how do I change Docker containers, to one from a different author or group? How do I install a second instance of an application? I closed the transfer window on Krusader. How do I get it back? How can I use private template repositories with unRaid? What does "Deprecated" mean? Docker Image Filling Up Why does my docker.img file keep filling up? Why does my docker.img file keep filling up while using Plex? My docker.img file is filling up due to excessive logging from various apps Troubleshooting, Maintenance I continually have "Server Execution Errors" whenever I try and start a container Why don't my Docker Container and VM mappings of remote shares to the local mount point (/mnt/disks) work after updating to 6.9? How come I get "Execution Error" when trying to start a container? Why cant (insert docker app name here) see my files mounted on another server or outside the array Where did my Docker files go? Why did my files get moved off the Cache drive? Why does Sonarr keep telling me that it can't import a file downloaded by NZBGet? (Or any other combination of apps?) How do I limit the CPU resources of a particular docker application? How do I limit the memory usage of a docker application? Why do I keep losing my Docker container configurations? Why did my newly configured Docker just stop working? Fix Common Problems plugin is complaining about Container Port x not found or changed on installed applications. What do I do? Fix Common Problems plugin is complaining about UD Mounted paths not mounted with the Slave Option. What do I do? Why can't I delete / modify files created by CouchPotato (or another docker app)? Why does a certain docker application always start when booting unRaid when autostart is set off? Why are some of my applications randomly stopping and won't restart? (unRaid 6.4+ with Unassigned Devices mounting SMB shares) How do I fix permission issues on file(s) created by Plex DVR? Why does Unraid keep adding ports that I've removed from the template back to the application when I update? Why do my remote share mappings fail after I updated UD? Using private repositories within CA How do I check my installed apps for vulnerabilities (Log4J etc)?1 point
-
Hi Guys i have made a video tutorial on how to pass through an nvidia gpu as the primary or only gpu in the server. This guide is based off hupsters great work on dumping the bios of the gpu. Hope you find it useful ! How to pass through an NVIDIA GPU as primary or only gpu in unRAID Here are some bios dumps from various Nvidia gpus GTX 5 Series evga 550ti 1GB https://www.dropbox.com/s/bbctm266ujctj4f/EVGA.GTX550ti.1024.110225.dump?dl=0 If using this please read here first http://lime-technology.com/forum/index.php?topic=52960.msg535568#msg535568 GTX 7 Series msi 7 50ti Twinfrozer https://www.dropbox.com/s/6cntzfu54qv2359/msi750titwinfrozer.dump?dl=0 evga GTX 760sc thanks to 1812) https://www.dropbox.com/s/yulm5ijodwko7jg/evgagtx760sc.dump?dl=0 GTX 9 Series gigabyte gtx960_2G https://www.dropbox.com/s/v6kvtdd5zxlmz02/Gigabytegtx960_GVN960IXOC_2GD.dump?dl=0 evga gtx970 SC https://www.dropbox.com/s/e2q89beqxjsehzz/evgagtx970sc.dump?dl=0 gigabyte gtx 970 https://www.dropbox.com/s/2iqoigtayh7pr5d/gigabyteGTX970.dump?dl=0 GTX 10 Series GTX 1050 Ti ZOTAC OC (thanks to darianf ) https://www.dropbox.com/s/8hxvgub2vxdq657/zotac1050tioc4g.dump?dl=0 GTX 1060 mini 3g Zotac(thanks to darianf ) https://www.dropbox.com/s/s6yhwl0kzksghcn/zotac1060mini3g.dump?dl=0 GTX1060_6gb EVGA (thanks to Brandur) https://www.dropbox.com/s/lyjczmwva573gx4/EVGA-GTX1060_6GB.dump?dl=0 GTX 1060 WINDFORCE OC 6g (thanks to @Lavoslav ) https://www.dropbox.com/s/6plqualklw8eptn/GV-N1060WF2OC-6GD.rom?dl=0 GTX1070 MSI founders edition https://www.dropbox.com/s/gtm917g5nnagpy6/msifoundersedition1070.dump?dl=0 GTX 1070 MSI seahawk . https://www.dropbox.com/s/8u4ryfqexh6ag0i/msiseahawk1070.dump?dl=0 GTX 1080 founders (thanks to heratic) https://www.dropbox.com/s/1f9ridkcmdrklv6/GTX1080FE.dump?dl=0 GTX 1080TI EVGA founders edition (thanks to heratic) . https://www.dropbox.com/s/f2xe3yi3c65kad7/1080ti.rom?dl=0 If anyone who has dumped their gpu bios could you please post here so we can get a collection on the site to help others as techpowerup bios doesnt work for us, nor to bios files dumped by gpuz How to edit a vbios from techpowerup using a hex editor @Matoking has written a script which will hex edit the vbios for you automatically for you. Please note he says it hasn't been tested extensively and warns this is used at your own risk https://github.com/Matoking/NVIDIA-vBIOS-VFIO-Patcher1 point
-
DEPRECATED
 1 point
 -
According to the btrfs calculator (set the number of devices to 3 and choose the RAID-5 profile) you should have 960 GB of space available from three 480 GB disks so, no, it isn't correct. I'd like to be able to use RAID-5 myself but it is currently not advised because it is buggy and there's a serious risk of data loss. You ought to switch to RAID-1 instead. That will give you 720 GB of space and your data will be much safer.1 point
-
Something the same or less of the monitor you are using to access it with.1 point
-
No worries!1 point
-
You have a user share, starts with 'D' and ends with 's' (maybe named Downloads?). It is set to cache-prefer. That setting is going to make Unraid write those files to cache, and when mover runs, it will try (prefer) to get any other files for that share moved from the array to cache. So that is the most likely culprit for your cache filling up. Also, your appdata share has some files on disk1. Settings - Docker and disable the docker service. Shares - User Shares and click on that share whose name starts with 'D' and ends with 's', and set it to cache-yes. Main - Array Operations and click Move Now. Wait for it to finish. Shares - User Shares and click the Compute All button at the bottom. Wait (takes a while) for it to produce the result then post a screenshot.1 point
-
We are waiting for the official docker container to be updated. Once that happens, we will have caught up with the rest of the group. https://hub.docker.com/r/pihole/pihole/ If you look at the Tags tab, you can see the one we normally use (latest) is 7 days old and there is a dev version that is 3 days old.1 point
-
yes, change in the tianocore bios.1 point
-
This is a great write-up and should work well for many people with less than 5TB of data. I previously used CloudBerry but quickly discovered that the backup software has a maximum of 5TB of data that it can manage unless you purchase the enterprise edition for $300. So this is an important consideration as many unraid users probably have far more than 5TB of data they would like to backup.1 point
-
Nice tutorial! I just created a Windows VM and use regular Backblaze (unlimited storage, $50 a year) client on it to back my stuff up. Map a drive(s) to the share(s) necessary on your unRAID box via a service account (so the Backblaze client will be able to process them like a system drive), selected what i wanted to back up, done. Backups, restores, etc, all easy peasy, even from the Backblaze web interface.1 point
-
Alright status update.. I FINALLY GOT THE DAMN THING TO BOOT.. You must do the vfio-pci.ids= thing but then run the commands below. This tells unraid to release the GPU echo 0 > /sys/class/vtconsole/vtcon0/bind echo 0 > /sys/class/vtconsole/vtcon1/bind echo efi-framebuffer.0 > /sys/bus/platform/drivers/efi-framebuffer/unbind1 point
-
tried it.. makes shit tons of writes to your log for the VM saying the resource is busy. Unraid isn't letting go.. Like the frozen song..1 point
-
Yeah they honestly don't seem to care.. The new intels are out and they are all on that now. Not an update since November and the only reason that update happened was because if you had 2 2080's the board wouldn't boot. Back then on the forums I was on there was an actual ASUS employee who would listen to our concerns/problems but he quit his job and since this radio silence from ASUS. He was our only way in and was amazing. Would even make us custom bios sometimes to fix issues before asus released fixes publicly. Btw tried UEFI boot for shits and giggles and below is what I get.. Thats my 1080ti.. Simply doesn't even map now. 2019-02-11T17:06:39.233906Z qemu-system-x86_64: -device vfio-pci,host=41:00.0,id=hostdev0,bus=pci.0,addr=0x3,romfile=/mnt/disk1/domains/1080ti.rom: Failed to mmap 0000:41:00.0 BAR 1. Performance may be slow1 point
-
I don't use encryption but was able to reproduce this issue, load average goes sky high and writes to the array with encryption enable, xfs or btrfs, are very slow, though encrypted cache seems unaffected, or at least much less so.1 point
-
For me I can boot unraid in UFEI mode but my nvidia gpu won't start for a VM1 point
-
Great tutorial. Thanks1 point
-
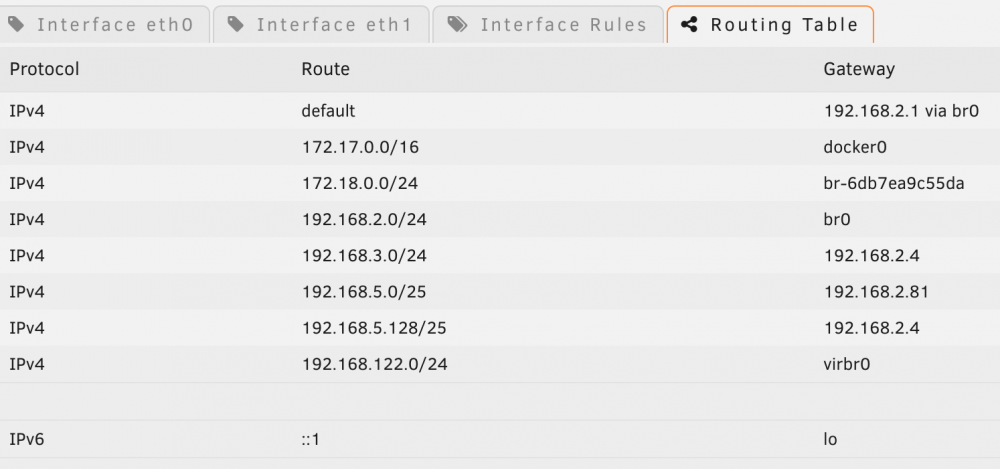
this is a universal problem when you have 2 default routes. what happens is that unless Unraid was trying to reach a local subnet IP, it would pick the last defined gateway and keep using that. My setup has only one IP assigned to Unraid and and all the VLANs have active interfaces for docker networks, but no IP otherwise.
 1 point
 -
@Tritech I will check the next days if it's the newest BIOS causing it.1 point
-
I see I have a mistake in my config. It should be "8,24" not "8-24". These 2 threads are the first core and it's hyperthread on the second die. The die I isolated and only use for my main VM. In theory using the iopin and the emulatorpin on the same die as the cores the Vm uses prevents communication between the 2 dies and reduces latency. These both cores are only used for emulating and the io stuff. Not sure how big the difference in performance is, but i set it up a couple weeks ago with the idea to have everything this VM does limited to only 1 die. NUMA. I had set the mode to strict before, but for some reason the VM always grabs a couple MB of RAM from node0 even if i tell her not to do so. A lot of people reported this behaviour. I couldn't figure it out yet for me, so i have set it to preferred till someone comes up with a fix. correct1 point
-
Looks like you have the same config as me. ASROCK Fatal1ty X399 Professional Gaming? 1080ti, NVME and onboard audio passthrough. Audio drops i only had before applying the MSI-fix. Make sure to run the program as administrator and recheck after every Nvidia driver update or every windows update if the settings are still in place. For me the settings are reset a couple times now after updates. I still using i440fx as machine type cause it was the recommended one as i started with unraid end of 2017 and it still works today. I played around a lot since then and tested a couple stuff. Currently my main VM uses cores from die1 only including emupin on that die. Die0 is used for other VMs and dockers and stuff. All the cores used by the VM are isolated from unraid so no other processes can access them. The CPU mode I've set is to decrease the CPUs cache latency inside the VM. With one of the next mayor qemu updates that shouldn't be needed anymore and the cache should be detected corectly without this tweak. I hadn't had the time yet to test if the latest Q35 versions brought any big improvements. The xml below works just fine for me, why changing it, right? <?xml version='1.0' encoding='UTF-8'?> <domain type='kvm' id='4'> <name>WIN10_NVME_UEFI</name> <uuid>6dce2fa4-5c94-dd9c-4bd8-cf3524279efa</uuid> <metadata> <vmtemplate xmlns="unraid" name="Windows 10" icon="windows.png" os="windows10"/> </metadata> <memory unit='KiB'>16777216</memory> <currentMemory unit='KiB'>16777216</currentMemory> <memoryBacking> <nosharepages/> </memoryBacking> <vcpu placement='static'>14</vcpu> <iothreads>1</iothreads> <cputune> <vcpupin vcpu='0' cpuset='9'/> <vcpupin vcpu='1' cpuset='25'/> <vcpupin vcpu='2' cpuset='10'/> <vcpupin vcpu='3' cpuset='26'/> <vcpupin vcpu='4' cpuset='11'/> <vcpupin vcpu='5' cpuset='27'/> <vcpupin vcpu='6' cpuset='12'/> <vcpupin vcpu='7' cpuset='28'/> <vcpupin vcpu='8' cpuset='13'/> <vcpupin vcpu='9' cpuset='29'/> <vcpupin vcpu='10' cpuset='14'/> <vcpupin vcpu='11' cpuset='30'/> <vcpupin vcpu='12' cpuset='15'/> <vcpupin vcpu='13' cpuset='31'/> <emulatorpin cpuset='8-24'/> <iothreadpin iothread='1' cpuset='8-24'/> </cputune> <numatune> <memory mode='preferred' nodeset='1'/> </numatune> <resource> <partition>/machine</partition> </resource> <os> <type arch='x86_64' machine='pc-i440fx-3.0'>hvm</type> <loader readonly='yes' type='pflash'>/usr/share/qemu/ovmf-x64/OVMF_CODE-pure-efi.fd</loader> <nvram>/etc/libvirt/qemu/nvram/6dce2fa4-5c94-dd9c-4bd8-cf3524279efa_VARS-pure-efi.fd</nvram> </os> <features> <acpi/> <apic/> <hyperv> <relaxed state='on'/> <vapic state='on'/> <spinlocks state='on' retries='8191'/> <vendor_id state='on' value='none'/> </hyperv> </features> <cpu mode='custom' match='exact' check='full'> <model fallback='forbid'>EPYC-IBPB</model> <topology sockets='1' cores='7' threads='2'/> <feature policy='require' name='topoext'/> <feature policy='disable' name='monitor'/> <feature policy='require' name='x2apic'/> <feature policy='require' name='hypervisor'/> <feature policy='disable' name='svm'/> </cpu> <clock offset='localtime'> <timer name='hypervclock' present='yes'/> <timer name='hpet' present='no'/> </clock> <on_poweroff>destroy</on_poweroff> <on_reboot>restart</on_reboot> <on_crash>restart</on_crash> <devices> <emulator>/usr/local/sbin/qemu</emulator> <disk type='file' device='disk'> <driver name='qemu' type='raw' cache='writeback'/> <source file='/mnt/user/isos/clover/spaces_win_clover.img'/> <backingStore/> <target dev='hdc' bus='sata'/> <boot order='1'/> <alias name='sata0-0-2'/> <address type='drive' controller='0' bus='0' target='0' unit='2'/> </disk> <disk type='block' device='disk'> <driver name='qemu' type='raw' cache='writeback'/> <source dev='/dev/disk/by-id/ata-Samsung_SSD_850_EVO_1TB_S2RFNX0J606029L'/> <backingStore/> <target dev='hdd' bus='sata'/> <alias name='sata0-0-3'/> <address type='drive' controller='0' bus='0' target='0' unit='3'/> </disk> <disk type='file' device='cdrom'> <driver name='qemu' type='raw'/> <source file='/mnt/user/isos/virtio-win-0.1.160-1.iso'/> <backingStore/> <target dev='hdb' bus='ide'/> <readonly/> <alias name='ide0-0-1'/> <address type='drive' controller='0' bus='0' target='0' unit='1'/> </disk> <controller type='usb' index='0' model='nec-xhci' ports='15'> <alias name='usb'/> <address type='pci' domain='0x0000' bus='0x00' slot='0x07' function='0x0'/> </controller> <controller type='pci' index='0' model='pci-root'> <alias name='pci.0'/> </controller> <controller type='ide' index='0'> <alias name='ide'/> <address type='pci' domain='0x0000' bus='0x00' slot='0x01' function='0x1'/> </controller> <controller type='sata' index='0'> <alias name='sata0'/> <address type='pci' domain='0x0000' bus='0x00' slot='0x03' function='0x0'/> </controller> <controller type='virtio-serial' index='0'> <alias name='virtio-serial0'/> <address type='pci' domain='0x0000' bus='0x00' slot='0x04' function='0x0'/> </controller> <interface type='bridge'> <mac address='52:54:00:65:2d:ab'/> <source bridge='br0'/> <target dev='vnet1'/> <model type='virtio'/> <alias name='net0'/> <address type='pci' domain='0x0000' bus='0x00' slot='0x02' function='0x0'/> </interface> <serial type='pty'> <source path='/dev/pts/1'/> <target type='isa-serial' port='0'> <model name='isa-serial'/> </target> <alias name='serial0'/> </serial> <console type='pty' tty='/dev/pts/1'> <source path='/dev/pts/1'/> <target type='serial' port='0'/> <alias name='serial0'/> </console> <channel type='unix'> <source mode='bind' path='/var/lib/libvirt/qemu/channel/target/domain-4-WIN10_NVME_UEFI/org.qemu.guest_agent.0'/> <target type='virtio' name='org.qemu.guest_agent.0' state='disconnected'/> <alias name='channel0'/> <address type='virtio-serial' controller='0' bus='0' port='1'/> </channel> <input type='mouse' bus='ps2'> <alias name='input0'/> </input> <input type='keyboard' bus='ps2'> <alias name='input1'/> </input> <hostdev mode='subsystem' type='pci' managed='yes'> <driver name='vfio'/> <source> <address domain='0x0000' bus='0x43' slot='0x00' function='0x0'/> </source> <alias name='hostdev0'/> <rom file='/mnt/user/Backup/vbios/Strix1080ti/AsusStrix1080TI_dump_edit.rom'/> <address type='pci' domain='0x0000' bus='0x00' slot='0x05' function='0x0'/> </hostdev> <hostdev mode='subsystem' type='pci' managed='yes'> <driver name='vfio'/> <source> <address domain='0x0000' bus='0x43' slot='0x00' function='0x1'/> </source> <alias name='hostdev1'/> <address type='pci' domain='0x0000' bus='0x00' slot='0x06' function='0x0'/> </hostdev> <hostdev mode='subsystem' type='pci' managed='yes'> <driver name='vfio'/> <source> <address domain='0x0000' bus='0x0a' slot='0x00' function='0x3'/> </source> <alias name='hostdev2'/> <address type='pci' domain='0x0000' bus='0x00' slot='0x08' function='0x0'/> </hostdev> <hostdev mode='subsystem' type='pci' managed='yes'> <driver name='vfio'/> <source> <address domain='0x0000' bus='0x41' slot='0x00' function='0x0'/> </source> <alias name='hostdev3'/> <address type='pci' domain='0x0000' bus='0x00' slot='0x09' function='0x0'/> </hostdev> <hostdev mode='subsystem' type='usb' managed='no'> <source> <vendor id='0x046d'/> <product id='0xc246'/> <address bus='5' device='2'/> </source> <alias name='hostdev4'/> <address type='usb' bus='0' port='1'/> </hostdev> <hostdev mode='subsystem' type='usb' managed='no'> <source> <vendor id='0x1b1c'/> <product id='0x1b50'/> <address bus='5' device='3'/> </source> <alias name='hostdev5'/> <address type='usb' bus='0' port='2'/> </hostdev> <memballoon model='virtio'> <alias name='balloon0'/> <address type='pci' domain='0x0000' bus='0x00' slot='0x0b' function='0x0'/> </memballoon> </devices> <seclabel type='dynamic' model='dac' relabel='yes'> <label>+0:+100</label> <imagelabel>+0:+100</imagelabel> </seclabel> </domain>
 1 point
 -
I just followed what's in here to first enable the NVIDIA card on my Unraid server, then to enable access to the GPU on my PLEX docker, then I followed the instructions over at PLEX forum to create a workaround to enable the NVDEC. (see this link : Instructions for the script It's only 2 lines of codes you put in a new file called "/usr/lib/plexmediaser/Plex Transcoder". Step 1. Go inside the docker PLEX terminal, to /usr/lib/plexmediaserver/. Step 2. Rename the file "Plex Transcoder" to "Plex Transcoder2" Step 3. Create a script called "Plex Transcoder" (I use nano editor, apt-get update, apt-get install nano, yes to all questions), and put this code in it : #!/bin/sh /usr/lib/plexmediaserver/Plex\ Transcoder2 -hwaccel nvdec "$@" This will tell call the Plex Transcoder and enable the decode part. Since it's a workaround, it won't show it Tautulli or in Plex Dashboard because plex doesn't know it decode hardware. You can see it working by running this command from the same Terminal inside plex docker: nvidia-smi dmon -s u There is column for enc. and one for dec., if it's not 0, it means it's working.1 point
-
I can thoroughly recommend Emby. Jellyfin is an alternative, but I wasn't too impressed with some of their behaviour initially so Emby gets my vote. The whole reason Emby went closed source was because the original Jellyfin dev forked their repo and removed all the nag screens/paywalls. Just cos you can, doesn't mean you should. Sent from my Mi A1 using Tapatalk1 point
-
You can try to guest the SMART device type using a function like get_smart_type in this file.1 point
-
I'm seriously considering trying out Emby as well and run into the same roadblock, I can't even test out the features I need without paying. Jellyfin is another option and is based on Emby so that will likely be what I test out first as Binhex recently put an unraid template together for it. It's hard when you paid for something and they seem to just ignore some of the more basic functionality things in favor of flashy features no one wants. I mean, I'm by no means above paying for something that does what I want it to, bought unraid after all, but it does kind of have to work. With Plex, I couldn't even try out half the features I intended on making use of without buying it and I have to admit there is definitely some buyers remorse there. Not to mention how little control you have over what is and is not allowed to transcode, a shame really. For people like me, a VM is not really possible as I am already making my poor little AMD server cry for mercy 75% of the time. 😀1 point
-
I don't post much but I have to agree its harder to discern what icon your looking at, example would be unbalance or speedtest it just draws you to it when navigating both by its color and shape/image1 point
-
Having just looked at CA for the first time in a while (my server is running fine and I don't fiddle with it much), here's what I said to Squid about all the new CA icons: I took a look at SpaceInvaderOne's video review of 6.7rc1 and I'll repeat my thoughts. The icon shapes are nice, but they're nothing but a sea of white. Again, I get that this is the latest trend in design, but it is, in my opinion a terrible one. There is considerably more cognitive load in mentally parsing the shapes when there is no color to help out. This is especially tough on those of us whose eyesight isn't quite as good as it used to be. There is a reason why modern IDEs all do syntax highlighting. This is an absolute God-send in comparison to the dark ages of working on a monochrome green or amber monitor! Just try disabling syntax highlighting in your modern IDE and see how hard that makes it - there's no good reason to go back. Again, I get that you're just following the "modern" trend, and I have tremendous appreciation for the incredible amount of work that goes into keeping the system updated with all the latest security patches and all the new features you're bringing to the table, but this is one trend I wouldn't mind missing out on. I'm sure that there will be a number of security patches in the 6.7 release, and I'd be remiss in skipping it just because of the UI design, but, based on what I've seen, I'd be tempted. And, yes, I really hate that my Android phone shows all my notification icons in white against a black background. When they allowed color there, I could tell at a glance if I had an orange text notification icon - now I have to analyze each one to see if it's the "new text message" shaped white square, among the sea of other white, essentially square, icons. </rant>1 point
-
glad to see you sorted it out at least you know, your unraid disk is just fine1 point
-
DEPRECATED1 point
-
5.10.12 is out: https://community.ubnt.com/t5/UniFi-Beta-Blog/UniFi-Network-Controller-5-10-12-Stable-Candidate-has-been/ba-p/26614771 point
-
Go to Main then click on"Flash" then in SMB security settings set export to "no" and Security to "private"1 point
-
Solved it by switching to qbittorrent, night and day how responsive the webui is. I'll never look back1 point
-
Please report back I'd also be interested in other torrent clients, but as far as I can tell Deluge is the best option. Considering running it on a VM to at least have the option for remote desktop if I need to other things than just monitoring torrents.1 point
-
I find that you can only about 5 files at a time or this container chokes. Same goes for manually adding files. And I have that same issue when trying to add a very large (50+GB) file. I'm going to try another Deluge docker container and see if that works better.1 point
-
I'm trying to clean up in my torrents and delete older stuff using "Remove torrent -> Remove with data", however whenever I do this I loose connection with the webui, and when it reloads I have deleted just 3-4 torrents out of the hundred i selected. Even if I select just a single torrent the webui crashes. Any ideas?1 point
-
Telnet/SSH to unRAID. Issue the command in Aptalca's post: du -ah /var/lib/docker/containers/ | grep -v "/$" | sort -rh | head -60 It lists the logs for the containers and their sizes. Locate the Docker Container ID in the list of a desired (large) log to delete: Go to the unRAID GUI Docker tab. Turn on advanced view. Find the container that matches the ID from the 'du' command. To delete the log, issue the command below with the name of the container (case sensitive) echo "" > $(docker inspect --format='{{.LogPath}}' sabnzbd)1 point